Page 164 of 521

163 Controls in detail
Control system
Vehicle status messages have been re-
corded
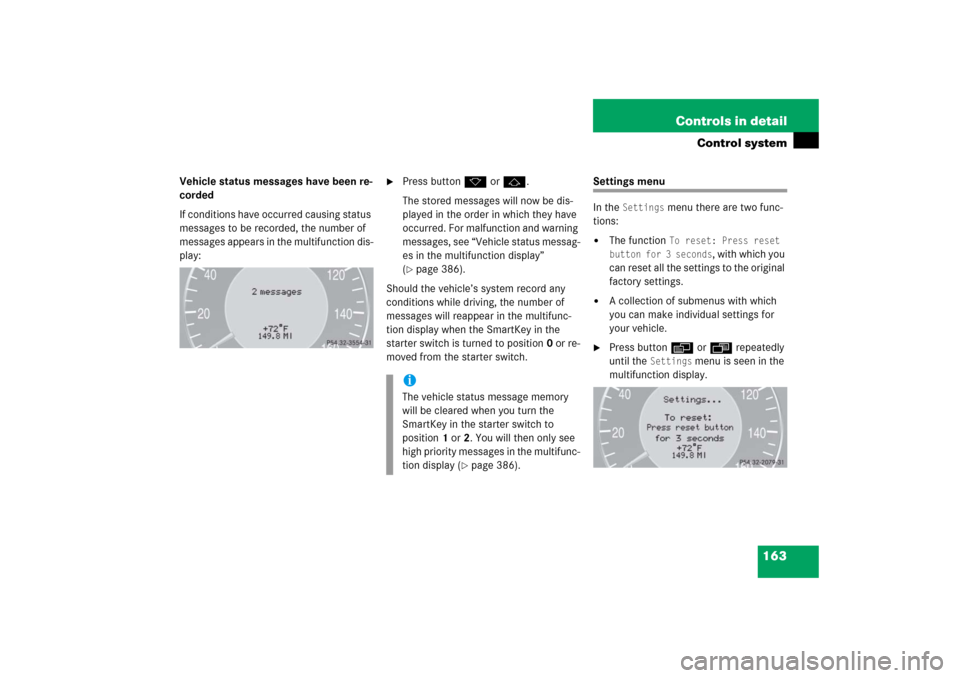
If conditions have occurred causing status
messages to be recorded, the number of
messages appears in the multifunction dis-
play:
�
Press buttonk orj.
The stored messages will now be dis-
played in the order in which they have
occurred. For malfunction and warning
messages, see “Vehicle status messag-
es in the multifunction display”
(�page 386).
Should the vehicle’s system record any
conditions while driving, the number of
messages will reappear in the multifunc-
tion display when the SmartKey in the
starter switch is turned to position0 or re-
moved from the starter switch.
Settings menu
In the
Settings
menu there are two func-
tions:
�
The function
To reset: Press reset
button for 3 seconds
, with which you
can reset all the settings to the original
factory settings.
�
A collection of submenus with which
you can make individual settings for
your vehicle.
�
Press buttonè orÿ repeatedly
until the
Settings
menu is seen in the
multifunction display.
iThe vehicle status message memory
will be cleared when you turn the
SmartKey in the starter switch to
position1 or2. You will then only see
high priority messages in the multifunc-
tion display (
�page 386).
Page 165 of 521

164 Controls in detailControl systemResetting all settings
You can reset all the functions of all sub-
menus to the factory settings.�
Press the reset button in the instru-
ment cluster (
�page 150) for approxi-
mately 3 seconds.
In the multifunction display you will see
the request to press the reset button
again to confirm.
�
Press the reset button again.
The functions of all the submenus will
reset to factory settings.Submenus in the Settings menu
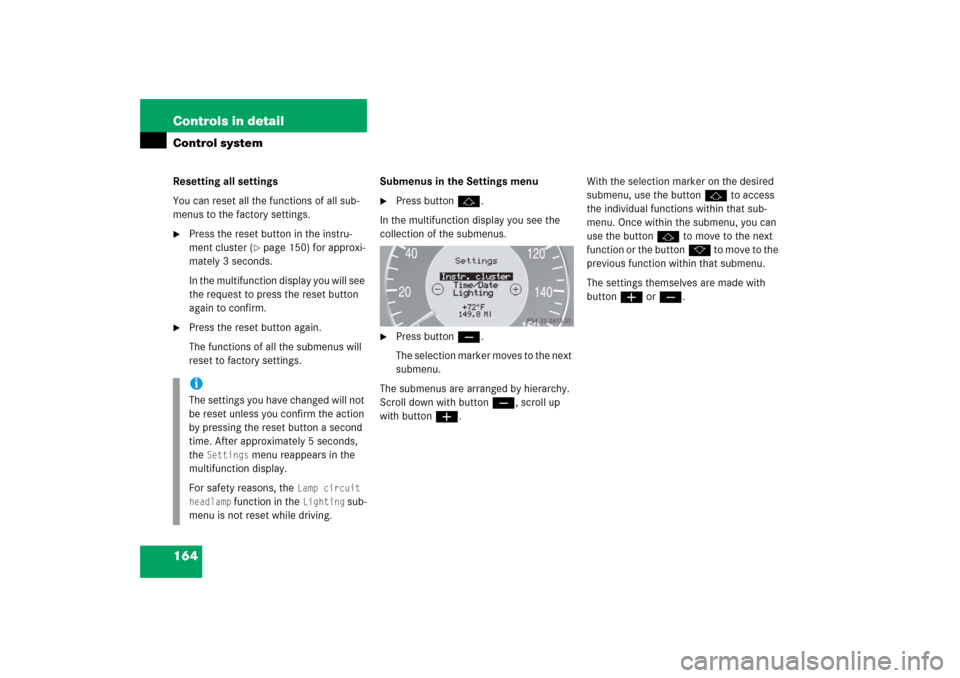
�
Press button j.
In the multifunction display you see the
collection of the submenus.
�
Press buttonç.
The selection marker moves to the next
submenu.
The submenus are arranged by hierarchy.
Scroll down with buttonç, scroll up
with buttonæ.With the selection marker on the desired
submenu, use the buttonj to access
the individual functions within that sub-
menu. Once within the submenu, you can
use the buttonj to move to the next
function or the buttonk t o m o v e t o t h e
previous function within that submenu.
The settings themselves are made with
buttonæ orç.
iThe settings you have changed will not
be reset unless you confirm the action
by pressing the reset button a second
time. After approximately 5 seconds,
the
Settings
menu reappears in the
multifunction display.
For safety reasons, the
Lamp circuit
headlamp
function in the
Lighting
sub-
menu is not reset while driving.
Page 169 of 521

168 Controls in detailControl systemTime/Date submenu
Access the
Time/Date
submenu via the
Settings
menu. Use the
Time/Date
sub-
menu to change the time and date display
settings. The following functions are avail-
able:Synchronizing the time
This function can only be seen on vehicles
with COMAND and navigation module*.
�
Move the selection marker with
buttonæ orç to the
Time/Date
submenu.
�
Press buttonj ork repeatedly
until the message
Time sync. with
head unit
appears in the multifunction
display.
The selection marker is on the current
setting.
�
Press buttonæ orç to select
the desired setting.Set time (hours)
This function can only be seen when time
synchronization is switched off.
�
Move the selection marker with
buttonæ orç to the
Time/Date
submenu.
�
Press buttonj ork repeatedly
until the message
Clock, hours
ap-
pears in the multifunction display.
The selection marker is on the hour set-
ting.
�
Press buttonæ orç to set the
hours.
�
Confirm by pressing reset button
(�page 150).
Function
Page
Synchronizing the time
168
Set time (hours)
168
Set time (minutes)
169
Set date (month)
169
Set date (day)
169
Set date (year)
170
iInformation on setting the time, refer to
separate COMAND instructions.
Page 170 of 521
169 Controls in detail
Control system
Set time (minutes)
This function can only be seen when time
synchronization is switched off.�
Move the selection marker with
buttonæ orç to the
Time/Date
submenu.
�
Press buttonj ork repeatedly
until the message
Clock, minutes
ap-
pears in the multifunction display.
The selection marker is on the minute
setting.
�
Press buttonæ orç to set the
minutes.
�
Confirm by pressing reset button
(�page 150).Set date (month)
�
Move the selection marker with
buttonæ orç to the
Time/Date
submenu.
�
Press buttonj ork repeatedly
until the message
Set date month
ap-
pears in the multifunction display.
The selection marker is on the month
setting.
�
Press buttonæ orç to set the
month.Set date (day)
�
Move the selection marker with
buttonæ orç to the
Time/Date
submenu.
�
Press buttonj ork repeatedly
until the message
Set date day
ap-
pears in the multifunction display.
The selection marker is on the day set-
ting.
�
Press buttonæ orç to set the
day.
Page 172 of 521

171 Controls in detail
Control system
�
Press buttonæ orç to select
manual operation (
manual
) or daytime
running lamp mode (
constant
) activat-
ed.
With daytime running lamp mode activated
and the exterior lamp switch at
positionM orU, the low beam
headlamps are switched on when the en-
gine is running.
In low ambient light conditions the follow-
ing lamps will switch on additionally:
�
Parking lamps
�
Tail lamps
�
License plate lamps
�
Side marker lamps
For more information on the daytime run-
ning lamp mode, see “Lighting”
(
�page 141).Setting locator lighting
With the locator lighting feature activated
and the exterior lamp switch in
positionU, the following lamps will
switch on during darkness when the vehi-
cle is unlocked using button Πon the
SmartKey or SmartKey with
KEYLESS-GO*:
�
Parking lamps
�
Tail lamps
�
License plate lamps
�
Side marker lamps
�
Front fog lamps
The locator lighting switches off when the
driver’s door is opened.
If you do not open a door after unlocking
the vehicle with the SmartKey, the lamps
will switch off automatically after approxi-
mately 40 seconds.
�
Move the selection marker with
buttonæ orç to the
Lighting
submenu.
iFor safety reasons, resetting the Lighting
submenu to factory settings
while driving (
�page 164) will not de-
activate the daytime running lamp
mode.
The following message appears in the
multifunction display:
Lighting - Can-
not be completely reset to factory
settings while driving.
��
Page 179 of 521

178 Controls in detailControl systemTrip computer menu
Use the trip computer menu to call up sta-
tistical data on your vehicle. The following
information is available:Fuel consumption statistics after start
�
Press buttonÿ orè repeatedly
until you see the first function of the
trip computer menu.
�
Press buttonj ork repeatedly
until the message
After start
appears
in the multifunction display.
1Distance driven since start
2Time elapsed since start
3Average speed since start
4Average fuel consumption since startFuel consumption since last reset
�
Press buttonÿ orè repeatedly
until you see the first function of the
trip computer menu.
�
Press buttonj ork repeatedly
until the message
After reset
appears
in the multifunction display:
1Distance driven since last reset
2Time elapsed since last reset
3Average speed since last reset
4Average fuel consumption since last re-
set
Function
Page
Fuel consumption statistics after
start
178
Fuel consumption statistics
since last reset
178
Call up range (distance to empty)
179
Page 180 of 521

179 Controls in detail
Control system
Resetting fuel consumption statistics�
Press buttonÿ orè repeatedly
until you see the first function of the
trip computer menu.
�
Press buttonj ork repeatedly
until you see the reading that you want
to reset in the multifunction display.
�
Press and hold the reset button in the
instrument cluster (
�page 24) until
the value is reset to 0.Calling up range (distance to empty)
�
Press buttonÿ orè repeatedly
until you see the first function of the
trip computer menu.
�
Press buttonj ork repeatedly
until the message
Range:
appears in
the multifunction display.
In the multifunction display you will see
the calculated range based on the cur-
rent fuel tank level.
iAll statistics stored since the last en-
gine start will be reset approximately
4 hours after the SmartKey in the start-
er switch is turned to position0 or re-
moved from the starter switch.
Resetting will not occur if you turn the
SmartKey back to position1 or2 with-
in this time period.
Page 198 of 521

197 Controls in detail
Good visibility
�Good visibility
For information on windshield wipers, see
“Windshield wipers” (
�page 56).
Headlamp cleaning system*
The button is located on the left side of the
dashboard.
1Headlamp washer button�
Switch on the ignition (
�page 36).
�
Press button1.
The headlamps are cleaned with a
high-pressure water jet.For more information on filling up the
washer reservoir, see “Windshield washer
system and headlamp cleaning system*”
(
�page 327).
Rear view mirrors
For more information on setting the rear
view mirrors, see “Mirrors” (
�page 45).
Auto-dimming mirrors
The reflection brightness of the exterior
rear view mirror on the driver’s side and
the interior rear view mirror will respond
automatically to glare when
�
the ignition is switched on
and
�
incoming light from headlamps falls on
the sensor in the interior rear view mir-
ror.
The rear view mirrors will not react if
�
reverse gear is engaged
�
the interior lighting is turned on
iThe headlamps will automatically be
cleaned when you have�
switched on the headlamps
and
�
operated the windshield wipers
with windshield washer fluid
fifteen times
When you switch off the ignition, the
counter resets.