Page 122 of 521

121 Controls in detail
Locking and unlocking
Opening the tailgate from the inside au-
tomatically*
In vehicles with tailgate opening/closing
system* you can open the tailgate from
the inside if the vehicle is stationary.
A minimum height clearance of 6.76 ft
(2.06 m) is required to open the tailgate.
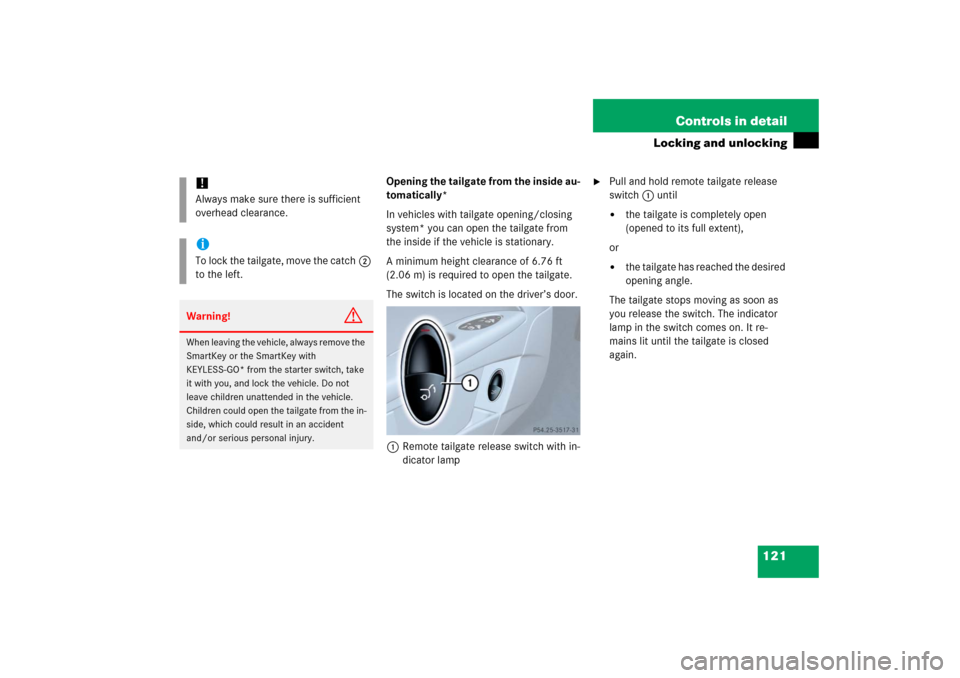
The switch is located on the driver’s door.
1Remote tailgate release switch with in-
dicator lamp
�
Pull and hold remote tailgate release
switch1 until�
the tailgate is completely open
(opened to its full extent),
or
�
the tailgate has reached the desired
opening angle.
The tailgate stops moving as soon as
you release the switch. The indicator
lamp in the switch comes on. It re-
mains lit until the tailgate is closed
again.
!Always make sure there is sufficient
overhead clearance.iTo lock the tailgate, move the catch2
to the left.Warning!
G
When leaving the vehicle, always remove the
SmartKey or the SmartKey with
KEYLESS-GO* from the starter switch, take
it with you, and lock the vehicle. Do not
leave children unattended in the vehicle.
Children could open the tailgate from the in-
side, which could result in an accident
and/or serious personal injury.
Page 123 of 521
122 Controls in detailLocking and unlocking
Limiting opening height of tailgate*
Vehicles with tailgate opening/closing
system*:
The tailgate opening height can be limited
when transporting goods on a roof rack
(e.g. presence of an optional MB sport lug-
gage container). When activated, the tail-
gate opens to approximately the height of
the roof edge.�
Activate the limiting opening height of
tailgate using the control system
(�page 176).
Closing the tailgate
1Handle�
Lower tailgate using handle1.
�
Close tailgate with hands placed flat on
the tailgate.
!The tailgate swings open upwards as
long as you pull and hold the remote
tailgate release switch. Always make
sure there is sufficient overhead clear-
ance. To stop the opening procedure,
release the remote tailgate release
switch.iThe tailgate can also be opened using
buttonŠ on the SmartKey or
SmartKey with KEYLESS-GO*.
Page 132 of 521

131 Controls in detailSeats
Head restraint height
(rear outer seats only)
1Release button
Raising:�
Manually adjust the height of the head
restraint by pulling it upward.
If the head restraint is fully retracted,
push release button1 and pull the
head restraint out.Lowering:
�
To lower the head restraint, push
release button1 and push down on
the head restraint.Head restraint tilt
(rear outer seats only)
Two different head restraint angle
positions are available.
1Release button
�
Press the release button1 and tilt the
head restraint to the desired position.
Warning!
G
For your protection, drive only with properly
positioned head restraints.
Adjust head restraint so that the head
restraint supports the back of the head at
eye level. This will reduce the potential for
injury to the head and neck in the event of
an accident or similar situation.
Do not drive the vehicle without the seat
head restraints. Head restraints are
intended to help reduce injuries during an
accident.
Page 134 of 521

133 Controls in detailSeats
Lumbar support
The curvature of the driver’s seat can be
adjusted to help enhance lower back sup-
port and seating comfort.
1Adjustment lever�
Move adjustment lever1 in direction
of the arrows until you have reached a
comfortable seating position.Drive - Dynamic seat* with multicon-
tour features
The Drive - Dynamic seat automatically ad-
justs the lateral support provided by the
backrest to your driving style.
The Drive - Dynamic seat electronically
controls the air pressure in the air cham-
bers of the backrest side bolsters. This
function improves driving comfort and
pleasure.
In addition, the Drive-Dynamic seat has a
movable seat cushion and inflatable air
cushions built into the backrest to provide
additional lumbar and side support.
The seat cushion movement, backrest
cushion height and curvature can be con-
tinuously varied with switches on the right
side of the seat on the driver side, or the
left side of the seat on the passenger side
after turning the SmartKey in the starter
switch to position2 or pressing the KEY-
LESS-GO* start/stop button twice.1Backrest center
2Backrest bottom
3Seat cushion depth
4Activate drive dynamic function
5Backrest side bolsters
6Massage function
�
Switch on the ignition (
�page 36).
Page 138 of 521

137 Controls in detailSeats
Folding bench seat in cargo compart-mentFolding out the folding bench seat
1Release handle for seat backrest
2Release handle for seat cushion
Before folding out the seat backrest, you
must:
�
fold the rear seat backrests into an up-
right position and lock them into place
�
move the handle for the twin roller
blind into the upper position
iThe folding bench seat in the cargo
compartment is approved only for per-
sons up to a height of 4.6 ft (1.40 m)
and a maximum weight of 110 lbs
(50 kg).
The twin roller blind must be installed
when the folding bench seat is in use.Warning!
G
When using the folding bench seat in the
cargo compartment, the seats in front of it
must be in the driving position.
Only drive when the head restraints for the
folding bench seat have been properly ad-
justed. The head restraints should be adjust-
e d so t ha t th e ba c k of th e h ea d is s uppo r te d
at approximately eye level. This can reduce
a child’s risk of injury in the event of an ac-
cident.
Warning!
G
Make sure that the seat belt is positioned
correctly on the body and is engaged in the
seat belt buckle.
Damaged covers should be replaced with
original covers only.
Do not leave children unattended in the ve-
hicle, even when they are secured in a child
restraint system.
Make sure that luggage and other objects
are adequately secured. The load could oth-
erwise injure someone in the event of an ac-
cident, during hard braking or steering
maneuvers.
iThe rear seat backrests can be adjust-
ed to a more reclined position to make
the folding bench seat more comfort-
able (
�page 262).
Page 141 of 521

140 Controls in detailMemory functionPrior to operating the vehicle, the driver
should check and adjust the seat height,
seat position fore and aft, and seat back-
rest angle if necessary, to ensure adequate
control, reach and comfort. The head re-
straint should also be adjusted for proper
height. See also the section on air bags
(�page 67) for more information on prop-
er seat positioning.
In addition, adjust the steering wheel to
ensure adequate control, reach, operation
and comfort. Both the interior and outside
rear view mirrors should be adjusted for
adequate rear vision.
Fasten seat belts. Infants and small chil-
dren should be seated in a properly se-
cured restraint system that complies with
U.S. Federal Motor Vehicle Safety Stan-
dards 213 and 225 and Canadian Motor
Vehicle Safety Standards 213 and 210.2.The following settings are stored when
using the buttons on the driver’s door:
�
Driver’s seat, backrest and head
restraint position and settings for
multicontour seat
�
Steering wheel position
�
Exterior rear view mirror positions
The following settings are stored when us-
ing the buttons on the front passenger
door:
�
Front passenger seat, backrest and
head restraint position and settings for
multicontour seatThe memory button and memory position
buttons are located on the door.
MMemory button
1, 2, 3Memory position button
�
Switch on the ignition (
�page 36).
or
�
Open the respective door.
Warning!
G
Do not activate the memory function while
driving. Activating the memory function
while driving could cause the driver to lose
control of the vehicle.
Page 168 of 521
167 Controls in detail
Control system
The table below shows what settings can
be changed within the various menus.
Detailed instructions on making individual
settings can be found on the following pag-
es.INSTRUMENT CLUSTER
TIME/DATE
LIGHTING
VEHICLE
CONVENIENCE
DYNAMIC SEAT*
Select speedometer dis-
play mode
Synchronizing the
time
Set daytime running
lamp mode
(USA only)
Set automatic lock-
ing
Activate
easy-entry / exit
feature
Set level for
dynamic seat, driver
Select language
Set time (hours)
Set locator lighting
Limiting opening
height of tailgate*
Set parking position
for exterior rear
view mirror
Set level for
dynamic seat, pas-
senger
Select display (speed dis-
play or outside tempera-
ture) for status line
Set time (minutes)
Setting ambient
lighting
Select display (speed dis-
play or outside tempera-
ture) for basic display
Set date (month)
Setting headlamps
delayed shut-off
Set date (day)
Setting interior
lighting delayed
shut-off
Set date (year)
Page 177 of 521

176 Controls in detailControl systemVehicle submenu
Access the
Vehicle
submenu via the
Set-
tings
menu. Use the
Vehicle
submenu to
make general vehicle settings. The follow-
ing functions are available:
Setting automatic locking
Use this function to activate or deactivate
the automatic central locking. With the au-
tomatic central locking system activated,
the vehicle is centrally locked at vehicle
speeds of approximately 9 mph
(15 km / h).
�
Move the selection marker with
buttonæ orç to the
Vehicle
submenu.
�
Press buttonj ork repeatedly
until the message
Automatic door
lock
. appears in the multifunction dis-
play.
The selection marker is on the current
setting.
�
Press buttonæ orç to switch Automatic door lock
on or
off
.Limiting opening height of tailgate*
Use this function to activate or deactivate
the limiting opening height of tailgate.
�
Move the selection marker with
buttonæ orç to the
Vehicle
submenu.
�
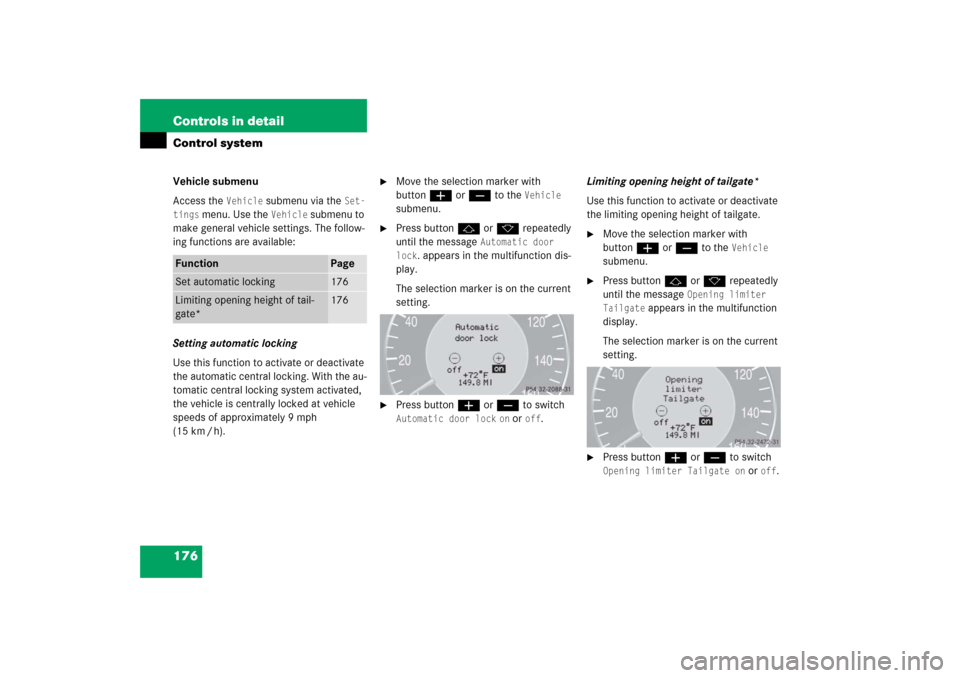
Press buttonj ork repeatedly
until the message
Opening limiter
Tailgate
appears in the multifunction
display.
The selection marker is on the current
setting.
�
Press buttonæ orç to switch Opening limiter Tailgate on
or
off
.
Function
Page
Set automatic locking
176
Limiting opening height of tail-
gate*
176