Page 39 of 456

38 Getting startedAdjustingSeat adjustment
The seat adjustment switches are located
in each door.
1Head restraint height
2Seat height
3Seat cushion tilt
4Seat cushion depth
5Seat fore and aft adjustment
6Seat backrest tilt
�
Switch on the ignition (
�page 34).
or
�
Open the respective door.
Seat fore and aft adjustment
�
Press the switch forward or backward
in the direction of arrow5.
Adjust seat to a comfortable seating
position that still allows you to reach
the accelerator/brake pedal safely.
The position should be as far to the rear
as possible, consistent with ability to
properly operate controls.Seat cushion tilt
�
Press the switch up or down in the di-
rection of arrow3 until your upper
legs are lightly supported.
Seat cushion depth
�
Press the switch forward or backward
in the direction of arrow4 until your
legs are supported comfortably.
Seat backrest tilt
�
Press the switch forward or backward
in the direction of arrow6 until your
arms are slightly angled when holding
the steering wheel.
A child’s risk of serious or fatal injuries is
significantly increased if the child restraints
are not properly secured in the vehicle and
the child is not properly secured in the child
restraint.
iThe memory function (
�page 122) lets
you store the settings for the seat posi-
tion together with the settings for the
steering wheel and the exterior rear
view mirrors.
!When moving the seat, make sure
there are no items in the footwell or be-
hind the seats. Otherwise you could
damage the seats.
��
Page 118 of 456
117 Controls in detailSeats
Lumbar support
You can adjust the contour of the seat’s
lumbar support to help enhance support to
your spine.
The thumbwheels for the driver’s and front
passenger’s seat are located on the outer
side of the seat.
1Thumbwheel�
Switch on the ignition (
�page 34).
�
Set the lumbar support between 0
and 5.
Multicontour seats*
The multicontour seat has inflatable air
cushions built into the seat backrest to
provide additional lumbar and side sup-
port.
The seat backrest cushion height and cur-
vature can be adjusted with switches on
the right side of the seat after switching on
ignition.The switches for the driver and front pas-
senger seat are located on the inner side of
the seat.
1Shoulder region support
2Side bolster adjustment
3Massage function (PULSE)
4Lumbar region support
�
Switch on the ignition (
�page 34).
Shoulder region support
�
Press æ or ç on switch1.
The air cushion inflates or deflates.
Page 164 of 456

163 Controls in detail
Control system
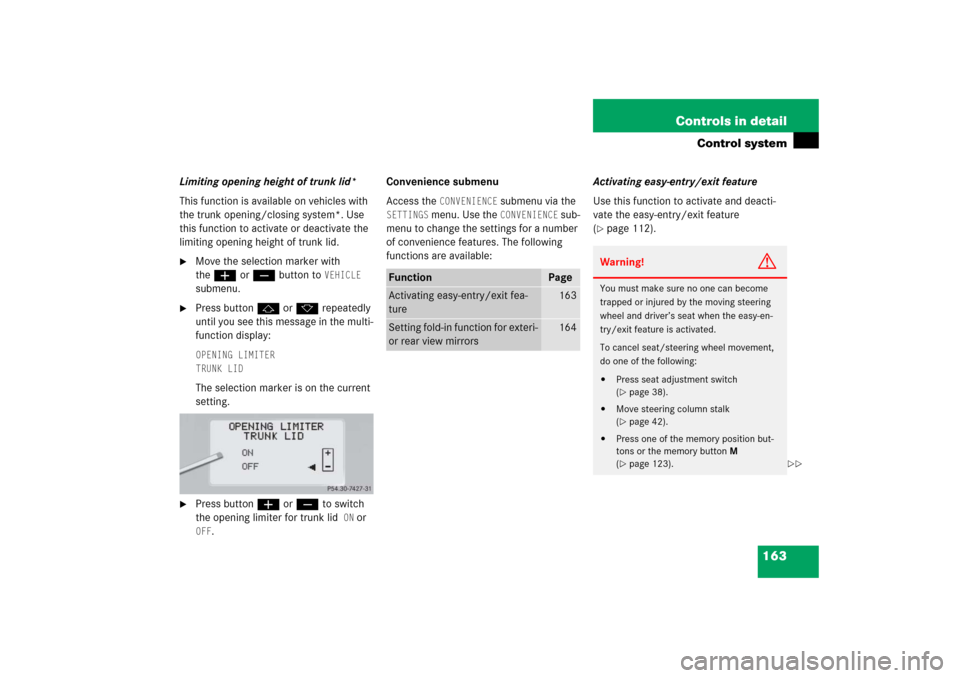
Limiting opening height of trunk lid*
This function is available on vehicles with
the trunk opening/closing system*. Use
this function to activate or deactivate the
limiting opening height of trunk lid.�
Move the selection marker with
theæ orç button to
VEHICLE
submenu.
�
Press buttonj ork repeatedly
until you see this message in the multi-
function display:OPENING LIMITER
TRUNK LIDThe selection marker is on the current
setting.
�
Press buttonæ orç to switch
the opening limiter for trunk lid
ON
or
OFF
.Convenience submenu
Access the
CONVENIENCE
submenu via the
SETTINGS
menu. Use the
CONVENIENCE
sub-
menu to change the settings for a number
of convenience features. The following
functions are available:Activating easy-entry/exit feature
Use this function to activate and deacti-
vate the easy-entry/exit feature
(
�page 112).
Function
Page
Activating easy-entry/exit fea-
ture
163
Setting fold-in function for exteri-
or rear view mirrors
164
Warning!
G
You must make sure no one can become
trapped or injured by the moving steering
wheel and driver’s seat when the easy-en-
try/exit feature is activated.
To cancel seat/steering wheel movement,
do one of the following:�
Press seat adjustment switch
(�page 38).
�
Move steering column stalk
(�page 42).
�
Press one of the memory position but-
tons or the memory button M
(�page 123).
��
Page 222 of 456

221 Controls in detail
Driving systems
Vehicle level control
Your vehicle automatically adjusts its ride
height to�
increase vehicle safety
�
reduce fuel consumptionThe vehicle chassis ride height is raised or
lowered according to the selected level
setting and to the vehicle speed:
�
With increasing speed, ride height is re-
duced by up to approximately 0.95 in
(24 mm).
�
With decreasing speed, the ride height
is again raised to the selected vehicle
level.Select the level 1 and 2 settings only when
required by current driving conditions.
Otherwise
�
Fuel consumption may increase.
�
Handling may be impaired.
The following vehicle level settings can be
selected when the vehicle is stationary:
Warning!
G
To help avoid personal injury, keep hands
and feet away from wheel housing area, and
stay away from under the vehicle when low-
ering the vehicle chassis.
iThese height adjustments are so small
that you may not notice any change.
Vehicle level when
stationary
Use for
Ride height increase
over normal
Automatic lowering
Indicator lamps
Normal level
Normal operation
None
Max. approx. 0.4 in (11 mm)
Both lamps off
Level 1
Driving with snow
chains (
�page 314)
Max. 0.55 in (14 mm)
1
1Dependent on load
Max. approx. 0.55 in (14 mm)
One lamp on
Level 2
Very rough road surface
conditions
Max. 0.95 in (24 mm)
1
Max. approx. 0.95 in (24 mm)
Both lamps on