Page 132 of 473
131 Controls in detail
Control system
AUDIO menu
The functions in the
Audio menu operate
the audio equipment which you currently
have turned on.
If no audio equipment is currently turned
on, the message
Audio off appears in the
multifunction display.
The following functions are available:Select radio station
�Turn on the radio (�page 200).
Vehicles with COMAND*:
Refer to separate operating
instructions.
�Press buttonè orÿ repeatedly
until the currently tuned station
appears in the multifunction display.
1Waveband setting
2Station frequency
�Press buttonk orj repeatedly
until the desired station is found.
FunctionPage
Select radio station131
Select satellite radio station*
(USA only)132
Operate CD player*132
i
You can only store new stations using
the corresponding feature on the radio
(
�page 208).
Vehicles with COMAND*:
Refer to separate operating
instructions.
You can also operate the radio in the
usual manner.
Page 133 of 473

The satellite radio is treated as a radio
application.
�Select satellite radio with the
corresponding soft key (SAT)")
132 Controls in detail
Control system
Select satellite radio station*
(USA only)
The satellite radio is treated as a radio
application.
�Select satellite radio with the
corresponding soft key (SAT) in the
radio menu.
1SAT mode and preset number
2Channel name or number
�Press buttonk orj repeatedly
until the desired channel is found.Operate the CD player*
Selecting CD track
�Turn on the radio and select CD or
CD changer* (
�page 219).
Vehicles with COMAND*:
Refer to separate operating
instructions.
�Press buttonè orÿ repeatedly
until the settings for the CD currently
being played appear in the
multifunction display.
1Current CD (for CD changer*)
2Current track
�Press buttonk orj repeatedly
until the desired track is selected.
i
For more information on satellite radio
operation, see “Introduction to satellite
radio* (USA only)” (
�page 209).
Vehicles with COMAND*:
Refer to separate operating
instructions.
i
The COMAND* system and the CD
changer* can play audio CDs as well as
CDs with MP3 files.
i
To select a CD from the CD changer*
magazine, press a number on the audio
system or the COMAND* system key
pad located in the center dashboard.
Page 134 of 473
 and for the CD
changer*, see (
�page 218).
Selecting CD MP3-track (vehicles with
COMAND* a")
133 Controls in detail
Control system
For more information on CD operation, see
“CD mode” (
�page 214) and for the CD
changer*, see (
�page 218).
Selecting CD MP3-track (vehicles with
COMAND* and/or CD changer*)
�Turn on the radio and select the
CD changer* (
�page 219) or turn on
COMAND* and select CD or
CD changer*.
Vehicles with COMAND*:
Refer to separate operating
instructions.
�Press buttonè orÿ repeatedly
until the settings for the CD currently
being played appear in the
multifunction display.
1MP3 mode (vehicles with COMAND*)
2Current track
�Press buttonk orj repeatedly
until the desired track is selected.For more information on MP3, see “MP3
notes” (
�page 216), and for operating,
see “MP3 playback” (
�page 217).i
A CD with MP3 files insert in the CD
changer* is handled by the
audio/COMAND* system like an audio
CD. Information contained on the CD
with MP3 files will not shown in the
multifunction display or in the au-
dio/COMAND* display.
i
Level of information displayed will vary
depending on the information con-
tained on the CD with MP3 files insert
in the single CD player of the
COMAND* system.
To select a CD from the CD changer*
magazine, press a number on the audio
system or the COMAND* system key
pad located in the center dashboard.
Page 141 of 473

140 Controls in detail
Control system
Time/Date submenu
Access the
Time/Date submenu via the
Settings menu. Use the Time/Date
submenu to change the instrument cluster
display settings.
The following functions are available:Time synchronization with head unit*
This function can only be seen on vehicles
with COMAND* and navigation module*.
�Move the selection marker with
buttonæ orç to the
Time/Date
submenu.
�Press buttonj ork repeatedly
until the message
Time synchro.
w/Head Unit
appears in the multifunc-
tion display.
The selection marker is on the current
setting.
�Press buttonæ orç to select
the desired setting.Set the time (hours)
This function can be seen in vehicles with
audio system, or in vehicles with
COMAND* if the time synchronization with
head unit* feature was set to
Off.
�Move the selection marker with
buttonæ orç to the
Time/Date
submenu.
�Press buttonj ork repeatedly
until the message
Time Hours appears
in the multifunction display.
FunctionPage
Time synchronization with
head unit*140
Set time (hours)140
Set time (minutes)141
Select automatic time change
(Daylight Saving Time (DST)
summer/Standard time winter)142
Set date (month)142
Set date (day)143
Set date (year)143
i
Vehicles with COMAND*:
For information on setting the time,
refer to the separate COMAND
operating instructions.
Page 142 of 473
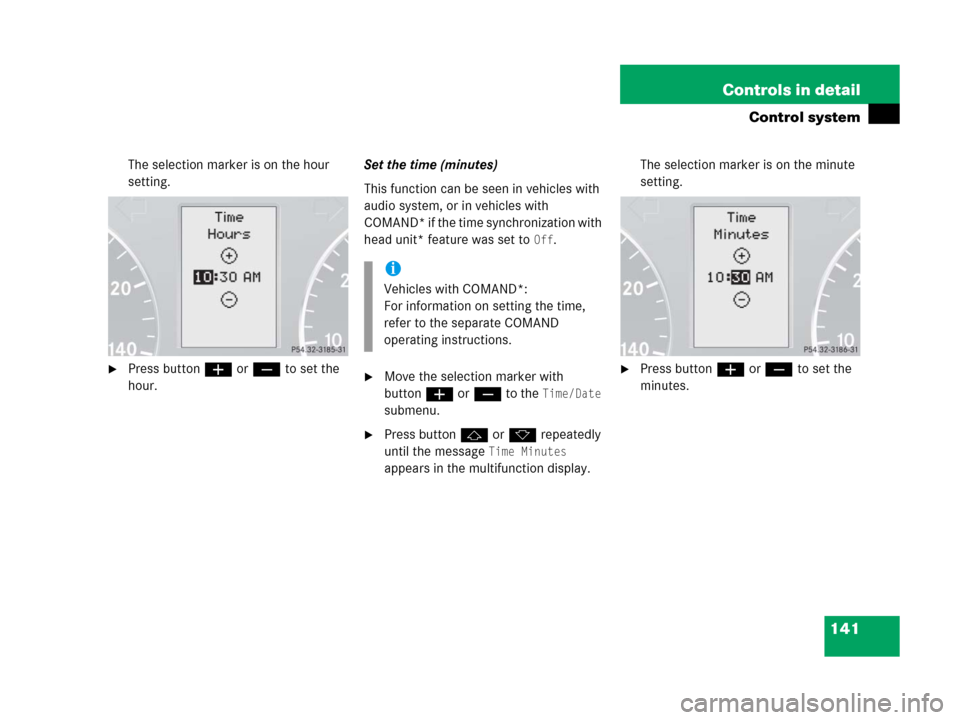
141 Controls in detail
Control system
The selection marker is on the hour
setting.
�Press buttonæ orç to set the
hour.Set the time (minutes)
This function can be seen in vehicles with
audio system, or in vehicles with
COMAND* if the time synchronization with
head unit* feature was set to
Off.
�Move the selection marker with
buttonæ orç to the
Time/Date
submenu.
�Press buttonj ork repeatedly
until the message
Time Minutes
appears in the multifunction display.The selection marker is on the minute
setting.
�Press buttonæ orç to set the
minutes.
i
Vehicles with COMAND*:
For information on setting the time,
refer to the separate COMAND
operating instructions.
Page 143 of 473
 summer/Standard
time winter)
This function can be seen in vehicles with
audio system, or in vehicles w")
142 Controls in detail
Control system
Select automatic time change (Daylight
Saving Time (DST) summer/Standard
time winter)
This function can be seen in vehicles with
audio system, or in vehicles with
COMAND* if the time synchronization with
head unit* feature was set to
Off.
�Move the selection marker with
buttonæ orç to the
Time/Date
submenu.
�Press buttonj ork repeatedly
until the message
Change-over
Summer / Winter time
appears in the
multifunction display.
The selection marker is on the current
setting.
�Press buttonæ orç to select if
the changeover between summer and
winter time should be automatic or
manual.
Set the date (month)
This function can be seen in vehicles with
audio system, or in vehicles with
COMAND* if the time synchronization with
head unit* feature was set to
Off.
�Move the selection marker with
buttonæ orç to the
Time/Date
submenu.
�Press buttonj ork repeatedly
until the message
Date Set MM appears
in the multifunction display.
The selection marker is on the month
setting.
�Press buttonæ orç to set the
month.
i
Vehicles with COMAND*:
For information on setting the date,
refer to the separate COMAND
operating instructions.
Page 144 of 473

This function can be seen in vehicles with
audio system, or in vehicles with
COMAND* if the time synchronization with
head unit* feature was")
143 Controls in detail
Control system
Set the date (day)
This function can be seen in vehicles with
audio system, or in vehicles with
COMAND* if the time synchronization with
head unit* feature was set to
Off.
�Move the selection marker with
buttonæ orç to the
Time/Date
submenu.
�Press buttonj ork repeatedly
until the message
Date Set day
appears in the multifunction display.The selection marker is on the day
setting.
�Press buttonæ orç to set the
day.Set the date (year)
This function can be seen in vehicles with
audio system, or in vehicles with
COMAND* if the time synchronization with
head unit* feature was set to
Off.
�Move the selection marker with
buttonæ orç to the
Time/Date
submenu.
�Press buttonj ork repeatedly
until the message
Date Set YY appears
in the multifunction display.
i
Vehicles with COMAND*:
For information on setting the date,
refer to the separate COMAND
operating instructions.
i
Vehicles with COMAND*:
For information on setting the date,
refer to the separate COMAND
operating instructions.
��
Page 153 of 473

152 Controls in detail
Control system
TEL menu*
You can use the functions in the
TEL menu
to operate your telephone, provided it is
connected to a hands-free system and
switched on.
�Switch on the telephone and Audio or
COMAND*.
�Press buttonÿ orè on the
steering wheel repeatedly until the
message
TEL appears in the
multifunction display.
Which messages will appear in the
multifunction display depends on whether
your telephone is switched on or off:
�If the telephone is off, the message
PHONE OFF appears in the multifunction
display.
�If the telephone is on:
The telephone will then search for a
network. During this time the multi-
function display is empty.
As soon as the telephone has found a
network, the message
READY appears in
the multifunction display.
This standby message indicates that your
telephone is ready for use and you can
operate it using the control system.
Warning!G
A driver’s attention to the road must always
be his/her primary focus when driving. For
your safety and the safety of others, we
recommend that you pull over to a safe
location and stop before placing or taking a
telephone call. If you choose to use the
telephone while driving, please use the
hands-free device and only use the
telephone when weather, road and traffic
conditions permit.
Some jurisdictions prohibit the driver from
using a cellular telephone while driving a
vehicle.
Bear in mind that at a speed of just 30 mph
(approximately 50 km/h), your vehicle is
covering a distance of 44 feet
(approximately 14 m) every second.
Never operate radio transmitters equipped
with a built-in or attached antenna (i.e. with-
out being connected to an external antenna)
from inside the vehicle while the engine is
running. Doing so could lead to a malfunc-
tion of the vehicle’s electronic system,
possibly resulting in an accident and
personal injury.