2006 MAZDA MODEL 5 reset
[x] Cancel search: resetPage 205 of 426

Black plate (205,1)
Multiple insertion
1. Press and hold the load button (
)
for about 2 seconds until a beep sound
is heard.
2. Press the load button (
) again
while “WAIT ”is displayed.
NOTE
If the button is not operated while
“WAIT ”is displayed, the display
changes to “IN ”and the CD can be
inserted.
3. When “IN ”is displayed, insert the CD.
4. When “IN ”is displayed again, insert
the next CD.
NOTE
The first-inserted CD will be played
automatically when:
lNo other CD is inserted within 15
seconds after “IN ”is displayed.
lThe CD trays are full.
Displaying the CD-inserted tray
number
When you want to know the number for a
CD-inserted tray, press the display button
(
). The tray number will be displayed
for 5 seconds.
Ejecting the CD
Normal ejection
1. Press the CD eject button (
). The
disc number and “DISC ”“OUT ”will
be displayed.
2. Pull out the CD.
NOTE
When the CD is ejected during play, the
next CD will be played automatically.
Ejecting CDs from desired tray number
1. Press and hold the CD eject button (
)
for about 2 seconds until a beep sound
is heard.
The “DISC ”“OUT ”display flashes.
2. Press the channel preset button for the desired CD number for less than 5
seconds after the beep sound is heard.
3. Pull out the CD.
Multiple ejection
1. Press and hold the CD eject button (
)
for about 2 seconds until a beep sound
is heard.
The “DISC ”“OUT ”display flashes.
2. Press the CD eject button (
) again
for less than 5 seconds after the beep
sound is heard.
NOTE
If the button is not pressed and about 5
seconds have elapsed while “DISC ”
“ OUT ”is flashing, CDs are
automatically ejected.
3. Pull out the CD, then the next CD will be ejected.
Interior Comfort
Audio System
6-35
Mazda3_8U55-EA-05G_Edition3 Page205
Tuesday, September 13 2005 10:43 AM
Form No.8U55-EA-05G
Page 216 of 426

Black plate (216,1)
qClock
NOTE
When the trip computer is being
displayed, press the CLOCK button to
change the display to the time.
When the ignition switch is in the ACC or
ON position, the time is displayed.
Time setting
NOTE
For trip computer-equipped vehicles,
press the INFO button instead of the
SET button when setting the time.
1. Press the CLOCK button until a beep sounds, and “12Hr ”and “24Hr ”will be
displayed.
2. Press the SET button to switch between “12Hr ”and “24Hr ”displays. The
selected display will flash.
To select the desired clock setting,
press the CLOCK button again while
the preferred setting is flashing. 3.
“Hr. ADJUST ”will be displayed next,
and the hour portion of the display will
flash. Press the SET button to set the
hour, then press the CLOCK button.
4. “Min. ADJUST ”will be displayed
next, and the minutes portion of the
display will flash. Press the SET button
to set the minutes, then press the
CLOCK button.
Time resetting
NOTE
For trip computer-equipped vehicles,
press the INFO button instead of the
SET button when resetting the time.
While the clock is displayed, press the
SET button 1.5 seconds or more. When
the button is released, a beep will sound
and the clock will be reset as follows:
(Example)
12:01 ―12:29 →12:00
12:30 ―12:59 →1:00
NOTE
When the SET button is released, the
seconds are reset to “00 ”.
q Ambient Temperature Displayí
With manual type air conditioner
When the ignition switch is in the ON
position, the ambient temperature is
displayed.
6-46
Interior Comfort
íSome models.
Interior Equipment
Mazda3_8U55-EA-05G_Edition3 Page216
Tuesday, September 13 2005 10:43 AM
Form No.8U55-EA-05G
Page 218 of 426

Black plate (218,1)
U.S.A.
CANADA
When you've slowed to about 5 km/h (3
mph),——L/100 km ( ——mpg) will be
displayed.
Average fuel economy mode
This mode displays the average fuel
economy by calculating the fuel
consumption and the distance traveled
since connecting the battery or resetting
the data.
Average fuel economy will be calculated
and displayed every minute.
When this mode is selected, CONSUM
AV will be displayed. U.S.A.
CANADA
To clear the data being displayed, press
the INFO button for more than 1 second.
After pressing the INFO button,
——L/
100 km ( ——mpg) will be displayed for
1 minute before the fuel economy is
recalculated and displayed.
Distance-to-empty mode
This mode displays the approximate
distance you can travel on the remaining
fuel based on the fuel economy.
The distance-to-empty will be calculated
and displayed every minutes.
When this mode is selected, REMNG will
be displayed.
6-48
Interior Comfort
Interior Equipment
Mazda3_8U55-EA-05G_Edition3 Page218
Tuesday, September 13 2005 10:43 AM
Form No.8U55-EA-05G
Page 219 of 426

Black plate (219,1)
U.S.A.
CANADA
NOTE
lEven though the distance-to-empty
display may indicate a sufficient
amount of remaining mileage before
refueling is required, refuel as soon
as possible if the fuel gauge needle
nears E or the low fuel warning light
illuminates.
lThe display won't change unless you
add more than approximately 20 L
(5.3 gal) of fuel.
Average vehicle speed mode
This mode displays the average vehicle
speed by calculating the distance and the
time traveled since connecting the battery
or resetting the data.
Average vehicle speed will be calculated
and displayed every 10 seconds.
When this mode is selected, AV will be
displayed.
U.S.A.
CANADA
To clear the data being displayed, press
the INFO button for more than 1 second.
After pressing the INFO button,——
km/h ( ——mile/h) will be displayed for
about 1 minute before the vehicle speed is
recalculated and displayed.
Interior Comfort
Interior Equipment
6-49
Mazda3_8U55-EA-05G_Edition3 Page219
Tuesday, September 13 2005 10:43 AM
Form No.8U55-EA-05G
Page 375 of 426

3
Product
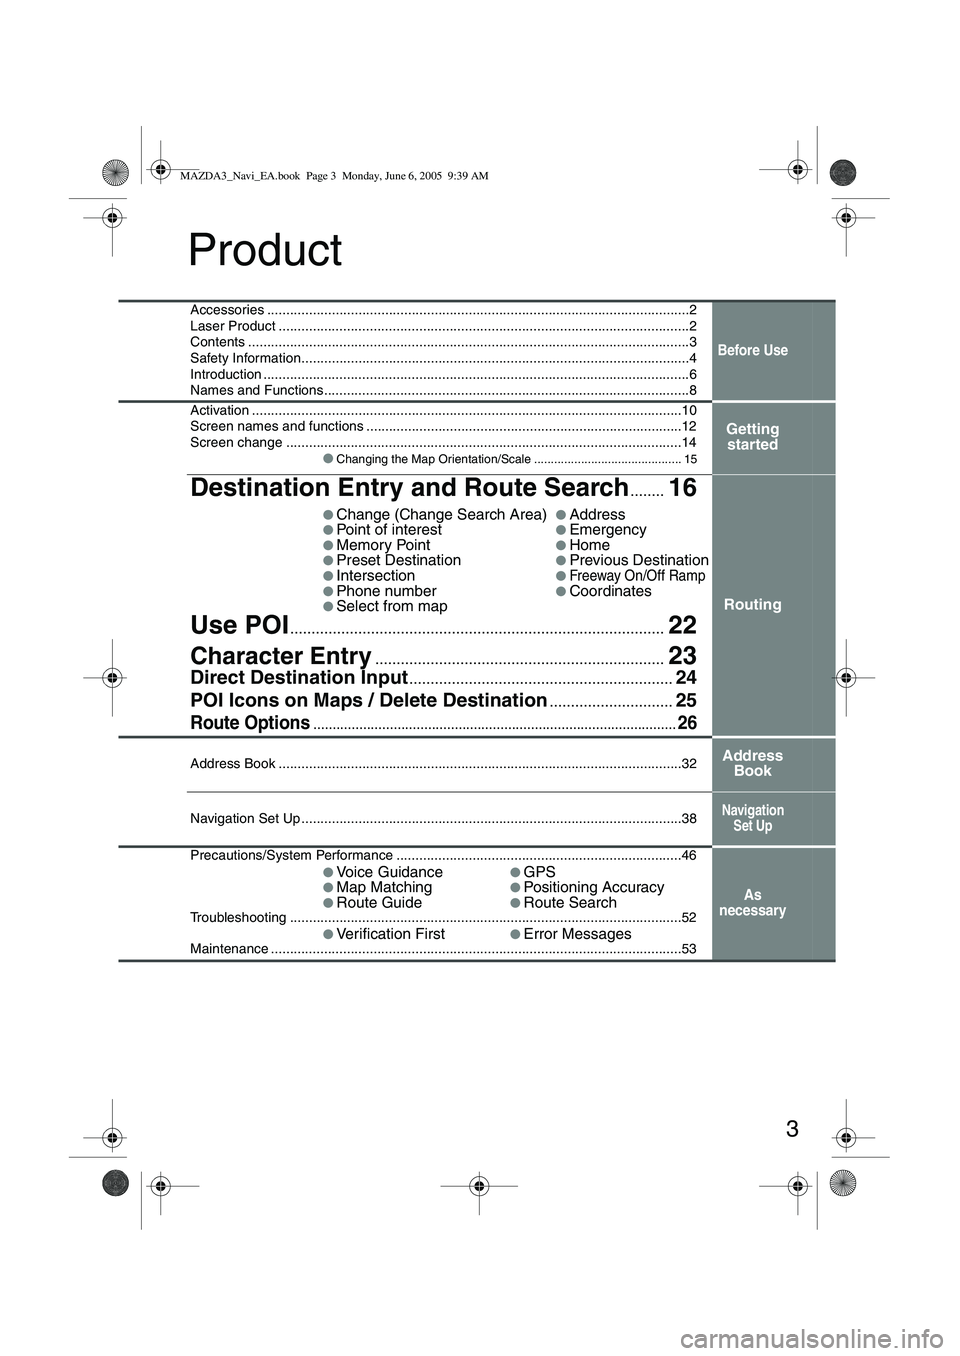
Accessories ...............................................................................................................2
Laser Product ............................................................................................................2
Contents ....................................................................................................................3
Safety Information......................................................................................................4
Introduction ................................................................................................................6
Names and Functions................................................................................................8
Before Use
Activation .................................................................................................................10
Screen names and functions ...................................................................................12
Screen change ........................................................................................................14●
Changing the Map Orientation/Scale ............................................ 15
Getting started
Destination Entry and Route Search........16
●Change (Change Search Area)●Address●Point of interest●Emergency●Memory Point●Home●Preset Destination●Previous Destination●Intersection●Freeway On/Off Ramp●Phone number●Coordinates●Select from map
Use POI........................................................................\
................22
Character Entry....................................................................23
Direct Destination Input..............................................................24
POI Icons on Maps / Delete Destination
.............................25
Route Options...............................................................................................26
Routing
Address Book ..........................................................................................................32Address Book
Navigation Set Up ....................................................................................................38Navigation
Set Up
Precautions/System Performance ...........................................................................46
●
Voice Guidance●GPS●Map Matching●Positioning Accuracy●Route Guide●Route SearchTroubleshooting .......................................................................................................52●
Verification First●Error MessagesMaintenance ............................................................................................................53
As
necessary
MAZDA3_Navi_EA.book Page 3 Monday, June 6, 2005 9:39 AM
Page 385 of 426

13
Getting started
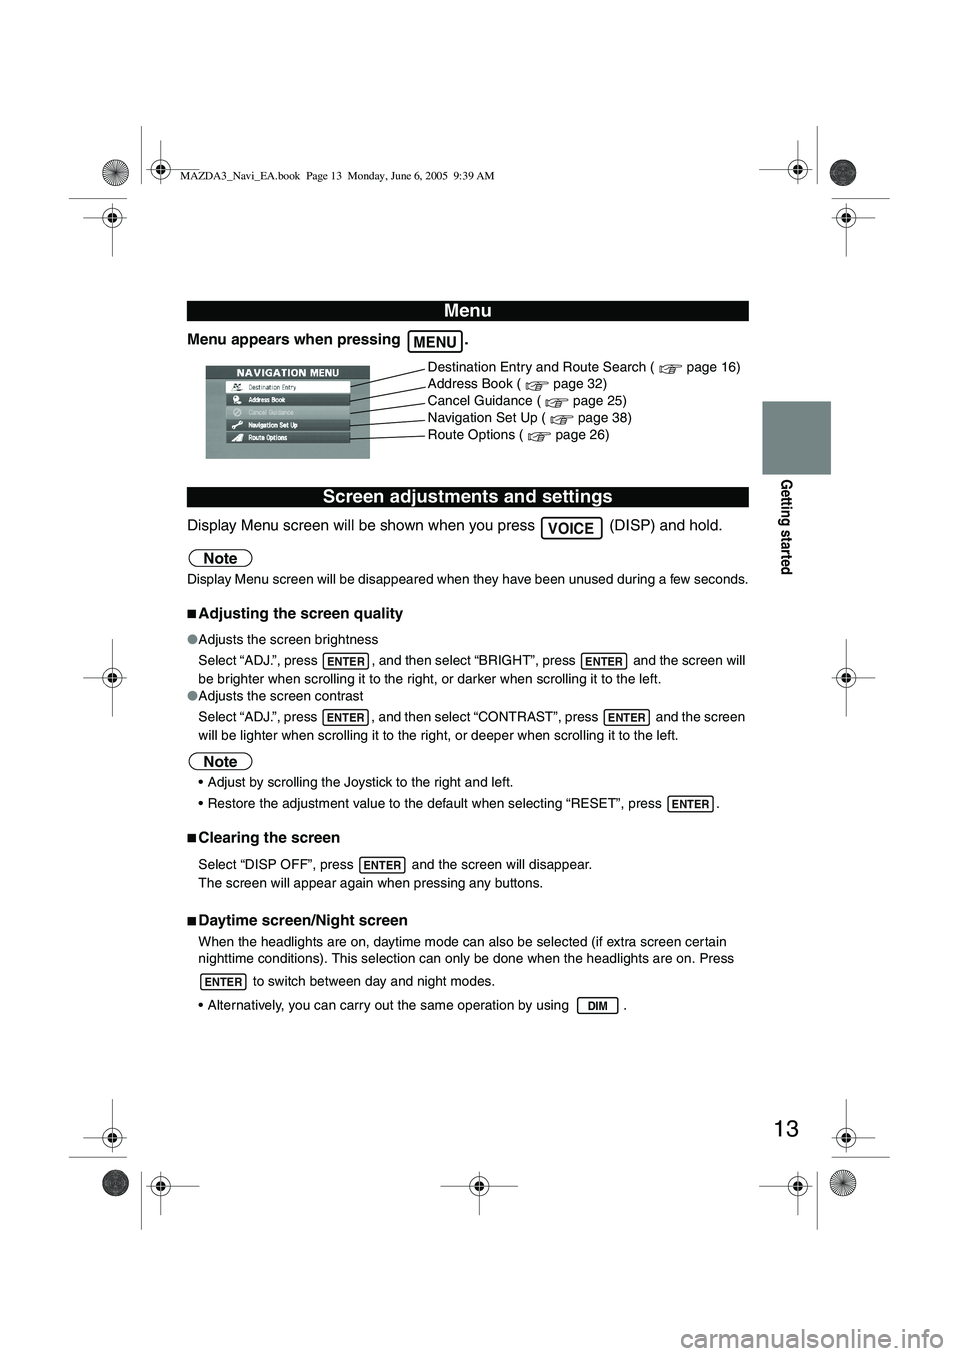
Menu appears when pressing .
Display Menu screen will be shown when you press (DISP) and hold.
Note
Display Menu screen will be disappeared when they have been unused during a few seconds.
■Adjusting the screen quality
●Adjusts the screen brightness
Select “ADJ.”, press , and then select “BRIGHT”, press and the screen will
be brighter when scrolling it to the right, or darker when scrolling it to the left.
● Adjusts the screen contrast
Select “ADJ.”, press , and then select “CONTRAST”, press and the screen
will be lighter when scrolling it to the right, or deeper when scrolling it to the left.
Note
Adjust by scrolling the Joystick to the right and left.
Restore the adjustment value to the default when selecting “RESET”, press .
■Clearing the screen
Select “DISP OFF”, press and the screen will disappear.
The screen will appear again when pressing any buttons.
■Daytime screen/Night screen
When the headlights are on, daytime mode can also be selected (if extra screen cer tain
nighttime conditions). This selection can only be done when the headlights are on. Press
to switch between day and night modes.
Alternatively, you can carry out the same operation by using .
Menu
Screen adjustments and settings
MENU
Destination Entry and Route Search ( page 16)
Address Book ( page 32)
Cancel Guidance ( page 25)
Navigation Set Up ( page 38)
Route Options ( page 26)
VOICE
ENTERENTER
ENTERENTER
ENTER
ENTER
ENTER
DIM
MAZDA3_Navi_EA.book Page 13 Monday, June 6, 2005 9:39 AM
Page 392 of 426

20
Routing
Destination Entry and Route Search
Before Steps select
Memory Point
Home
Preset Destination
Previous Destination
Intersection
Freeway On/
Off Ramp
Phone number
Coordinates
Select from
map
MENUENTER
Open the
[DESTINATION
ENTRY] MenuSelect Select the
category for
desired Mem
Point
Select
Select
Select the de
Select Select the P
Select Enter/Select
1st street na
Select
Enter/Select
name of the
freeway
Select
Select
Select
Enter the lat
: degrees
: minutes
: seconds
Select
MAZDA3_Navi_EA.book Page 20 Monday, June 6, 2005 9:39 AM
Page 393 of 426

21
Routing
● For Character Entry, please refer to page 23.
Select the
category for the
desired Memory
PointSelect the desired Memory Point : Display up to five previous suggestions.
: Display the five previous suggestions.
: The order of the displayed list can be changed.
Direct destination
input
( page 24)
Select the desired Preset Destination.
Select the Previous Destination.
Enter/Select the
1st street name
Enter/Select the 2nd
street name
Enter/Select the
name of the
freeway Select
or Select the
desired the
On Ramp or
the Off Ramp
name.
Select Select the phone
number
Enter the latitude
: degrees
: minutes
: seconds
Enter the longitude
Select
MAZDA3_Navi_EA.book Page 21 Monday, June 6, 2005 9:39 AM