Page 310 of 651
AUDIO
289
Radio operation
(a) Listening to the radio
Push these buttons to choose either an AM or FM station.
“AM”, “FM1”, “FM2” or “FM TYPE” appears on the d\
isplay.
Turn this knob to the right to step up the frequency or to
the left to step down.
Your radio automatically changes to stereo reception when a
stereo broadcast is received. “ST” appears on the display. If
the signal becomes weak, the radio reduces the amount of
channel separation to prevent the weak signal from creating
noise. If the signal becomes extremely weak, the radio
switches from stereo to mono reception. In this case, “ST”
disappears from the display.
Page 311 of 651
 Presetting a station
1. Tune in the desired station.
2. Push one of the station selector buttons (1 — 6) and
hold it until a beep is heard. This sets the station to the
button and the")
AUDIO
290(b) Presetting a station
1. Tune in the desired station.
2. Push one of the station selector buttons (1 — 6) and
hold it until a beep is heard. This sets the station to the
button and the button number (1 — 6) appears on the
display.
Each
button can store one AM station and two FM stations. To
change the preset station to a different one, follow the same
procedure.
The preset station memory is cancelled when the power
source is interrupted by battery disconnection or a blown fuse. (c) Selecting a station
Tune in the desired station using one of the following methods.
Seek tuning: Push the “SEEK” button. The radio will begin
seeking up
or down for a station of the nearest frequency and
will stop on reception. Each time you push the button, the
stations will be searched automatically one after another.
Preset tuning: Push the button (1 — 6) for the station you
want. The button number (1 — 6) and station frequency
appear on the display.
Manual tuning: Turn the “TUNE” knob. The radio will step up
or down to another frequency.
Page 336 of 651
 switch: Use this switch to eject the disc
from the DVD p")
AUDIO
315
Buttons on the DVD player unit
The rear seat entertainment system can be operate with the
switches on the DVD player.
1“” (eject) switch: Use this switch to eject the disc
from the DVD player.
2“SOURCE” switch: Push this switch to turn on the rear
seat entertainment system.
To change the audio mode, turn on the system and push the
source switch until the mode you desire is displayed. If a tape
or disc is not inserted, the “TAPE”, “CD” and “DVD” modes are
skipped.
3“TUNE/TRACK” switch: Use this switch to tune or seek
(radio mode), fast forward or rewind (“TAPE” mode),
select a desired track (“CD” mode) or select a desired
chapter/track (“DVD” mode).
Radio mode: Use this switch to tune or seek.
� To tune, repeatedly push this switch briefly until your desired
station is found.
� To seek, push and hold this switch until you hear a beep.
The radio will begin seeking up or down the band for a
station, and will stop on reception.
TAPE mode: Use this switch to fast forward or rewind a tape,
or for automatic program selection.
� To skip forward or rewind using automatic program
selection, push this switch briefly. By using automatic
program selection, you can skip up to 9 programs at a time.
For details, see page 276 or 296.
� To fast forward or rewind the tape, push and hold this switch
until you hear a beep. To stop fast forwarding or rewinding,
push and hold the same side of the switch until you hear a
beep.
Page 340 of 651
AUDIO
319
�
1Remote control buttons (with navigation system)
2Remote control buttons (without navigation
system)
3DVD player unit
To turn on the system, push the “SOURCE” button.
The screen indicates which mode can be selected. Push the
“DVD” or “VIDEO” button when the connected DVD player or
your personal audio machine is on. The rear seat
entertainment system will be turned on.
The rear seat entertainment system can select all the modes.
When a cassette tape, a CD, a DVD video disc, an audio CD,
a video CD, a CD text, a dts−CD or a DVD audio disc is not
loaded on the front audio system or the DVD player, only the
radio mode can be selected on the rear seat entertainment
system.
To turn off the system, push the “OFF” button.
When the front audio system is turned off, the rear audio
system and the DVD player will be turned off simultaneously.
Page 353 of 651
AUDIO
332
The “DVD Hint!” screen appears when the DVD mode is
first selected after you turn the ignition key to the “ACC”
or “ON” position.
Push the “OK” switch when you read the message.(d) DVD player operation switches
The DVD player can be operated with the remote control
buttons directly.
Page 357 of 651
AUDIO
336
�1Screen switch2Remote control button
3DVD player unit
To turn off the switches on the screen, push the
“CURSOR” button once again or push the “Hide Buttons”
on the screen.
Page 360 of 651
AUDIO
339
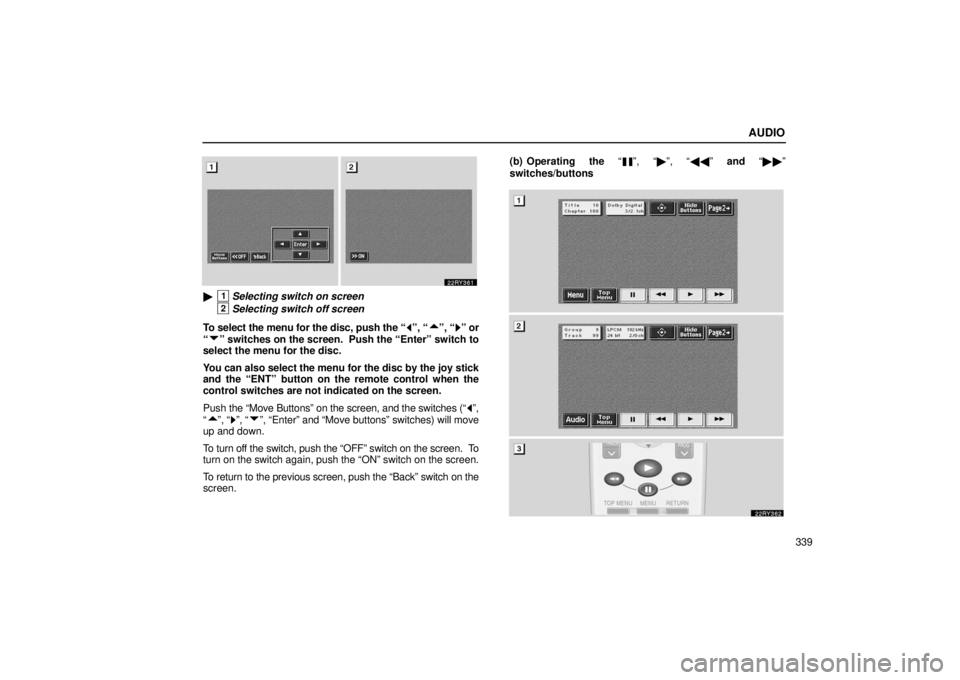
�1Selecting switch on screen
2Selecting switch off screen
To select the menu for the disc, push the “
”, “”, “” or
“
” switches on the screen. Push the “Enter” switch to
select the menu for the disc.
You can also select the menu for the disc by the joy stick
and the “ENT” button on the remote control when the
control switches are not indicated on the screen.
Push the “Move Buttons” on the screen, and the switches (“
”,
“
”, “”, “”, “Enter” and “Move buttons” switches) will move
up and down.
To turn off the switch, push the “OFF” switch on the screen. To
turn on the switch again, push the “ON” switch on the screen.
To return to the previous screen, push the “Back” switch on the
screen. (b) Operating the “
”, “�
”, “�� ” and “�� ”
switches/buttons
Page 361 of 651
AUDIO
340�
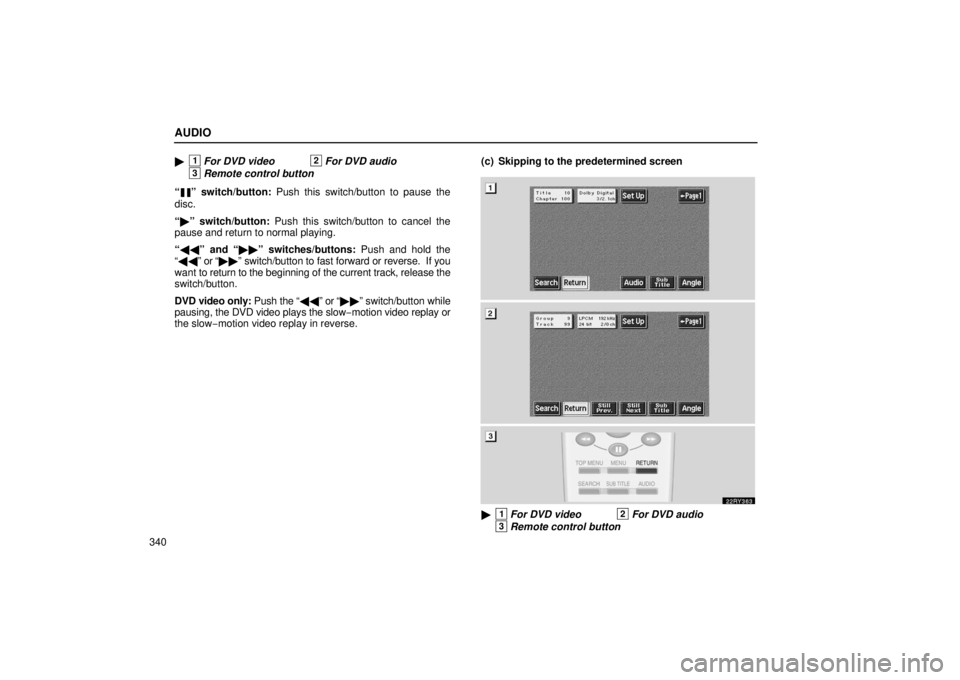
1For DVD video2For DVD audio
3Remote control button
“
” switch/button: Push this switch/button to pause the
disc.
“ � ” switch/button: Push this switch/button to cancel the
pause and return to normal playing.
“ �� ” and “ ��” switches/buttons: Push and hold the
“ �� ” or “�� ” switch/button to fast forward or reverse. If you
want to return to the beginning of the current track, release the
switch/button.
DVD video only: Push the “�� ” or “��” switch/button while
pausing, the DVD video plays the slow −motion video replay or
the slow− motion video replay in reverse. (c) Skipping to the predetermined screen
�1For DVD video2For DVD audio
3Remote control button
 Listening to the radio
Push these buttons to choose either an AM or FM station.
“AM”, “FM1”, “FM2” or “FM TYPE” appears on the d\
isplay.
Turn this knob")