Page 335 of 651

AUDIO
314
1“DVD” button: Turn on the DVD mode.
2“SOURCE” button: Turn on the rear seat
entertainment system and selects the mode.
3“INFO” button: Indicate the “Information Menu”
screen. (See the separate “Navigation System
Owner’s Manual”.)
4“MENU” button: Indicate the “Menu” screen when the
navigation system is operated. (See the separate
“Navigation System Owner’s Manual”.)
5“OFF” button: Turn off the rear seat entertainment
system.
6Joy stick: Select a control switch, mode switch on the
screen or the menu for the disc.
7“ENT” button: Input the selected switch or the
selected menu for the disc.
8“DISC/CH/PROG” button: Skip directly to a desired
preset station, disc, track or chapter.
9“ �� ” button: Fast forwards a screen when the DVD
player is operated.
10“RETURN” button: Skip to the predetermined scene
for the disc.
11“MENU” button: Indicate the menu screen for DVD
video when the DVD player is operated.
12“AUDIO” button: Indicate the changing audio screen
when the DVD player is operated.
13“SUB TITLE” button: Indicate the changing subtitle
screen when the DVD player is operated.
14“DISPLAY” button: Adjust the color, tone, contrast
and brightness of the screen.
15“SET UP” button: Indicate the initial set up screen
when the DVD player is operated.
16“ANGLE” button: Select the angle of the screen when
the DVD player is operated.
17“SEARCH” button: Indicate the title search screen
when the DVD player is operated.
18“TOP MENU” button: Indicate the title selection
screen for DVD video when the DVD player is operated.
19“” button: Pause a screen when the DVD player is
operated.
20“ �� ” button: Reverse a screen when the DVD player
is operated.
21“ � ” button: Play a screen when the DVD player is
operated.
22“TUNE/TRACK” button: Operate the front audio
system or select the track/chapter when the DVD
player is operated.
23“CURSOR” button: Indicates the control switches on
the screen when the DVD player is operated.
24“MAP” button: Indicate the map screen when the
navigation system is operated. (See the separate
“Navigation System Owner’s Manual”.)
25“DEST” button: Indicate the “Destination” screen
when the navigation system is operated. (See the
separate “Navigation System Owner’s Manual”.)
26“VIDEO” button: Turn on the video mode when your
personal audio device is connected.
Page 336 of 651
 switch: Use this switch to eject the disc
from the DVD p")
AUDIO
315
Buttons on the DVD player unit
The rear seat entertainment system can be operate with the
switches on the DVD player.
1“” (eject) switch: Use this switch to eject the disc
from the DVD player.
2“SOURCE” switch: Push this switch to turn on the rear
seat entertainment system.
To change the audio mode, turn on the system and push the
source switch until the mode you desire is displayed. If a tape
or disc is not inserted, the “TAPE”, “CD” and “DVD” modes are
skipped.
3“TUNE/TRACK” switch: Use this switch to tune or seek
(radio mode), fast forward or rewind (“TAPE” mode),
select a desired track (“CD” mode) or select a desired
chapter/track (“DVD” mode).
Radio mode: Use this switch to tune or seek.
� To tune, repeatedly push this switch briefly until your desired
station is found.
� To seek, push and hold this switch until you hear a beep.
The radio will begin seeking up or down the band for a
station, and will stop on reception.
TAPE mode: Use this switch to fast forward or rewind a tape,
or for automatic program selection.
� To skip forward or rewind using automatic program
selection, push this switch briefly. By using automatic
program selection, you can skip up to 9 programs at a time.
For details, see page 276 or 296.
� To fast forward or rewind the tape, push and hold this switch
until you hear a beep. To stop fast forwarding or rewinding,
push and hold the same side of the switch until you hear a
beep.
Page 337 of 651
/chapter·track (“DVD\
”
mode).
� To select a desired track (“CD” mode) or chap")
AUDIO
316CD or DVD
mode: Use this switch to fast forward/rewind a disc
or select a desired track (“CD” mode)/chapter·track (“DVD\
”
mode).
� To select a desired track (“CD” mode) or chapter/track
(“DVD” mode), push this switch briefly.
� To fast forward or rewind a disc, push and hold this switch
until you hear a beep. To stop fast forwarding or rewinding,
push and hold the same side of the switch until you hear a
beep.
4“DISC/CH/PROG” switch: Use this switch to select a
preset station (radio mode), reverse side of a tape
(“TAPE” mode) or a desired CD (“CD” mode).
Radio mode: Push this switch to select a preset station. The
station you assigned to that particular switch on the audio
system will be selected.
“TAPE” mode: Push this switch to select the reverse side of
a cassette tape.
“CD” mode: Push this switch to select a desired CD (for a CD
changer only). Push until the desired CD number appears.
5“CURSOR (REMOTE)” switch: Use this switch to
display the DVD control switches or to locate the remote
control when you lose sight of the remote control.
6Joy stick and “ENT” switch: Use this joy stick to select
a control switch, mode switch on the screen or the menu
for a disc. Push the “ENT” switch to input the selected
switch or menu.
7“DISC” indicator light: This light indicates that the disc
is loaded.
Page 338 of 651

AUDIO
317
Using your audio system: some basics
The following instructions are for the rear passengers.
Please let the rear passengers read and follow the
instructions when the rear passengers use the rear seat
entertainment system.
This section describes some of the basic features of the rear
seat entertainment system. Some information may not pertain
to your system.
Your audio system adjusts to the optimum volume and tone
quality automatically. While the system is adjusting the audio
sound, the audio sound fades out and then fades in.
The rear seat entertainment system is designed for the rear
passengers to enjoy audio and DVD video separately from the
front audio system.
The rear seat entertainment system can be operated when the
ignition key is in the “ACC” or “ON” position.
The rear passengers can enjoy all modes (AM and FM radio,
cassette tape player, CD player with changer and DVD player)
on the rear seat entertainment system only if a cassette tape
and a CD are loaded in the front audio system.
The rear seat entertainment system can play DVD video, audio
CD, video CD, CD text, dts −CD or DVD audio only when a disc
is loaded in the DVD player. You can enjoy videos and sound when your personal audio
system is connected to the input terminal adapter. For details,
refer to the manufacturer’s instructions.
You can enjoy the rear seat entertainment system with
commercial
headphone. See “Headphone jacks” on page 371
in this Section for details.
You can also enjoy the rear seat entertainment system with a
wireless headphone. The wireless headphone can be used
within rear seat. If the signal becomes weak, the headphone
will mute. For details, refer to the manufacturer’s instructions.
With some wireless headphone generally available in the
market, it may be difficult to catch sound properly. Lexus
recommends the use of Lexus genuine wireless headphone.
You can purchase a wireless headphone at a Lexus dealer.
Page 339 of 651
AUDIO
318
CAUTION
�Do not operate a motor vehicle while using
headphones. Doing so may cause an accident,
resulting in death or serious injury.
� With DVD player:
Conversational speech on some DVDs is recorded at
a low volume to emphasize the impact of sound
effects. If you adjust the volume assuming that the
conversations represent the maximum volume level
that the DVD will play, you may be startled by louder
sound effects or when you change to a different
audio source. Be sure to adjust the volume with this
in mind.
Make sure the volume is not increased, before you
turn on the headphone.
NOTICE
To prevent the battery from being discharged, do not
leave the audio system on longer than necessary when
the engine is not running.
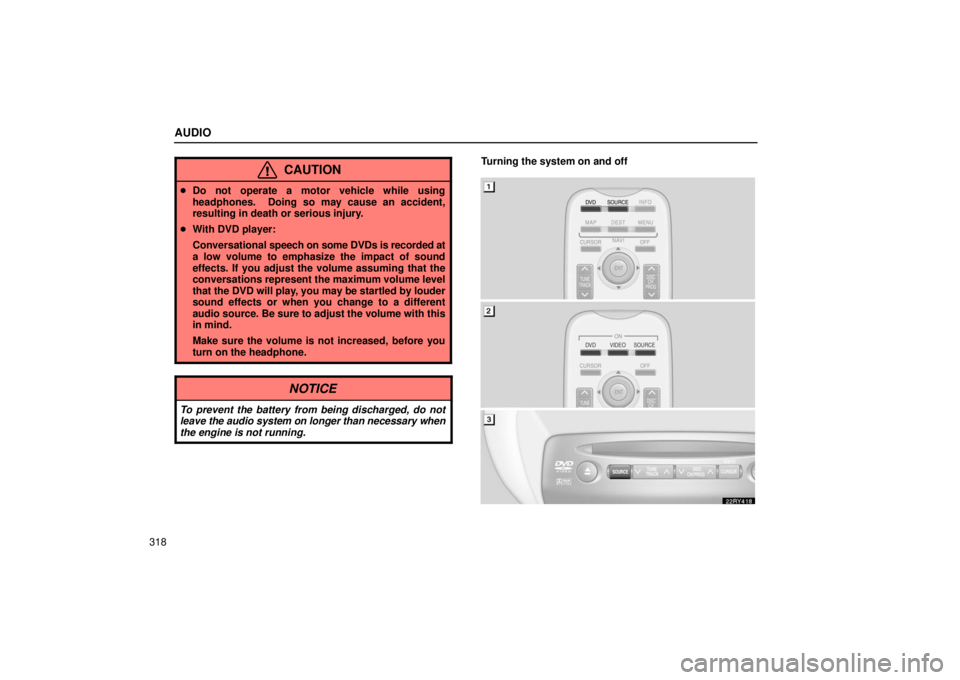
Turning the system on and off
Page 340 of 651
AUDIO
319
�
1Remote control buttons (with navigation system)
2Remote control buttons (without navigation
system)
3DVD player unit
To turn on the system, push the “SOURCE” button.
The screen indicates which mode can be selected. Push the
“DVD” or “VIDEO” button when the connected DVD player or
your personal audio machine is on. The rear seat
entertainment system will be turned on.
The rear seat entertainment system can select all the modes.
When a cassette tape, a CD, a DVD video disc, an audio CD,
a video CD, a CD text, a dts−CD or a DVD audio disc is not
loaded on the front audio system or the DVD player, only the
radio mode can be selected on the rear seat entertainment
system.
To turn off the system, push the “OFF” button.
When the front audio system is turned off, the rear audio
system and the DVD player will be turned off simultaneously.
Page 342 of 651
AUDIO
321
�
1Screen switch2Remote control button
3DVD player unit
Use the joy stick to select the mode. Push the “ENT”
button to enter the mode.
The mode display which is selected by the joy stick is
colored blue. When the “ENT” button is pushed, the mode
display changes to green. If the mode display is gray, it
cannot be selected.
The “Speaker sound” on the mode display is selected on the
front audio system.
When you select a mode, the screen indicates which is
selected.Radio operation
(a) Listening to the radio
� AM mode
�FM mode
Page 343 of 651
AUDIO
322Using joy stick and the “ENT” button to select either AM or FM
mode.
“AM”, “FM1” or “FM2” appears on the screen.
If the front audio system receives
a traffic announcement (TA)
while the rear seat audio system is in the radio mode, “TRAF”
will flash on the screen and the rear seat audio system will turn
off. When the front audio receives a traf fic announcement (TA),
the rear seat audio system cannot select the AM/FM mode. (b) Selecting a station
Tune in the desired station using one of the following methods.
�1Remote control button
2DVD player unit
Seek tuning: Push and hold the “
” or “” (TUNE/TRACK)
button. The radio will seek up or down for a station of the
nearest frequency and will stop on reception. Each time you
push the button, the stations will be searched one after
another.