Page 245 of 493
AUDIO
223
(d) Your cassette player
When
you insert a cassette, the exposed tape should be to the
right.
NOTICE
Never try to disassemble or oil any part of the cassette
player. Do not insert anything except a cassette tape
into the slot.
(e) Your CD player with changer
22x647
Your changer can store up to 6 CDs and play selected CDs or
continuously play all the CDs set in the player.
When you set CDs into the player, make sure their labels face
up. If not, the player will display “ERROR1” and the CD
number.
NOTICE
� Never try to disassemble or oil any part of the CD
player. Do not insert anything other than CDs into the
slot.
� Do not insert a CD upon another one, or it will damage
the changer. Insert only one CD into the slot at a time.
The player is intended for use with 12 cm (4.7 in.) CDs only.
Page 260 of 493

AUDIO
238
CD player operation
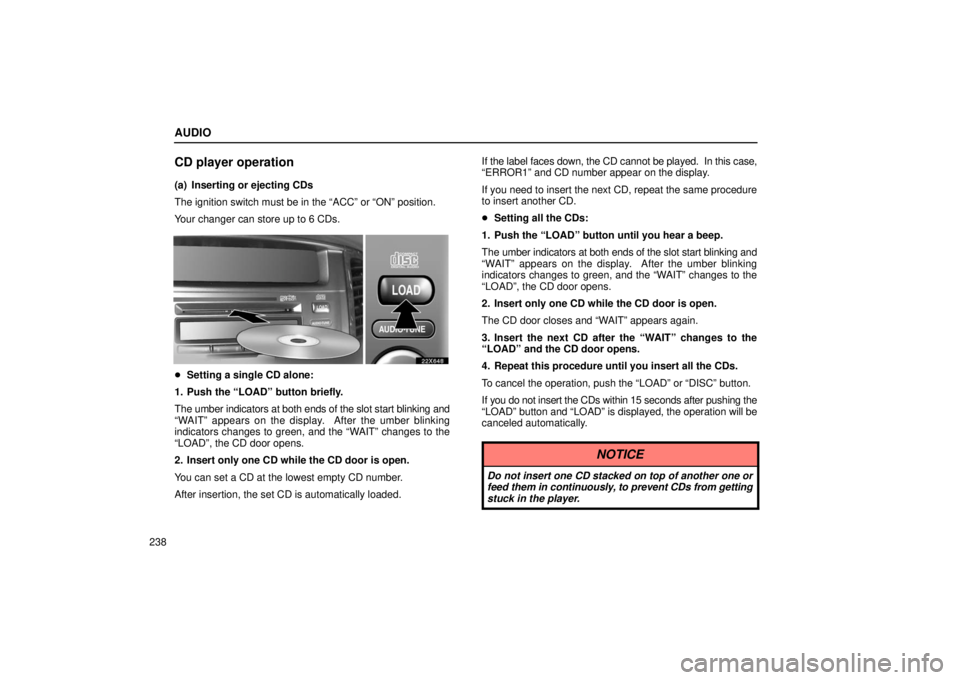
(a) Inserting or ejecting CDs
The ignition switch must be in the “ACC” or “ON” position.
Your changer can store up to 6 CDs.
22x648
�Setting a single CD alone:
1. Push the “LOAD” button briefly.
The umber indicators at both ends of the slot start blinking and
“WAIT” appears on the display. After the umber blinking
indicators changes to green, and the “WAIT” changes to the
“LOAD”, the CD door opens.
2. Insert only one CD while the CD door is open.
You can set a CD at the lowest empty CD number.
After insertion, the set CD is automatically loaded. If the label faces down, the CD cannot be played. In this case,
“ERROR1” and CD number appear on the display.
If you need to insert the next CD, repeat the same procedure
to insert another CD.
�
Setting all the CDs:
1. Push the “LOAD” button until you hear a beep.
The umber indicators at both ends of the slot start blinking and
“WAIT” appears on the display. After the umber blinking
indicators changes to green, and the “WAIT” changes to the
“LOAD”, the CD door opens.
2. Insert only one CD while the CD door is open.
The CD door closes and “WAIT” appears again.
3. Insert the next CD after the “WAIT” changes to the
“LOAD” and the CD door opens.
4. Repeat this procedure until you insert all the CDs.
To cancel the operation, push the “LOAD” or “DISC” button.
If you do not insert the CDs within 15 seconds after pushing the
“LOAD” button and “LOAD” is displayed, the operation will be
canceled automatically.
NOTICE
Do not insert one CD stacked on top of another one or
feed them in continuously, to prevent CDs from getting
stuck in the player.
Page 272 of 493
AUDIO
250
22sv02
�Low quality CDs
22sv03
�Labeled CDs
NOTICE
Do not use special shaped, transparent/translucent, low
quality or labeled CDs such as those shown in the
illustrations. The use of such CDs may damage the
player or changer, or it may be impossible to eject the
CD.