Page 259 of 3229
Pos it ion t he wheel knuckl e as sembl y in a pres s
and s upport on s pecial t ool s .
Speci al Tool (s ): 205-728 Pres s t he wheel bearing out of the wheel
knuckle ass embly us i ng s pecial t ool .
Speci al Tool (s ): 205-726 22.
Remove t he brake backi ng plate.
23. 24. CAUTION: Mark the component s t o aid
i ns t allat ion.
Remove t he wheel knuckl e bushi ng.
Speci al Tool (s ): LR-121 ,
204-620-02 ,
204-620-03 24.
Installation
Page 260 of 3229
1. CAUTION: Make s ure that the ins tall ati on
marks are al igned.
1. 2. CAUTION: Make s ure the correct s peci al tool is
us ed to ins tal l the bus hings to the correct dept h.
Inst all t he wheel knuckl e bushi ng.
Speci al Tool (s ): LR-121 ,
204-620-01 ,
204-620-02 2.
Inst all t he brake backi ng plate.
3. 4. CAUTION: One s i de of the beari ng is magnet ic.
The magneti c s ide i s identi fi abl e by t he appl icati on of a
mat t black fi nis h. The magnet ic s i de mus t face t owards
t he inboard s i de of the vehicle. Before fit ti ng the
beari ng, make s ure the magnet ic face is clean. The
beari ng mus t be handl ed wit h extreme care.
Pos it ion t he wheel knuckl e as sembl y in a pres s
and s upport on s pecial t ool .
Speci al Tool (s ): 204-528/2 Pres s t he new wheel bearing i nto the wheel
knuckle ass embly us i ng s pecial t ool .
Speci al Tool (s ): 205-726 4.
Inst all t he ci rcli p t o t he wheel knuckl e as sembl y.
5.
Page 261 of 3229

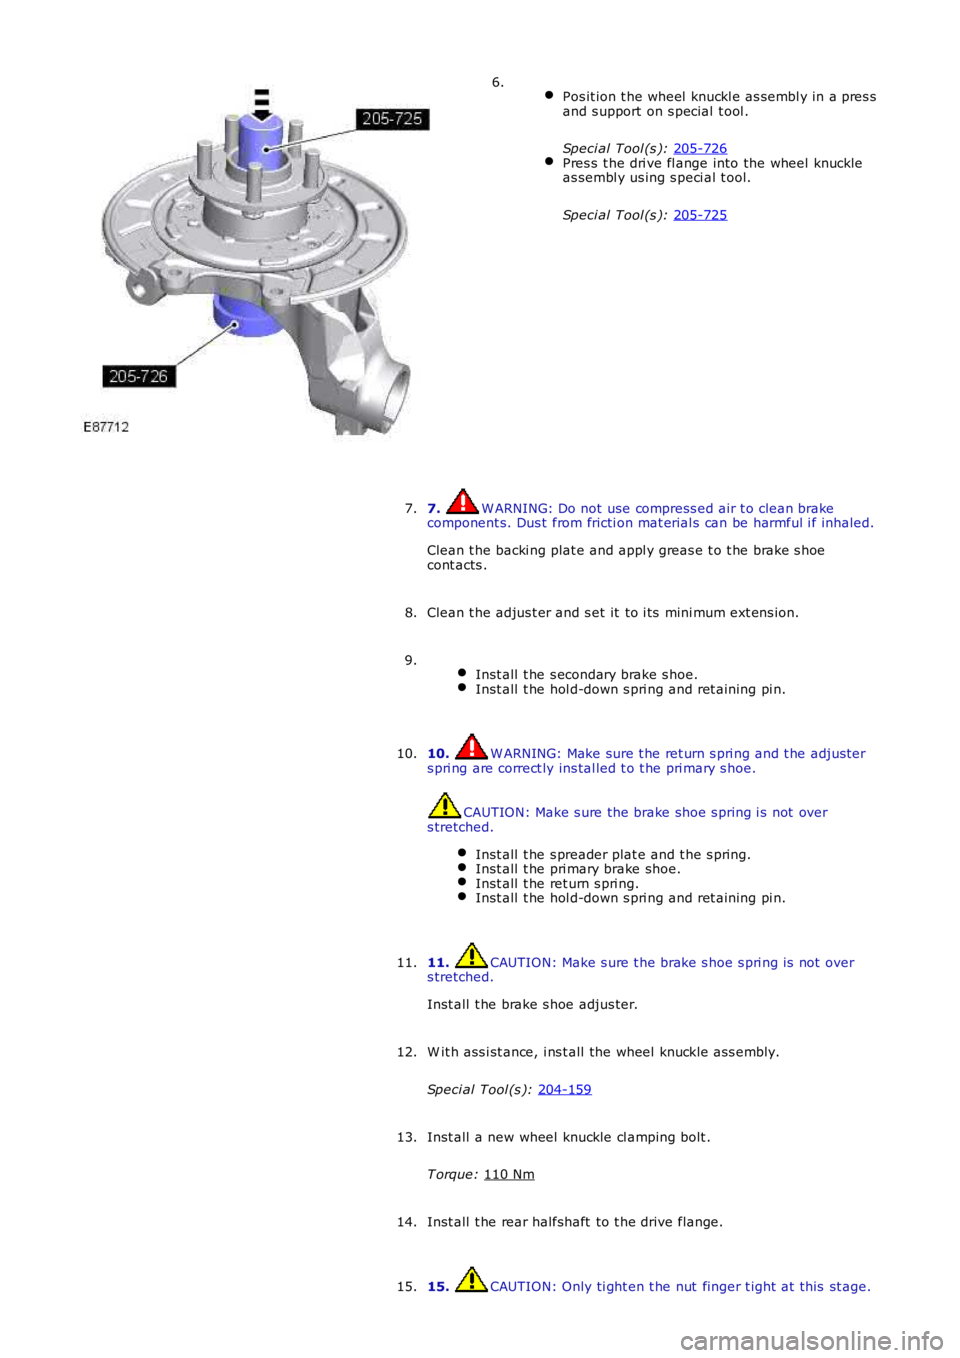
Pos it ion t he wheel knuckl e as sembl y in a pres s
and s upport on s pecial t ool .
Speci al Tool (s ): 205-726 Pres s t he dri ve fl ange into the wheel knuckle
as sembl y us ing s peci al t ool.
Speci al Tool (s ): 205-725 6.
7. W ARNING: Do not use compress ed air t o clean brake
component s. Dus t from fricti on mat erial s can be harmful i f inhaled.
Clean t he backi ng plat e and appl y greas e t o t he brake s hoe
cont acts .
7.
Clean t he adjus t er and s et it to i ts mini mum ext ens ion.
8.
Inst all t he s econdary brake s hoe. Inst all t he hol d-down s pri ng and ret aining pi n.9.
10. W ARNING: Make sure t he ret urn s pri ng and t he adjust er
s pri ng are correct ly ins tal led t o t he pri mary s hoe. CAUTION: Make s ure the brake shoe s pring i s not over
s tretched.
Inst all t he s preader plat e and t he s pring. Inst all t he pri mary brake shoe.
Inst all t he ret urn s pri ng.
Inst all t he hol d-down s pri ng and ret aining pi n.10.
11. CAUTION: Make s ure t he brake s hoe s pri ng is not over
s tretched.
Inst all t he brake s hoe adjus ter.
11.
W it h ass i st ance, i ns t all the wheel knuckle ass embly.
Speci al Tool (s ): 204-159 12.
Inst all a new wheel knuckle cl amping bolt .
T orque: 110 Nm 13.
Inst all t he rear halfshaft to t he drive flange.
14.
15. CAUTION: Only ti ght en t he nut finger t ight at this st age.
15.
Page 262 of 3229

Inst all a new rear hal fs haft nut , do not full y t ighten at t his s t age.
16. CAUTION: Only ti ght en t he nut s and bolt s finger ti ght at
t his s t age.
Connect both lower arms to the hub as s embly, do not full y t ighten
at t hi s s tage.
16.
17. CAUTION: Only ti ght en t he nut and bol t fi nger-t ight at thi s
s tage.
Connect t he trail ing arm t o t he hub as sembl y, do not fully ti ght en at
t his s t age.
17.
18. CAUTION: Make s ure t hat the cl ip i s correct ly l ocat ed.
Connect t he parking brake cable. Secure t he parking brake cable.18.
19. CAUTION: Make s ure t hat the mati ng faces are cl ean and
free of foreign mat eri al.
Inst all t he brake dis c.
T orque: 35 Nm 19.
20. CAUTIONS: Make s ure that t he mat ing faces are clean and free of foreign
mat eri al . Make s ure that t he brake hos e is not t wis t ed and is correctl y
l ocated.
Secure t he brake caliper and anchor plat e t o t he wheel knuckl e.
T orque: 110 Nm 20.
Inst all t he rear wheel s peed s ens or t o t he wheel knuckle.
T orque: 5 Nm 21.
Inst all t he brake li ne and wheel speed s ensor brackets .
T orque: 10 Nm 22.
23. W ARNING: Make sure t hat a new nut is i nst all ed.
Secure t he s tabil izer bar l ink.
T orque: 60 Nm 23.
Support the weight of the vehicle us i ng a jack under the rear hub.
24.
25. CAUTIONS: Nut s and bolt s mus t be t ightened wi th the wei ght of t he
vehicle on the s us pens ion. Do not us e ai r tools to i nst all t he nut. Fail ure t o follow thi s
25.
Page 263 of 3229
Stage 1:
Stage 2:
i ns t ructi on may resul t in damage t o t he component.
Tight en bot h l ower arm nut s and bolt s .
T orque: 175 Nm Tight en the trai li ng arm nut and bol t.
T orque: 270 Nm Tight en the rear hal fs haft nut .
T orque: 330 Nm 30°
St ake t he hub nut.
Adjus t t he parking brake.
Refer t o: Parking Brake Cabl e Adjus tment (206-05 Parking Brake and
Actuat ion, General Procedures ).
26.
Inst all t he wheel and t ire.
Refer t o: W heel and Ti re (204-04 W heel s and Tires, Removal and
Inst all at ion).
27.
Page 266 of 3229
Publi s hed: 11-May-2011
Rear Suspension - Shock Absorber and Spring Assembly
Removal and Inst all ati on
Removal
Remove t he rear quart er t ri m panel.
Refer t o: Rear Quarter Tri m Panel (501-05 Int erior Tri m andOrnament ati on, Removal and Ins tal lat ion).
1.
2. W ARNING: Make sure t o s upport the vehicle wit h axles tands .
Rais e and s upport t he vehi cl e.
2.
Remove t he wheel and t ire.
Refer t o: W heel and Ti re (204-04 W heel s and Tires, Removal andInst all at ion).
3.
4. CAUTION: Make s ure that no load i s placed ont he brake hos e.4.
5. CAUTION: Di scard the nut .5.
Page 267 of 3229
Remove and dis card t he bolt from the rear wheelknuckle.6.
7.
8.
9. CAUTION: Make s ure that no component scatch.9.
Page 268 of 3229

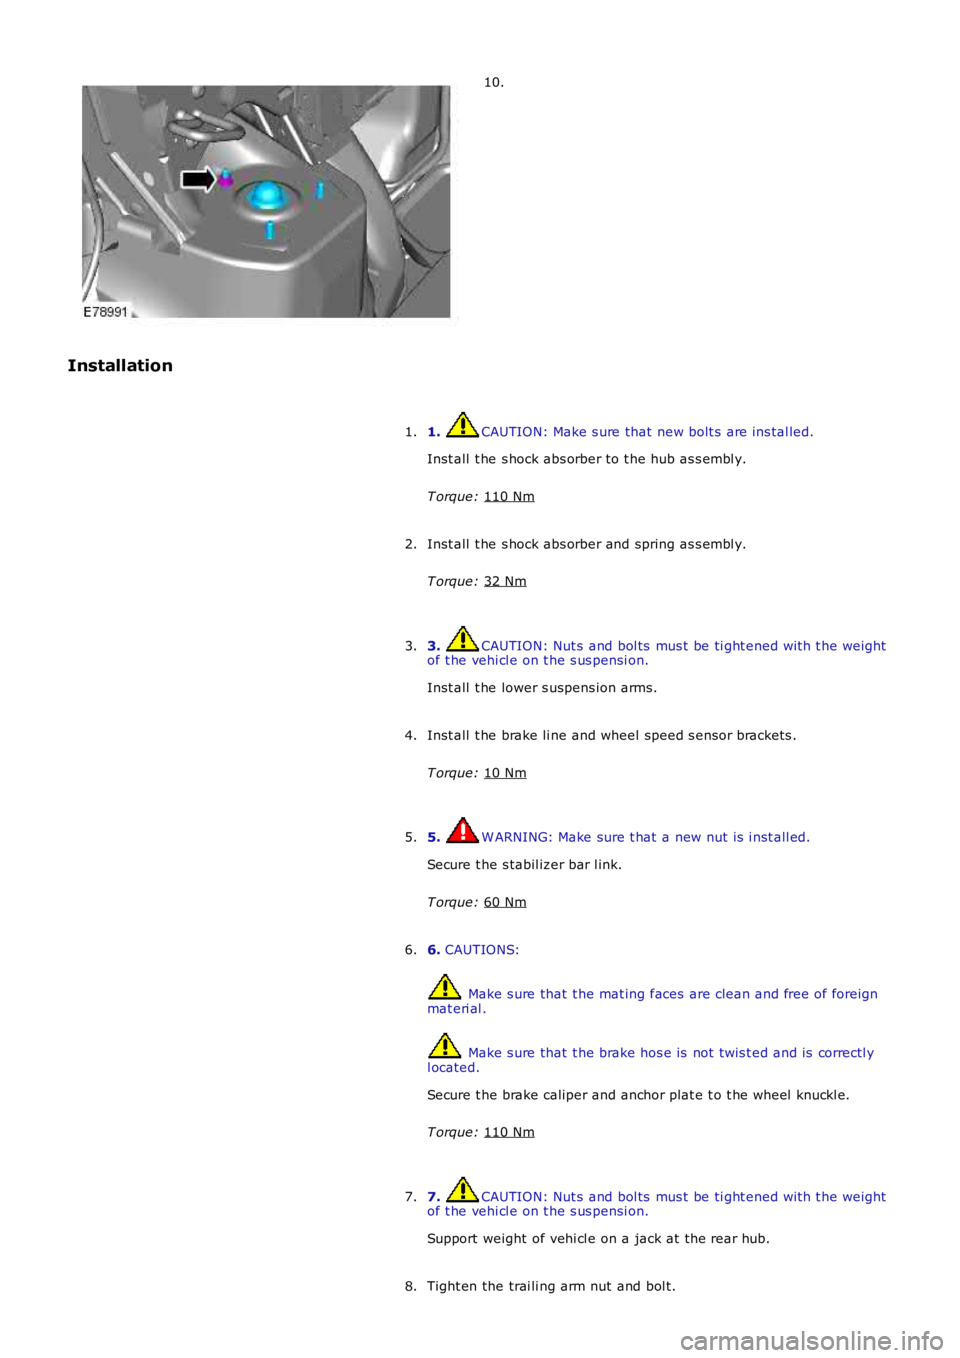
10.
Installation 1. CAUTION: Make s ure that new bolt s are ins tal led.
Inst all t he s hock abs orber to t he hub as s embl y.
T orque: 110 Nm 1.
Inst all t he s hock abs orber and spring as s embl y.
T orque: 32 Nm 2.
3. CAUTION: Nut s and bol ts mus t be ti ght ened wit h t he weight
of t he vehi cl e on t he s us pensi on.
Inst all t he lower s uspens ion arms.
3.
Inst all t he brake li ne and wheel speed s ensor brackets .
T orque: 10 Nm 4.
5. W ARNING: Make sure t hat a new nut is i nst all ed.
Secure t he s tabil izer bar l ink.
T orque: 60 Nm 5.
6. CAUTIONS: Make s ure that t he mat ing faces are clean and free of foreign
mat eri al . Make s ure that t he brake hos e is not t wis t ed and is correctl y
l ocated.
Secure t he brake caliper and anchor plat e t o t he wheel knuckl e.
T orque: 110 Nm 6.
7. CAUTION: Nut s and bol ts mus t be ti ght ened wit h t he weight
of t he vehi cl e on t he s us pensi on.
Support weight of vehi cl e on a jack at the rear hub.
7.
Tight en the trai li ng arm nut and bol t.
8.