Page 55 of 354
Knowing your vehicle98
3
1
2
3
4
5
6
7
8
9
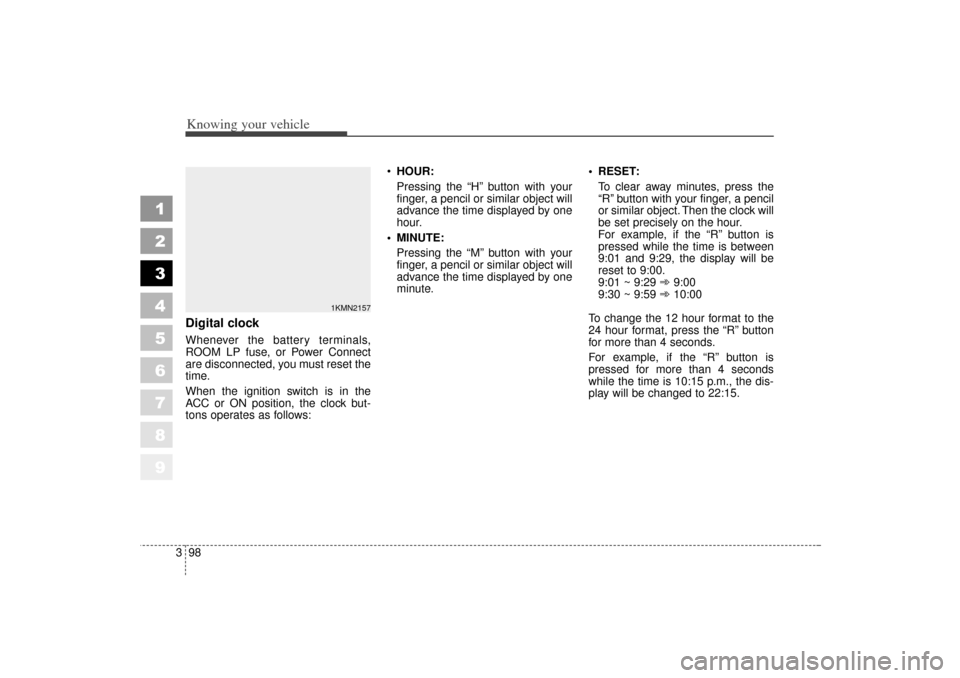
Digital clockWhenever the battery terminals,
ROOM LP fuse, or Power Connect
are disconnected, you must reset the
time.
When the ignition switch is in the
ACC or ON position, the clock but-
tons operates as follows:
HOUR:
Pressing the “H” button with your
finger, a pencil or similar object will
advance the time displayed by one
hour.
MINUTE: Pressing the “M” button with your
finger, a pencil or similar object will
advance the time displayed by one
minute. RESET:
To clear away minutes, press the
“R” button with your finger, a pencil
or similar object. Then the clock will
be set precisely on the hour.
For example, if the “R” button is
pressed while the time is between
9:01 and 9:29, the display will be
reset to 9:00.
9:01 ~ 9:29 ➾ 9:00
9:30 ~ 9:59 ➾ 10:00
To change the 12 hour format to the
24 hour format, press the “R” button
for more than 4 seconds.
For example, if the “R” button is
pressed for more than 4 seconds
while the time is 10:15 p.m., the dis-
play will be changed to 22:15.
1KMN2157
KM CAN (ENG) 3 (55~)new.qxd 7/29/05 9:37 AM Page 98
Page 83 of 354
317
Knowing your vehicle
1
2
3
4
5
6
7
8
9
The ignition switch must be in the ON
position for power windows to oper-
ate. Each door has a power window
switch that controls that door’s win-
dow. However, the driver has a power
window lock switch which can block
the operation of passenger windows.
The power windows can be operated
for approximately 30 seconds after
the ignition key is removed or turned
to the ACC or LOCK position.
However, if the front doors are
opened, the power windows cannot
be operated even within the 30 sec-
onds after the ignition key removal.
While driving, if you notice buffeting
and pulsation (wind shock) with
either side window open, you should
open the opposite window slightly to
reduce the condition.
✽ ✽NOTICE To prevent the power window sys-
tem from the possibility of dam-
age, do not open or close two win-
dows at the same time. This will
also ensure the longevity of the
fuse.
Never try to operate the main switch on the driver's door and the
individual door window switch in
opposing directions at the same
time. If this is done, the window
will stop and cannot be opened or
closed.
CAUTION -
Windows
Always double check to make sure all arms, hands, head and
other obstructions are safely
out of the way before closing a
window.
Do not allow children to play with the power windows. Keep
the driver’s door power win-
dow lock switch in the LOCK
position (depressed). Serious
injury can result from uninten-
tional window operation by
the child.
Do not extend face or arms outside through the window
opening while driving.
KM CAN (ENG) 3 (~54)new.qxd 7/29/05 9:33 AM Page 17
Page 271 of 354
67
In case of an emergency
ELECTRICAL CIRCUIT PROTECTION Fuses A vehicle’s electrical system is pro-
tected from electrical overload dam-
age by fuses.
This vehicle has two fuse panels,
one located in the driver's side panel
bolster, the other in the engine com-
partment near the battery.If any of your vehicle’s lights, acces-
sories, or controls do not work, check
the appropriate circuit fuse. If a fuse
has blown, the element inside the
fuse will be melted.
If the electrical system does not
work, first check the driver’s side
fuse panel.
Always replace a blown fuse with
one of the same rating.
If the replacement fuse blows, this
indicates an electrical problem. Avoid
using the system involved and imme-
diately consult an Authorized Kia
Dealer.
Two kinds of fuses are used: stan-
dard for lower amperage rating and
main for higher amperage ratings.
1
2
3
4
5
6
7
8
9
1LDA4002
Standard
Main fuse
NormalNormal
Blown
Blown
KM CAN (ENG) 6 new.qxd 7/29/05 9:40 AM Page 7
Page 272 of 354
In case of an emergency86Fuse replacement ✽
✽NOTICEDo not use a screwdriver or any
other metal object to remove fuses
because it may cause a short circuit
and damage the system.
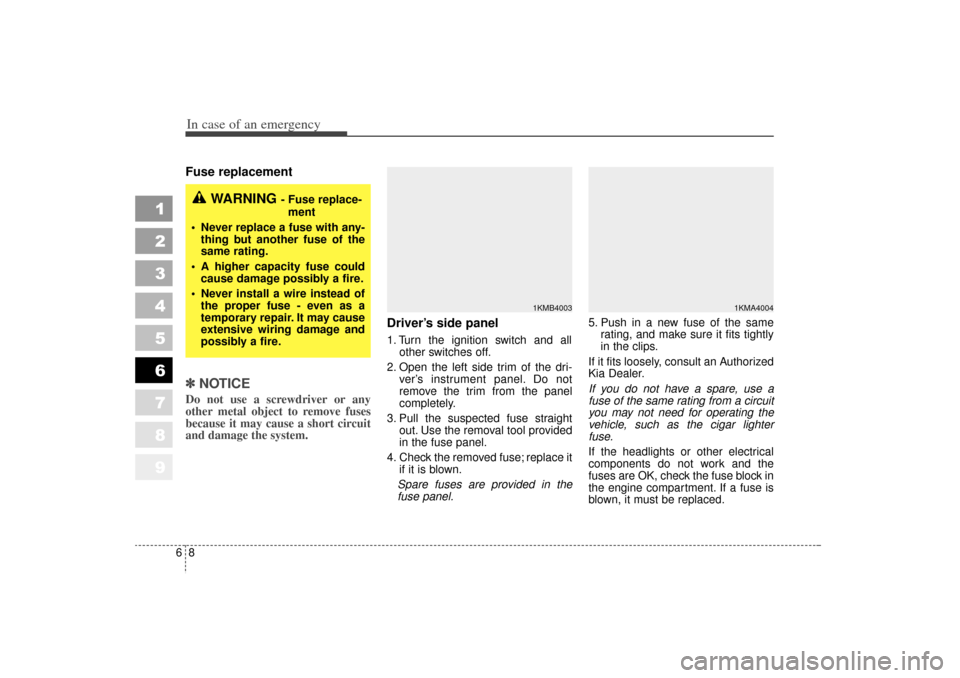
Driver’s side panel1. Turn the ignition switch and all
other switches off.
2. Open the left side trim of the dri- ver’s instrument panel. Do not
remove the trim from the panel
completely.
3. Pull the suspected fuse straight out. Use the removal tool provided
in the fuse panel.
4. Check the removed fuse; replace it if it is blown.
Spare fuses are provided in the
fuse panel. 5. Push in a new fuse of the same
rating, and make sure it fits tightly
in the clips.
If it fits loosely, consult an Authorized
Kia Dealer.
If you do not have a spare, use a
fuse of the same rating from a circuit
you may not need for operating the
vehicle, such as the cigar lighter
fuse.
If the headlights or other electrical
components do not work and the
fuses are OK, check the fuse block in
the engine compartment. If a fuse is
blown, it must be replaced.
1
2
3
4
5
6
7
8
9
1KMB4003
1KMA4004
WARNING
- Fuse replace- ment
Never replace a fuse with any- thing but another fuse of the
same rating.
A higher capacity fuse could cause damage possibly a fire.
Never install a wire instead of the proper fuse - even as a
temporary repair. It may cause
extensive wiring damage and
possibly a fire.
KM CAN (ENG) 6 new.qxd 7/29/05 9:40 AM Page 8
Page 273 of 354
69
In case of an emergency
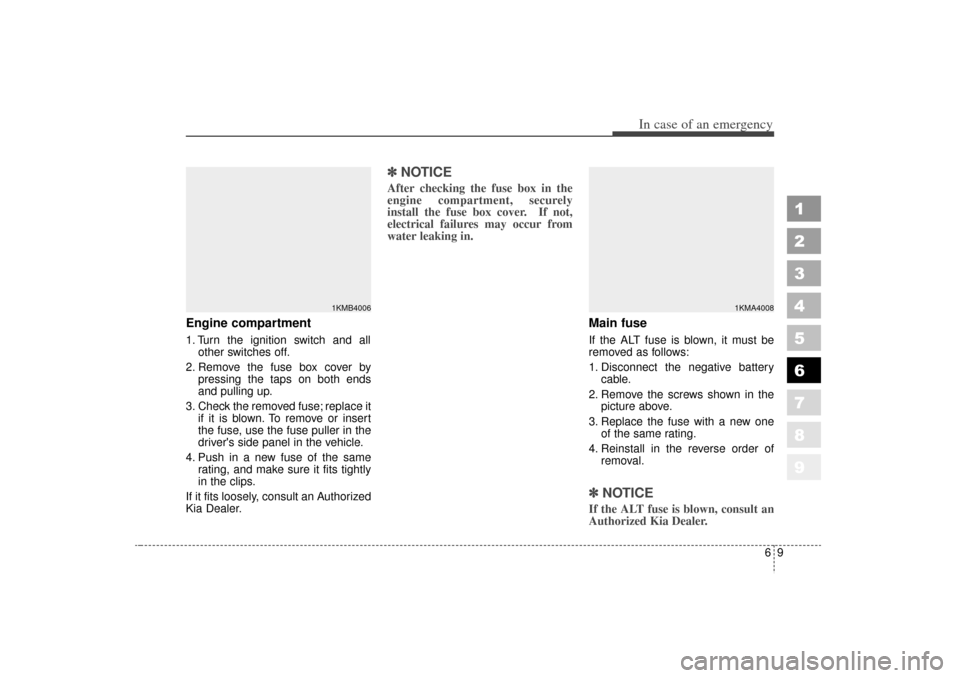
Engine compartment1. Turn the ignition switch and allother switches off.
2. Remove the fuse box cover by pressing the taps on both ends
and pulling up.
3. Check the removed fuse; replace it if it is blown. To remove or insert
the fuse, use the fuse puller in the
driver's side panel in the vehicle.
4. Push in a new fuse of the same rating, and make sure it fits tightly
in the clips.
If it fits loosely, consult an Authorized
Kia Dealer.
✽ ✽ NOTICEAfter checking the fuse box in the
engine compartment, securely
install the fuse box cover. If not,
electrical failures may occur from
water leaking in.
Main fuseIf the ALT fuse is blown, it must be
removed as follows:
1. Disconnect the negative battery
cable.
2. Remove the screws shown in the picture above.
3. Replace the fuse with a new one of the same rating.
4. Reinstall in the reverse order of removal.✽ ✽NOTICEIf the ALT fuse is blown, consult an
Authorized Kia Dealer.
1
2
3
4
5
6
7
8
9
1KMB4006
1KMA4008
KM CAN (ENG) 6 new.qxd 7/29/05 9:40 AM Page 9
Page 274 of 354
1
2
3
4
5
6
7
8
9
Fuse/Relay panel descriptionInside the fuse/relay box covers, you can find the fuse/relay label describing fuse/relay name and capacity.In case of an emergency10
6Driver’s side panel
1KMA4009/1KMR4010
Engine compartment
KM CAN (ENG) 6 new.qxd 7/29/05 9:40 AM Page 10
Page 275 of 354
611
In case of an emergency
1
2
3
4
5
6
7
8
9
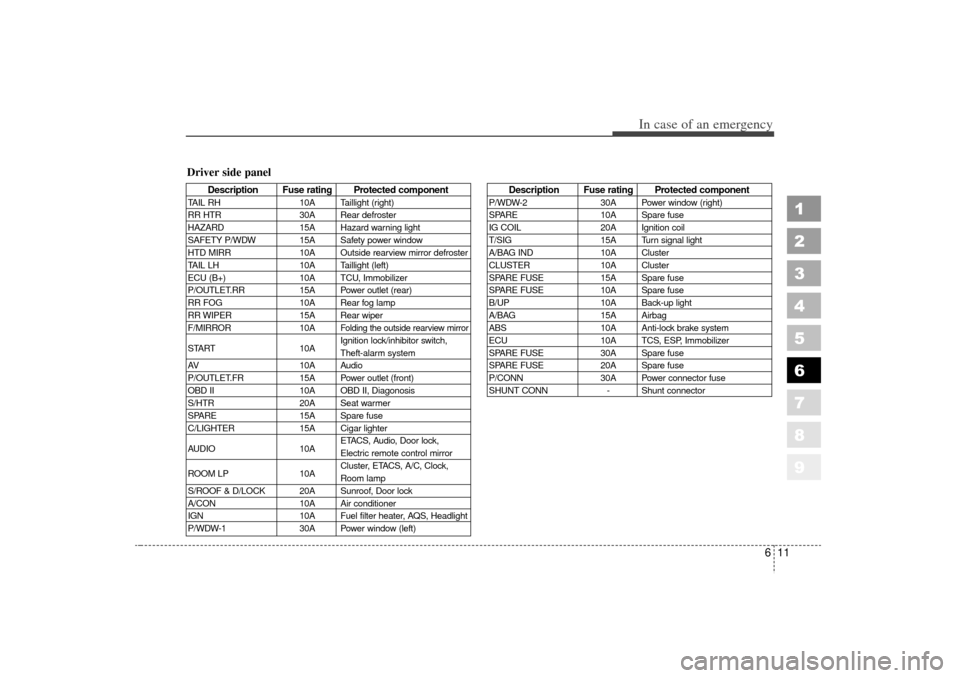
Description Fuse rating Protected component
TAIL RH10A Taillight (right)
RR HTR 30A Rear defroster
HAZARD 15A Hazard warning light
SAFETY P/WDW 15A Safety power window
HTD MIRR 10A Outside rearview mirror defroster
TAIL LH 10A Taillight (left)
ECU (B+) 10A TCU, Immobilizer
P/OUTLET.RR 15A Power outlet (rear)
RR FOG 10A Rear fog lamp
RR WIPER 15A Rear wiper
F/MIRROR 10A
Folding the outside rearview mirror
START10AIgnition lock/inhibitor switch,
Theft-alarm system
AV 10A Audio
P/OUTLET.FR 15A Power outlet (front)
OBD II 10A OBD II, Diagonosis
S/HTR 20A Seat warmer
SPARE 15A Spare fuse
C/LIGHTER 15A Cigar lighter
AUDIO 10AETACS, Audio, Door lock,
Electric remote control mirror
ROOM LP 10ACluster, ETACS, A/C, Clock,
Room lamp
S/ROOF & D/LOCK 20A Sunroof, Door lock
A/CON 10A Air conditioner
IGN 10A Fuel filter heater, AQS, Headlight
P/WDW-1 30A Power window (left)
Description Fuse rating Protected component
P/WDW-230A Power window (right)
SPARE 10A Spare fuse
IG COIL 20A Ignition coil
T/SIG 15A Turn signal light
A/BAG IND 10A Cluster
CLUSTER 10A Cluster
SPARE FUSE 15A Spare fuse
SPARE FUSE 10A Spare fuse
B/UP 10A Back-up light
A/BAG 15A Airbag
ABS 10A Anti-lock brake system
ECU 10A TCS, ESP, Immobilizer
SPARE FUSE 30A Spare fuse
SPARE FUSE 20A Spare fuse
P/CONN 30A Power connector fuse
SHUNT CONN - Shunt connector
Driver side panel
KM CAN (ENG) 6 new.qxd 7/29/05 9:40 AM Page 11
Page 276 of 354
In case of an emergency12
6
1
2
3
4
5
6
7
8
9
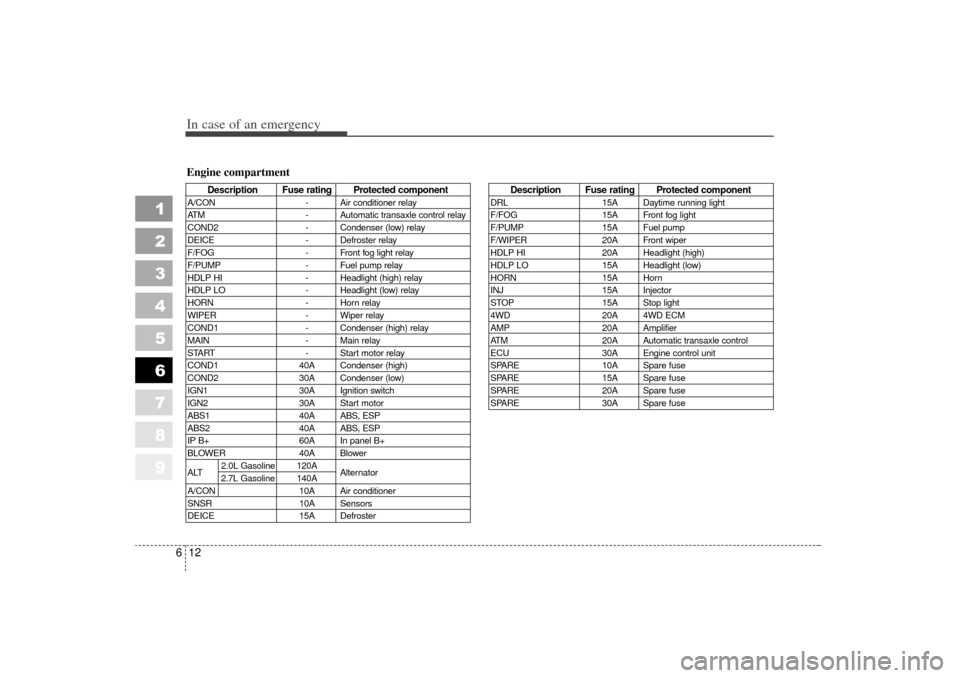
Engine compartment
Description Fuse rating Protected component
A/CON - Air conditioner relay
ATM - Automatic transaxle control relay
COND2 - Condenser (low) relay
DEICE - Defroster relay
F/FOG - Front fog light relay
F/PUMP - Fuel pump relay
HDLP HI - Headlight (high) relay
HDLP LO - Headlight (low) relay
HORN - Horn relay
WIPER - Wiper relay
COND1 - Condenser (high) relay
MAIN - Main relay
START - Start motor relay
COND1 40A Condenser (high)
COND2 30A Condenser (low)
IGN1 30A Ignition switch
IGN2 30A Start motor
ABS1 40A ABS, ESP
ABS2 40A ABS, ESP
IP B+ 60A In panel B+
BLOWER 40A Blower
ALT 2.0L Gasoline 120A
Alternator
2.7L Gasoline 140A
A/CON 10A Air conditioner
SNSR 10A Sensors
DEICE 15A Defroster
Description Fuse rating Protected component
DRL15A Daytime running light
F/FOG 15A Front fog light
F/PUMP 15A Fuel pump
F/WIPER 20A Front wiper
HDLP HI 20A Headlight (high)
HDLP LO 15A Headlight (low)
HORN 15A Horn
INJ 15A Injector
STOP 15A Stop light
4WD 20A 4WD ECM
AMP 20A Amplifier
ATM 20A Automatic transaxle control
ECU 30A Engine control unit
SPARE 10A Spare fuse
SPARE 15A Spare fuse
SPARE 20A Spare fuse
SPARE 30A Spare fuse
KM CAN (ENG) 6 new.qxd 7/29/05 9:40 AM Page 12