Page 215 of 347

Features of your vehicle206
31. LOAD ButtonThis compact disc player will accommo-
date up to six compact discs.
To insert multiple discs into the player,
perform the following:
1. Press and release the LOAD Button.
2. Green light on the slot will be illuminat-
ed and the lowest number of empty
slot will blink on the display.
After “WAIT” is displayed on the LCD,
the slot will open with “INSERT” dis-
played on the LCD.
3. Insert a disc partway into the slot, label side up. The player will pull the disc in.
When the disc is inserted, the disc will
begin to play automatically.✽ ✽ NOTICE• The disc can be only inserted while the
green light is blinking on the slot.
• This CD player is suitable only for 12 cm discs, do not use irregular shaped
CDs.To insert multiple discs do the followings:
1. Press and hold the LOAD button for
one second or more.
You will then hear a beep sound and
the green light on the slot will be illumi-
nated, and the numbers of empty disc
will blink on the display. 2. After “WAIT” is displayed on the LCD
with the lowest number of empty slot
blinking, the slot will open with “INSERT”
displayed on the LCD.
3. Insert a disc partway into the slot, label side up. The player will pull the disc in.
Once the disc is loaded, the numbers
of the empty disc will blink on the dis-
play continuously.
If the next “DISC NO.” is displayed when
the slot is illuminated, you can then load
another disc.
4. Load the remaining disc by following the same procedures 1 and 2. When
you finished loading 6 discs, the CD
player will begin to play the last CD
loaded.
5. To load more than one disc but less than six, complete Steps 1 and 2.
When you have finished loading discs,
press LOAD button to cancel the loading
function or wait for 10 seconds. The CD
player will begin to play the last CD
loaded. As each CD starts to play, the
DISC number will appear on the display.
✽ ✽ NOTICEThe disc player takes up to six discs. Do
not try to load more than six.
2. Playing CD Button Press the CD Button to start CD play-
back, during radio operation or cas-
sette tape playback.
When discs are in the CD deck, if you press the CD button, the CD player will
begin playing even if the radio or cas-
sette player is being used.
The CD player can be used when the ignition switch is in either the “ON” or
“ACC” position.
Push the CD button to turn on that function without pushing the Power
ON-OFF control knob.✽ ✽ NOTICE• Do not stick paper or tape etc., on the
label side or the recording side of any
discs, as it may cause a malfunction.
• The unit can play a multi-session CD- R (recordable CD) and CD-RW
(rewritable CD) that consists of more
than two sessions.
Please refer to the manual of CD-
R/CD-RW recorder or CD-R/CD-RW
software for more information on
finalization process.
• Depending on the recording status, some CD-Rs/CD-RWs may not play
on this unit.
Page 221 of 347

Features of your vehicle212
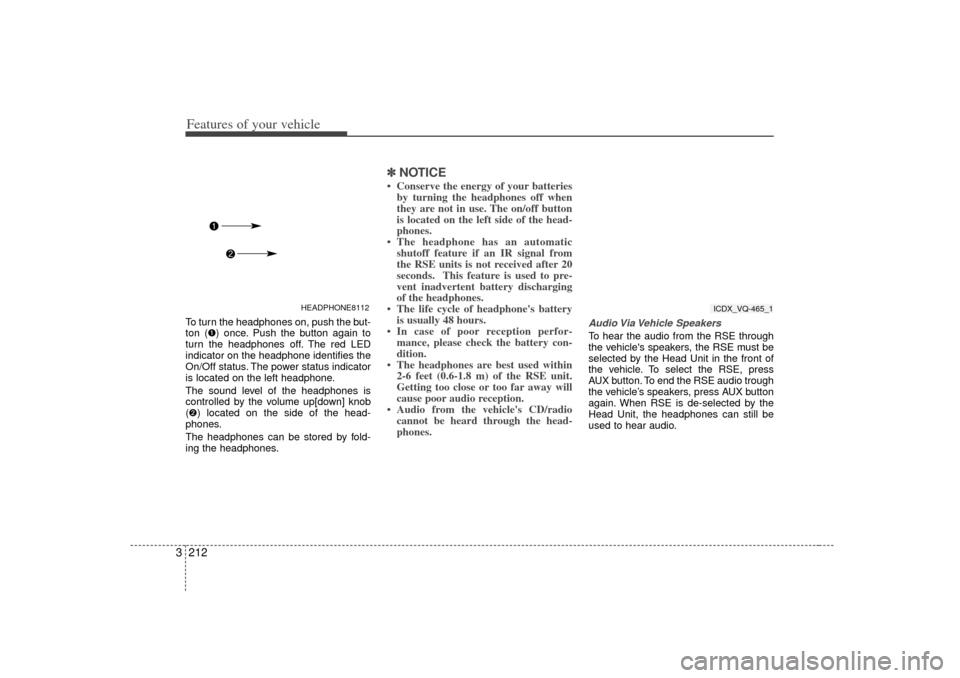
3To turn the headphones on, push the but-
ton (�) once. Push the button again to
turn the headphones off. The red LED
indicator on the headphone identifies the
On/Off status. The power status indicator
is located on the left headphone.
The sound level of the headphones is
controlled by the volume up[down] knob
(�) located on the side of the head-
phones.
The headphones can be stored by fold-
ing the headphones.
✽ ✽
NOTICE• Conserve the energy of your batteries
by turning the headphones off when
they are not in use. The on/off button
is located on the left side of the head-
phones.
• The headphone has an automatic shutoff feature if an IR signal from
the RSE units is not received after 20
seconds. This feature is used to pre-
vent inadvertent battery discharging
of the headphones.
• The life cycle of headphone's battery is usually 48 hours.
• In case of poor reception perfor- mance, please check the battery con-
dition.
• The headphones are best used within 2-6 feet (0.6-1.8 m) of the RSE unit.
Getting too close or too far away will
cause poor audio reception.
• Audio from the vehicle's CD/radio cannot be heard through the head-
phones.
Audio Via Vehicle SpeakersTo hear the audio from the RSE through
the vehicle's speakers, the RSE must be
selected by the Head Unit in the front of
the vehicle. To select the RSE, press
AUX button. To end the RSE audio trough
the vehicle’s speakers, press AUX button
again. When RSE is de-selected by the
Head Unit, the headphones can still be
used to hear audio.
HEADPHONE8112
ICDX_VQ-465_1
Page 280 of 347

What to do in an emergency85TPMS (Tire pressure
monitoring system)
malfunction indicatorThe TPMS malfunction indicator
comes on and stays on when there is
a problem with the Tire Pressure
Monitoring System. If Front Left sen-
sor fails, the TPMS malfunction indica-
tor comes on, but if Front Right, Rear
Left, or Rear Right tire is under-inflat-
ed, the low tire pressure and position
indicators may come on together with
the TPMS malfunction indicator.
Have the system checked by an
authorized Kia dealer as soon as
possible to determine the cause of
the problem.
✽ ✽NOTICE• The TPMS malfunction indicator
may be illuminated if the vehicle is
moving around electric power
supply cable or radio transmitter
such as police stations, govern-
ment and public offices, broad-
casting stations, military installa-
tions, airports, or transmitting
tower, etc. this can interfere with
normal operation of the Tire
Monitoring System (TPMS).
• The TPMS malfunction indicator may be illuminated if some elec-
tronic devices, such as notebook
computer, are used in the vehicle.
This can interfere with normal
operation of the Tire Monitoring
System (TPMS).Changing a tire with TPMSIf you have a flat tire, the Low Tire
Pressure and Position indicators will
come on. Have the flat tire repaired
by an authorized Kia dealer as soon
as possible or replace the flat tire
with the compact spare tire. NEVER
use a puncture-repairing agent to
repair and/or inflate a low pressure
tire. If used, you will have to replace
the tire pressure sensor. Each wheel is equipped with a tire
pressure sensor mounted inside the
tire behind the valve stem. You must
use TPMS specific wheels. It is rec-
ommended that you always have
your tires serviced by an authorized
Kia dealer as soon as possible.
Even if you replace the low pressure
tire with the compact tire, the Low
Tire Pressure and Position indicators
will remain on when the low pressure
tire is in the vehicle. However, if the
low pressure tire is not in the vehicle,
the Low Tire Pressure and Position
indicators will go off and the TPMS
malfunction indicator will go on after
a few minutes because the compact
spare tire does not have a sensor.
Once the low pressure tire is re-
inflated to the recommended pres-
sure and installed on the vehicle, the
TPMS malfunction indicator and the
low tire pressure and position indica-
tors will extinguish within a few min-
utes.
If the indicators are not extinguished
after a few minutes, please visit an
authorized Kia dealer.
TPMS
WARNING
- Low tire
pressure
Significantly low tire pressure
makes the vehicle unstable and
can contribute to loss of vehicle
control and increased braking
distances.
Continued driving on low pres-
sure tires will cause the tires to
overheat and fail.
Page:
< prev 1-8 9-16 17-24