2006 KIA Rio tow
[x] Cancel search: towPage 78 of 220

369
Knowing your vehicle
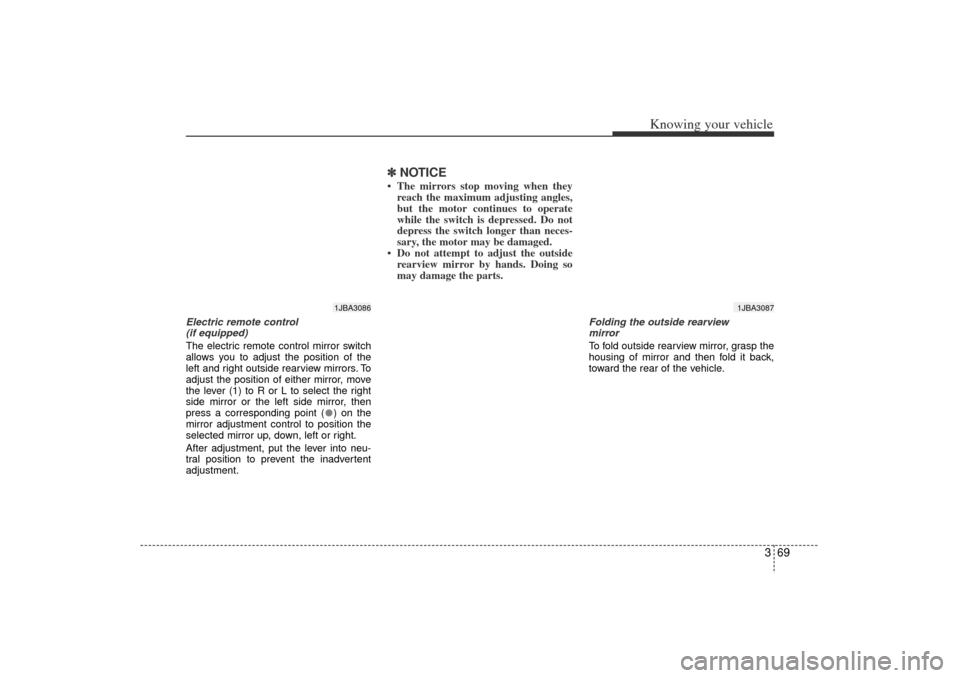
Electric remote control
(if equipped)
The electric remote control mirror switch
allows you to adjust the position of the
left and right outside rearview mirrors. To
adjust the position of either mirror, move
the lever (1) to R or L to select the right
side mirror or the left side mirror, then
press a corresponding point ( ) on the
mirror adjustment control to position the
selected mirror up, down, left or right.
After adjustment, put the lever into neu-
tral position to prevent the inadvertent
adjustment.
✽ ✽NOTICE The mirrors stop moving when they
reach the maximum adjusting angles,
but the motor continues to operate
while the switch is depressed. Do not
depress the switch longer than neces-
sary, the motor may be damaged.
Do not attempt to adjust the outside rearview mirror by hands. Doing so
may damage the parts.
Folding the outside rearview
mirror
To fold outside rearview mirror, grasp the
housing of mirror and then fold it back,
toward the rear of the vehicle.
1JBA3086
1JBA3087
JB CAN 3.qxd 7/29/05 8:57 AM Page 69
Page 79 of 220

Knowing your vehicle70
3Outside rearview mirror heater
(if equipped)
The outside rearview mirror heater is
automatically turned on when the rear
window defroster is turned on. To heat
the outside rearview mirror glass, push
the button for the rear window defroster.
The rearview mirror heater (and rear win-
dow defroster) will not operate unless the
engine is running.
The outside rearview mirror glass will be
heated for defrosting or defogging and
will give you improved rear vision in
inclement weather conditions. Push the
button again to turn the heater off. The
outside rearview mirror heater automati-
cally turns off after 20 minutes.
Day/night rearview mirror
(if equipped)Adjust the rearview mirror to center on
the view through the rear window. Make
this adjustment before you start driving.
Make this adjustment before you start
driving and while the day/night lever is in
the day position.
Pull the day/night lever toward you to
reduce glare from the headlights of vehi-
cles behind you during night driving.
Remember that you lose some rearview
clarity in the night position.
CAUTION
Do not place objects in the rear seat
or cargo area which would interfere
with your vision out the rear window.
1JBA3088
Day
Night
Day/Night lever
JB CAN 3.qxd 7/29/05 8:57 AM Page 70
Page 90 of 220

381
Knowing your vehicle
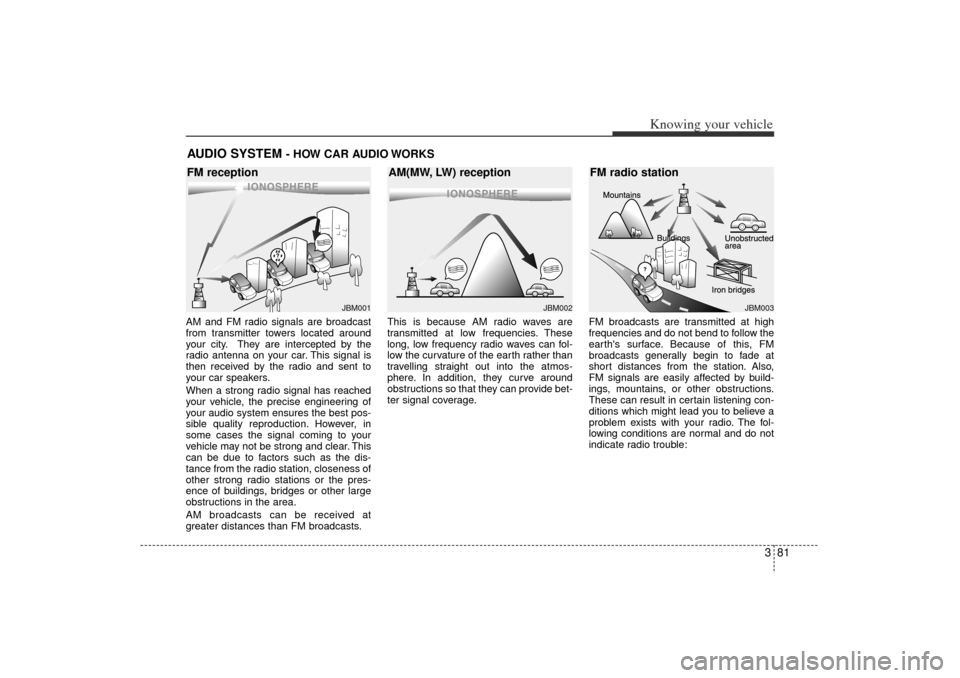
AM and FM radio signals are broadcast
from transmitter towers located around
your city. They are intercepted by the
radio antenna on your car. This signal is
then received by the radio and sent to
your car speakers.
When a strong radio signal has reached
your vehicle, the precise engineering of
your audio system ensures the best pos-
sible quality reproduction. However, in
some cases the signal coming to your
vehicle may not be strong and clear. This
can be due to factors such as the dis-
tance from the radio station, closeness of
other strong radio stations or the pres-
ence of buildings, bridges or other large
obstructions in the area.
AM broadcasts can be received at
greater distances than FM broadcasts.This is because AM radio waves are
transmitted at low frequencies. These
long, low frequency radio waves can fol-
low the curvature of the earth rather than
travelling straight out into the atmos-
phere. In addition, they curve around
obstructions so that they can provide bet-
ter signal coverage.
FM broadcasts are transmitted at high
frequencies and do not bend to follow the
earth's surface. Because of this, FM
broadcasts generally begin to fade at
short distances from the station. Also,
FM signals are easily affected by build-
ings, mountains, or other obstructions.
These can result in certain listening con-
ditions which might lead you to believe a
problem exists with your radio. The fol-
lowing conditions are normal and do not
indicate radio trouble:AUDIO SYSTEM
- HOW CAR AUDIO WORKS
¢¢¢
JBM001
¢¢
¢
¢¢¢JBM002
JBM003
FM reception AM(MW, LW) receptionFM radio station
JB CAN 3.qxd 7/29/05 8:57 AM Page 81
Page 110 of 220

Driving your vehicle24Ignition switch and anti-theft
steering column lock
Ignition switch position
LOCK
The steering wheel locks to protect
against theft. The ignition key can be
removed only in the LOCK position.
When turning the ignition switch to the
LOCK position, push the key inward at
the ACC position and turn the key toward
the LOCK position (manual transaxle).
ACC (Accessory)
The steering wheel is unlocked and elec-
trical accessories are operative.
ON
This is the normal running position after
the engine is started. The warning lights
can be checked before the engine is
started.
Do not leave the ignition switch ON if the
engine is not running to prevent battery
discharge.START
Turn the ignition key to the START posi-
tion to start the engine. The engine will
crank until you release the key; then it
returns to the ON position. The brake
warning lamp can be checked in this
position.
If it is difficult to turn the ignition key to
the START position, turn the steering
wheel right and left to release resistance
and then turn the key.
Automatic transaxle
When turning the ignition switch to the
LOCK position, the shift lever must be in
the P (Park) position.
IGNITION SWITCH
1JBH32011JBN3201
Manual Transaxle
Automatic Transaxle
JB CAN 4.qxd 7/29/05 8:58 AM Page 2
Page 120 of 220

Driving your vehicle12
4Parking on curbed streets When parking your vehicle on an uphill
grade, park as close to the curb as
possible and turn the front wheels
away from the curb so that the front
wheels will contact the curb if the vehi-
cle moves backward.
When parking your vehicle on a down- hill grade, park as close to the curb as
possible and turn the front wheels
toward the curb so that the front
wheels will contact the curb if the vehi-
cle moves forward.
Anti-lock brake system (ABS)
(if equipped)
The ABS continuously senses the speed
of the wheels. If the wheels are going to
lock, the ABS repeatedly modulates the
hydraulic brake pressure to the wheels.
When you apply your brakes under con-
ditions which may lock the wheels, you
may hear a “tik-tik’’ sound from the
brakes, or feel a corresponding sensation
in the brake pedal. This is normal and it
means your ABS is active.
In order to obtain the maximum benefit
from your ABS in an emergency situation,
do not attempt to modulate your brake
pressure and do not try to pump your
brakes. Press your brake pedal as hard
as possible or as hard as the situation
warrants and allow the ABS to control the
force being delivered to the brakes.
Even with the anti-lock brake system,your vehicle still requires sufficient
stopping distance. Always maintain a
safe distance from the vehicle in front
of you.
Always slow down when cornering. The anti-lock brake system cannot pre-
vent accidents resulting from exces-
sive speeds.
On loose or uneven road surfaces, operation of the anti-lock brake system
may result in a longer stopping dis-
tance than for vehicles equipped with a
conventional brake system.
WARNING
- ABS Brakes
Your ABS is not a substitute for
good driving judgement. You can
still have an accident. In fact, your
ABS will probably not be able to
prevent an accident in the following
driving conditions:
Dangerous driving, such asneglecting safety precautions,
speeding, or driving too close to
the vehicle in front of you.
Driving at high speed in situa- tions providing considerably less
traction, such as wet conditions
where hydroplaning could occur.
Driving too fast on poor road sur- faces. The ABS is designed to
improve maximum braking effec-
tiveness on typical highways and
roads in good condition. On poor
road surfaces, the ABS may actu-
ally reduce braking effectiveness.
JB CAN 4.qxd 7/29/05 8:58 AM Page 12
Page 126 of 220

Driving your vehicle18
4Fuel gaugeThe fuel gauge indicates the approxi-
mate amount of fuel remaining in the fuel
tank.
Fuel tank capacity - 45 liters
(11.9 gallons)
The fuel gauge is supplemented by a low
fuel warning light, which will illuminate
when the fuel level has dropped to about
5.5~6.5 liters (1.5~1.7 gallons).
Engine temperature
gauge This gauge shows the temperature of the
engine coolant when the ignition switch
is ON.
Do not continue driving with an overheat-
ed engine. If your vehicle overheats, refer
to “Overheating” in the Index.✽ ✽ NOTICEIf the gauge pointer moves beyond the
normal range area toward the “H” posi-
tion, it indicates overheating that may
damage the engine.
Instrument panel illumination
(if equipped)When the vehicle’s parking lights or head-
lights are on, rotate the illumination con-
trol knob to adjust the instrument panel
illumination intensity.
1JBN4055
WARNING -
Fuel gauge
Running out of fuel can expose
vehicle occupants to danger, both
in vehicle operation and by stop-
ping in high neighborhoods.
You must stop and obtain addition-
al fuel as soon as possible after the
warning light comes on or when the
gauge indicator comes close to the
E level.
JB CAN 4.qxd 7/29/05 8:58 AM Page 18
Page 129 of 220

421
Driving your vehicle
Low brake fluid level warning
If the warning light remains on, it may
indicate that the brake fluid level in the
reservoir is low.
If the warning light remains on:
1. Drive carefully to the nearest safelocation and stop your vehicle.
2. With the engine stopped, check the brake fluid level immediately and add
fluid as required. Then check all brake
components for fluid leaks.
3. Do not drive the vehicle if leaks are found, the warning light remains on or
the brakes do not operate properly.
Have it towed to any authorized Kia
dealer for a brake system inspection
and necessary repairs.
To check bulb operation, check whether
the parking brake and brake fluid warning
light illuminates when the ignition switch
is in the ON position.
Trunk lid open
warning (if equipped)This warning light activates when the
trunk is not closed securely.Door ajar warningThis warning light illuminates when a
door is not closed securely.Low washer fluid level
warning indicator
(if equipped)This warning light indicates the washer
fluid reservoir is near empty. Refill the
washer fluid as soon as possible.Low fuel level
warningThis warning light indicates the fuel tank
is nearly empty. The warning light will
come on when the fuel level has dropped
to about 5.5~6.5 liters (1.5~1.7 gallons).
Refuel as soon as possible.
Headlight high beam
indicator This indicator illuminates when the head-
lights are on and in the high beam posi-
tion or when the turn signal lever is pulled
into the Flash-to-Pass position.Air bag warning
(if equipped) This warning light will blink or illuminate
for approximately 6 seconds each time
you turn the ignition switch to the ON
position.
If this indicator does not go out, or if it illu-
minates while the vehicle is being driven,
see an authorized Kia dealer for immedi-
ate service.Check fuel filler cap
warning This warning light indicates the fuel filler
cap is not tight securely.
Always make sure that the fuel filler cap
is tight.
WARNING
Driving the vehicle with a brake
warning light on is dangerous. If the
brake warning light remains on,
have the brakes checked and
repaired immediately by an author-
ized Kia dealer.
AIR
BAGCHECK FUELCAP
JB CAN 4.qxd 7/29/05 8:58 AM Page 21
Page 130 of 220

Driving your vehicle22
4Malfunction indicator
(if equipped)This indicator light is part of the Engine
Control System which monitors various
emission control system components. If
this light illuminates while driving, it indi-
cates that a potential problem has been
detected somewhere in the emission
control system.
Generally, your vehicle will continue to be
drivable and will not need towing, but
have the system checked by an author-
ized Kia dealer as soon as possible.
Safety belt warning chime
(if equipped)If the driver's seat belt is not fastened
when the ignition key is turned “ON” or if
it is disconnected after the key is turn
ON, the safety belt warning chime will
sound for approximately 6 seconds.
If the driver’s lap/shoulder belt is not fas-
tened within 30 seconds after the engine
is started, the safety belt warning chime
will sound for 6 seconds. This cycle will
repeat 11 times with an interval of 24
seconds between cycles.Door ajar warning chime
(if equipped)If a door is opened with the ignition
switch ON, the warning chime will sound.Key reminder warning chime
(if equipped)If the driver’s door is opened and the igni-
tion key is left in the ignition switch in the
LOCK or ACC position, the key reminder
warning chime will sound. This is to pre-
vent you from locking your keys in the
vehicle.
CHECKCHECK
CAUTION
Prolonged driving with the
Emission Control System
Malfunction Indicator Lamp
( ) illuminated may cause
damage to the emission control
systems which could effect dri-
vability and/or fuel economy.
If the
Emission
Control System
Malfunction Indicator Light ( )
begins to flash ON and OFF,
potential catalytic converter dam-
age is possible which could result
in loss of engine power. Have the
Engine Control System inspected
as soon as possible by an author-
ized Kia dealer.
CHECKCHECK
CHECKCHECK
JB CAN 4.qxd 7/29/05 8:58 AM Page 22