2006 KIA PICANTO clutch
[x] Cancel search: clutchPage 105 of 281

Driving your vehicle
4
4
1 23456789
Starting the gasoline engine
1. Make sure the parking brake is
applied.
2. Manual Transaxle - Depress the
clutch pedal fully and shift the
transaxle into Neutral. Keep the
clutch pedal depressed while turn-
ing the ignition switch to the startposition.
Automatic Transaxle - Place the
transaxle shift lever in P (Park).
Depress the brake pedal fully.
You can also start the engine
when the shift lever is in the N(Neutral) position.
3. Turn the ignition switch to START and hold it there until the engine
starts (a maximum of 10 seconds),
then release the key. 4. In extremely cold weather (below
-18°C / 0°F) or after the vehicle
has not been operated for several
days, let the engine warm up with-
out depressing the accelerator.
Whether the engine is cold or warm,
it should be started without
depressing the accelerator.
✽✽
NOTICE
Do not engage the starter for more than 10 seconds. If the engine stalls
or fails to start, wait 5 to 10 seconds
before re-engaging the starter.
Improper use of the starter maydamage it.
Starting the diesel engine
To start the diesel engine when the engine is cold, it has to be pre-heat-
ed before starting the engine and
then have to be warmed up before
starting the driving.
1. Make sure the parking brake is applied.
2. Manual Transaxle - Depress the
clutch pedal fully and shift the
transaxle into the Neutral. Keepthe clutch pedal depressed while
cranking the engine.
Automatic Transaxle - Place the
transaxle shift lever in P(park).
Depress the brake pedal fully.
You can also start the engine when
the shift lever is in the N(neutral)position.
3. Turn the ignition switch ON posi- tion to pre-heat the engine. Then
the glow indicator light will illumi-
nate.
STARTING THE ENGINE
CAUTION
If the engine stalls while you are
in motion, do not attempt tomove the shift lever to the P(Park) position. If traffic and road conditions permit, you mayput the shift lever in the N(Neutral) position while the vehicle is still moving and turnthe ignition switch to the STARTposition in an attempt to restart the engine.
CAUTION
Always wear appropriate shoeswhen operating your vehicle.Unsuitable shoes (high heels,ski boots,etc.) may interfere with your ability to use thebrake and accelerator pedal,and the clutch (if equipped).
Page 107 of 281

Driving your vehicle
6
4
1 23456789
Manual transaxle operation
The manual transaxle has five for-
ward gears.
Press the clutch pedal down fully
while shifting, then release it slowly.
The gearshift lever must be returned
to the neutral position before shifting
into R (Reverse).
Make sure the vehicle is completely
stopped before shifting into R(Reverse).
Never operate the engine with thetachometer (rpm) in the red area.
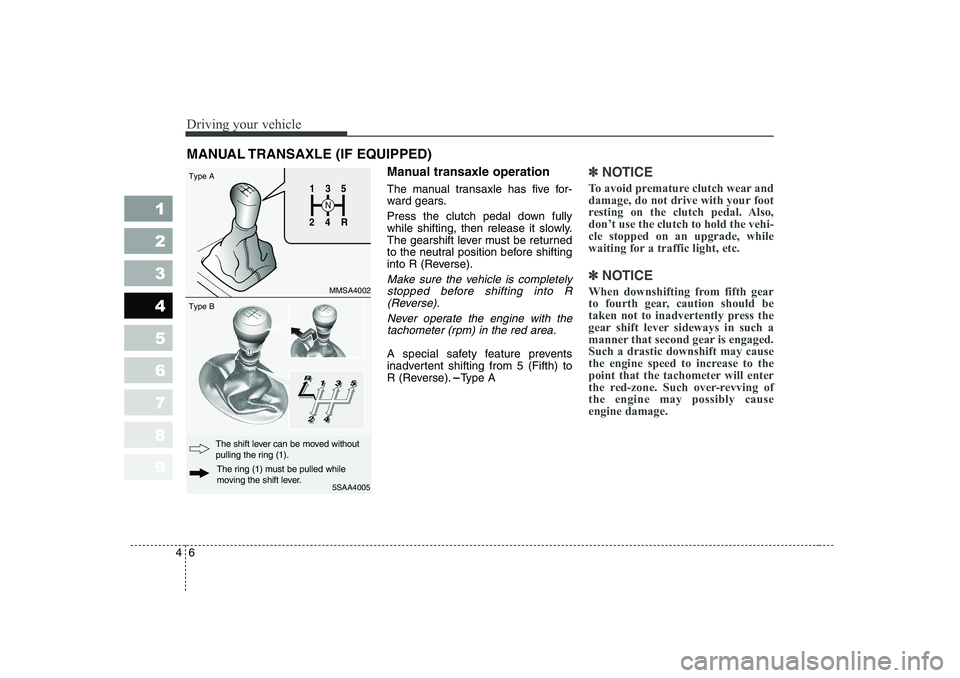
A special safety feature prevents
inadvertent shifting from 5 (Fifth) to
R (Reverse). Type A
✽✽ NOTICE
To avoid premature clutch wear and
damage, do not drive with your foot
resting on the clutch pedal. Also,don’t use the clutch to hold the vehi-cle stopped on an upgrade, while
waiting for a traffic light, etc.
✽
✽ NOTICE
When downshifting from fifth gear
to fourth gear, caution should be
taken not to inadvertently press the
gear shift lever sideways in such a
manner that second gear is engaged.Such a drastic downshift may cause
the engine speed to increase to the
point that the tachometer will enter
the red-zone. Such over-revving ofthe engine may possibly causeengine damage.
MANUAL TRANSAXLE (IF EQUIPPED)
1
2 4
R
3
S
N
135
R
4
2
5SAA4005
Type A Type B
MMSA4002
The ring (1) must be pulled while
moving the shift lever.
The shift lever can be moved without
pulling the ring (1).
Page 214 of 281

1 234567891 23456789
10
Maintenance services / 7-3 Normal maintenance schedule / 7-5
Maintenance under severe usage conditions / 7-8
Owner maintenance / 7-10Engine compartment / 7-12
Engine oil and oil filter / 7-14Engine cooling system / 7-17Brakes and clutch / 7-20Parking brake / 7-21Drive belts / 7-22
Power steering / 7-23
Steering wheel / 7-24Manual transaxle / 7-25Automatic transaxle / 7-27Lubricants and fluids / 7-30
Fuel filter / 7-31
Air cleaner / 7-31
Climate control air filter / 7-33
Wiper blades / 7-35
Maintenance
Page 219 of 281

1 23456789
Maintenance
6
7
NORMAL MAINTENANCE SCHEDULE (cont.)
I : Inspect and if necessary, adjust, correct, clean or replace.
R : Replace or change. *3
: If the diesel fuel specifications don't meet the European standards EN590, replace it more frequently.
Consult an authorized Kia dealer for details.
*4 : When adding coolant, use only a qualified coolant additive for your vehicle and never mix hard water in the coolant filled at
the factory. An improper coolant mixture can result in serious malfunction or engine damage.
MAINTENANCE ITEM
Number of months or driving distance, whichever comes first
Months 12 24 36 48 60 72 84 96
Miles×1,000 10 20 30 40 50 60 70 80
Km×1,000 15 30 45 60 75 90 105 120
Fuel filter cartridge *3
Diesel R R R R
Fuel lines and hoses I I I I
Cooling system Engine coolant For Europe
*4
Except Europe
Battery condition
I I I I I I I I
All electrical systems I I I I
Brake lines, hoses and connections I I I I I I I I
Brake pedal, clutch pedal I I I I
Parking brake I I I I
Inspect “Coolant level adjustment and leak” every day
Inspect “Water pump” when replacing the drive belt or timing belt
At first, replace at 90,000 km or 60 months: after that, replace every 45,000 km or 24 months
Replace every 45,000 km or 24 months
MAINTENANCE INTERVALS
Page 220 of 281

1 23456789
77
Maintenance
NORMAL MAINTENANCE SCHEDULE (cont.)
I : Inspect and if necessary, adjust, correct, clean or replace.
R : Replace or change.
Number of months or driving distance, whichever comes first
Months 12 24 36 48 60 72 84 96
Miles×1,000 10 20 30 40 50 60 70 80
Km×1,000 15 30 45 60 75 90 105 120
Brake/clutch fluid For Europe I R I R I R I R
Except EuropeIII IIIII
Disc brakes and pads I I I I I I I I
Drum brakes and linings I I I I
Power steering fluid and hoses I I I I
Steering gear box, linkage and boots I I I I I I I I
Drive shaft and boots I I I I
Tire (pressure & tread wear) I I I I I I I I
Front suspension ball joints I I I I I I I I
Bolt and nuts on chassis and body I I I I I I I I
Air conditioner refrigerant (if equipped) I I I I I I I I
Air conditioner compressor (if equipped) I I I I I I I I
Climate control air filter (if equipped) R R R R R R R R
Manual transxle fluid (if equipped) I I I I I I I I
Automatic transaxle fluid (if equipped)
For Europe III IIRII
Except EuropeIII IIIII
MAINTENANCE INTERVALS
MAINTENANCE ITEM
Page 233 of 281

Maintenance
20
7
1 23456789
BRAKES AND CLUTCH (IF EQUIPPED)
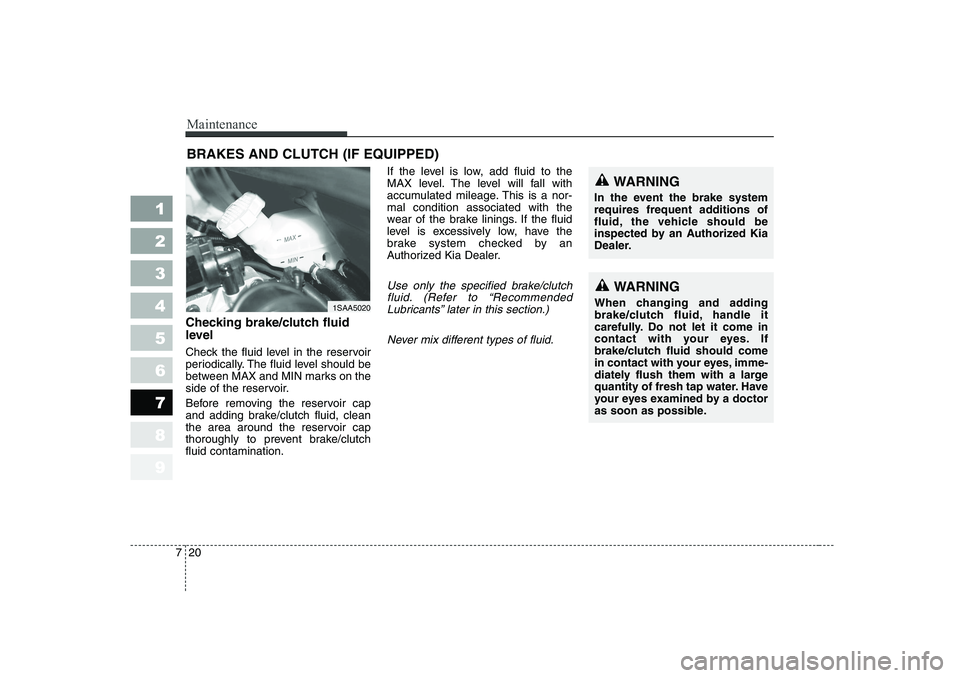
Checking brake/clutch fluid
level
Check the fluid level in the reservoir
periodically. The fluid level should be
between MAX and MIN marks on the
side of the reservoir.
Before removing the reservoir cap
and adding brake/clutch fluid, clean
the area around the reservoir cap
thoroughly to prevent brake/clutchfluid contamination. If the level is low, add fluid to the
MAX level. The level will fall with
accumulated mileage. This is a nor-mal condition associated with the
wear of the brake linings. If the fluid
level is excessively low, have the
brake system checked by an
Authorized Kia Dealer.
Use only the specified brake/clutch
fluid. (Refer to “RecommendedLubricants” later in this section.)
Never mix different types of fluid.WARNING
When changing and adding
brake/clutch fluid, handle it
carefully. Do not let it come in
contact with your eyes. If
brake/clutch fluid should come
in contact with your eyes, imme-
diately flush them with a large
quantity of fresh tap water. Have
your eyes examined by a doctor
as soon as possible.
WARNING
In the event the brake system
requires frequent additions of
fluid, the vehicle should be
inspected by an Authorized Kia
Dealer.
1SAA5020
Page 234 of 281

721
Maintenance
1 23456789
Checking the parking brake
Check the stroke of the parking
brake by counting the number of
“clicks’’ heard while fully applying it
from the released position. Also, the
parking brake alone should securely
hold the vehicle on a fairly steep
grade. If the stroke is more or less
than specified, have the parking
brake adjusted by an Authorized Kia
Dealer.
Stroke : 6~8 “clicks’’ at a force of 20 kg (44 lbs, 196 N).
1SAA3021
PARKING BRAKE
CAUTION
Do not allow brake/clutch fluid
to contact the vehicle's body paint, as paint damage willresult. Brake/clutch fluid, whichhas been exposed to open air for an extended time shouldnever be used as its quality can-not be guaranteed. It should be thrown out. Don't put in thewrong kind of fluid. For exam-ple, just a few drops of mineral- based oil, such as engine oil, inyour brake clutch system candamage brake clutch systemparts.
Page 267 of 281

Maintenance
54
7
1 23456789
LUBRICANT SPECIFICATIONS
Recommended lubricants
To help achieve proper engine and
powertrain performance and durabil-
ity, use only lubricants of the proper
quality. The correct lubricants alsohelp promote engine efficiency that
results in improved fuel economy. Engine oils labeled Energy
Conserving Oil are now available.
Along with other additional benefits,
they contribute to fuel economy byreducing the amount of fuel neces-
sary to overcome engine friction.
Often, these improvements are diffi-
cult to measure in everyday driving,
but in a year’s time, they can offer
significant cost and energy savings.Recommended SAE viscosity
number
✽✽
NOTICE
Always be sure to clean the area
around any filler plug, drain plug,
or dipstick before checking or drain-
ing any lubricant. This is especially
important in dusty or sandy areasand when the vehicle is used on
unpaved roads. Cleaning the plug
and dipstick areas will prevent dirt
and grit from entering the engine
and other mechanisms that could bedamaged.
*¹ Refer to the recommended SAE viscosity numbers on the next page.
These lubricants and fluids are recommended for use in your vehicle.
Lubricant Classification
API Service SJ, SL or above,
ILSAC GF-3 or above
API Service CH-4 or above,
ACEA B4 or above
Manual transaxle fluid
API Service GL-4 (SAE 75W-85, fill-for-life)
Automatic transaxle fluid ESSO JWS 3314
Power steering fluid PSF-III
Brake/Clutch fluid FMVSS116 DOT-3 or DOT-4
Engine oil *¹
Gasoline Engine
Diesel Engine