Page 241 of 315
621
In case of an emergency
1 23456789
4. Remove the wheel lug nut wrench,jack, jack handle, and spare tire
from the vehicle.
5. Block both the front and rear of the wheel that is diagonally opposite
the jack position. 6. Loosen the wheel lug nuts coun-
terclockwise one turn each, but do
not remove any nut until the tire
has been raised off the ground.
WARNING - Changing a tire
To prevent vehicle movement
while changing a tire, always
set the parking brake fully, and
always block the wheel diago-
nally opposite the wheel being
changed.
It is recommended that the wheels of the vehicle be
chocked, and that no person
should remain in a vehicle that
is being jacked.
1LDN40131LDN4014
Page 242 of 315
In case of an emergency
22
6
1 23456789
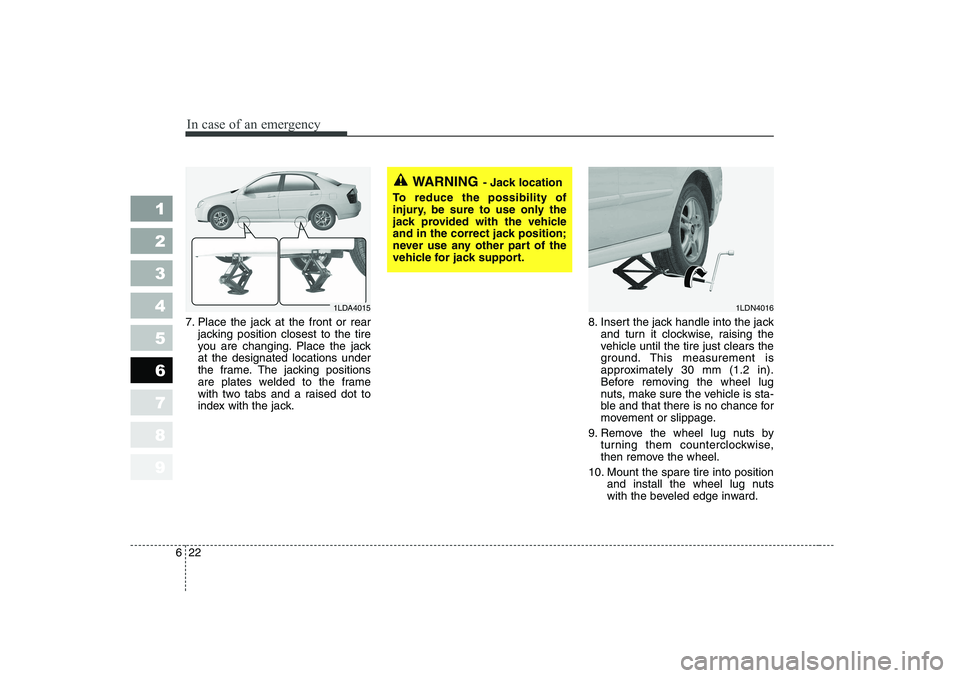
7. Place the jack at the front or rear
jacking position closest to the tire
you are changing. Place the jackat the designated locations under
the frame. The jacking positions
are plates welded to the frame
with two tabs and a raised dot to
index with the jack. 8. Insert the jack handle into the jack
and turn it clockwise, raising the
vehicle until the tire just clears the
ground. This measurement is
approximately 30 mm (1.2 in).
Before removing the wheel lug
nuts, make sure the vehicle is sta-
ble and that there is no chance for
movement or slippage.
9. Remove the wheel lug nuts by turning them counterclockwise,
then remove the wheel.
10. Mount the spare tire into position and install the wheel lug nuts
with the beveled edge inward.
WARNING - Jack location
To reduce the possibility of
injury, be sure to use only the
jack provided with the vehicle
and in the correct jack position;
never use any other part of the
vehicle for jack support.
1LDN40161LDA4015
Page 256 of 315
711
Maintenance
1 23456789
At least monthly:
Check coolant level in the coolantrecovery reservoir.
Check the operation of all exterior lights, including the stoplights, turn
signals and hazard warning flash-
ers.
Check the inflation pressures of all tires including the spare.
At least twice a year
(i.e., every Spring and Fall) :
Check radiator, heater and air con- ditioning hoses for leaks or da-
mage.
Check windshield washer spray and wiper operation. Clean wiper
blades with clean cloth dampened
with washer fluid.
Check headlight alignment.
Check muffler, exhaust pipes, shields and clamps.
Check the lap/shoulder belts for wear and function.
Check for worn tires and loose wheel lug nuts.
At least once a year :
Clean body and door drain holes.
Lubricate door hinges and checks,and hood hinges.
Lubricate door and hood locks and latches.
Lubricate door rubber weather- strips.
Check the air conditioning system before the warm weather season.
Check the power steering fluid level.
Inspect and lubricate automatic transaxle linkage and controls.
Clean battery and terminals.
Check the brake fluid level.
Page 264 of 315
719
Maintenance
1 23456789
ENGINE COOLING SYSTEM
The high-pressure cooling system
has a reservoir filled with year-round
antifreeze coolant. The reservoir is
filled at the factory.
Check the antifreeze protection and
coolant level at least once a year, atthe beginning of the winter season,
and before traveling to a colder cli-
mate. Checking the coolant level
WARNING
- Removing
radiator cap
Never attempt to remove the radiator cap while the engine
is operating or hot. Doing somight lead to cooling system
and engine damage and could
result in serious personal
injury from escaping hotcoolant or steam.
Turn the engine off and wait until it cools down. Even then,
use extreme care when
removing the radiator cap.
Wrap a thick towel around it,
and turn it counterclockwise
slowly to the first stop. Step
back while the pressure is
released from the cooling sys-
tem. When you are sure all thepressure has been released,
press down on the cap, using
a thick towel, and continue
turning counterclockwise to
remove it.
(Continued)
(Continued)
Even if the engine is not oper-ating, do not remove the radi- ator cap or the drain plugwhile the engine and radiator
are hot. Hot coolant and steam
may still blow out under pres-
sure, causing serious injury.
Page 266 of 315
721
Maintenance
1 23456789
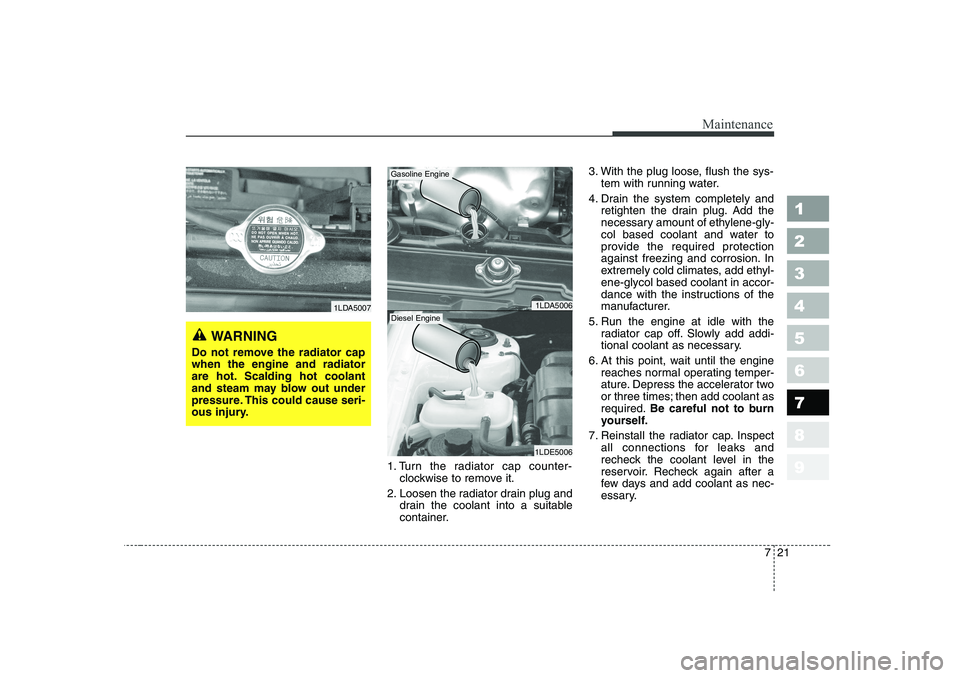
1. Turn the radiator cap counter-clockwise to remove it.
2. Loosen the radiator drain plug and drain the coolant into a suitable
container. 3. With the plug loose, flush the sys-
tem with running water.
4. Drain the system completely and retighten the drain plug. Add the
necessary amount of ethylene-gly-
col based coolant and water to
provide the required protection
against freezing and corrosion. In
extremely cold climates, add ethyl-ene-glycol based coolant in accor-
dance with the instructions of the
manufacturer.
5. Run the engine at idle with the radiator cap off. Slowly add addi-
tional coolant as necessary.
6. At this point, wait until the engine reaches normal operating temper-
ature. Depress the accelerator two
or three times; then add coolant asrequired. Be careful not to burn
yourself.
7. Reinstall the radiator cap. Inspect all connections for leaks and
recheck the coolant level in the
reservoir. Recheck again after a
few days and add coolant as nec-
essary.
1LDA5006
1LDE5006
1LDA5007
WARNING
Do not remove the radiator cap when the engine and radiator
are hot. Scalding hot coolant
and steam may blow out under
pressure. This could cause seri-
ous injury.
Gasoline Engine
Diesel Engine
Page 276 of 315
731
Maintenance
1 23456789
LUBRICANTS AND FLUIDS
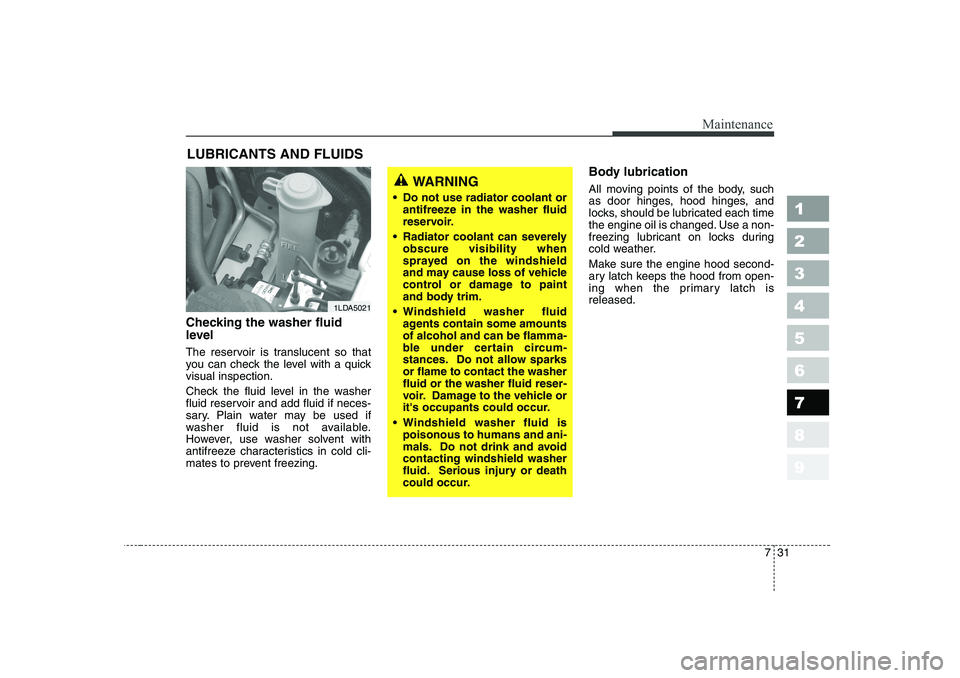
Checking the washer fluid
level
The reservoir is translucent so that
you can check the level with a quickvisual inspection.
Check the fluid level in the washer
fluid reservoir and add fluid if neces-
sary. Plain water may be used if
washer fluid is not available.
However, use washer solvent with
antifreeze characteristics in cold cli-
mates to prevent freezing. Body lubrication
All moving points of the body, such
as door hinges, hood hinges, and
locks, should be lubricated each time
the engine oil is changed. Use a non-
freezing lubricant on locks during
cold weather.
Make sure the engine hood second-
ary latch keeps the hood from open-
ing when the primary latch isreleased.
1LDA5021
WARNING
Do not use radiator coolant or antifreeze in the washer fluid
reservoir.
Radiator coolant can severely obscure visibility when
sprayed on the windshield
and may cause loss of vehicle
control or damage to paint
and body trim.
Windshield washer fluid agents contain some amountsof alcohol and can be flamma-
ble under certain circum-
stances. Do not allow sparksor flame to contact the washerfluid or the washer fluid reser-
voir. Damage to the vehicle or
it's occupants could occur.
Windshield washer fluid is poisonous to humans and ani-
mals. Do not drink and avoidcontacting windshield washer
fluid. Serious injury or death
could occur.
Page 279 of 315
Maintenance
34
7
1 23456789
3. Replace the air cleaner element.
We recommend that the air clean- er element be replaced with gen-
uine Kia parts.
4. Lock the cover with the cover attaching clips. Replace the element according tothe Scheduled Maintenance Section.
If the vehicle is operated in extreme-
ly dusty or sandy areas, replace theelement more often than the usualrecommended intervals. (Refer to Maintenance Under Severe UsageConditions in this section.)
1LDA5013
CAUTION
Do not drive with the air clean- er removed; this will result inexcessive engine wear.
Driving without an air cleaner encourages backfiring, whichcould cause a fire in theengine compartment.
When removing the air cleaner element, be careful that dustor dirt does not enter the air intake, or damage may result.
Page 283 of 315
Maintenance
38
7
1 23456789
1. Raise the wiper arm and turn the
wiper blade assembly to expose
the plastic locking clip.
✽✽ NOTICE
Do not allow the wiper arm to fall against the windshield.
2. Compress the clip and slide the blade assembly downward. 3. Lift it off the arm.
4. Install the blade assembly in the
reverse order of removal.
1LDA50231LDA50241LDA5025