Page 8 of 322
10
Your vehicle at a glance22
1
2
3
4
5
6
7
8
9
EXTERIOR OVERVIEW
1. Headlight (high beam)
2. Headlights (low beam)
3. Turn signal light
4. Side mark light
5. Engine hood
6. Inside rearview mirror
7. Seat
8. Steering wheel
9. Door
10. Outside rearview mirror
2GHN0001
Page 9 of 322
10
23
1
2
3
4
5
6
7
8
9
Your vehicle at a glance
1. Rear door child safety lock
2. Fuel filler lid
3. Rear window
4. Trunk release lever and key lock
5. Spare tire
6. Outside rearview mirror
7. Tail lights
8. High mounted stop light
9. Door handle (driver)
10. Door handle (passenger)
11. Emergency trunk release lever
2GHN0002
Page 10 of 322
10
Your vehicle at a glance42
1
2
3
4
5
6
7
8
9
INTERIOR OVERVIEW
1. Door lock/unlock button
2. Power window switches
3. Outside rearview mirror control switch
4. Seat adjust knob
5. Hood release lever
6. Parking brake pedal
7. Parking brake release lever
8. Instrument panel illumination
9. Steering wheel
10. Instrument cluster
11. Inside rearview mirror
12. Trunk release lever
13. Fuel filler lid release button
14. Seat
15. Master power door lock control
16. Master power window control lock
17. Brake pedal
18. Accelerator pedal
19. Vent controls
20. Steering wheel tilt
2GHN0005
Page 45 of 322
Knowing your vehicle34
3
1
2
3
4
5
6
7
8
910
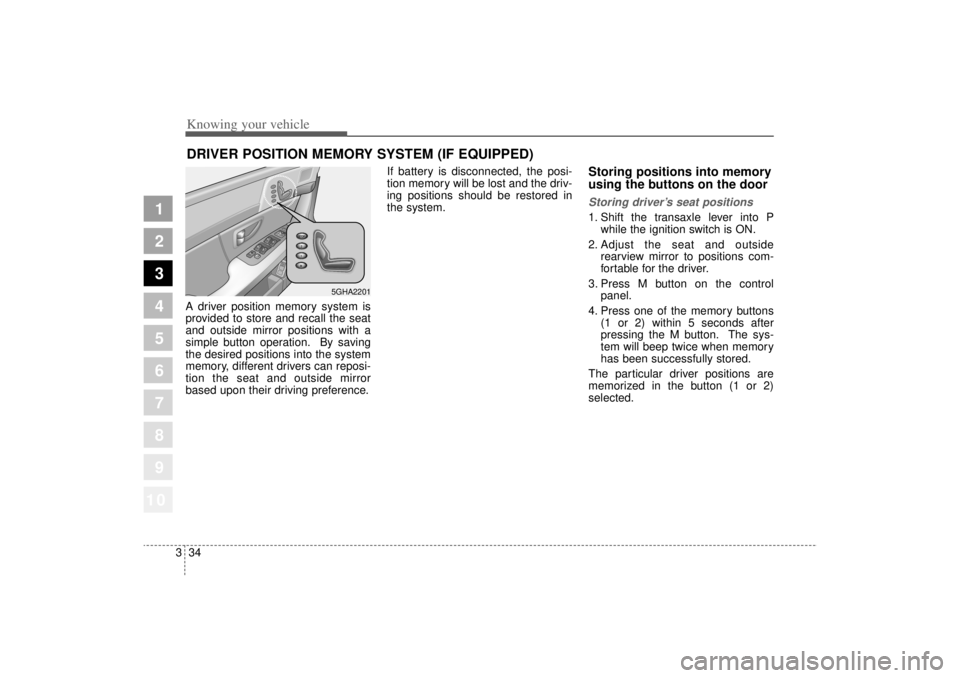
A driver position memory system is
provided to store and recall the seat
and outside mirror positions with a
simple button operation. By saving
the desired positions into the system
memory, different drivers can reposi-
tion the seat and outside mirror
based upon their driving preference. If battery is disconnected, the posi-
tion memory will be lost and the driv-
ing positions should be restored in
the system.
Storing positions into memory
using the buttons on the doorStoring driver’
s seat positions1. Shift the transaxle lever into P
while the ignition switch is ON.
2. Adjust the seat and outside rearview mirror to positions com-
fortable for the driver.
3. Press M button on the control panel.
4. Press one of the memory buttons (1 or 2) within 5 seconds after
pressing the M button. The sys-
tem will beep twice when memory
has been successfully stored.
The particular driver positions are
memorized in the button (1 or 2)
selected.
DRIVER POSITION MEMORY SYSTEM (IF EQUIPPED)
5GHA2201
Page 46 of 322
335
1
2
3
4
5
6
7
8
910
Knowing your vehicle
Recalling positions from memory1. Shift the transaxle lever into Pwhile the ignition switch is ON.
2. To recall the position in memory, press the desired memory button
(1 or 2) the system will beep once,
then seat and outside rearview
mirror will automatically adjust to
the stored positions.
Adjusting one of the control knobs for
the seat or outside rearview mirror
while the system is recalling the
stored positions will cause the move-
ment for that component to stop and
move in the direction that the control
knob is moved. Other components
will continue position recalling.
To stop the position recall at any
point in the recall process, press the
STOP button once. Seat and outside
rearview mirror position recalling will
stop.
Storing and recalling with
transmitterStoring with the transmitterTurn the ignition switch to LOCK from
ON and lock all the doors using the
transmitter. The seat and outside
rearview mirror positions will be
stored in the system memory.
Driver’ s position recalling with
transmitterUnlock the door with the transmitter,
positions stored in the system mem-
ory will be recalled automatically.
If using two transmitters, recalling
times may vary because stored posi-
tions in each transmitter may be dif-
ferent.
Example) If doors are locked with
transmitter A and unlocked with
transmitter B, the positions memo-
rized when unlocked with transmitter
B will be recalled and may take
slightly longer than if unlocked with
transmitter A.
CAUTION
Use caution when recalling adjustment memory while sit-ting in the vehicle. Press theSTOP button immediately if theseat moves too far in any direc-tion.
Page 83 of 322
Knowing your vehicle72
3
1
2
3
4
5
6
7
8
910
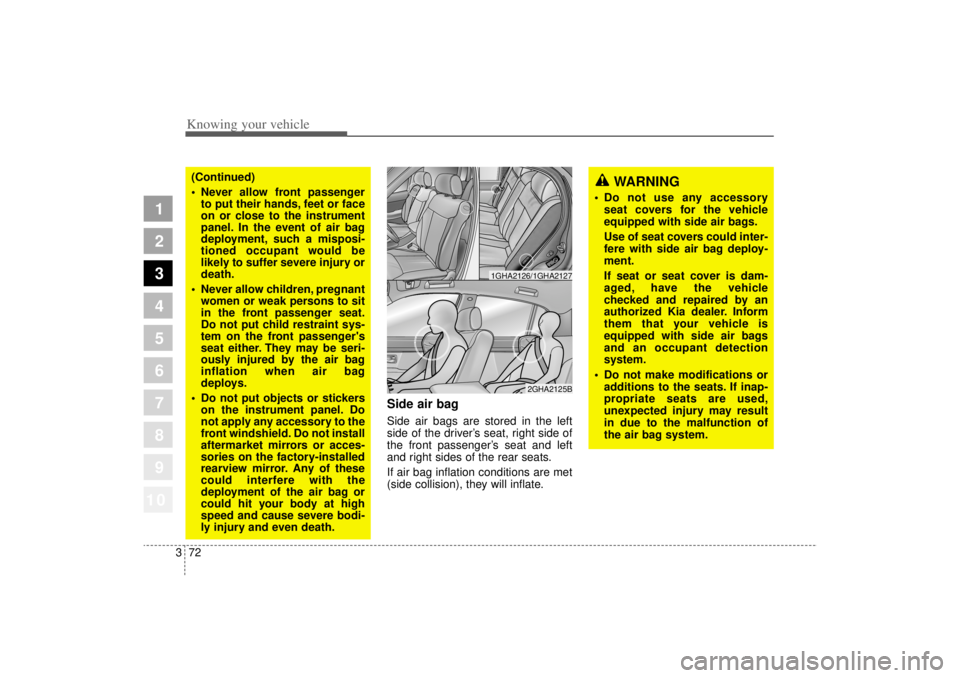
Side air bagSide air bags are stored in the left
side of the driver’ s seat, right side of
the front passenger’ s seat and left
and right sides of the rear seats.
If air bag inflation conditions are met
(side collision), they will inflate.
WARNING
Do not use any accessory
seat covers for the vehicle
equipped with side air bags.
Use of seat covers could inter-
fere with side air bag deploy-
ment.
If seat or seat cover is dam-
aged, have the vehicle
checked and repaired by an
authorized Kia dealer. Inform
them that your vehicle is
equipped with side air bags
and an occupant detection
system.
Do not make modifications or
additions to the seats. If inap-
propriate seats are used,
unexpected injury may result
in due to the malfunction of
the air bag system.
2GHA2125B
1GHA2126/1GHA2127
(Continued)
Never allow front passenger
to put their hands, feet or face
on or close to the instrument
panel. In the event of air bag
deployment, such a misposi-
tioned occupant would be
likely to suffer severe injury or
death.
Never allow children, pregnant
women or weak persons to sit
in the front passenger seat.
Do not put child restraint sys-
tem on the front passenger's
seat either. They may be seri-
ously injured by the air bag
inflation when air bag
deploys.
Do not put objects or stickers
on the instrument panel. Do
not apply any accessory to the
front windshield. Do not install
aftermarket mirrors or acces-
sories on the factory-installed
rearview mirror. Any of these
could interfere with the
deployment of the air bag or
could hit your body at high
speed and cause severe bodi-
ly injury and even death.
Page 103 of 322
Knowing your vehicle92
3
1
2
3
4
5
6
7
8
910
Outside rearview mirror Be sure to adjust mirror angles
before driving.✽ ✽
NOTICEDo not scrape ice off the mirror
face; this may damage the surface of
the glass. If ice should restrict move-
ment of the mirror, do not force the
mirror for adjustment. To remove
ice, use a deicer spray, or a sponge
or soft cloth with very warm water.
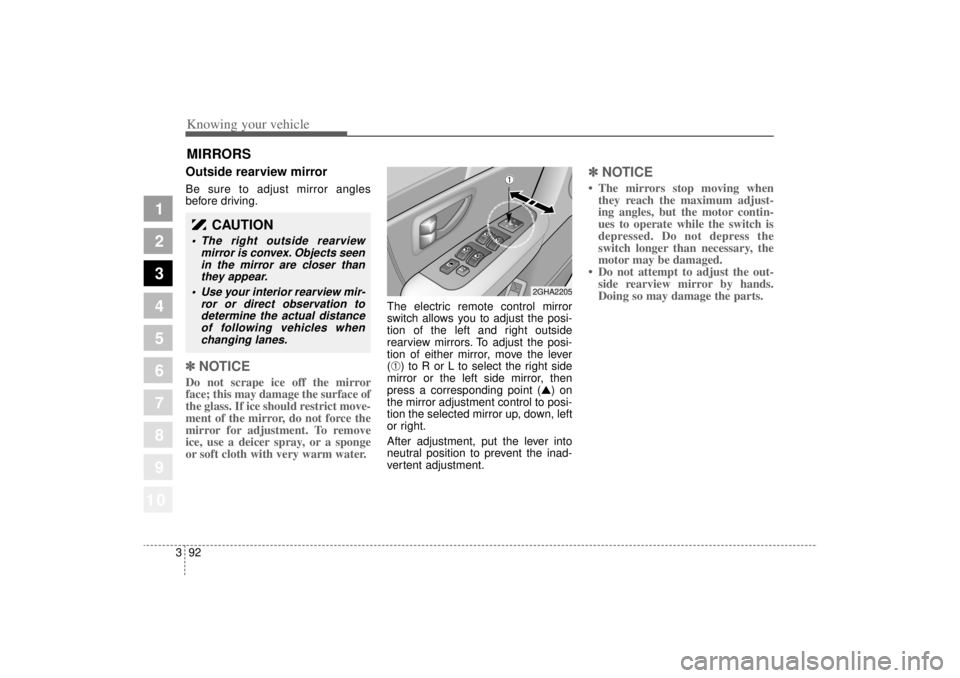
The electric remote control mirror
switch allows you to adjust the posi-
tion of the left and right outside
rearview mirrors. To adjust the posi-
tion of either mirror, move the lever
(➀) to R or L to select the right side
mirror or the left side mirror, then
press a corresponding point (�) on
the mirror adjustment control to posi-
tion the selected mirror up, down, left
or right.
After adjustment, put the lever into
neutral position to prevent the inad-
vertent adjustment.
✽ ✽ NOTICE• The mirrors stop moving when
they reach the maximum adjust-
ing angles, but the motor contin-
ues to operate while the switch is
depressed. Do not depress the
switch longer than necessary, the
motor may be damaged.
• Do not attempt to adjust the out- side rearview mirror by hands.
Doing so may damage the parts.
MIRRORS
2GHA2205
CAUTION
The right outside rearview
mirror is convex. Objects seenin the mirror are closer thanthey appear.
Use your interior rearview mir-
ror or direct observation todetermine the actual distanceof following vehicles whenchanging lanes.
➀
Page 104 of 322
393
1
2
3
4
5
6
7
8
910
Knowing your vehicle
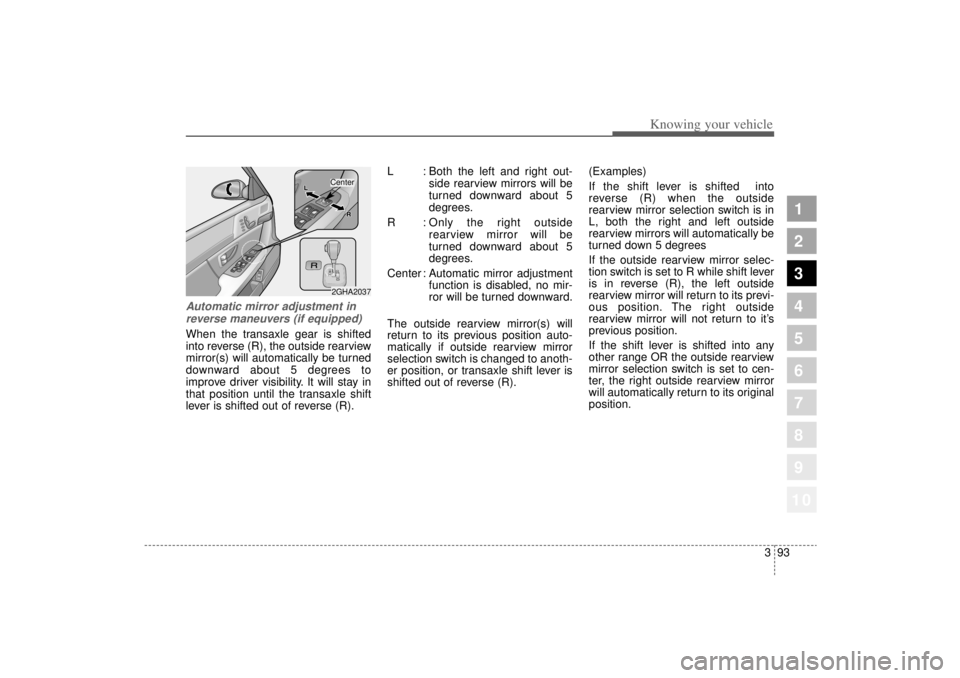
Automatic mirror adjustment inreverse maneuvers (if equipped)When the transaxle gear is shifted
into reverse (R), the outside rearview
mirror(s) will automatically be turned
downward about 5 degrees to
improve driver visibility. It will stay in
that position until the transaxle shift
lever is shifted out of reverse (R). L : Both the left and right out-
side rearview mirrors will be
turned downward about 5
degrees.
R : Only the right outside rearview mirror will be
turned downward about 5
degrees.
Center : Automatic mirror adjustment function is disabled, no mir-
ror will be turned downward.
The outside rearview mirror(s) will
return to its previous position auto-
matically if outside rearview mirror
selection switch is changed to anoth-
er position, or transaxle shift lever is
shifted out of reverse (R). (Examples)
If the shift lever is shifted into
reverse (R) when the outside
rearview mirror selection switch is in
L, both the right and left outside
rearview mirrors will automatically be
turned down 5 degrees
If the outside rearview mirror selec-
tion switch is set to R while shift lever
is in reverse (R), the left outside
rearview mirror will return to its previ-
ous position. The right outside
rearview mirror will not return to it
’s
previous position.
If the shift lever is shifted into any
other range OR the outside rearview
mirror selection switch is set to cen-
ter, the right outside rearview mirror
will automatically return to its original
position.
2GHA2037Center