2006 KIA AMANTI homelink
[x] Cancel search: homelinkPage 193 of 322
1
2
3
4
5
6
7
8
9101
2
3
4
5
6
7
8
910
Fuel requirements / 5-2
Emission control system / 5-3
Before driving / 5-5
Suggestions for economical operation / 5-6
Special driving conditions / 5-7
Trailer towing / 5-13
Overloading / 5-20
Label information / 5-21
Homelink
®wireless control system / 5-23
Driving tips
Page 215 of 322
523
Driving tips
1
2
3
4
5
6
7
8
910
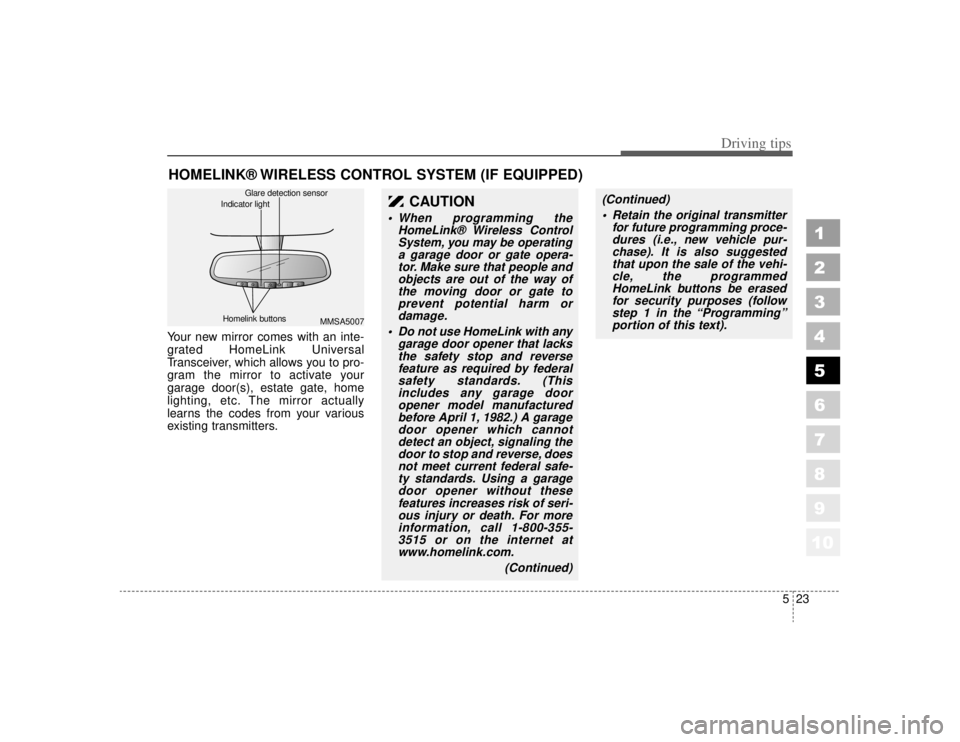
HOMELINK® WIRELESS CONTROL SYSTEM (IF EQUIPPED)Your new mirror comes with an inte-
grated HomeLink Universal
Transceiver, which allows you to pro-
gram the mirror to activate your
garage door(s), estate gate, home
lighting, etc. The mirror actually
learns the codes from your various
existing transmitters.
CAUTION
When programming theHomeLink® Wireless ControlSystem, you may be operatinga garage door or gate opera-tor. Make sure that people andobjects are out of the way ofthe moving door or gate toprevent potential harm ordamage.
Do not use HomeLink with any garage door opener that lacksthe safety stop and reversefeature as required by federalsafety standards. (Thisincludes any garage dooropener model manufacturedbefore April 1, 1982.) A garagedoor opener which cannotdetect an object, signaling thedoor to stop and reverse, doesnot meet current federal safe-ty standards. Using a garagedoor opener without thesefeatures increases risk of seri-ous injury or death. For moreinformation, call 1-800-355-3515 or on the internet atwww.homelink.com.
(Continued)
(Continued) Retain the original transmitter for future programming proce-dures (i.e., new vehicle pur-chase). It is also suggestedthat upon the sale of the vehi-cle, the programmedHomeLink buttons be erasedfor security purposes (followstep 1 in the “Programming”portion of this text).
MMSA5007
Homelink buttons Glare detection sensor
Indicator light
Page 216 of 322
Driving tips24
5
1
2
3
4
5
6
7
8
910
ProgrammingYour vehicle may require the ignition
switch to be turned to the ACC posi-
tion for programming and/or opera-
tion of HomeLink. It is also recom-
mended that a new battery be
replaced in the hand-held transmitter
of the device being programmed to
HomeLink for quicker training and
accurate transmission of the radio-
frequency.
Follow these steps to train your
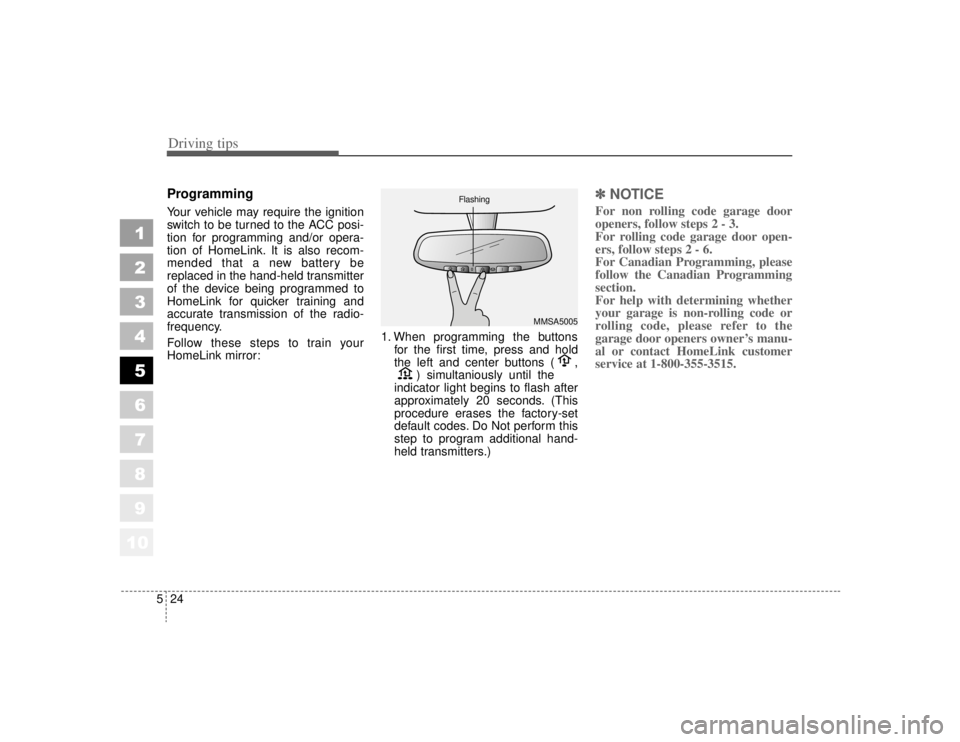
HomeLink mirror: 1. When programming the buttons
for the first time, press and hold
the left and center buttons ( , ) simultaniously until the
indicator light begins to flash after
approximately 20 seconds. (This
procedure erases the factory-set
default codes. Do Not perform this
step to program additional hand-
held transmitters.)
✽ ✽ NOTICEFor non rolling code garage door
openers, follow steps 2 - 3.
For rolling code garage door open-
ers, follow steps 2 - 6.
For Canadian Programming, please
follow the Canadian Programming
section.
For help with determining whether
your garage is non-rolling code or
rolling code, please refer to the
garage door openers owner’s manu-
al or contact HomeLink customer
service at 1-800-355-3515.
MMSA5005
Flashing
Page 217 of 322
525
Driving tips
1
2
3
4
5
6
7
8
910
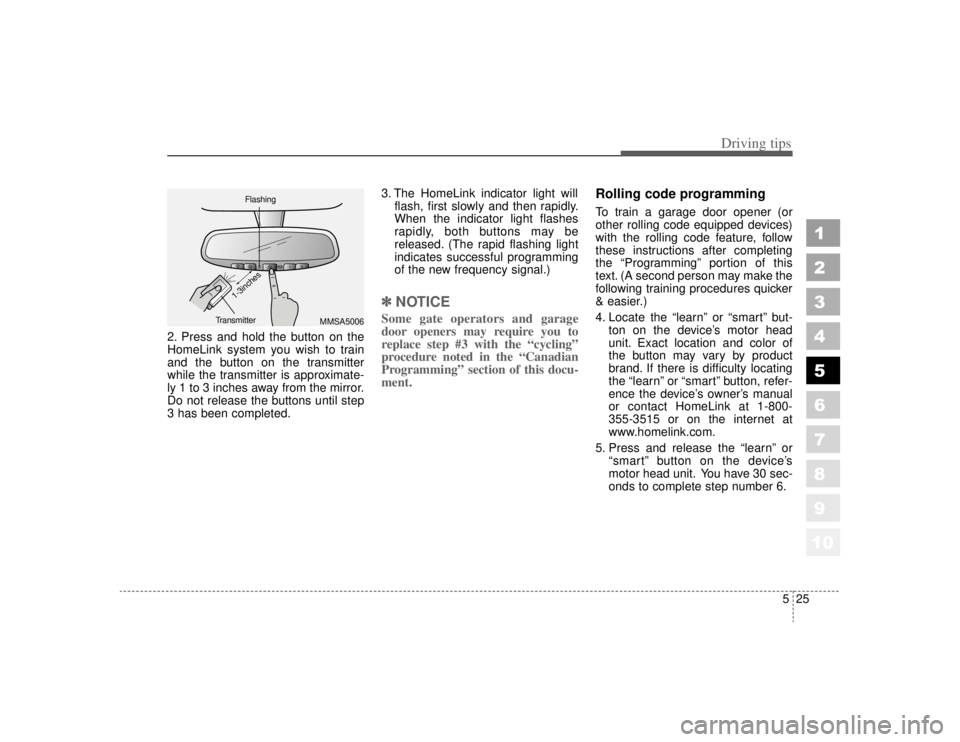
2. Press and hold the button on the
HomeLink system you wish to train
and the button on the transmitter
while the transmitter is approximate-
ly 1 to 3 inches away from the mirror.
Do not release the buttons until step
3 has been completed.3. The HomeLink indicator light will
flash, first slowly and then rapidly.
When the indicator light flashes
rapidly, both buttons may be
released. (The rapid flashing light
indicates successful programming
of the new frequency signal.)
✽ ✽NOTICESome gate operators and garage
door openers may require you to
replace step #3 with the “cycling”
procedure noted in the “Canadian
Programming” section of this docu-
ment.
Rolling code programmingTo train a garage door opener (or
other rolling code equipped devices)
with the rolling code feature, follow
these instructions after completing
the “Programming” portion of this
text. (A second person may make the
following training procedures quicker
& easier.)
4. Locate the “learn” or “smart” but-
ton on the device’s motor head
unit. Exact location and color of
the button may vary by product
brand. If there is difficulty locating
the “learn” or “smart” button, refer-
ence the device’s owner’s manual
or contact HomeLink at 1-800-
355-3515 or on the internet at
www.homelink.com.
5. Press and release the “learn” or “smart” button on the device’s
motor head unit. You have 30 sec-
onds to complete step number 6.
MMSA5006
Flashing
Transmitter
1-3inches
Page 218 of 322
Driving tips26
5
1
2
3
4
5
6
7
8
910
6. Return to the vehicle and firmly
press and release the pro-
grammed HomeLink button up to
three times. The rolling code
equipped device should now rec-
ognize the HomeLink signal and
activate when the HomeLink but-
ton is pressed. The remaining two
buttons may now be programmed
if this has not previously been
done. Refer to the “Programming”
portion of this text.
Operating HomeLink To operate, simply press the pro-
grammed HomeLink button.
Activation will now occur for the
trained product (garage door, securi-
ty system, entry door lock, estate
gate, or home or office lighting). For
convenience, the hand-held trans-
mitter of the device may also be used
at any time. The HomeLink Wireless
Controls System (once programmed)
or the original hand-held transmitter
may be used to activate the device
(e.g. garage door, entry door lock,
etc.). In the event that there are still
programming difficulties, contact
HomeLink at 1-800-355-3515 or on
the internet at www.homelink.com.
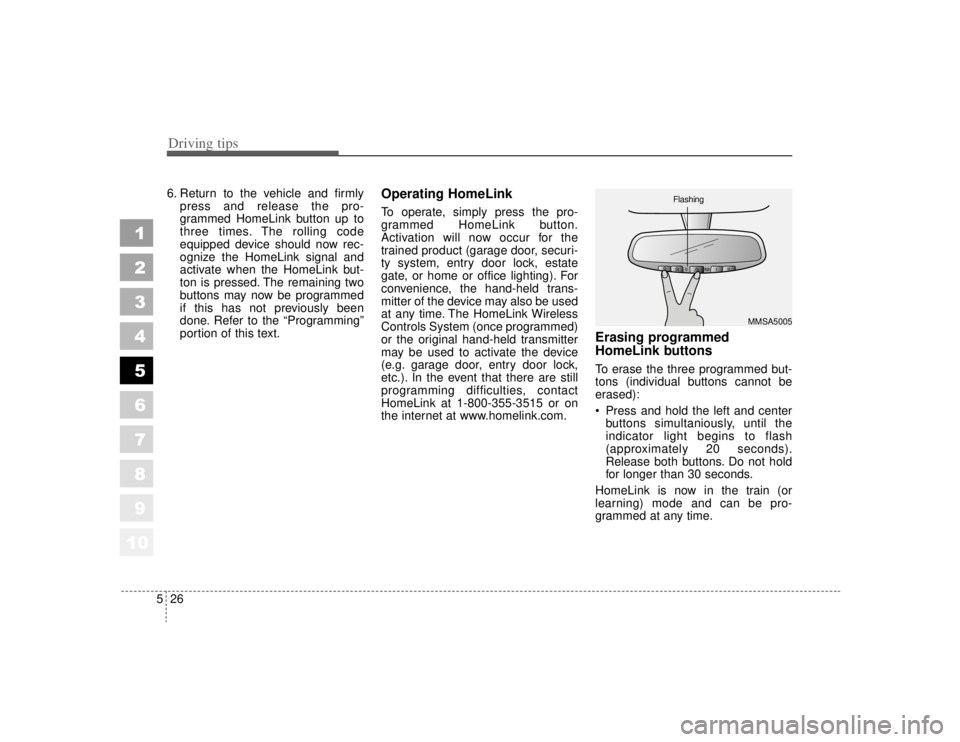
Erasing programmed
HomeLink buttonsTo erase the three programmed but-
tons (individual buttons cannot be
erased):
Press and hold the left and centerbuttons simultaniously, until the
indicator light begins to flash
(approximately 20 seconds).
Release both buttons. Do not hold
for longer than 30 seconds.
HomeLink is now in the train (or
learning) mode and can be pro-
grammed at any time.
MMSA5005
Flashing
Page 219 of 322
527
Driving tips
1
2
3
4
5
6
7
8
910
Reprogramming a single
HomeLink buttonTo program a device to HomeLink
using a HomeLink button previously
trained, follow these steps:
1. Press and hold the desiredHomeLink button. Do NOT release
until step 4 has been completed.
2. When the indicator light begins to flash slowly (after 20 seconds),
position the hand-held transmitter
1 to 3 inches away from the
HomeLink surface.
3. Press and hold the hand-held transmitter button (or press and
“cycle” - as described in
“Canadian Programming” above).
4. The HomeLink indicator light will flash, first slowly and then rapidly.
When the indicator light begins to
flash rapidly, release both buttons.
The previous device has now been
erased and the new device can be
activated by pushing the HomeLink
button that has just been pro-
grammed. This procedure will not
affect any other programmed
HomeLink buttons.
Gate operator programming &
canadian programmingDuring programming, your hand-held
transmitter may automatically stop
transmitting. Continue to press and
hold the HomeLink button (note
steps 2 through 4 in the
“Programming” portion of this text)
while you press and re-press
(“cycle”) your handheld transmitter
every two seconds until the frequen-
cy signal has been learned. The indi-
cator light will flash slowly and then
rapidly after several seconds upon
successful training.✽ ✽ NOTICEIf programming a garage door open-
er or gate, it is advised to unplug the
device during the “cycling” process
to prevent possible motor burn-up.
AccessoriesIf you would like additional informa-
tion on the HomeLink Wireless
Control System, HomeLink compati-
ble products, or to purchase other
accessories such as the HomeLink®
Lighting Package, please contact
HomeLink at 1-800-355-3515 or on
the internet at www.homelink.com.
This device complies with FCC rules
part 15. Operation is subject to the
following two conditions:
(1) This device may not cause harm-
ful interference.
(2) This device must accept any
interference that may be received
including interference that may
cause undesired operation.
Page 317 of 322
10 5
Index
Hazard Warning Flasher . . . . . . . . . . . . . . . . . . . 4-53,6-2
Hazardous Driving conditions . . . . . . . . . . . . . . . . . . . 5-7
HeadlightHigh Beam Indicator . . . . . . . . . . . . . . . . . . . . . . . 4-40
Replacement . . . . . . . . . . . . . . . . . . . . . . . . . . . . . 7-44
Headrest adjustment Driver’s seat . . . . . . . . . . . . . . . . . . . . . . . . . . . . . 3-24
Front passenger seat . . . . . . . . . . . . . . . . . . . . . . . . 3-28
Rear seat . . . . . . . . . . . . . . . . . . . . . . . . . . . . . . . . 3-32
HLA (Hydraulic Lash Adjustment) Noise . . . . . . . . . 5-12
Homelink® Wireless Control System . . . . . . . . . . . . 5-23
Hood . . . . . . . . . . . . . . . . . . . . . . . . . . . . . . . . . . . .\
. 3-88
Horn . . . . . . . . . . . . . . . . . . . . . . . . . . . . . . . . . . . .\
. 4-20
How To Use This Manual . . . . . . . . . . . . . . . . . . . . . . 1-2
If You Have a Flat Tire . . . . . . . . . . . . . . . . . . . . . . 6-20
Ignition Switch . . . . . . . . . . . . . . . . . . . . . . . . . . . . . . 4-2 And Anti-Theft Steering Column Lock . . . . . . . . . . 4-2
Illumination, Instrument Panel . . . . . . . . . . . . . . . . . 4-35
Immobilizer system . . . . . . . . . . . . . . . . . . . . . . . . . . . 3-7
Indicators, Warnings and . . . . . . . . . . . . . . . . . . . . . . 4-36
Infants and Small Children, Restraint of . . . . . . . . . . 3-48
Inflation Pressures (Tire) . . . . . . . . . . . . . . . . . . . . . . 7-37
Inspections, Necessary . . . . . . . . . . . . . . . . . . . . . . . . 5-5
Installation of a mobile two-way radio system . . . . . . 9-4 Instrument
Cluster . . . . . . . . . . . . . . . . . . . . . . . . . . . . . 4-32, 4-33
Panel Vents . . . . . . . . . . . . . . . . . . . . . . . . . . . . . . 4-62
Panel Illumination . . . . . . . . . . . . . . . . . . . . . . . . . 4-35
Panel Overview . . . . . . . . . . . . . . . . . . . . . . . . . . . . 2-5
Interior Overview . . . . . . . . . . . . . . . . . . . . . . . . . . . . . . . . . 2-4
Care . . . . . . . . . . . . . . . . . . . . . . . . . . . . . . . . . . . .\
7-57
Features . . . . . . . . . . . . . . . . . . . . . . . . . . . . . . . . 3-102
General Precautions . . . . . . . . . . . . . . . . . . . . . . . . 7-57
Lights . . . . . . . . . . . . . . . . . . . . . . . . . . . . . . . . . . 3-97
Trim, Cleaning the Upholstery and . . . . . . . . . . . . 7-57
Window Glass, Cleaning the . . . . . . . . . . . . . . . . . 7-57
Intermittent Wipers, Variable . . . . . . . . . . . . . . . . . . . 4-50
Jacking Instructions . . . . . . . . . . . . . . . . . . . . . . . . . 6-20
Jump Starting . . . . . . . . . . . . . . . . . . . . . . . . . . . . . . . 6-4
Keyless Entry, remote . . . . . . . . . . . . . . . . . . . . . . . . . 3-4
Key Reminder Warning Chime . . . . . . . . . . . . . . . . . 4-43
Keys . . . . . . . . . . . . . . . . . . . . . . . . . . . . . . . . . . . .\
. . 3-2
Knowing Your Vehicle . . . . . . . . . . . . . . . . . . . . . . . . 3-1
1
2
3
4
5
6
7
8
910
HI
JK