Page 8 of 322
10
Your vehicle at a glance22
1
2
3
4
5
6
7
8
9
EXTERIOR OVERVIEW
1. Headlight (high beam)
2. Headlights (low beam)
3. Turn signal light
4. Side mark light
5. Engine hood
6. Inside rearview mirror
7. Seat
8. Steering wheel
9. Door
10. Outside rearview mirror
2GHN0001
Page 106 of 322
395
1
2
3
4
5
6
7
8
910
Knowing your vehicle
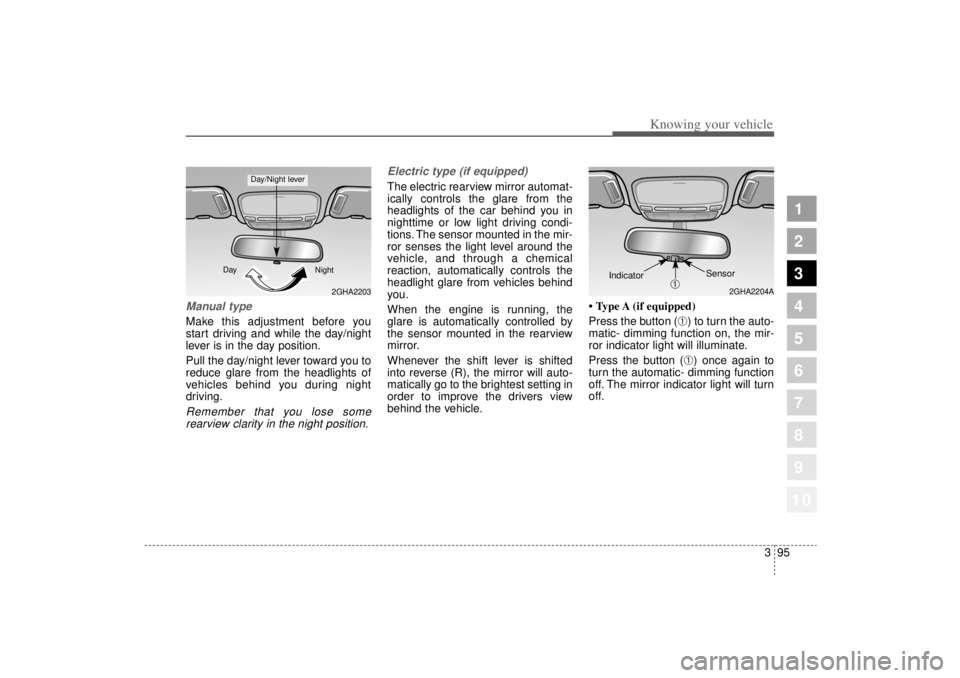
Manual type Make this adjustment before you
start driving and while the day/night
lever is in the day position.
Pull the day/night lever toward you to
reduce glare from the headlights of
vehicles behind you during night
driving.Remember that you lose somerearview clarity in the night position. Electric type (if equipped)
The electric rearview mirror automat-
ically controls the glare from the
headlights of the car behind you in
nighttime or low light driving condi-
tions. The sensor mounted in the mir-
ror senses the light level around the
vehicle, and through a chemical
reaction, automatically controls the
headlight glare from vehicles behind
you.
When the engine is running, the
glare is automatically controlled by
the sensor mounted in the rearview
mirror.
Whenever the shift lever is shifted
into reverse (R), the mirror will auto-
matically go to the brightest setting in
order to improve the drivers view
behind the vehicle.
• Type A (if equipped)
Press the button (
➀) to turn the auto-
matic- dimming function on, the mir-
ror indicator light will illuminate.
Press the button (➀) once again to
turn the automatic- dimming function
off. The mirror indicator light will turn
off.
2GHA2203
Day
Night
Day/Night lever
2GHA2204A
Sensor
➀
Indicator
Page 157 of 322
435
1
2
3
4
5
6
7
8
910
Driving your vehicle
Engine temperature gauge This gauge shows the temperature
of the engine coolant when the igni-
tion switch is ON.
Do not continue driving with an over-
heated engine. If your vehicle over-
heats, refer to “Overheating” in the
Index.✽ ✽
NOTICEIf the gauge pointer moves beyond
the normal range area toward the
“H” position, it indicates overheat-
ing that may damage the engine.
Fuel gaugeThe fuel gauge indicates the approx-
imate amount of fuel remaining in the
fuel tank.
Fuel tank capacity - 18.49 US gal.
(70 litres).
The fuel gauge is supplemented by a
low fuel warning light, which will illu-
minate when the fuel level has
dropped to about 2.38 US gal. (9
liters).
Instrument panel illuminationWhen the vehicle’s parking lights or
headlights are on, rotate the illumina-
tion control knob to adjust the instru-
ment panel illumination intensity.
2GHN2052
Page 162 of 322
Driving your vehicle40
4
1
2
3
4
5
6
7
8
910
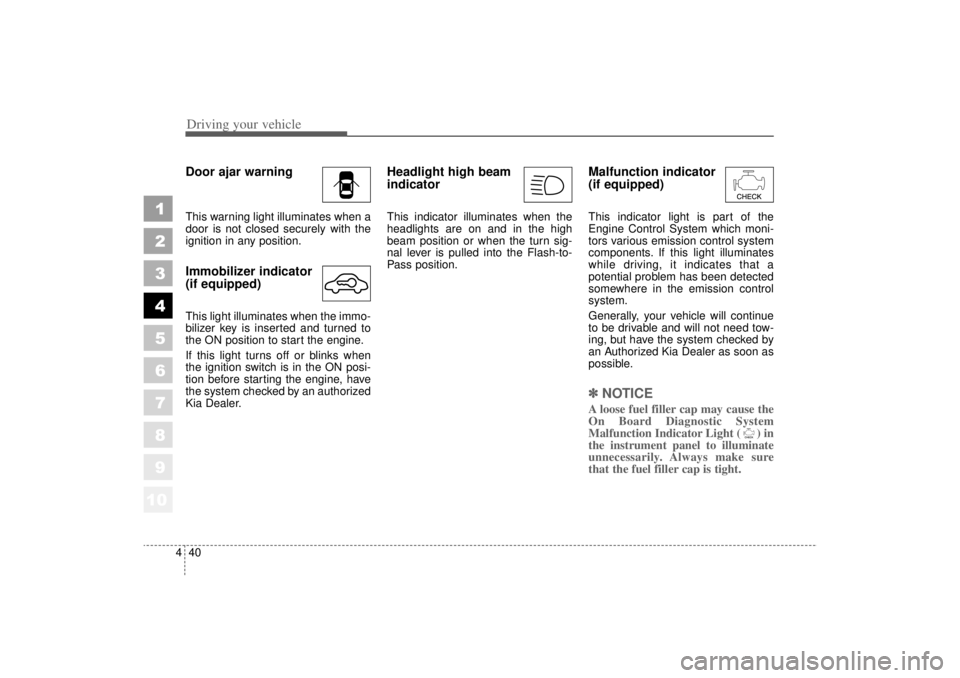
Door ajar warningThis warning light illuminates when a
door is not closed securely with the
ignition in any position.Immobilizer indicator
(if equipped)This light illuminates when the immo-
bilizer key is inserted and turned to
the ON position to start the engine.
If this light turns off or blinks when
the ignition switch is in the ON posi-
tion before starting the engine, have
the system checked by an authorized
Kia Dealer.
Headlight high beam
indicator This indicator illuminates when the
headlights are on and in the high
beam position or when the turn sig-
nal lever is pulled into the Flash-to-
Pass position.
Malfunction indicator
(if equipped)This indicator light is part of the
Engine Control System which moni-
tors various emission control system
components. If this light illuminates
while driving, it indicates that a
potential problem has been detected
somewhere in the emission control
system.
Generally, your vehicle will continue
to be drivable and will not need tow-
ing, but have the system checked by
an Authorized Kia Dealer as soon as
possible.✽ ✽
NOTICEA loose fuel filler cap may cause the
On Board Diagnostic System
Malfunction Indicator Light ( ) in
the instrument panel to illuminate
unnecessarily. Always make sure
that the fuel filler cap is tight.
Page 168 of 322
Driving your vehicle46
4
1
2
3
4
5
6
7
8
910
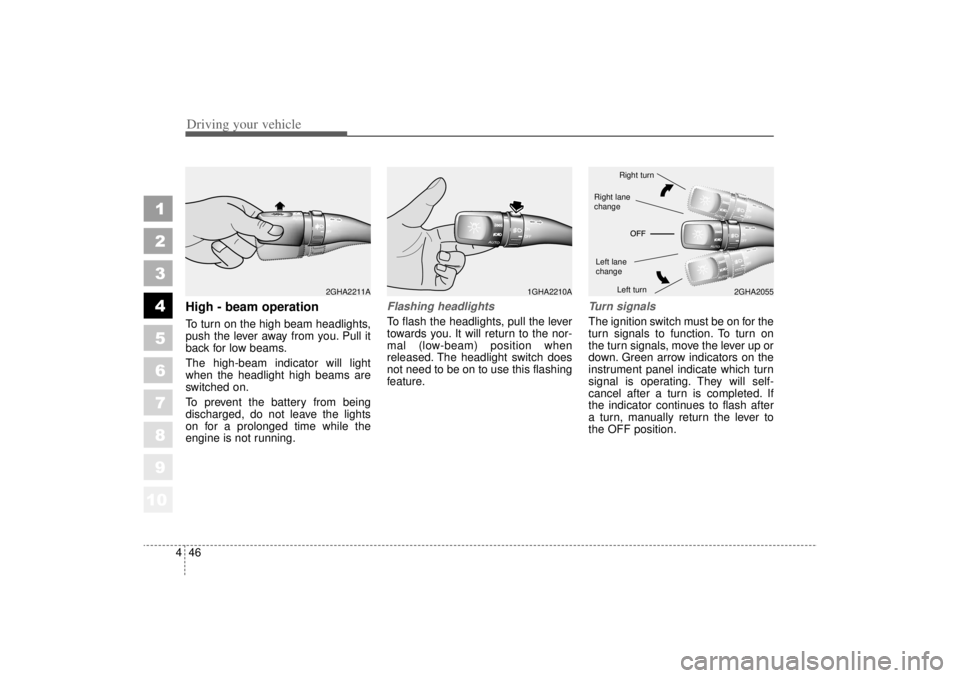
High - beam operation To turn on the high beam headlights,
push the lever away from you. Pull it
back for low beams.
The high-beam indicator will light
when the headlight high beams are
switched on.
To prevent the battery from being
discharged, do not leave the lights
on for a prolonged time while the
engine is not running.
Flashing headlights To flash the headlights, pull the lever
towards you. It will return to the nor-
mal (low-beam) position when
released. The headlight switch does
not need to be on to use this flashing
feature.
Turn signalsThe ignition switch must be on for the
turn signals to function. To turn on
the turn signals, move the lever up or
down. Green arrow indicators on the
instrument panel indicate which turn
signal is operating. They will self-
cancel after a turn is completed. If
the indicator continues to flash after
a turn, manually return the lever to
the OFF position.
1GHA2210A
2GHA2055
2GHA2211A
Right turnLeft turn
Left lane
changeRight lane
change
Page 169 of 322
447
1
2
3
4
5
6
7
8
910
Driving your vehicle
Lane change signals To signal a lane change, move the
turn signal lever slightly and hold it in
position. The lever will return to the
OFF position when released.
If an indicator stays on and does not
flash or if it flashes abnormally, one
of the turn signal bulbs may be
burned out and will require replace-
ment.✽ ✽
NOTICEIf an indicator flash is abnormally
quick or slow, bulb may be burned
out or have a poor electrical con-
nection in the circuit. Automatic headlight aiming
(if equipped)
To provide better driver visibility and
reduce eye fatigue, the headlight
aiming (direction) is automatically
controlled depending on vehicle load
and vehicle angle (when vehicle is
loaded with passengers, cargo or
used for towing, the additional load
can alter the headlight aiming point
on the road surface). This system
provides constant automatic head-
light aiming under various vehicle
conditions and angles to ensure the
headlights are always pointed in the
right direction.
✽ ✽
NOTICEIf the automatic headlight aiming
system does not operate when the
vehicle is loaded with passengers
and the front portion of the vehicle
is at an elevated angle, or it is not
adjusting correctly, have the vehicle
checked and repaired by an author-
ized Kia dealer. Do not attempt to
adjust the headlights manually,
damage to the automatic headlight
aiming system could occur.
Page 200 of 322
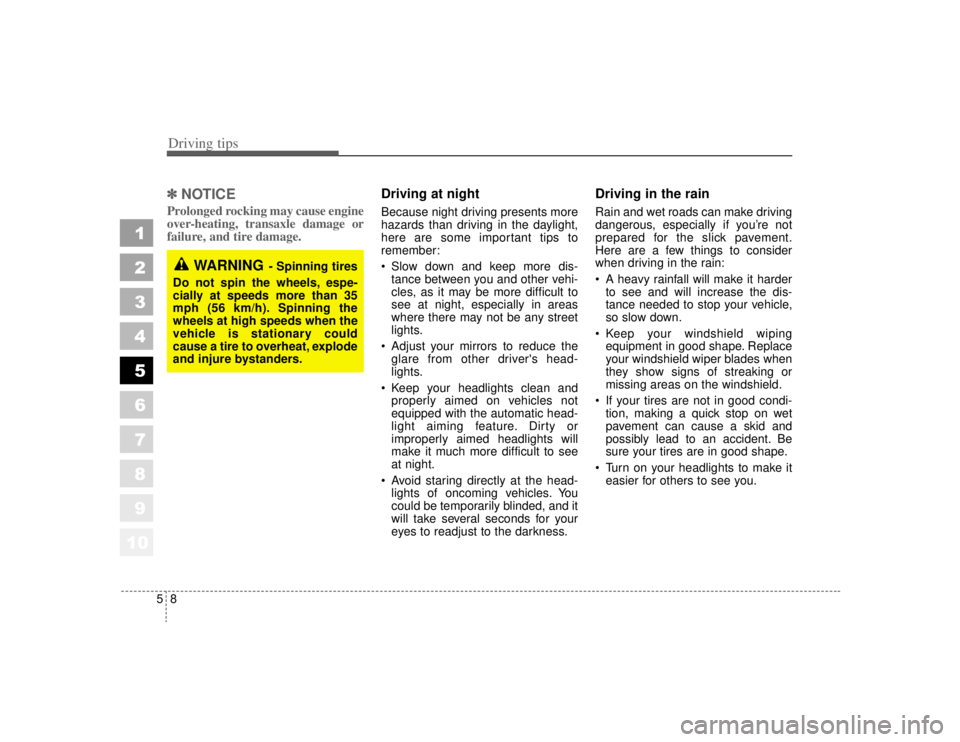
Driving tips85✽
✽NOTICEProlonged rocking may cause engine
over-heating, transaxle damage or
failure, and tire damage.
Driving at night Because night driving presents more
hazards than driving in the daylight,
here are some important tips to
remember:
Slow down and keep more dis-
tance between you and other vehi-
cles, as it may be more difficult to
see at night, especially in areas
where there may not be any street
lights.
Adjust your mirrors to reduce the glare from other driver's head-
lights.
Keep your headlights clean and properly aimed on vehicles not
equipped with the automatic head-
light aiming feature. Dirty or
improperly aimed headlights will
make it much more difficult to see
at night.
Avoid staring directly at the head- lights of oncoming vehicles. You
could be temporarily blinded, and it
will take several seconds for your
eyes to readjust to the darkness.
Driving in the rain Rain and wet roads can make driving
dangerous, especially if you’re not
prepared for the slick pavement.
Here are a few things to consider
when driving in the rain:
A heavy rainfall will make it harderto see and will increase the dis-
tance needed to stop your vehicle,
so slow down.
Keep your windshield wiping equipment in good shape. Replace
your windshield wiper blades when
they show signs of streaking or
missing areas on the windshield.
If your tires are not in good condi- tion, making a quick stop on wet
pavement can cause a skid and
possibly lead to an accident. Be
sure your tires are in good shape.
Turn on your headlights to make it easier for others to see you.
1
2
3
4
5
6
7
8
910
WARNING
- Spinning tires
Do not spin the wheels, espe-
cially at speeds more than 35
mph (56 km/h). Spinning the
wheels at high speeds when the
vehicle is stationary could
cause a tire to overheat, explode
and injure bystanders.
Page 228 of 322
In case of an emergency86Fuse replacement
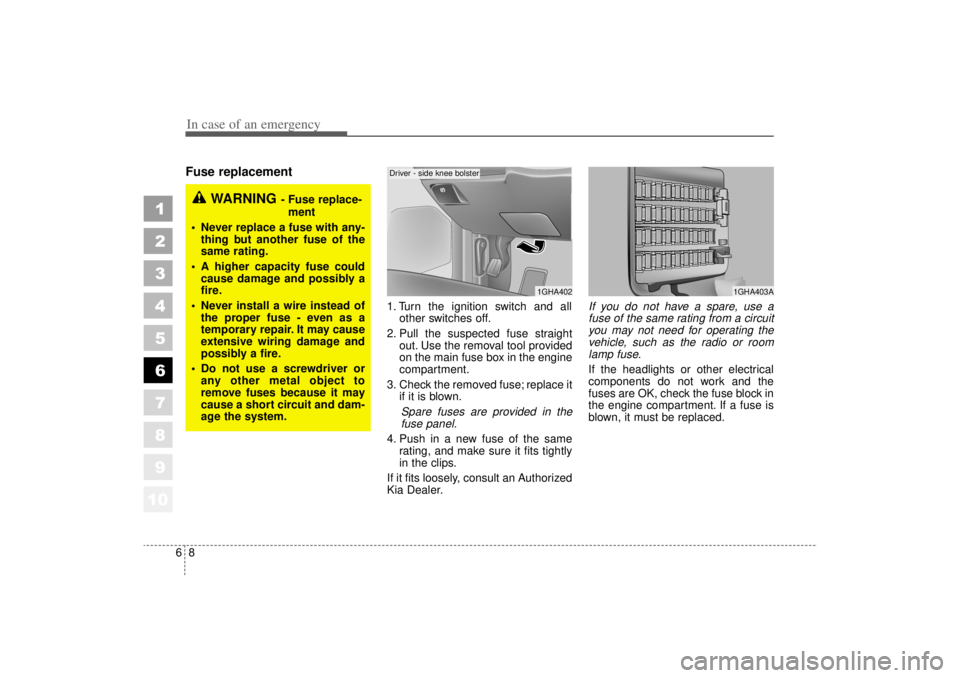
1. Turn the ignition switch and allother switches off.
2. Pull the suspected fuse straight out. Use the removal tool provided
on the main fuse box in the engine
compartment.
3. Check the removed fuse; replace it if it is blown.
Spare fuses are provided in thefuse panel.
4. Push in a new fuse of the same rating, and make sure it fits tightly
in the clips.
If it fits loosely, consult an Authorized
Kia Dealer.
If you do not have a spare, use a fuse of the same rating from a circuityou may not need for operating thevehicle, such as the radio or roomlamp fuse.If the headlights or other electrical
components do not work and the
fuses are OK, check the fuse block in
the engine compartment. If a fuse is
blown, it must be replaced.
1
2
3
4
5
6
7
8
910
1GHA402
1GHA403A
WARNING
- Fuse replace-
ment
Never replace a fuse with any- thing but another fuse of the
same rating.
A higher capacity fuse could cause damage and possibly a
fire.
Never install a wire instead of the proper fuse - even as a
temporary repair. It may cause
extensive wiring damage and
possibly a fire.
Do not use a screwdriver or any other metal object to
remove fuses because it may
cause a short circuit and dam-
age the system.
Driver - side knee bolster