Page 102 of 322
391
1
2
3
4
5
6
7
8
910
Knowing your vehicle
✽ ✽NOTICE• Make sure to refuel with gasoline
(unleaded fuel) only for the gaso-
line engine vehicles.
• Check to make sure the fuel filler cap is securely closed after refuel-
ing.
• If the fuel filler cap requires replacement, use only a genuine
Kia cap or the equivalent specified
for your vehicle. An incorrect fuel
filler cap can result in a serious
malfunction of the fuel system or
emission control system. Correct
replacement caps are available at
authorized Kia dealers.
• Do not spill fuel on the exterior surfaces of the vehicle. Any type of
fuel spilled on painted surfaces
may damage the paint.
• A loose fuel filler cap may cause the “Check Engine” (Malfunction
Indicator) light in the instrument
panel to illuminate unnecessarily.
• If the fuel filler lid will not open in cold weather because the area
around it is frozen, push or lightly
tap the lid.
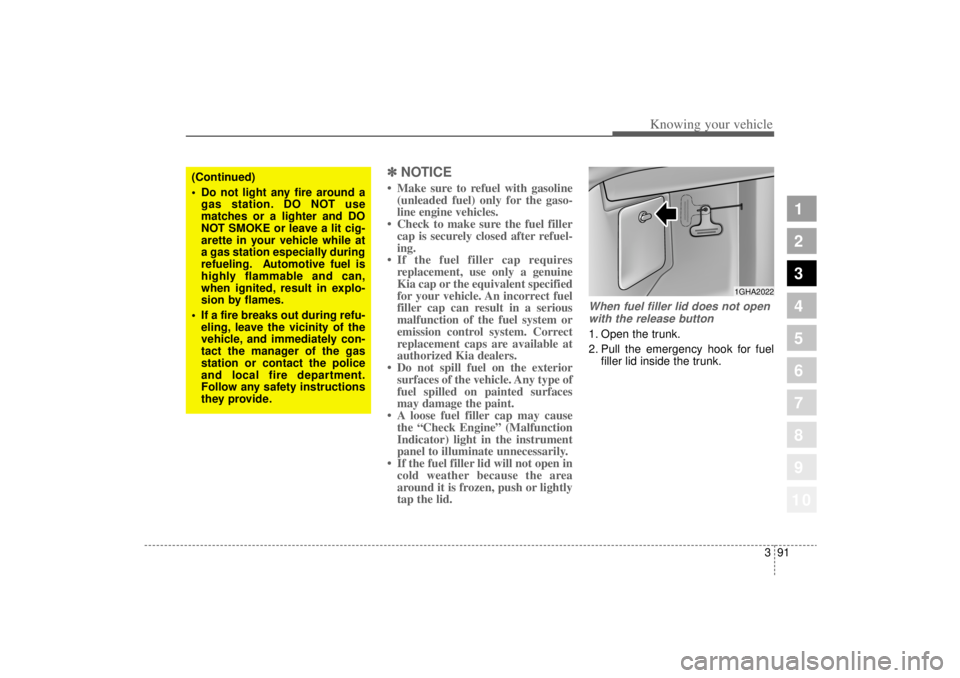
When fuel filler lid does not open
with the release button1. Open the trunk.
2. Pull the emergency hook for fuel filler lid inside the trunk.
1GHA2022
(Continued)
Do not light any fire around a
gas station. DO NOT use
matches or a lighter and DO
NOT SMOKE or leave a lit cig-
arette in your vehicle while at
a gas station especially during
refueling. Automotive fuel is
highly flammable and can,
when ignited, result in explo-
sion by flames.
If a fire breaks out during refu-
eling, leave the vicinity of the
vehicle, and immediately con-
tact the manager of the gas
station or contact the police
and local fire department.
Follow any safety instructions
they provide.
Page 103 of 322
Knowing your vehicle92
3
1
2
3
4
5
6
7
8
910
Outside rearview mirror Be sure to adjust mirror angles
before driving.✽ ✽
NOTICEDo not scrape ice off the mirror
face; this may damage the surface of
the glass. If ice should restrict move-
ment of the mirror, do not force the
mirror for adjustment. To remove
ice, use a deicer spray, or a sponge
or soft cloth with very warm water.
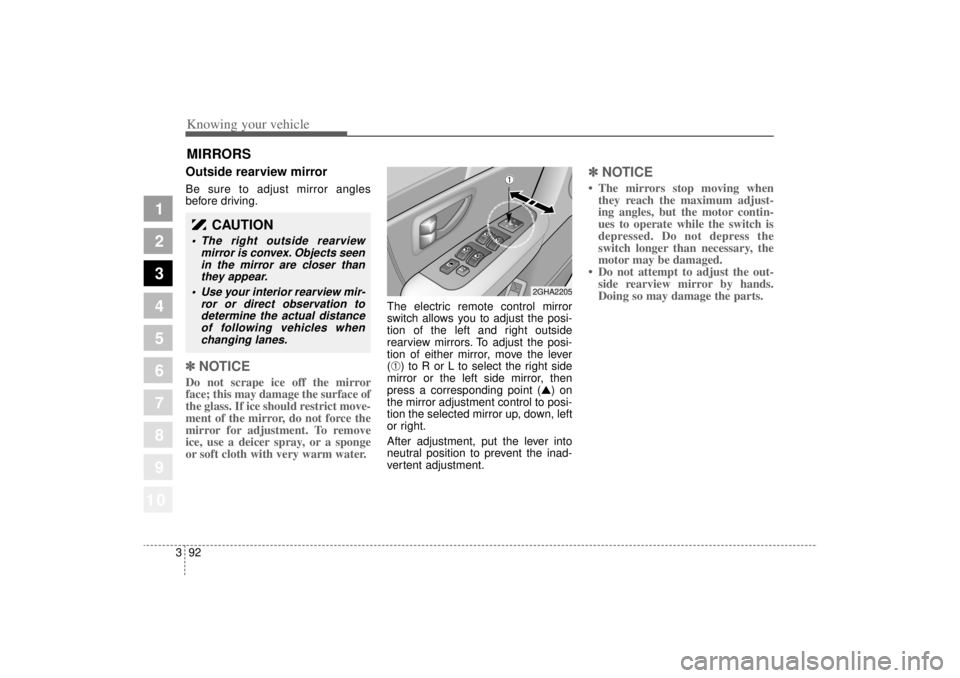
The electric remote control mirror
switch allows you to adjust the posi-
tion of the left and right outside
rearview mirrors. To adjust the posi-
tion of either mirror, move the lever
(➀) to R or L to select the right side
mirror or the left side mirror, then
press a corresponding point (�) on
the mirror adjustment control to posi-
tion the selected mirror up, down, left
or right.
After adjustment, put the lever into
neutral position to prevent the inad-
vertent adjustment.
✽ ✽ NOTICE• The mirrors stop moving when
they reach the maximum adjust-
ing angles, but the motor contin-
ues to operate while the switch is
depressed. Do not depress the
switch longer than necessary, the
motor may be damaged.
• Do not attempt to adjust the out- side rearview mirror by hands.
Doing so may damage the parts.
MIRRORS
2GHA2205
CAUTION
The right outside rearview
mirror is convex. Objects seenin the mirror are closer thanthey appear.
Use your interior rearview mir-
ror or direct observation todetermine the actual distanceof following vehicles whenchanging lanes.
➀
Page 108 of 322
397
1
2
3
4
5
6
7
8
910
Knowing your vehicle
Map light Front (if equipped)The lights are turned ON or OFF by
pressing the corresponding switch.
Dome light (if equipped)
➀
OFF - The light stays off evenwhen a door is open.
➁
DOOR - The light turns on or offwhen a door is opened
or closed.
Interior light goes out
slowly if the door is
closed.
When a door is unlocked by the transmitter, interi-
or light stays on for 30
seconds as long as the
door is not opened.
➂
ON - The light turns on and stays on even when the doors are
all closed.
INTERIOR LIGHTS
2GHA2060
OFF DOOR
ON
E2BLA324
Page 128 of 322
Driving your vehicle64
1
2
3
4
5
6
7
8
910
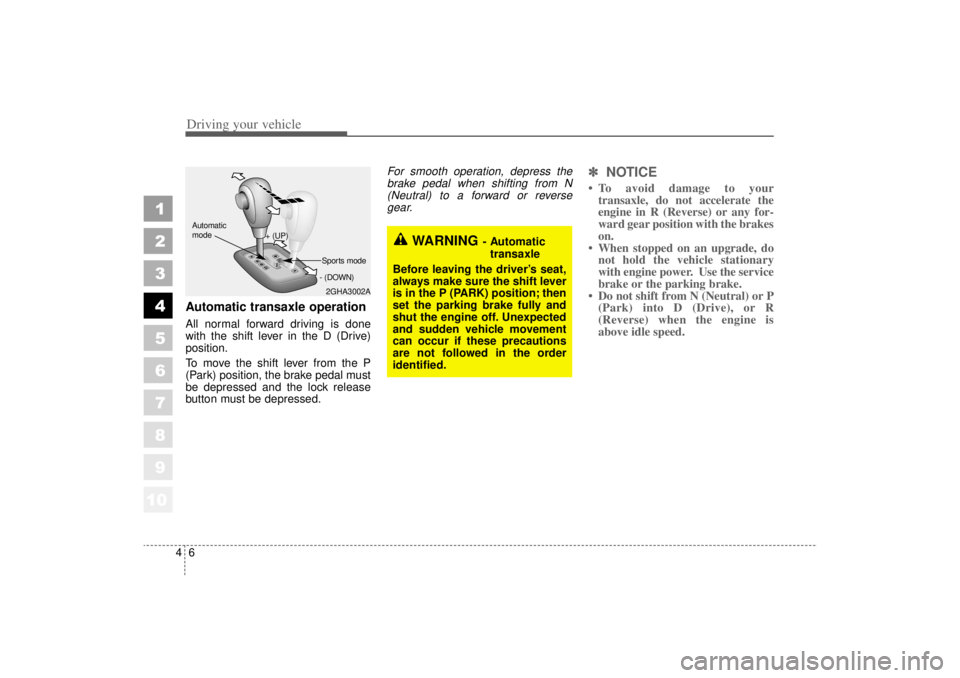
Automatic transaxle operationAll normal forward driving is done
with the shift lever in the D (Drive)
position.
To move the shift lever from the P
(Park) position, the brake pedal must
be depressed and the lock release
button must be depressed.
For smooth operation, depress thebrake pedal when shifting from N(Neutral) to a forward or reversegear.
✽ ✽
NOTICE• To avoid damage to your
transaxle, do not accelerate the
engine in R (Reverse) or any for-
ward gear position with the brakes
on.
• When stopped on an upgrade, do not hold the vehicle stationary
with engine power. Use the service
brake or the parking brake.
• Do not shift from N (Neutral) or P (Park) into D (Drive), or R
(Reverse) when the engine is
above idle speed.
2GHA3002A
+ (UP)
- (DOWN)
Automatic
modeSports mode
WARNING
- Automatic
transaxle
Before leaving the driver’s seat,
always make sure the shift lever
is in the P (PARK) position; then
set the parking brake fully and
shut the engine off. Unexpected
and sudden vehicle movement
can occur if these precautions
are not followed in the order
identified.
Page 129 of 322
47
1
2
3
4
5
6
7
8
910
Driving your vehicle
Transaxle rangesP (park)This position locks the transaxle and
prevents the front wheels from rotat-
ing. Always come to a complete stop
before shifting into this position.
✽ ✽
NOTICEThe transaxle may be damaged if
you shift into P (Park) while the
vehicle is in motion.(Continued)
Before leaving the driver’s
seat, always make sure the
shift lever is in the P (PARK)
position. Set the parking
brake fully, shut the engine off
and take the key with you.
Unexpected and sudden vehi-
cle movement can occur if you
do not follow these precau-
tions in the order specified.
Never leave a child unattend- ed in a vehicle.
WARNING
Shifting into P (Park) while thevehicle is in motion will cause
the drive wheels to lock which
will cause you to lose control
of the vehicle.
Do not use the P (Park) posi- tion in place of the parking
brake. Always make sure the
shift lever is latched in the P
(Park) position so that it can-
not be moved unless the lock
release button is pushed in,
AND set the parking brake
fully.
(Continued)
Page 131 of 322
49
1
2
3
4
5
6
7
8
910
Driving your vehicle
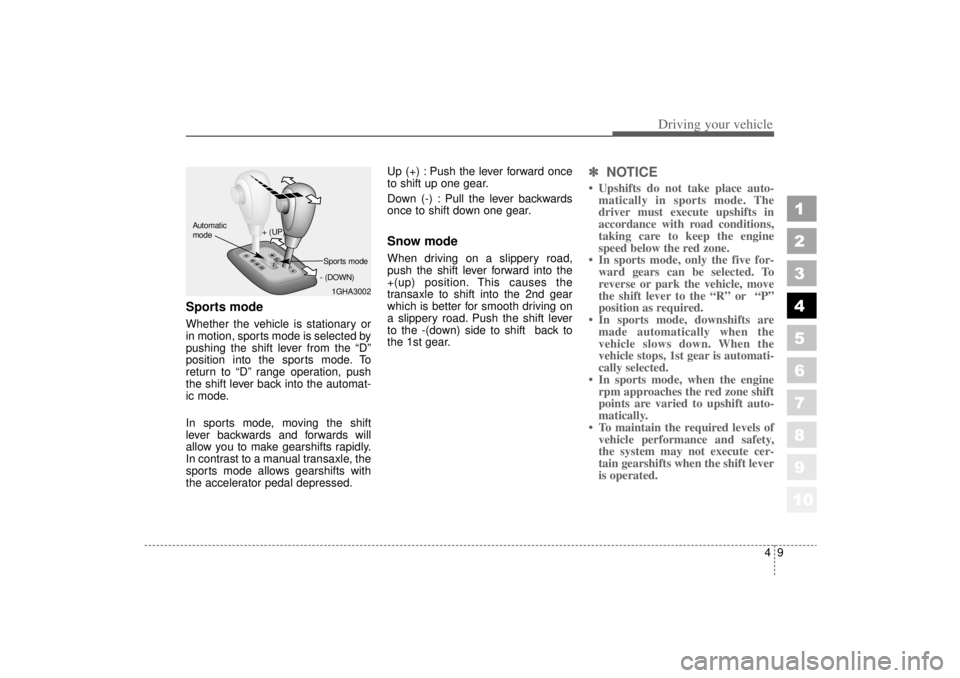
Sports modeWhether the vehicle is stationary or
in motion, sports mode is selected by
pushing the shift lever from the “D”
position into the sports mode. To
return to “D” range operation, push
the shift lever back into the automat-
ic mode.
In sports mode, moving the shift
lever backwards and forwards will
allow you to make gearshifts rapidly.
In contrast to a manual transaxle, the
sports mode allows gearshifts with
the accelerator pedal depressed.Up (+) : Push the lever forward once
to shift up one gear.
Down (-) : Pull the lever backwards
once to shift down one gear.
Snow modeWhen driving on a slippery road,
push the shift lever forward into the
+(up) position. This causes the
transaxle to shift into the 2nd gear
which is better for smooth driving on
a slippery road. Push the shift lever
to the -(down) side to shift back to
the 1st gear.
✽ ✽
NOTICE• Upshifts do not take place auto-
matically in sports mode. The
driver must execute upshifts in
accordance with road conditions,
taking care to keep the engine
speed below the red zone.
• In sports mode, only the five for- ward gears can be selected. To
reverse or park the vehicle, move
the shift lever to the “R” or “P”
position as required.
• In sports mode, downshifts are made automatically when the
vehicle slows down. When the
vehicle stops, 1st gear is automati-
cally selected.
• In sports mode, when the engine rpm approaches the red zone shift
points are varied to upshift auto-
matically.
• To maintain the required levels of vehicle performance and safety,
the system may not execute cer-
tain gearshifts when the shift lever
is operated.
1GHA3002
+ (UP)
- (DOWN)
Automatic
modeSports mode
Page 137 of 322
415
1
2
3
4
5
6
7
8
910
Driving your vehicle
Anti-lock brake system (ABS)
The ABS system continuously sens-
es the speed of the wheels. If the
wheels are going to lock, the ABS
system repeatedly modulates the
hydraulic brake pressure to the
wheels.
When you apply your brakes under
conditions which may lock the
wheels, you may hear a “tik-tik’’
sound from the brakes, or feel a cor-
responding sensation in the brake
pedal. This is normal and it means
your ABS system is active.
In order to obtain the maximum ben-
efit from your ABS system in an
emergency situation, do not attempt
to modulate your brake pressure and
do not try to pump your brakes.
Press your brake pedal as hard as
possible or as hard as the situation
warrants and allow the ABS system
to control the force being delivered to
the brakes.
WARNING
- ABS Brakes
Your ABS is not a substitute for
good driving judgement. You
can still have an accident. In
fact, your ABS system will prob-
ably not be able to prevent an
accident in the following driving
conditions:
Dangerous driving, such as neglecting safety precautions,
speeding, or driving too close
to the vehicle in front of you.
Driving at high speed in situa- tions providing considerably
less traction, such as wet con-
ditions where hydroplaning
could occur.
(Continued)
(Continued)
Driving too fast on poor roadsurfaces. The ABS is
designed to improve maxi-
mum braking effectiveness on
typical highways and roads in
good condition. On poor road
surfaces in poor condition,
the ABS may actually reduce
braking effectiveness.
Page 151 of 322
429
1
2
3
4
5
6
7
8
910
Driving your vehicle
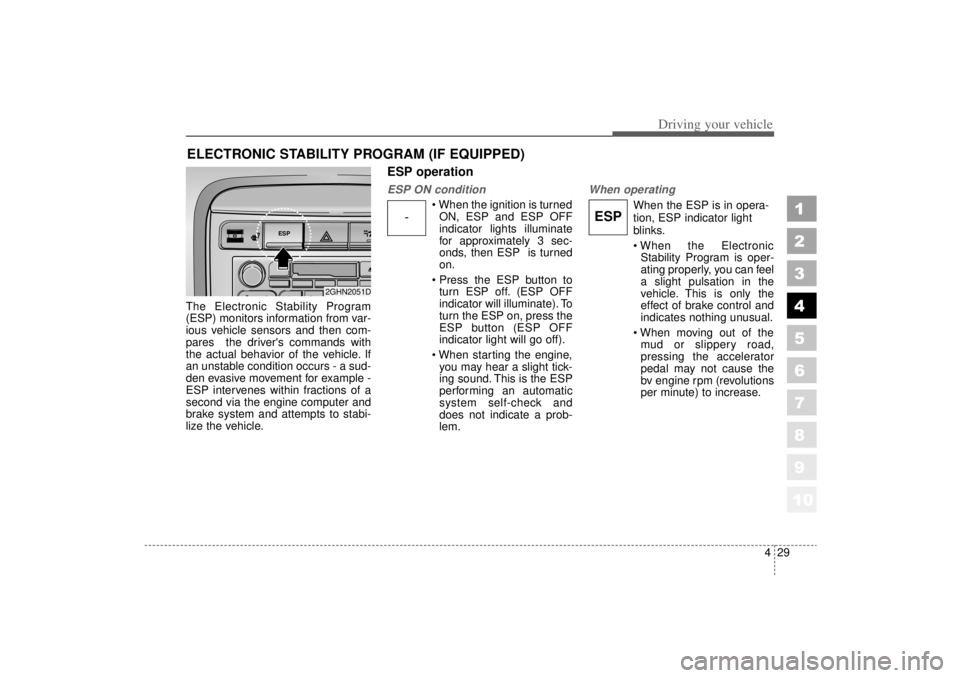
The Electronic Stability Program
(ESP) monitors information from var-
ious vehicle sensors and then com-
pares the driver's commands with
the actual behavior of the vehicle. If
an unstable condition occurs - a sud-
den evasive movement for example -
ESP intervenes within fractions of a
second via the engine computer and
brake system and attempts to stabi-
lize the vehicle.
ESP operationESP ON condition
When the ignition is turnedON, ESP and ESP OFF
indicator lights illuminate
for approximately 3 sec-
onds, then ESP is turned
on.
Press the ESP button to turn ESP off. (ESP OFF
indicator will illuminate). To
turn the ESP on, press the
ESP button (ESP OFF
indicator light will go off).
When starting the engine, you may hear a slight tick-
ing sound. This is the ESP
performing an automatic
system self-check and
does not indicate a prob-
lem.
When operating
When the ESP is in opera-
tion, ESP indicator light
blinks.
When the ElectronicStability Program is oper-
ating properly, you can feel
a slight pulsation in the
vehicle. This is only the
effect of brake control and
indicates nothing unusual.
When moving out of the mud or slippery road,
pressing the accelerator
pedal may not cause the
bv engine rpm (revolutions
per minute) to increase.
ELECTRONIC STABILITY PROGRAM (IF EQUIPPED)
-
ESP
ESP
2GHN2051D