2006 HYUNDAI TUCSON warning lights
[x] Cancel search: warning lightsPage 155 of 289
2
DRIVING YOUR HYUNDAI
4
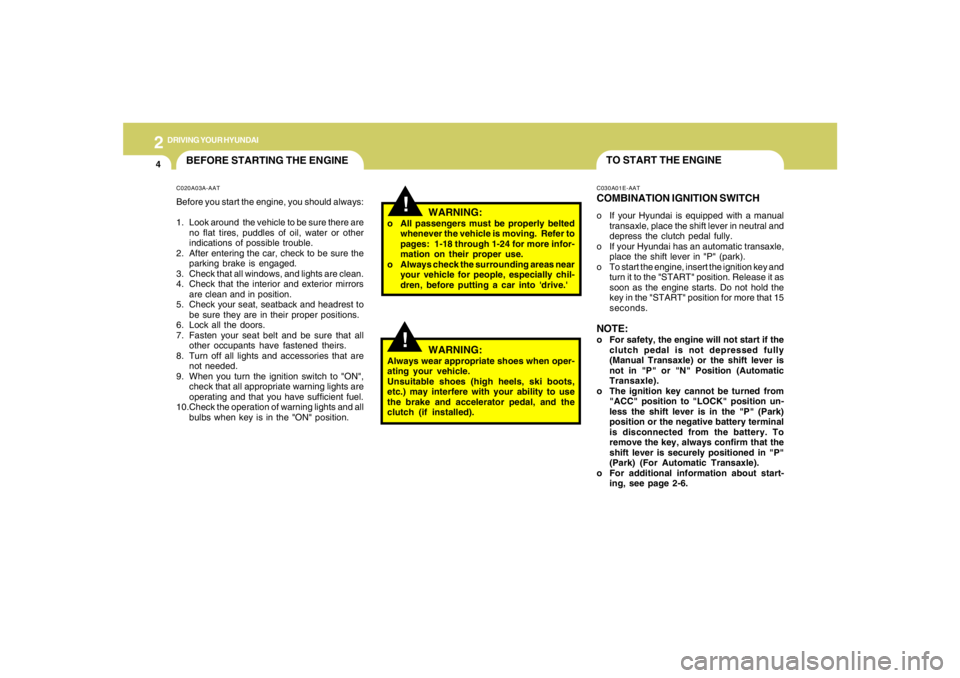
TO START THE ENGINEC030A01E-AATCOMBINATION IGNITION SWITCHo If your Hyundai is equipped with a manual
transaxle, place the shift lever in neutral and
depress the clutch pedal fully.
o If your Hyundai has an automatic transaxle,
place the shift lever in "P" (park).
o To start the engine, insert the ignition key and
turn it to the "START" position. Release it as
soon as the engine starts. Do not hold the
key in the "START" position for more that 15
seconds.NOTE:o For safety, the engine will not start if the
clutch pedal is not depressed fully
(Manual Transaxle) or the shift lever is
not in "P" or "N" Position (Automatic
Transaxle).
o The ignition key cannot be turned from
"ACC" position to "LOCK" position un-
less the shift lever is in the "P" (Park)
position or the negative battery terminal
is disconnected from the battery. To
remove the key, always confirm that the
shift lever is securely positioned in "P"
(Park) (For Automatic Transaxle).
o For additional information about start-
ing, see page 2-6.
BEFORE STARTING THE ENGINEC020A03A-AATBefore you start the engine, you should always:
1. Look around the vehicle to be sure there are
no flat tires, puddles of oil, water or other
indications of possible trouble.
2. After entering the car, check to be sure the
parking brake is engaged.
3. Check that all windows, and lights are clean.
4. Check that the interior and exterior mirrors
are clean and in position.
5. Check your seat, seatback and headrest to
be sure they are in their proper positions.
6. Lock all the doors.
7. Fasten your seat belt and be sure that all
other occupants have fastened theirs.
8. Turn off all lights and accessories that are
not needed.
9. When you turn the ignition switch to "ON",
check that all appropriate warning lights are
operating and that you have sufficient fuel.
10.Check the operation of warning lights and all
bulbs when key is in the "ON" position.
!
WARNING:
o All passengers must be properly belted
whenever the vehicle is moving. Refer to
pages: 1-18 through 1-24 for more infor-
mation on their proper use.
o Always check the surrounding areas near
your vehicle for people, especially chil-
dren, before putting a car into 'drive.'
!
WARNING:
Always wear appropriate shoes when oper-
ating your vehicle.
Unsuitable shoes (high heels, ski boots,
etc.) may interfere with your ability to use
the brake and accelerator pedal, and the
clutch (if installed).
Page 157 of 289
2
DRIVING YOUR HYUNDAI
6
!
4. Turn the ignition key to the "START" position
and release it when the engine starts.
After the engine has started, allow the engine
to run for 10 to 20 seconds prior to placing
the vehicle in gear.
The starter should not be operated for more
than 15 seconds at a time. Wait 15-30 sec-
onds between starting attempts to protect
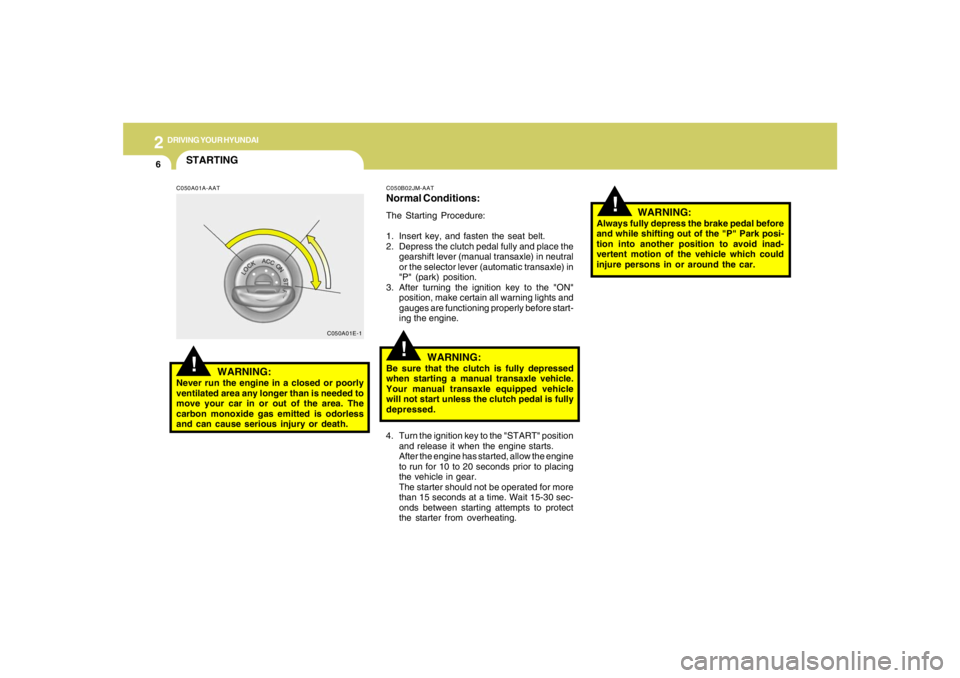
the starter from overheating.C050B02JM-AATNormal Conditions:The Starting Procedure:
1. Insert key, and fasten the seat belt.
2. Depress the clutch pedal fully and place the
gearshift lever (manual transaxle) in neutral
or the selector lever (automatic transaxle) in
"P" (park) position.
3. After turning the ignition key to the "ON"
position, make certain all warning lights and
gauges are functioning properly before start-
ing the engine.
WARNING:
Be sure that the clutch is fully depressed
when starting a manual transaxle vehicle.
Your manual transaxle equipped vehicle
will not start unless the clutch pedal is fully
depressed.
!
C050A01E-1
STARTING!
C050A01A-AAT
WARNING:
Never run the engine in a closed or poorly
ventilated area any longer than is needed to
move your car in or out of the area. The
carbon monoxide gas emitted is odorless
and can cause serious injury or death.
WARNING:
Always fully depress the brake pedal before
and while shifting out of the "P" Park posi-
tion into another position to avoid inad-
vertent motion of the vehicle which could
injure persons in or around the car.
Page 176 of 289
2
DRIVING YOUR HYUNDAI
25
!HIGHER SPEED MOTORINGC170A02A-AATPre-Trip Inspections1. Tires:
Adjust the tire inflation pressures to specifica-
tion. Low tire inflation pressures will result in
overheating and possible failure of the tires.
Avoid using worn or damaged tires which may
result in reduced traction or tire failure.NOTE:Never exceed the maximum tire inflation
pressure shown on the tires.
WARNING:
o Underinflated or overinflated tires can
cause poor handling, loss of vehicle
control, and sudden tire failure leading
to accidents, injuries, and even death.
Always check tires are properly inflated
before driving. Refer to pages 2-28 and
8-3 for proper tire pressures and further
information.
o Driving on tires with no or insufficient
tread is dangerous. Worn-out tires can
result in loss of vehicle control, colli-
sions, injury, and even death. Worn-out
tires should be replaced as soon as
possible and should never be used for
driving. Always check tire tread before
driving your car. Refer to 8-11 for further
information and tread limits.
USE OF LIGHTSC180A01A-AATCheck your lights regularly for correct opera-
tion and always keep them clean. When driving
during the day in conditions of poor visibility, it
is helpful to drive with headlights on low beam.
This enables you to be seen as well as to see. 2. Fuel, engine coolant and engine oil:
High speed travel consumes more fuel than
urban motoring. Do not forget to check both
engine coolant and engine oil.
3. Drive belt:
A loose or damaged drive belt may result in
overheating of the engine.
Page 179 of 289
2
DRIVING YOUR HYUNDAI
28
C190F01O-AATTrailer or Vehicle Towing Tips1. Before towing, check hitch and safety chain
connections as well as proper operation of
the trailer running lights, brake lights, and
turn signals.
2. Trailer towing requires more fuel than normal
conditions.
3. To maintain engine braking efficiency, do not
tow a trailer with the transaxle in fifth gear
(manual transaxle) or overdrive (automatic
transaxle).
4. Always secure items in the trailer to prevent
load shift while driving.
5. Check the condition and air pressure of all
tires on the trailer and your car. Low tire
pressure can seriously affect the handling.
Also check the spare tire.
6. The vehicle/trailer combination is more af-
fected by crosswind and buffeting.
When being passed by a large vehicle, keep
a constant speed and steer straight ahead.
If there is too much wind buffeting, slow down
to get out of the other vehicle's air turbulence.
7. When parking your car and trailer, especially
on a hill, be sure to follow all the normal
precautions. Turn your front wheel into the
curb, set the parking brake firmly, and put the
transaxle in 1st or Reverse (manual) or Park
(automatic). In addition, place wheel chocks
at each of the trailer's tires.8. If the trailer has electric brakes, start your
vehicle and trailer moving, and then apply the
trailer brake controller by hand to be sure the
brakes are working. This lets you check
your electrical connection at the same time.
9. During your trip, check occasionally to be
sure that the load is secure, and that the
lights and any trailer brakes are still working.
10.Avoid jerky starts, sudden acceleration or
sudden stops.
11.Avoid sharp turns and rapid lane changes.
12.Avoid holding the brake pedal down too long
or too frequently. This could cause the brakes
to overheat, resulting in reduced braking
efficiency.
13.When going down a hill, shift into a lower gear
and use the engine braking effect.
When ascending a long grade, downshift the
transaxle to a lower gear and reduce speed
to reduce chances of engine overloading
and/or overheating.
14.If you have to stop while going uphill, do not
hold the vehicle in place by pressing on the
accelerator. This can cause the automatic
transaxle to overheat. Use the parking brake
or footbrake.
15.If the transaxle shifts frequently while going
up a hill, shift down one gear.
NOTE:When towing check transaxle fluid more
frequently.
!
WARNING:
o Improperly loading your vehicle and
trailer can seriously affect its steering
and braking performance causing a
crash which could cause serious injury
or death.
o Towing a trailer affected vehicle han-
dling and braking.
o Drive more slowly when towing a trailer
and allow more distance when braking.
o Be careful when driving in slippery and
windy conditions.
o Be careful when turning and while driv-
ing up and down hills.
o Do not exceed 45 mph or the posted
towing speed limit, whichever is lower.
Page 188 of 289
3
WHAT TO DO IN AN EMERGENCY
3
JUMP STARTING!
o If you should accidentally get acid on your
skin or in your eyes, immediately remove
any contaminated clothing and flush the area
with clear water for at least 15 minutes. Then
promptly obtain medical attention. If you
must be transported to an emergency facil-
ity, continue to apply water to the affected
area with a sponge or cloth.
o The gas produced by the battery during the
jump-start operation is highly explosive. Do
not smoke or allow a spark or an open flame
in the vicinity.
o The battery being used to provide the jump
start must be 12-volt. If you cannot deter-
mine that it is a 12-volt battery, do not attempt
to use it for the jump start.
o To jump start a car with a discharged battery,
follow this procedure exactly:
1. If the booster battery is installed in another
vehicle, be sure the two vehicles are not
touching.
2. Turn off all unnecessary lights and acces-
sories in both vehicles.
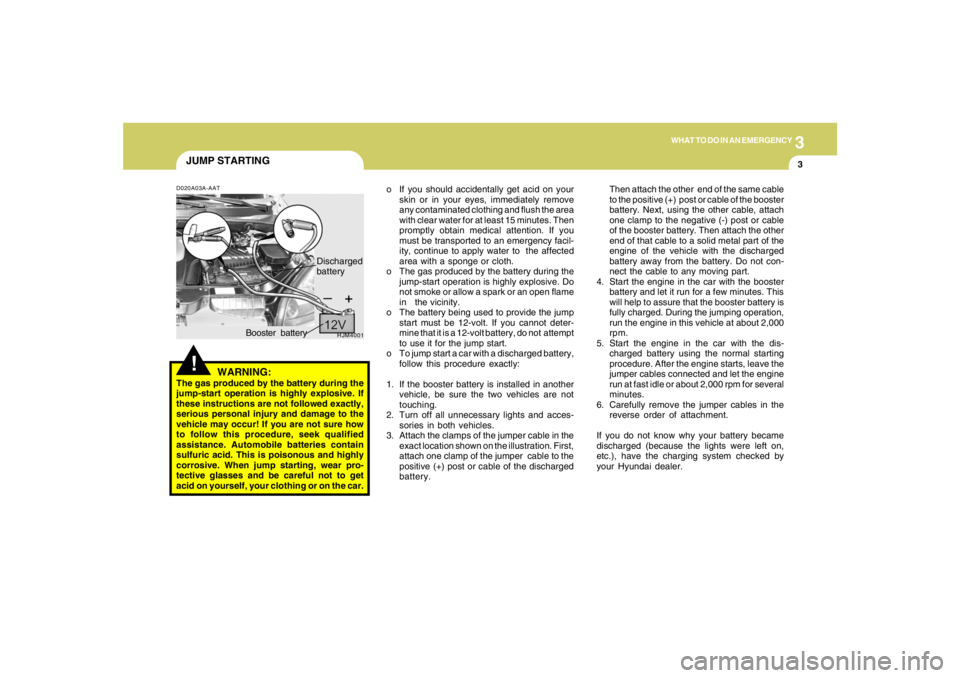
3. Attach the clamps of the jumper cable in the
exact location shown on the illustration. First,
attach one clamp of the jumper cable to the
positive (+) post or cable of the discharged
battery.Then attach the other end of the same cable
to the positive (+) post or cable of the booster
battery. Next, using the other cable, attach
one clamp to the negative (-) post or cable
of the booster battery. Then attach the other
end of that cable to a solid metal part of the
engine of the vehicle with the discharged
battery away from the battery. Do not con-
nect the cable to any moving part.
4. Start the engine in the car with the booster
battery and let it run for a few minutes. This
will help to assure that the booster battery is
fully charged. During the jumping operation,
run the engine in this vehicle at about 2,000
rpm.
5. Start the engine in the car with the dis-
charged battery using the normal starting
procedure. After the engine starts, leave the
jumper cables connected and let the engine
run at fast idle or about 2,000 rpm for several
minutes.
6. Carefully remove the jumper cables in the
reverse order of attachment.
If you do not know why your battery became
discharged (because the lights were left on,
etc.), have the charging system checked by
your Hyundai dealer.
D020A03A-AAT
WARNING:
The gas produced by the battery during the
jump-start operation is highly explosive. If
these instructions are not followed exactly,
serious personal injury and damage to the
vehicle may occur! If you are not sure how
to follow this procedure, seek qualified
assistance. Automobile batteries contain
sulfuric acid. This is poisonous and highly
corrosive. When jump starting, wear pro-
tective glasses and be careful not to get
acid on yourself, your clothing or on the car.
HJM4001
Booster batteryDischarged
battery
Page 245 of 289
6
DO-IT-YOURSELF MAINTENANCE
26
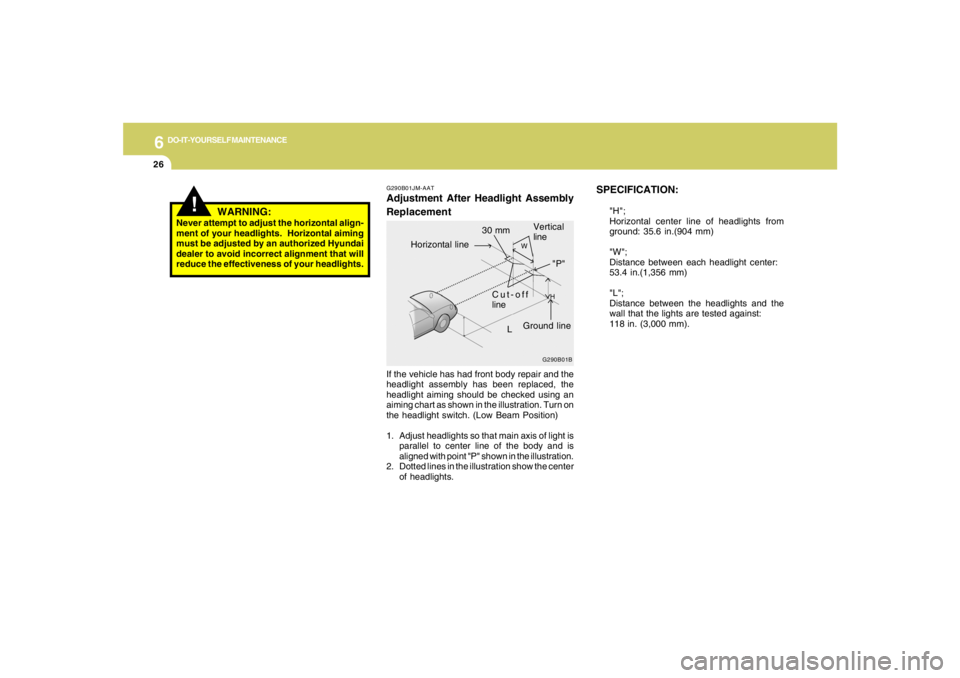
SPECIFICATION:
"H";
Horizontal center line of headlights from
ground: 35.6 in.(904 mm)
"W";
Distance between each headlight center:
53.4 in.(1,356 mm)
"L";
Distance between the headlights and the
wall that the lights are tested against:
118 in. (3,000 mm).
G290B01JM-AATAdjustment After Headlight Assembly
ReplacementIf the vehicle has had front body repair and the
headlight assembly has been replaced, the
headlight aiming should be checked using an
aiming chart as shown in the illustration. Turn on
the headlight switch. (Low Beam Position)
1. Adjust headlights so that main axis of light is
parallel to center line of the body and is
aligned with point "P" shown in the illustration.
2. Dotted lines in the illustration show the center
of headlights.
G290B01B
L
W
H
Cut-off
line
Ground line
"P" Horizontal line
Vertical
line
30 mm
!
WARNING:
Never attempt to adjust the horizontal align-
ment of your headlights. Horizontal aiming
must be adjusted by an authorized Hyundai
dealer to avoid incorrect alignment that will
reduce the effectiveness of your headlights.
Page 285 of 289
10
INDEX
4
H
Hazard Warning System ..................................................................1-62
Heating and Cooling Control .............................................................1-88
Heating and Ventilation
Air flow control..............................................................................1-90
Air intake control switch ...............................................................1-89
Bi-level heating.............................................................................1-94
Defrosting / Defogging .................................................................1-94
Fan speed control (Blower control) .............................................1-89
Temperature control....................................................................1-93
High-Mounted Rear Stop Light .........................................................1-80
Hood Release....................................................................................1-82
Horn.................................................................................................1-85
How to Use Luggage Room.............................................................1-77
I
Ignition Switch ...................................................................................... 2-5
Instrument Cluster and Indicator Lights...........................................1-46
Instrument Panel Light Control (Rheostat).......................................1-63
Interior Light.......................................................................................1-69
J
Jump Starting...................................................................................... 3-3
K
Keys................................................................................................... 1-3
If you lose your keys ...................................................................3-19
Positions......................................................................................... 2-5L
Light Bulbs Replacement..................................................................6-27
Luggage Compartment Light ............................................................1-76
Luggage Net ......................................................................................1-79
M
Maintenance Intervals
Explanation of scheduled maintenance items ............................... 5-7
Maintenance under severe usage conditions............................... 5-6
Scheduled maintenance................................................................ 5-4
Service requirements.................................................................... 5-2
Mirrors
Automatic Dimming Rear View Mirror With Compass ................1-73
Day-night inside rearview mirror .................................................1-73
Outside rearview mirror ...............................................................1-71
Outside rearview mirror Heater ..................................................
1-72
O
Odometer / Trip Odometer ...............................................................1-54
Occupant Classification System ......................................................1-38
P
Parking Brake....................................................................................1-74
Power Outlet......................................................................................1-64
Power Steering Fluid Level ...............................................................6-24
Page 287 of 289
10
INDEX
6
Towing
A trailer (or vehicle)......................................................................2-26
Emergency...................................................................................3-18
If your car must be towed ............................................................3-16
Traction Control System ...................................................................2-13
Transaxle
Automatic........................................................................................ 2-9
Automatic transaxle fluid checking ..............................................6-12
Manual............................................................................................ 2-7
Manual transaxle oil checking.....................................................6-11
Trip Computer...................................................................................1-55
V
Vehicle Identification Number............................................................. 8-2
Vechcle Load Limit ............................................................................2-29
Vehicle Specifications
Engine ............................................................................................. 9-3
Lubrication chart .................................................................. 9-4 ~ 9-5
Measurement................................................................................. 9-2
W
Warning and Indicator Lights ............................................................1-48
Windows
Power...........................................................................................1-11
Windshield Wiper and Washer ..........................................................1-59
Rear Window wiper and washer switch......................................1-61
Windshield Wiper Blade De-icer .......................................................1-62
Windshield Wiper Blades ..................................................................6-10
Winter Driving....................................................................................2-23