2006 Hyundai Tiburon warning
[x] Cancel search: warningPage 208 of 266
6
DO-IT-YOURSELF MAINTENANCE
14
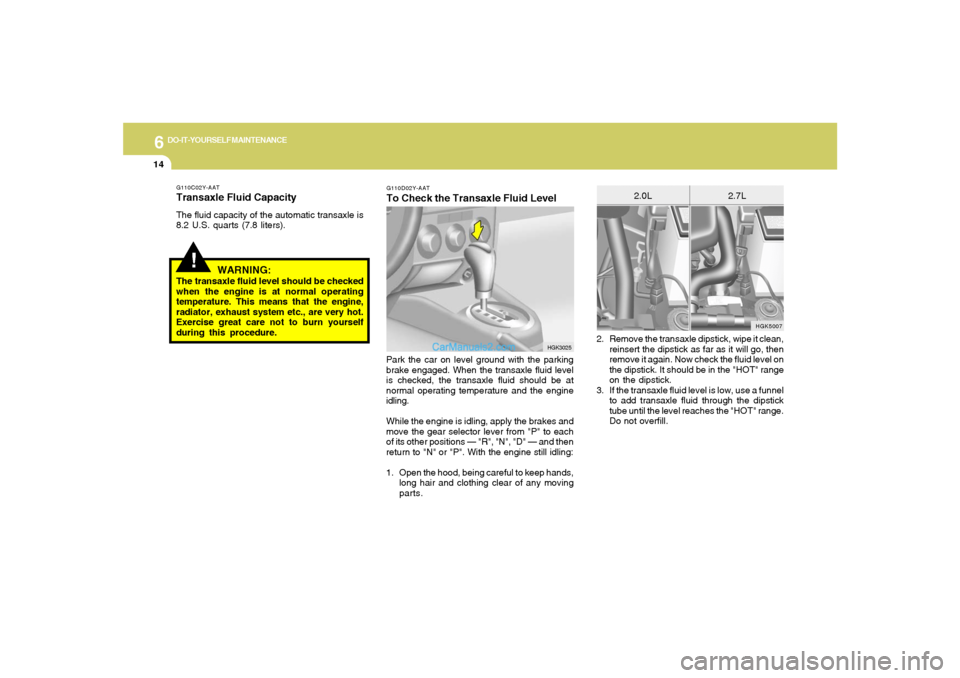
2. Remove the transaxle dipstick, wipe it clean,
reinsert the dipstick as far as it will go, then
remove it again. Now check the fluid level on
the dipstick. It should be in the "HOT" range
on the dipstick.
3. If the transaxle fluid level is low, use a funnel
to add transaxle fluid through the dipstick
tube until the level reaches the "HOT" range.
Do not overfill.
G110D02Y-AATTo Check the Transaxle Fluid LevelPark the car on level ground with the parking
brake engaged. When the transaxle fluid level
is checked, the transaxle fluid should be at
normal operating temperature and the engine
idling.
While the engine is idling, apply the brakes and
move the gear selector lever from "P" to each
of its other positions — "R", "N", "D" — and then
return to "N" or "P". With the engine still idling:
1. Open the hood, being careful to keep hands,
long hair and clothing clear of any moving
parts.
HGK3025HGK5007
2.0L 2.7L
!
G110C02Y-AATTransaxle Fluid CapacityThe fluid capacity of the automatic transaxle is
8.2 U.S. quarts (7.8 liters).
WARNING:
The transaxle fluid level should be checked
when the engine is at normal operating
temperature. This means that the engine,
radiator, exhaust system etc., are very hot.
Exercise great care not to burn yourself
during this procedure.
Page 209 of 266
6
DO-IT-YOURSELF MAINTENANCE
15
!
HGK5008
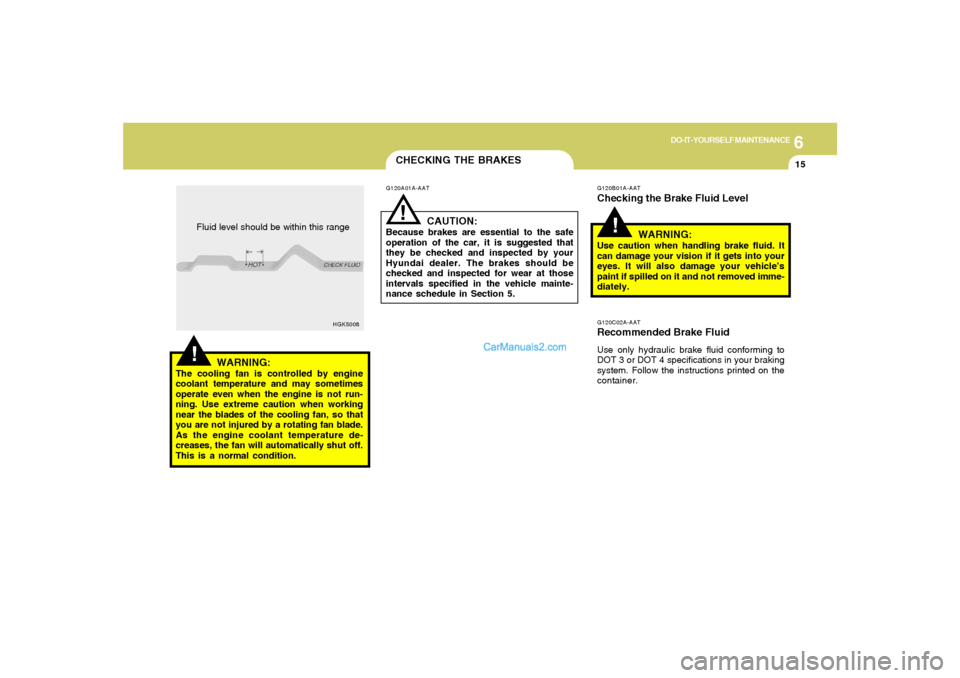
Fluid level should be within this range
WARNING:
The cooling fan is controlled by engine
coolant temperature and may sometimes
operate even when the engine is not run-
ning. Use extreme caution when working
near the blades of the cooling fan, so that
you are not injured by a rotating fan blade.
As the engine coolant temperature de-
creases, the fan will automatically shut off.
This is a normal condition.
CHECKING THE BRAKESG120A01A-AAT
CAUTION:
Because brakes are essential to the safe
operation of the car, it is suggested that
they be checked and inspected by your
Hyundai dealer. The brakes should be
checked and inspected for wear at those
intervals specified in the vehicle mainte-
nance schedule in Section 5.
!
!
G120B01A-AATChecking the Brake Fluid Level
WARNING:Use caution when handling brake fluid. It
can damage your vision if it gets into your
eyes. It will also damage your vehicle’s
paint if spilled on it and not removed imme-
diately.G120C02A-AATRecommended Brake FluidUse only hydraulic brake fluid conforming to
DOT 3 or DOT 4 specifications in your braking
system. Follow the instructions printed on the
container.
Page 210 of 266
6
DO-IT-YOURSELF MAINTENANCE
16
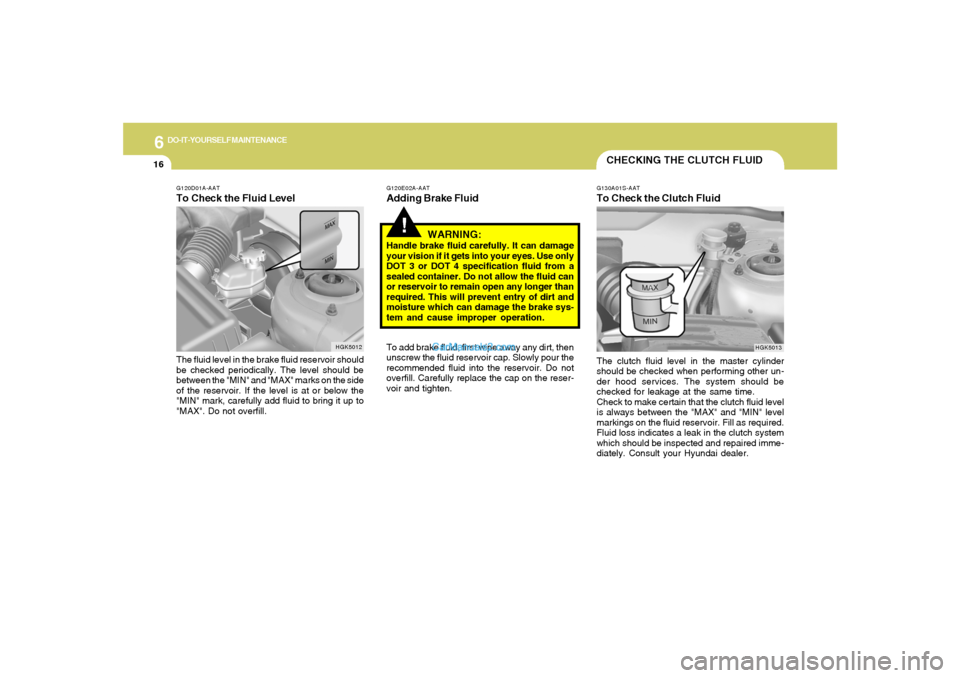
CHECKING THE CLUTCH FLUIDG130A01S-AATTo Check the Clutch FluidThe clutch fluid level in the master cylinder
should be checked when performing other un-
der hood services. The system should be
checked for leakage at the same time.
Check to make certain that the clutch fluid level
is always between the "MAX" and "MIN" level
markings on the fluid reservoir. Fill as required.
Fluid loss indicates a leak in the clutch system
which should be inspected and repaired imme-
diately. Consult your Hyundai dealer.
HGK5013
G120D01A-AATTo Check the Fluid LevelThe fluid level in the brake fluid reservoir should
be checked periodically. The level should be
between the "MIN" and "MAX" marks on the side
of the reservoir. If the level is at or below the
"MIN" mark, carefully add fluid to bring it up to
"MAX". Do not overfill.
HGK5012
To add brake fluid, first wipe away any dirt, then
unscrew the fluid reservoir cap. Slowly pour the
recommended fluid into the reservoir. Do not
overfill. Carefully replace the cap on the reser-
voir and tighten.G120E02A-AATAdding Brake Fluid
!
WARNING:
Handle brake fluid carefully. It can damage
your vision if it gets into your eyes. Use only
DOT 3 or DOT 4 specification fluid from a
sealed container. Do not allow the fluid can
or reservoir to remain open any longer than
required. This will prevent entry of dirt and
moisture which can damage the brake sys-
tem and cause improper operation.
Page 211 of 266
6
DO-IT-YOURSELF MAINTENANCE
17
!
G130B02A-AATTo Replace the FluidRecommended brake fluid conforming to DOT
3 or DOT 4 specification should be used. The
reservoir cap must be fully tightened to avoid
contamination from foreign matter or moisture.NOTE:Do not allow any other liquids to contami-
nate the brake fluid. Seal damage will result.
WARNING:
Use caution when handling brake fluid. It
can damage your vision if you get it in your
eyes. It will also damage your vehicle’s
paint if spilled on it and not removed imme-
diately.
AIR CONDITIONING CAREG140A01A-AATKeeping the Condenser CleanThe air conditioning condenser (and engine
radiator) should be checked periodically for
accumulation of dirt, dead insects, leaves, etc.
These can interfere with maximum cooling ef-
ficiency. When removing such accumulations,
brush or hose them away carefully to avoid
bending the cooling fins.
!
G140C01A-AATLubricationTo lubricate the compressor and the seals in the
system, the air conditioning should be run for at
least 10 minutes each week. This is particularly
important during cool weather when the air
conditioning system is not otherwise in use.G140B01A-AATChecking the Air Conditioning Opera-
tion1. Start the engine and let it run at a fast idle for
several minutes with the air conditioning set
at the maximum cold setting.
2. If the air coming out of the in-dash vents is
not cold, have the air conditioning system
inspected by your Hyundai dealer.
CAUTION:
Running the air conditioning system for
extended periods of time with a low refrig-
erant level may damage the compressor.
Page 217 of 266

6
DO-IT-YOURSELF MAINTENANCE
23
!
CAUTION:
A burned-out fuse indicates that there is a
problem in the electrical circuit. If you re-
place a fuse and it blows as soon as the
accessory is turned on, the problem is
serious and should be referred to a Hyundai
dealer for diagnosis and repair. Never re-
place a fuse with anything except a fuse
with the same or a lower amperage rating.
A higher capacity fuse could cause damage
and create a fire hazard.
G200B02L
GoodBurned out
1. Turn off the ignition and all other switches.
2. Open the fuse box and examine each fuse.
Remove each fuse by pulling it toward you
(a small "fuse puller" tool is contained in the
fuse box to simplify this operation).
3. Be sure to check all other fuses, even if you
find one that appears to have burned out.
HXDFL1026-1
4. Replace the blown fuse by pressing a new
fuse of the same rating into place. The fuse
should be a snug fit. If it is not, have the fuse
clip repaired or replaced by a Hyundai dealer.
If you do not have a spare fuse, you may be
able to borrow a fuse of the same or lower
rating from an accessory you can tempo-
rarily get along without (the radio or cigarette
lighter, for example). Always remember to
replace the borrowed fuse.
NOTE:See page 6-39 for the fuse panel descrip-
tions.
CHECKING THE BATTERY!
G210A01A-AAT
WARNING:
Batteries can be dangerous! When working
with batteries, carefully observe the follow-
ing precautions to avoid serious injuries.
The fluid in the battery contains a strong solution
of sulfuric acid, which is poisonous and highly
corrosive. Be careful not to spill it on yourself or
the car. If you do spill battery fluid on yourself,
immediately do the following:
D010B01GK
Page 218 of 266
6
DO-IT-YOURSELF MAINTENANCE
24
!
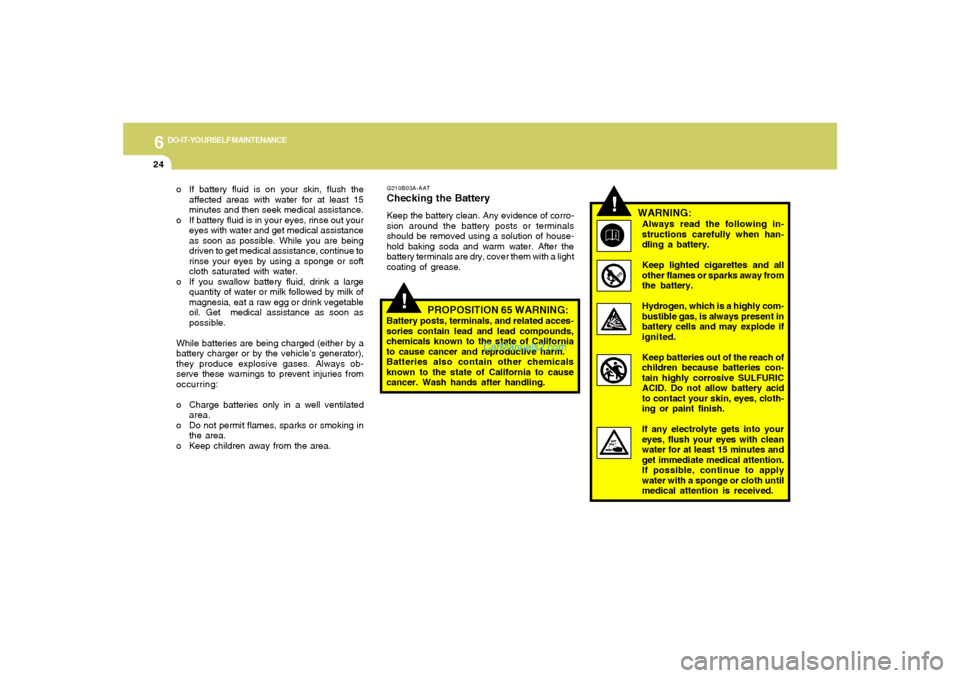
WARNING:Always read the following in-
structions carefully when han-
dling a battery.
Keep lighted cigarettes and all
other flames or sparks away from
the battery.
Hydrogen, which is a highly com-
bustible gas, is always present in
battery cells and may explode if
ignited.
Keep batteries out of the reach of
children because batteries con-
tain highly corrosive SULFURIC
ACID. Do not allow battery acid
to contact your skin, eyes, cloth-
ing or paint finish.
If any electrolyte gets into your
eyes, flush your eyes with clean
water for at least 15 minutes and
get immediate medical attention.
If possible, continue to apply
water with a sponge or cloth until
medical attention is received.
o If battery fluid is on your skin, flush the
affected areas with water for at least 15
minutes and then seek medical assistance.
o If battery fluid is in your eyes, rinse out your
eyes with water and get medical assistance
as soon as possible. While you are being
driven to get medical assistance, continue to
rinse your eyes by using a sponge or soft
cloth saturated with water.
o If you swallow battery fluid, drink a large
quantity of water or milk followed by milk of
magnesia, eat a raw egg or drink vegetable
oil. Get medical assistance as soon as
possible.
While batteries are being charged (either by a
battery charger or by the vehicle’s generator),
they produce explosive gases. Always ob-
serve these warnings to prevent injuries from
occurring:
o Charge batteries only in a well ventilated
area.
o Do not permit flames, sparks or smoking in
the area.
o Keep children away from the area.
!
G210B03A-AATChecking the BatteryKeep the battery clean. Any evidence of corro-
sion around the battery posts or terminals
should be removed using a solution of house-
hold baking soda and warm water. After the
battery terminals are dry, cover them with a light
coating of grease.
PROPOSITION 65 WARNING:
Battery posts, terminals, and related acces-
sories contain lead and lead compounds,
chemicals known to the state of California
to cause cancer and reproductive harm.
Batteries also contain other chemicals
known to the state of California to cause
cancer. Wash hands after handling.
Page 219 of 266
6
DO-IT-YOURSELF MAINTENANCE
25
!
CHECKING ELECTRIC COOLING
FANS!
G220A01A-AAT
WARNING:
The cooling fan is controlled by engine
coolant temperature and may sometimes
operate even when the engine is not run-
ning. Use extreme caution when working
near the blades of the coolant fan, so that
you are not injured by a rotating fan blade.
As the engine coolant temperature de-
creases the fan will automatically shut off.
This is a normal condition. If electrolyte gets on your skin,
thoroughly wash the contacted
area.
If you feel a pain or a burning
sensation, get medical attention
immediately.
Wear eye protection when charg-
ing or working near a battery.
Always provide ventilation when
working in an enclosed space.
o When lifting a plastic-cased battery, ex-
cessive pressure on the case may cause
battery acid to leak, resulting in personal
injury. Lift with a battery carrier or with
your hands on opposite corners.
o Never attempt to charge the battery when
the battery cables are connected.
o The electrical ignition system works with
high voltage.
Never touch these components with the
engine running or the ignition switched
on.
WARNING:
G220C01A-AATChecking Condenser Cooling FanThe condenser coolant fan should come on
automatically whenever the air conditioning is in
operation.G220B01A-AATChecking Engine Cooling FanThe engine cooling fan should come on auto-
matically if the engine coolant temperature is
high.
Page 221 of 266

6
DO-IT-YOURSELF MAINTENANCE
27
G290B01GK-AATAdjustment After Headlight Assembly
ReplacementIf the vehicle has had front body repair and the
headlight assembly has been replaced, the
headlight aiming should be checked using an
aiming screen as shown in the illustration. Turn
on the headlight switch.
1. Adjust headlights so that main axis of light is
parallel to center line of the body and is
aligned with point "P" shown in the illustration.
2. Dotted lines in the illustration show the center
of headlights.
G290B01GK
L
W
H
H
Cut-off line
Ground line
"P"
Horizontal line
Vertical line
0.827 in. (21 mm)
!
1. Keep all tires inflated to the correct pressure.
2. Place the vehicle on level ground and press
the front bumper & rear bumper down sev-
eral times. Place vehicle at a distance of 118
in. (3m) from the test wall.
3. See that the vehicle is unloaded (except for
full levels of coolant, engine oil and fuel, and
spare tire, jack, and tools).
4. Clean the head light lenses and turn on the
headlights.
5. Open the hood.
6. Draw the vertical line (through the center of
each headlight beam pattern) and the hori-
zontal line (through the center of each head-
light beam pattern) on the aiming screen.
And then, draw the parallel line at 0.827 in. (21
mm) under the horizontal line.
7. Adjust each cut-off line of the low beam to the
parallel line with a phillips screwdriver -
VERTICAL AIMING.
WARNING:
Never attempt to adjust the horizontal align-
ment of your headlights. Horizontal aiming
must be adjusted by an authorized Hyundai
dealer to avoid incorrect alignment that will
reduce the effectiveness of your headlights.
SPECIFICATION:"H"
Horizontal center line of headlights from ground:
Low Beam: 26.7 in. (679mm)
High Beam: 26.5 in. (672mm)
"W"
Distance between each headlight center :
Low Beam: 47.3 in. (1,202mm)
High Beam: 38.0 in. (966mm)
"L"
Distance between the headlights and the wall
that the lights are tested against : 118 in. (3,000
mm)