2006 Hyundai Terracan liquid
[x] Cancel search: liquidPage 11 of 539

1. Multi-Function Light Switch/ Front Fog Light Switch
2. Instrument Cluster
3. Horn and Driver's Airbag (If Installed)
4. Rear Fog Light Switch (If Installed)
5. Windshield Wiper/Washer Switch
6. Panel Brightness Control Knob (Rheostat Switch)(If Installed)
7. Hazard Warning Switch
8. Cruise Control Main Switch (If Installed)
9. Headlight Leveling Switch (If Installed)
10. Audio System (If Installed)
11. Heating/Air Conditioning Control Panel
12. Glove Box
13. Passenger's Airbag (If Installed)
14. Hood Release Lever
CAUTION:
When installing a container of liquid air freshener inside the vehicle, do not place it near theinstrument cluster nor on the instrument panel surface. If there is any leakage from the air freshener onto these areas (Instrument cluster, instrument panel or air ventilator), it maydamage these parts. If the liquid from air freshener does leak onto these areas, wash them with water immediately.
! 15. Multi Box
16. Steering Wheel Tilt Lever (If Installed)
17. Remote Fuel-Filler Lid Release Lever
18. Cruise Control Switch (If Installed)
19. Cigarette Lighter/ Front Ashtray
20. Coin Holder
21. Shift Lever
22. Seat Warmer Switch (If Installed)
23. Front Power Outlet
24. Transfer Shift Knob
25. Parking Brake
26. Front Drink Holder
27. Rear Power Outlet
28. Rear Drink Holder
29. Rear Ashtray
Page 13 of 539

CAUTION:
When installing a container of liquid air freshener inside the vehicle, do not place it near the instrument cluster nor on the instrument panel surface. If there is any leakage from the air freshener onto these areas (Instrument cluster, instrument panel or air ventilator), it may damage these parts. If the liquid from air freshener does leak onto these areas, wash themwith water immediately.!
1. Passenger's Airbag (If Installed)
2. Glove Box
3. Heating/Air Conditioning Control Panel
4. Audio System (If Installed)
5. Headlight Leveling Switch (If Installed)
6. Cruise Control Main Switch (If Installed)
7. Hazard Warning Switch
8. Panel Brightness Control Knob (Rheostat Switch)
(If Installed)
9. Windshield Wiper/Washer Switch
10. Rear Fog Light Switch (If Installed)
11. Horn and Driver's Airbag (If Installed)
12. Instrument Cluster
13. Multi-Function Light Switch/ Front Fog Light Switch
14. Rear Ashtray 15. Rear Drink Holder
16. Rear Power Outlet
17. Front Drink Holder
18. Parking Brake
19. Transfer Shift Knob
20. Front Power Outlet
21. Seat Warmer Switch (If Installed)
22. Shift Lever
23. Coin Holder
24. Cigarette Lighter/ Front Ashtray
25. Steering Wheel Tilt Lever (If Installed)
26. Cruise Control Switch (If Installed)
27. Remote Fuel-Filler Lid Release Lever
28. Multi Box
29. Hood Release Lever
Page 29 of 539
1
FEATURES OF YOUR HYUNDAI
15
!
After completion of the step above, the turn signal lights will blink twice toindicate that the system is disarmed. NOTE: If any door, tail gate or engine hood is not opened within 30 seconds,the system will be rearmed.
CAUTION:
Only the transmitter can disarm thearmed stage. If the transmitter does not disarm the system, it is neces- sary to take the following steps;
1. Unlock the door with the key, which will cause the alarm to be activated.
2. Insert the key in the ignition key
cylinder and turn the ignition keyto "ON" position.
3. Wait for 30 seconds. After completing the steps above, the system will be disarmed. B070F02A-GAT Keyless Entry System (If Installed) Locking doors
1. Close all doors.
2. Push the "LOCK" button on the trans-
mitter.
3. At the same time all doors lock, the
turn signal lights will blink once toindicate that the system is armed.
Unlocking doors
1. Push the "UNLOCK" button on the transmitter.
2. At the same time all doors unlock,
the turn signal lights will blink twice to indicate that the system is dis- armed.
NOTE: The transmitter will not work if any of following occur:
- The ignition key is in ignition switch.
- You exceed the operating distance
limit (10 m).
- The battery in the transmitter is weak. - Other vehicles or objects may be
blocking the signal.
- The weather is extremely cold.
- The transmitter is close to a radio transmitter such as a radio station or an airport which can interfere with normal operation of the trans- mitter.
When the transmitter does not work correctly, open and close the door with the ignition key. If you have aproblem with the transmitter, con- tact an authorized Hyundai Dealer. NOTE: Keep the transmitter away from wa- ter or any liquid. If the keyless entry system is inoperative due to expo- sure to water or liquids, it will not becovered by your manufacturer ve- hicle warranty.
Page 65 of 539
1
FEATURES OF YOUR HYUNDAI
51
!WARNING:
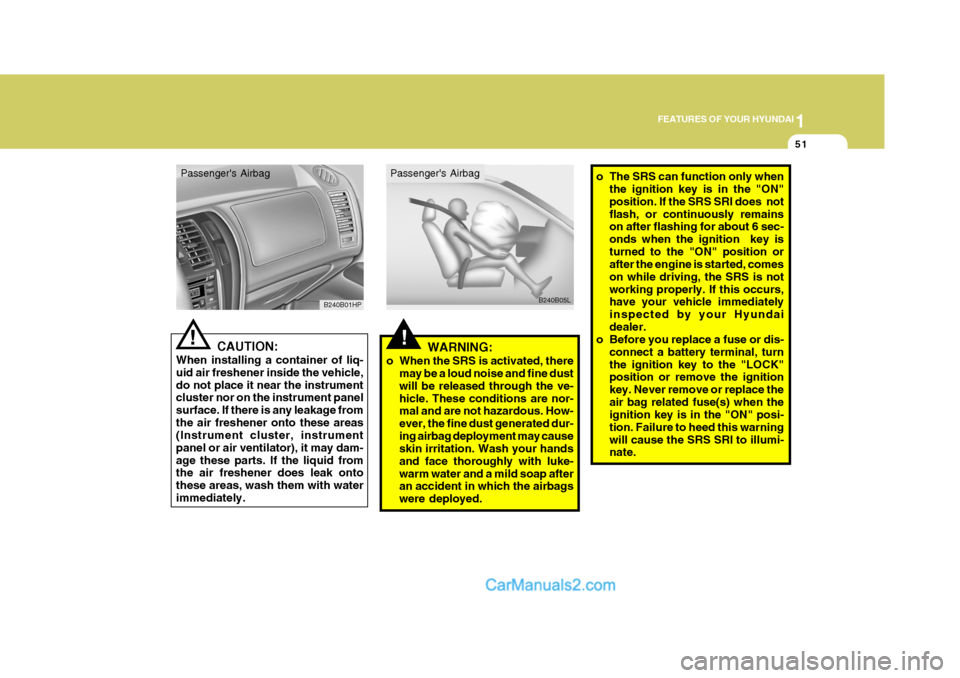
o When the SRS is activated, there may be a loud noise and fine dust will be released through the ve-hicle. These conditions are nor- mal and are not hazardous. How- ever, the fine dust generated dur-ing airbag deployment may cause skin irritation. Wash your hands and face thoroughly with luke-warm water and a mild soap after an accident in which the airbags were deployed. o The SRS can function only when
the ignition key is in the "ON"position. If the SRS SRI does notflash, or continuously remains on after flashing for about 6 sec- onds when the ignition key isturned to the "ON" position or after the engine is started, comes on while driving, the SRS is notworking properly. If this occurs, have your vehicle immediately inspected by your Hyundaidealer.
o Before you replace a fuse or dis-
connect a battery terminal, turnthe ignition key to the "LOCK" position or remove the ignition key. Never remove or replace theair bag related fuse(s) when the ignition key is in the "ON" posi- tion. Failure to heed this warningwill cause the SRS SRI to illumi- nate.! CAUTION:
When installing a container of liq- uid air freshener inside the vehicle,do not place it near the instrument cluster nor on the instrument panel surface. If there is any leakage fromthe air freshener onto these areas (Instrument cluster, instrument panel or air ventilator), it may dam-age these parts. If the liquid from the air freshener does leak onto these areas, wash them with waterimmediately. B240B01HP
B240B05L
Passenger's Airbag Passenger's Airbag
Page 95 of 539

1
FEATURES OF YOUR HYUNDAI
81ASHTRAY
B430A01HP-GAT Front Ashtray The front ashtray may be opened by pushing and releasing the ashtray/ciga- rette lighter door at its top edge.To remove the ashtray in order to clean it, the metal ash receptacle should be removed from the ashtray door. Donot attempt to remove the entire ash- tray door assembly, or damage will result. Instead, lift the metal ash re-ceptacle upward and pull it out. To reinstall it, place it in the proper posi- tion and press it down and forward toreengage the ash receptacle rear lip in the ashtray door. The ashtray light will only illuminate when the exterior bodylights are switched on. HHP2167
B440A01E-AAT Rear Ashtray The rear ashtray may be opened by pulling it out by its top edge. To remove the ashtray to empty or clean it, pressdown on the spring-loaded tab inside the ashtray and lift the ashtray upward and pull it all the way out.
HHP2168DRINK HOLDER
!
B450A02O-GAT Front Drink Holder The front drink holder is located on the main console for holding cups or cans.
WARNING:
o Use caution when using the drink holders. A spilled beverage thatis very hot can injure you or yourpassengers. Spilled liquids can damage interior trim and electri- cal components.
o Do not place objects other than cups or cans in the drink holder.Such objects can be thrown outin the event of a sudden stop or an accident, possibly injuring the passengers in the vehicle. HHP2177
Page 96 of 539

1FEATURES OF YOUR HYUNDAI
82
!
B450B01HP-GAT Rear Drink Holder (Type B) (If Installed) The rear drink holder is located in the rear seat arm rest for holding cups orcans. The rear drink holder can be used by opening the lid of arm rest.
WARNING:
Do not place objects other thancups or cans in the drink holder. Such objects can be thrown out inthe event of a sudden stop or an accident, possibly injuring the pas- sengers in the vehicle. B450B01HP
!
B450C01HP-GAT Rear Drink Holder (Type A) The rear drink holder is located behind the center console for holding cups or cans. The rear drink holder can beused by pressing the locking release button.
HHP2178WARNING:
o Use caution when using the drink holders. A spilled beverage thatis very hot can injure you or your passengers. Spilled liquids candamage interior trim and electri- cal components.
o Do not place objects other than cups or cans in the drink holder.Such objects can be thrown out in the event of a sudden stop oran accident, possibly injuring the passengers in the vehicle.
CAUTION:
When not in use or before folding the second seat, place the rear drink holder in closed position to pre-vent it from being broken.!
Page 249 of 539

6 DO-IT-YOURSELF MAINTENANCE
22
!
G120E02A-AAT
Adding Brake Fluid
WARNING:
Handle brake fluid carefully. It can damage your vision if it gets into your eyes. Use only DOT 3 or DOT4 specification fluid from a sealed container. Do not allow the fluid can or reservoir to remain openany longer than required. This will prevent entry of dirt and moisture which can damage the brake sys-tem and cause improper opera- tion.
To add brake fluid, first wipe away any
dirt, then unscrew the fluid reservoircap. Slowly pour the recommended fluid into the reservoir. Do not overfill.Carefully replace the cap on the reser- voir and tighten.
CHECKING THE CLUTCH FLUID
!
G130A01A-AAT
To Check the Clutch Fluid The clutch fluid level in the master
cylinder should be checked when performing other under hood services. The system should be checked for leakage at the same time. Check tomake certain that the clutch fluid level is always between the "MAX" and "MIN" level markings on the fluid res-ervoir. Fill as required. Fluid loss indi- cates a leak in the clutch system which should be inspected and re-paired immediately. Consult your Hyundai dealer. G130B02A-AAT
To Replace the Fluid
Recommended brake fluid conforming
to DOT 3 or DOT 4 specification shouldbe used. The reservoir cap must be fully tightened to avoid contaminationfrom foreign matter or moisture.
NOTE: Do not allow any other liquids to
contaminate the brake fluid. Seal damage will result.
WARNING:
Use caution when handling brake
fluid. It can damage your vision ifyou get it in your eyes. It will also damage your vehicle’s paint if spilled on it and not removed im-mediately.
HHP5016
Page 266 of 539
6
DO-IT-YOURSELF MAINTENANCE
39HEADLIGHT AIMING AD- JUSTMENT
G290A01HP-GAT
G290A01HP G290A02HP
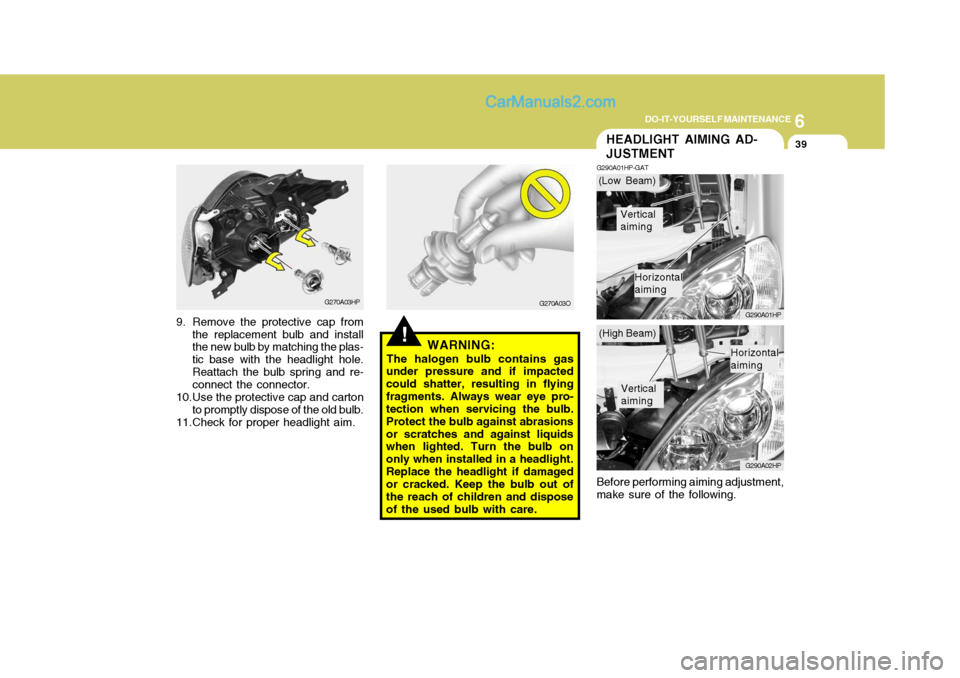
Before performing aiming adjustment, make sure of the following.
!WARNING:
The halogen bulb contains gas
under pressure and if impacted could shatter, resulting in flyingfragments. Always wear eye pro- tection when servicing the bulb. Protect the bulb against abrasionsor scratches and against liquids when lighted. Turn the bulb on only when installed in a headlight.Replace the headlight if damaged or cracked. Keep the bulb out of the reach of children and disposeof the used bulb with care.
G270A03HP
9. Remove the protective cap from the replacement bulb and install the new bulb by matching the plas- tic base with the headlight hole.Reattach the bulb spring and re- connect the connector.
10.Use the protective cap and carton to promptly dispose of the old bulb.
11.Check for proper headlight aim. G270A03O(Low Beam)
(High Beam)
Vertical aiming
Horizontal aiming
Vertical aiming
Horizontal aiming