Page 14 of 539

YOUR VEHICLE AT A GLANCE
B255A01HP-GAT INDICATOR SYMBOLS ON THE INSTRUMENT CLUSTER
Turn Signal Indicator Lights
ABS Service Reminder Indicator (SRI) (If Installed) High Beam Indicator Light Low Oil Pressure Warning Light Parking Brake/Low Brake Fluid Level Warning Light Charging System Warning Light
Tail Gate Open Warning Light
Door Ajar Warning Light Low Fuel Level Warning Light
Front Fog Indicator Light
O/D OFF Indicator Light (If Installed)
Immobilizer Warning Indicator Light (If Installed)
SRS (Airbag) Service Reminder Indicator (SRI) (If Installed) Seat Belt Warning Light Cruise Indicator Light (If Installed)
Malfunction Indicator Light (If Installed)
A/T(Automatic Transmission) Oil Temperature Warning Light (If Installed)
4WD LOW Indicator Light 4WD HIGH Indicator Light (Part-time 4WD only)
4WD System Warning Light (Full-time 4WD only)
Fuel Filter Warning Light (Diesel Engine)
Brake Vacuum Warning Light (Diesel Engine)
* More detailed explanations of these items will be found beginning on page 1-58.
Diesel Preheat Indicator Light (Diesel Engine)
Page 69 of 539

1
FEATURES OF YOUR HYUNDAI
55
1. Tachometer
2. Turn Signal Indicator Light
3. Coolant Temperature Gauge
4. Fuel Gauge
5. Speedometer
6. ABS Service Reminder Indicator (SRI) (If Installed)
7. Supplemental Restraint (AirBag) System Service Reminder lndicator (SRI) (If Installed)
8. Low Oil Pressure Warning Light
9. Parking Brake/Low Brake Fluid Level Warning Light
10.Charging System Warning Light
11.A/T Oil Temperature Warning Light (If Installed)
12.Overdrive Off Indicator Light (If Installed)
13.High Beam Indicator Light 14.Front Fog Indicator Light
15.Automatic Transmission Position Indicator Light (If Installed)
16.Cruise Indicator Light (If Installed)
17.4WD LOW Indicator Light
18.4WD HIGH Indicator Light (Part-time 4WD)
/4WD System Warning Light (Full-time 4WD)
19.Malfunction Indicator Light (MIL) (If Installed)
20.Trip Odometer
21.Odometer 22.Trip Odometer Reset Knob
23.Tail Gate Open Warning Light
24.Door Ajar Warning Light
25.Seat Belt Warning Light
26.Low Fuel Warning Light
Page 71 of 539
1
FEATURES OF YOUR HYUNDAI
57
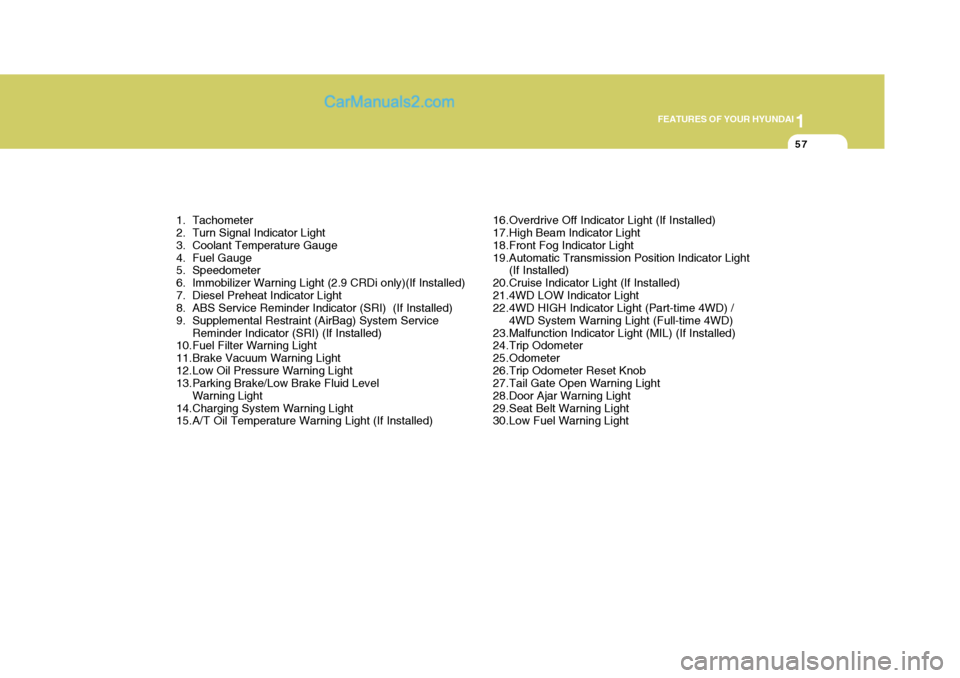
1. Tachometer
2. Turn Signal Indicator Light
3. Coolant Temperature Gauge
4. Fuel Gauge
5. Speedometer
6. Immobilizer Warning Light (2.9 CRDi only)(If Installed)
7. Diesel Preheat Indicator Light
8. ABS Service Reminder Indicator (SRI) (If Installed)
9. Supplemental Restraint (AirBag) System Service Reminder Indicator (SRI) (If Installed)
10.Fuel Filter Warning Light
11.Brake Vacuum Warning Light
12.Low Oil Pressure Warning Light
13.Parking Brake/Low Brake Fluid Level
Warning Light
14.Charging System Warning Light
15.A/T Oil Temperature Warning Light (If Installed) 16.Overdrive Off Indicator Light (If Installed)
17.High Beam Indicator Light
18.Front Fog Indicator Light
19.Automatic Transmission Position Indicator Light
(If Installed)
20.Cruise Indicator Light (If Installed)
21.4WD LOW Indicator Light
22.4WD HIGH Indicator Light (Part-time 4WD) / 4WD System Warning Light (Full-time 4WD)
23.Malfunction Indicator Light (MIL) (If Installed)
24.Trip Odometer
25.Odometer
26.Trip Odometer Reset Knob
27.Tail Gate Open Warning Light
28.Door Ajar Warning Light
29.Seat Belt Warning Light
30.Low Fuel Warning Light
Page 72 of 539
1FEATURES OF YOUR HYUNDAI
58WARNING AND INDICATOR LIGHTS
!
B260D01A-AAT
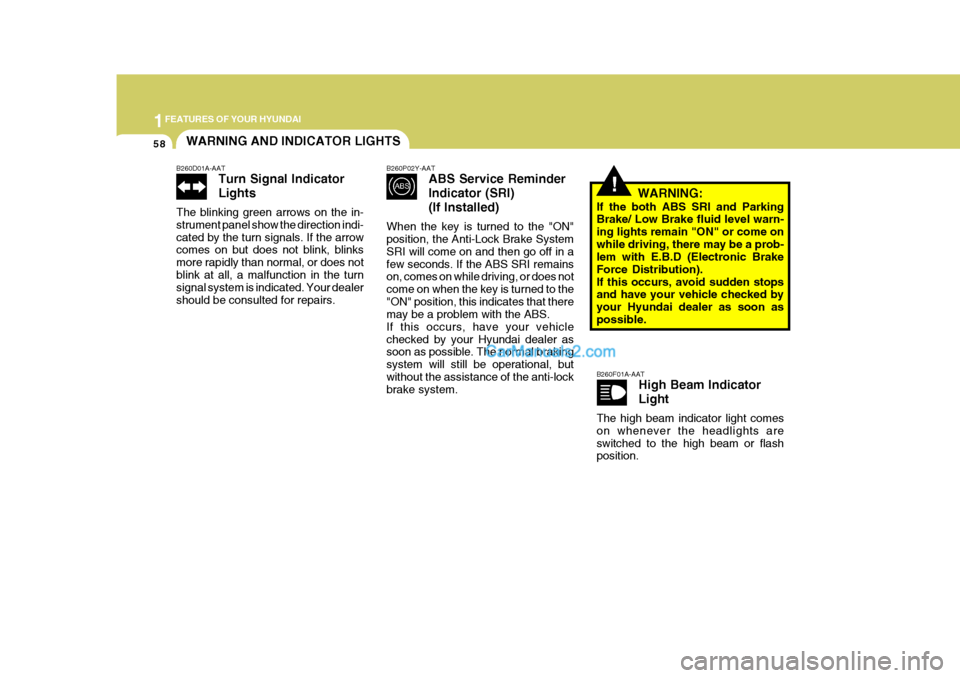
Turn Signal Indicator Lights
The blinking green arrows on the in- strument panel show the direction indi-cated by the turn signals. If the arrow comes on but does not blink, blinks more rapidly than normal, or does notblink at all, a malfunction in the turn signal system is indicated. Your dealer should be consulted for repairs. B260P02Y-AAT
ABS Service Reminder Indicator (SRI)(If Installed)
When the key is turned to the "ON" position, the Anti-Lock Brake System SRI will come on and then go off in afew seconds. If the ABS SRI remains on, comes on while driving, or does not come on when the key is turned to the"ON" position, this indicates that there may be a problem with the ABS. If this occurs, have your vehiclechecked by your Hyundai dealer as soon as possible. The normal braking system will still be operational, butwithout the assistance of the anti-lock brake system. WARNING:
If the both ABS SRI and ParkingBrake/ Low Brake fluid level warn- ing lights remain "ON" or come onwhile driving, there may be a prob- lem with E.B.D (Electronic Brake Force Distribution).If this occurs, avoid sudden stops and have your vehicle checked by your Hyundai dealer as soon aspossible. B260F01A-AAT High Beam Indicator Light
The high beam indicator light comes on whenever the headlights areswitched to the high beam or flash position.
Page 87 of 539
1
FEATURES OF YOUR HYUNDAI
73MULTI-FUNCTION LIGHT SWITCH
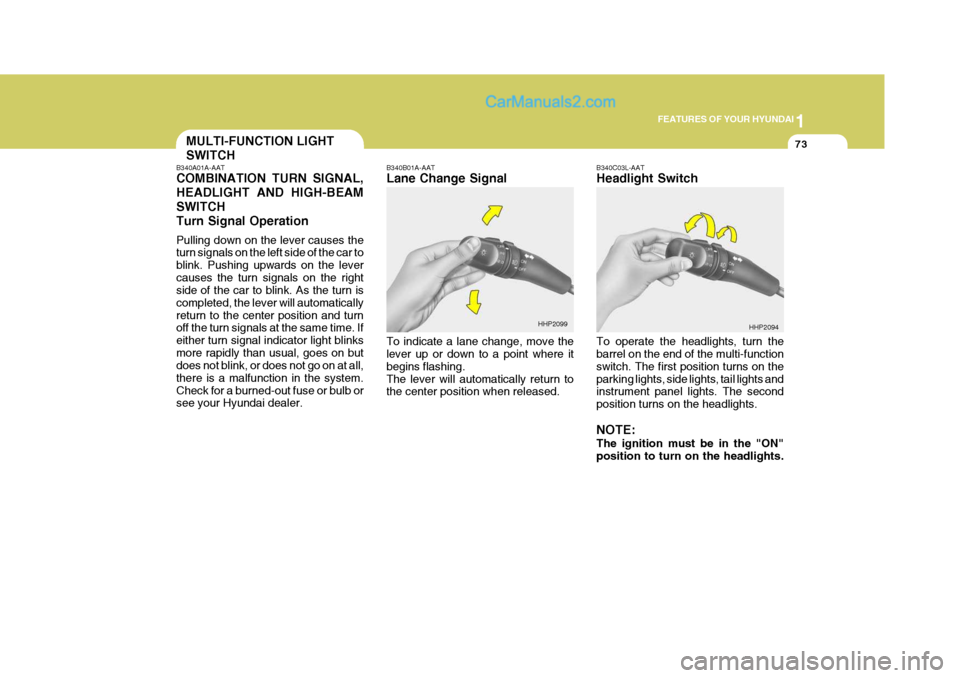
B340A01A-AAT COMBINATION TURN SIGNAL, HEADLIGHT AND HIGH-BEAMSWITCHTurn Signal Operation Pulling down on the lever causes the turn signals on the left side of the car to blink. Pushing upwards on the levercauses the turn signals on the right side of the car to blink. As the turn is completed, the lever will automaticallyreturn to the center position and turn off the turn signals at the same time. If either turn signal indicator light blinksmore rapidly than usual, goes on but does not blink, or does not go on at all, there is a malfunction in the system.Check for a burned-out fuse or bulb or see your Hyundai dealer. B340B01A-AAT Lane Change Signal To indicate a lane change, move the lever up or down to a point where it begins flashing.The lever will automatically return to the center position when released.
B340C03L-AAT Headlight Switch To operate the headlights, turn the barrel on the end of the multi-function switch. The first position turns on theparking lights, side lights, tail lights and instrument panel lights. The second position turns on the headlights. NOTE: The ignition must be in the "ON" position to turn on the headlights.
HHP2099
HHP2094
Page 88 of 539
1FEATURES OF YOUR HYUNDAI
74
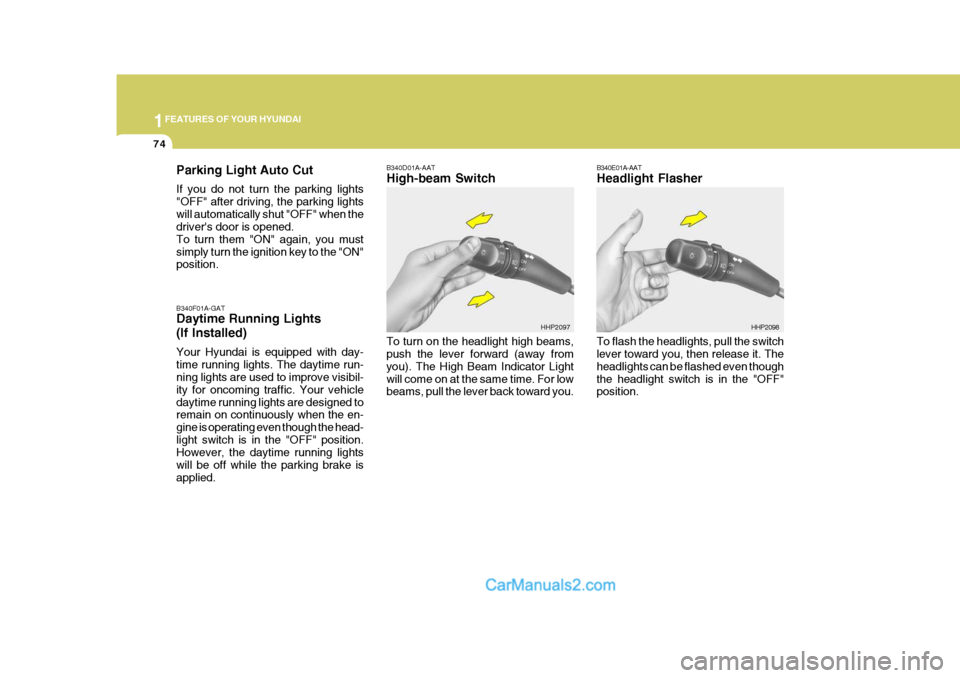
B340E01A-AAT Headlight Flasher To flash the headlights, pull the switch lever toward you, then release it. The headlights can be flashed even thoughthe headlight switch is in the "OFF" position. HHP2098
B340F01A-GAT Daytime Running Lights (If Installed) Your Hyundai is equipped with day- time running lights. The daytime run- ning lights are used to improve visibil- ity for oncoming traffic. Your vehicledaytime running lights are designed to remain on continuously when the en- gine is operating even though the head-light switch is in the "OFF" position. However, the daytime running lights will be off while the parking brake isapplied. B340D01A-AAT High-beam Switch
Parking Light Auto Cut If you do not turn the parking lights "OFF" after driving, the parking lightswill automatically shut "OFF" when the driver's door is opened. To turn them "ON" again, you mustsimply turn the ignition key to the "ON" position.
To turn on the headlight high beams,push the lever forward (away from you). The High Beam Indicator Lightwill come on at the same time. For low beams, pull the lever back toward you.HHP2097
Page 113 of 539
1
FEATURES OF YOUR HYUNDAI
99REAR SEAT ARMREST
B611A01HP-AAT (If Installed)
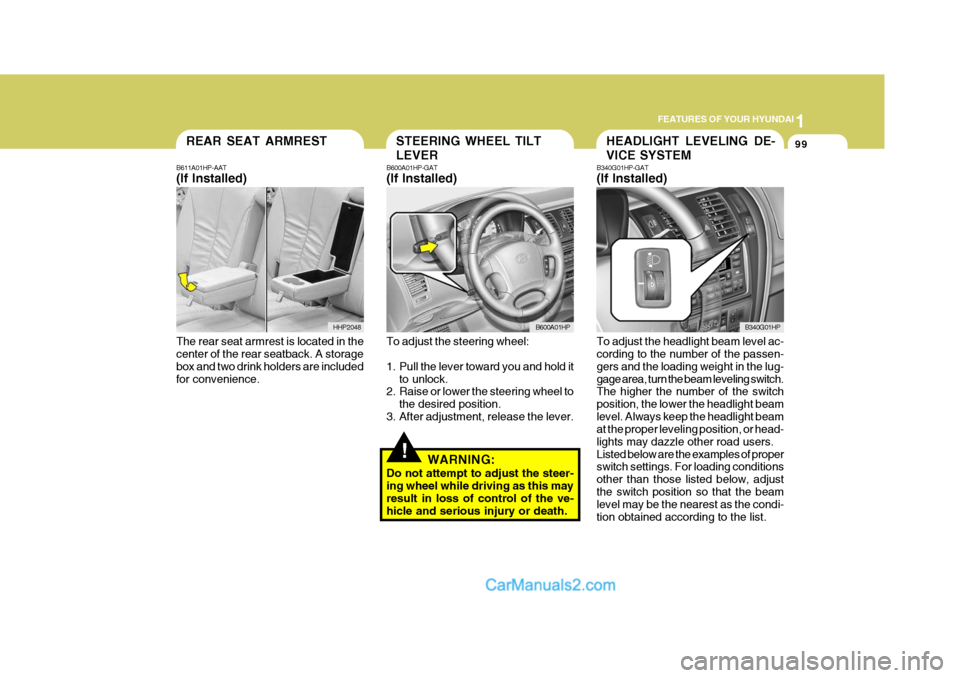
The rear seat armrest is located in the center of the rear seatback. A storage box and two drink holders are includedfor convenience. HHP2048HEADLIGHT LEVELING DE- VICE SYSTEMSTEERING WHEEL TILT LEVER
!
B600A01HP-GAT (If Installed) To adjust the steering wheel:
1. Pull the lever toward you and hold it
to unlock.
2. Raise or lower the steering wheel to
the desired position.
3. After adjustment, release the lever.
WARNING:
Do not attempt to adjust the steer- ing wheel while driving as this may result in loss of control of the ve- hicle and serious injury or death. B340G01HP-GAT (If Installed) To adjust the headlight beam level ac- cording to the number of the passen- gers and the loading weight in the lug-gage area, turn the beam leveling switch. The higher the number of the switch position, the lower the headlight beamlevel. Always keep the headlight beam at the proper leveling position, or head- lights may dazzle other road users.Listed below are the examples of proper switch settings. For loading conditions other than those listed below, adjustthe switch position so that the beam level may be the nearest as the condi- tion obtained according to the list.
B600A01HP
B340G01HP
Page 266 of 539
6
DO-IT-YOURSELF MAINTENANCE
39HEADLIGHT AIMING AD- JUSTMENT
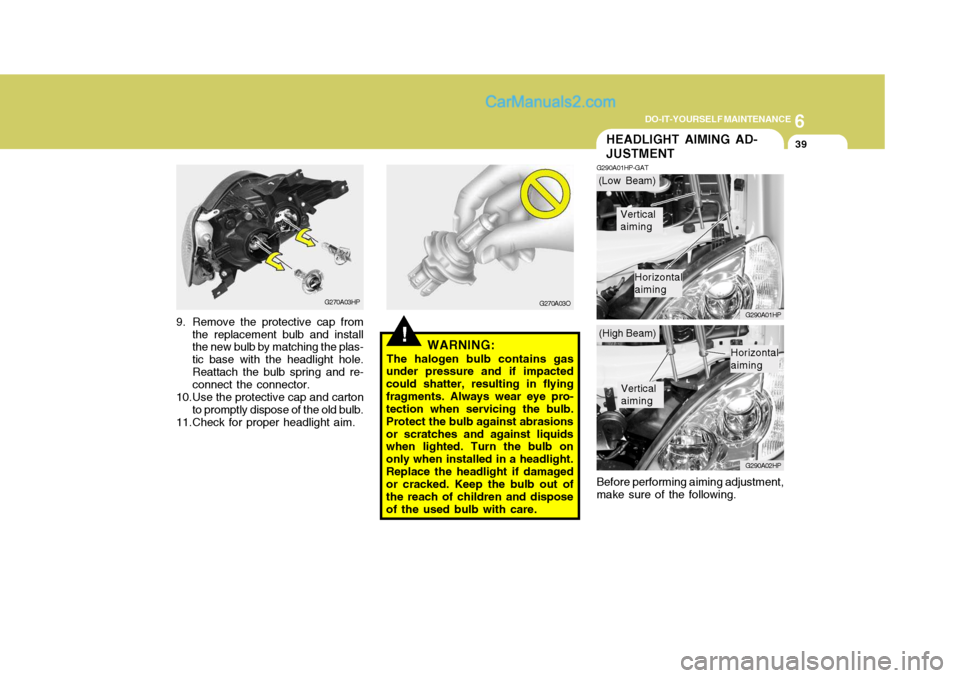
G290A01HP-GAT
G290A01HP G290A02HP
Before performing aiming adjustment, make sure of the following.
!WARNING:
The halogen bulb contains gas
under pressure and if impacted could shatter, resulting in flyingfragments. Always wear eye pro- tection when servicing the bulb. Protect the bulb against abrasionsor scratches and against liquids when lighted. Turn the bulb on only when installed in a headlight.Replace the headlight if damaged or cracked. Keep the bulb out of the reach of children and disposeof the used bulb with care.
G270A03HP
9. Remove the protective cap from the replacement bulb and install the new bulb by matching the plas- tic base with the headlight hole.Reattach the bulb spring and re- connect the connector.
10.Use the protective cap and carton to promptly dispose of the old bulb.
11.Check for proper headlight aim. G270A03O(Low Beam)
(High Beam)
Vertical aiming
Horizontal aiming
Vertical aiming
Horizontal aiming