2006 Hyundai Terracan bulb
[x] Cancel search: bulbPage 87 of 539
1
FEATURES OF YOUR HYUNDAI
73MULTI-FUNCTION LIGHT SWITCH
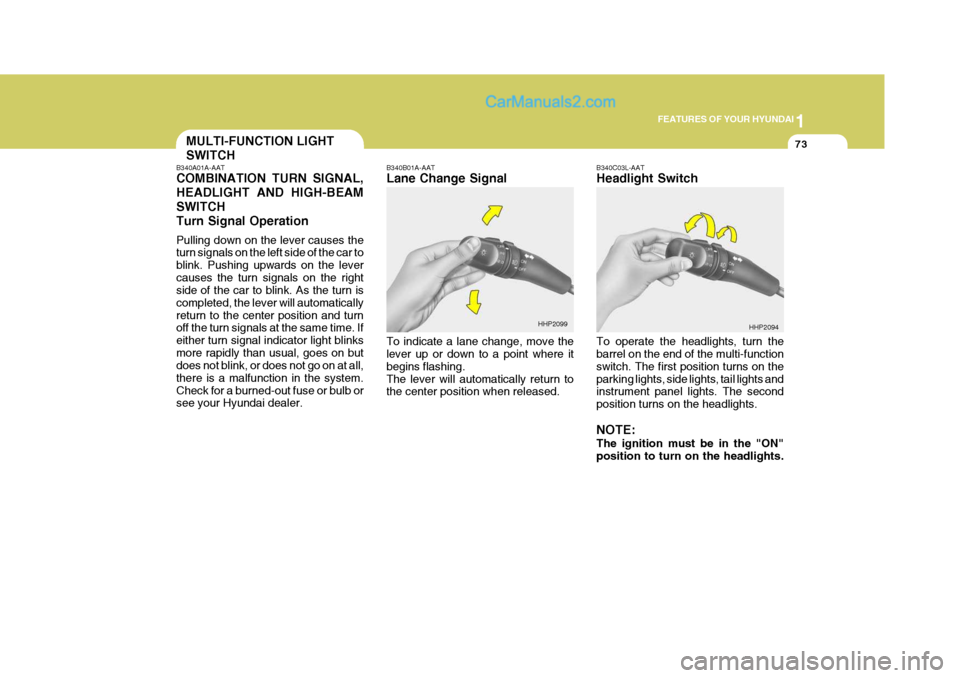
B340A01A-AAT COMBINATION TURN SIGNAL, HEADLIGHT AND HIGH-BEAMSWITCHTurn Signal Operation Pulling down on the lever causes the turn signals on the left side of the car to blink. Pushing upwards on the levercauses the turn signals on the right side of the car to blink. As the turn is completed, the lever will automaticallyreturn to the center position and turn off the turn signals at the same time. If either turn signal indicator light blinksmore rapidly than usual, goes on but does not blink, or does not go on at all, there is a malfunction in the system.Check for a burned-out fuse or bulb or see your Hyundai dealer. B340B01A-AAT Lane Change Signal To indicate a lane change, move the lever up or down to a point where it begins flashing.The lever will automatically return to the center position when released.
B340C03L-AAT Headlight Switch To operate the headlights, turn the barrel on the end of the multi-function switch. The first position turns on theparking lights, side lights, tail lights and instrument panel lights. The second position turns on the headlights. NOTE: The ignition must be in the "ON" position to turn on the headlights.
HHP2099
HHP2094
Page 158 of 539
2
DRIVING YOUR HYUNDAI
3
!
BEFORE STARTING THE ENGINE
C020A02A-AAT Before you start the engine, you should always:
1. Look around the vehicle to be sure
there are no flat tires, puddles of oil, water or other indications of possible trouble.
2. After entering the car, check to be sure the parking brake is engaged.
3. Check that all windows, and lights are clean.
4. Check that the interior and exterior
mirrors are clean and in position.
5. Check your seat, seatback and headrest to be sure they are in theirproper positions.
6. Lock all the doors.
7. Fasten your seat belt and be sure
that all other occupants have fas- tened theirs.
8. Turn off all lights and accessories
that are not needed.
9. When you turn the ignition switch to "ON", check that all appropriatewarning lights are operating andthat you have sufficient fuel.
10. Check the operation of warning
lights and all bulbs when key is inthe "ON" position.
WARNING:
Your vehicle is equipped with tires designed to provide for safe ride and handling capability.Do not use a size and type of tire and wheel that is different from the one that was originally installed onyour vehicle. It can affect the safety and performance of your vehicle, which could lead to handling fail-ure or rollover and serious injury. When replacing the tires, be sure to equip all four tires with the tire andwheel of the same size, type, tread, brand and load-carrying capacity. If you nevertheless decide to equipyour vehicle with any tire/wheel combination not recommended by Hyundai for off-road driving, youshould not use these tires for high- way driving.
!WARNING:
Always wear appropriate shoes when operating your vehicle.Unsuitable shoes (high heels, ski boots, etc.) may interfere with your ability to use the brake and accelera-tor pedal, and the clutch (if installed).
Page 228 of 539

Engine Compartment .................................................... 6-2
General Checks ........................................................... 6-5
Checking the Engine Oil .............................................. 6-6 Changing the Engine Oil and Filter ............................. 6-10
Checking and Changing the Engine Coolant ..............6-11
Changing the Air Cleaner Filte r ...................................6-14
Checking the Transmission Oil (Manual)................... 6-17
Checking the Transmission Fluid (Automatic)............6-18
Checking the Brakes .................................................. 6-21
Checking the Clutch Fluid ........................................... 6-22
Air Conditioning Care .................................................. 6-23
Changing the Climate Control Air Filter .. ....................6-24
Checking Drive Belts .................................................. 6-27
Checking and Replacing Fuses ..................................6-28
Checking The Battery ................................................. 6-31
Checking The Electric Cooling Fans ..........................6-33
Power Steering Fluid Level ......................................... 6-33
Fuel Filter ..................................................................... 6-34
Replacement of Headlight Bulbs ................................. 6-38
Headlight Aiming Adjustment ...................................... 6-39
Bulb Wattages ............................................................. 6-42
Fuse Panel D escription ............................................... 6-43
DO-IT-YOURSELF MAINTENANCE
6
6
Page 265 of 539

6 DO-IT-YOURSELF MAINTENANCE
38REPLACING HEADLIGHT BULBS
G260A03A-GAT Before attempting to replace a head- light bulb, be sure the switch is turned to the "OFF" position. The next paragraph shows how to reach the headlight bulbs so they may be changed. Be sure to replacethe burned-out bulb with one of the same number and wattage rating.
CAUTION:
o Keep the lamps out of contact with petroleum product, such as oil, gasoline, etc.
o After heavy, driving rain or wash- ing, headlight and taillight lensescould appear frosty. This condi- tion is caused by the temperature difference between the lamp in-side and outside. This is similar to the condensation on your win- dows inside your vehicle duringthe rain and doesn’t indicate a problem with your vehicle. If the water leaks into the lamp bulbcircuitry, have the vehicle checked by an Authorized Hyundai Dealer.
! G270A01B-GAT
Headlight Bulb
1. Allow the bulb to cool. Wear eye
protection.
2. Open the engine hood.
3. Always grasp the bulb by its plas- tic base, avoid touching the glass.
4. Using a spanner, remove the head- light assembly mounting bolts.
5. Disconnect the power cord from the bulb base in the back of the headlight.
G270A01HP7. Disconnect the connector from the
bulb base in the back of the head- light.
G270A02HP
6. Turn the plastic cover counterclock- wise and remove it. 8. Push the bulb spring to remove the
headlight bulb.
Page 266 of 539
6
DO-IT-YOURSELF MAINTENANCE
39HEADLIGHT AIMING AD- JUSTMENT
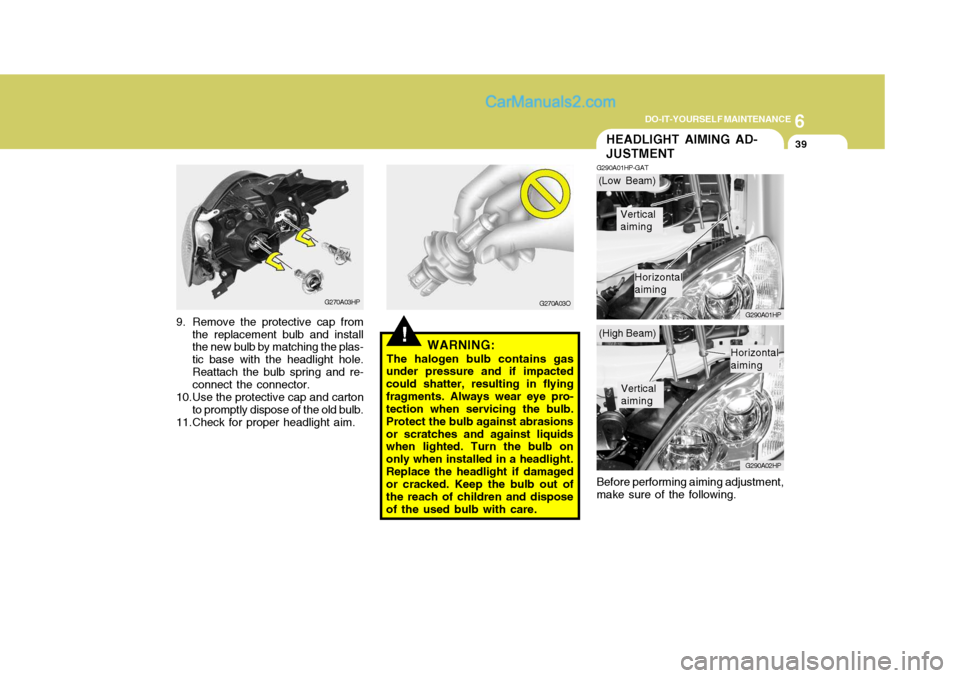
G290A01HP-GAT
G290A01HP G290A02HP
Before performing aiming adjustment, make sure of the following.
!WARNING:
The halogen bulb contains gas
under pressure and if impacted could shatter, resulting in flyingfragments. Always wear eye pro- tection when servicing the bulb. Protect the bulb against abrasionsor scratches and against liquids when lighted. Turn the bulb on only when installed in a headlight.Replace the headlight if damaged or cracked. Keep the bulb out of the reach of children and disposeof the used bulb with care.
G270A03HP
9. Remove the protective cap from the replacement bulb and install the new bulb by matching the plas- tic base with the headlight hole.Reattach the bulb spring and re- connect the connector.
10.Use the protective cap and carton to promptly dispose of the old bulb.
11.Check for proper headlight aim. G270A03O(Low Beam)
(High Beam)
Vertical aiming
Horizontal aiming
Vertical aiming
Horizontal aiming
Page 269 of 539
6 DO-IT-YOURSELF MAINTENANCE
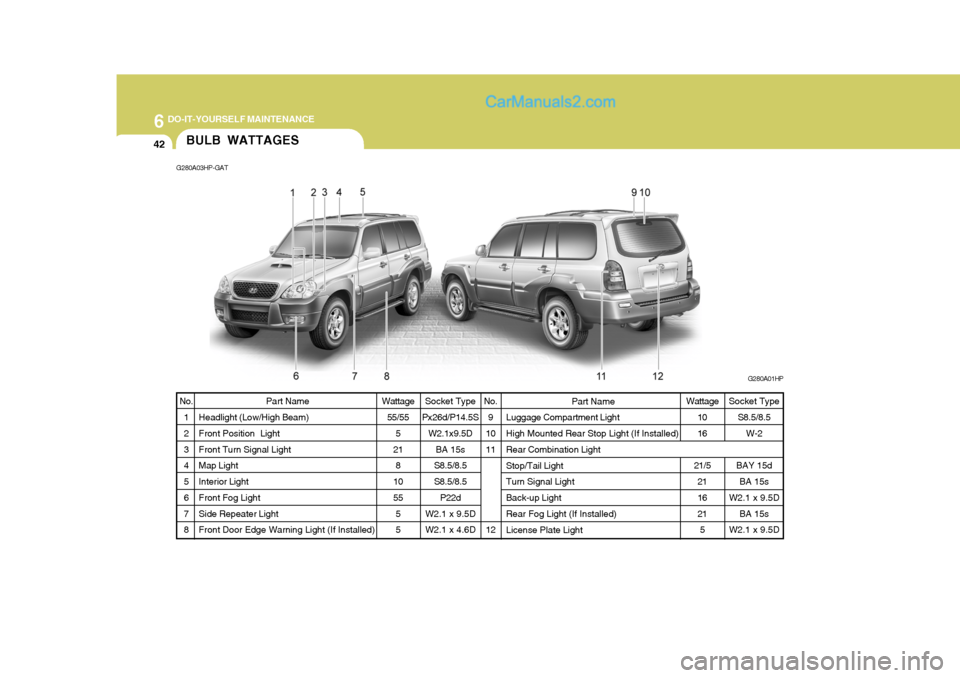
42BULB WATTAGES
Wattage55/55 5
21 8
10 55 55
Part Name
Headlight (Low/High Beam)Front Position Light Front Turn Signal Light Map Light Interior Light Front Fog Light Side Repeater Light Front Door Edge Warning Light (If Installed) Wattage
1016
21/5 2116 215
No.
9
1011 12 Part Name
Luggage Compartment Light High Mounted Rear Stop Light (If Installed) Rear Combination Light Stop/Tail Light Turn Signal Light Back-up Light Rear Fog Light (If Installed) License Plate Light
No.
1 2 3 4 5 6 7 8
G280A03HP-GAT
G280A01HP
Socket Type S8.5/8.5W-2
BAY 15d BA 15s
W2.1 x 9.5D
BA 15s
W2.1 x 9.5D
Socket Type
Px26d/P14.5S W2.1x9.5D
BA 15s
S8.5/8.5 S8.5/8.5 P22d
W2.1 x 9.5D W2.1 x 4.6D
Page 419 of 539
2
DRIVING YOUR HYUNDAI
3
!WARNING:
Your vehicle is equipped with tyres designed to provide for safe ride and handling capability.Do not use a size and type of tyre and wheel that is different from the one that was originally installed on yourvehicle. It can affect the safety and performance of your vehicle, which could lead to handling failure orrollover and serious injury. When replacing the tyres, be sure to equip all four tyres with the tyre andwheel of the same size, type, tread, brand and load-carrying capacity. If you nevertheless decide to equipyour vehicle with any tyre/wheel com- bination not recommended by Hyundai for off-road driving, youshould not use these tyres for high- way driving.
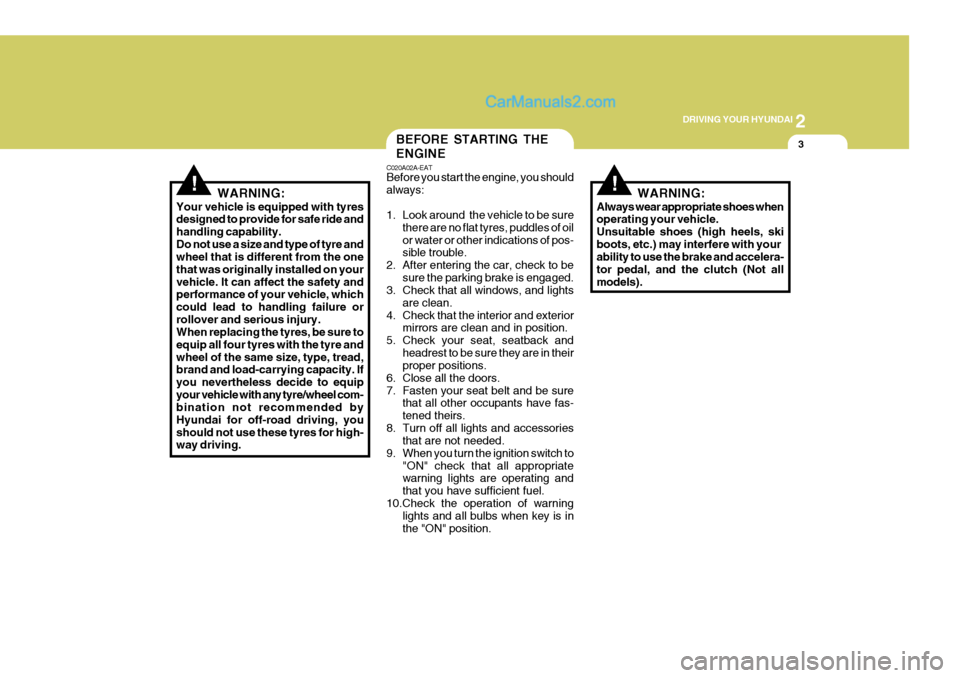
BEFORE STARTING THE ENGINE
C020A02A-EAT Before you start the engine, you should always:
1. Look around the vehicle to be sure
there are no flat tyres, puddles of oil or water or other indications of pos- sible trouble.
2. After entering the car, check to be
sure the parking brake is engaged.
3. Check that all windows, and lights
are clean.
4. Check that the interior and exterior mirrors are clean and in position.
5. Check your seat, seatback and headrest to be sure they are in theirproper positions.
6. Close all the doors.
7. Fasten your seat belt and be sure that all other occupants have fas-tened theirs.
8. Turn off all lights and accessories that are not needed.
9. When you turn the ignition switch to "ON" check that all appropriate warning lights are operating and that you have sufficient fuel.
10.Check the operation of warning lights and all bulbs when key is inthe "ON" position. WARNING:
Always wear appropriate shoes when operating your vehicle. Unsuitable shoes (high heels, skiboots, etc.) may interfere with your ability to use the brake and accelera- tor pedal, and the clutch (Not allmodels).
!
Page 479 of 539
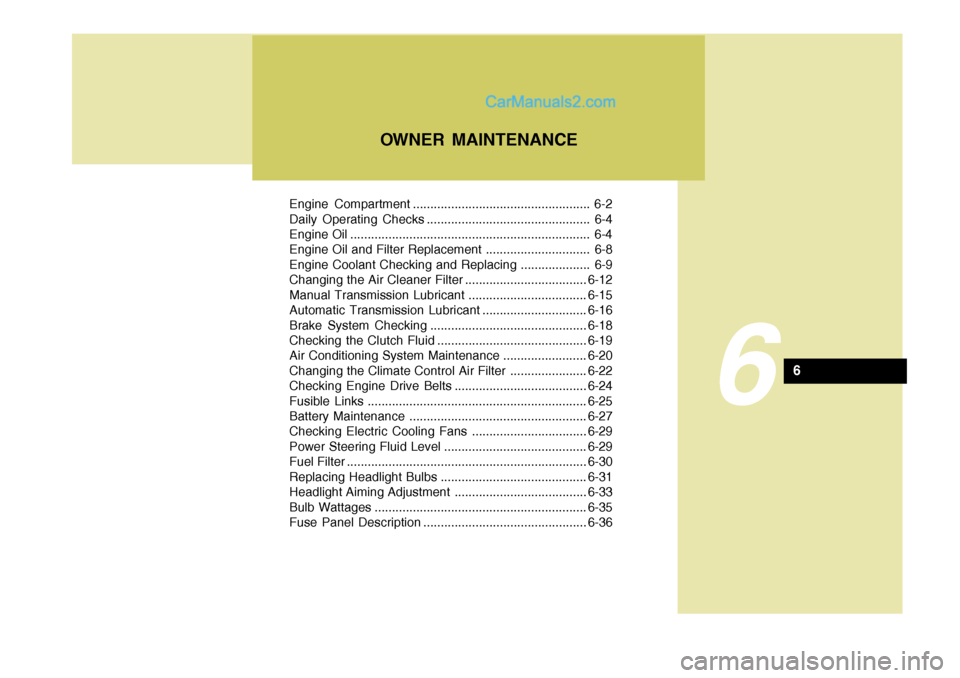
Engine Compartment ................................................... 6-2
Daily Operating Checks ............................................... 6-4
Engine Oil ..................................................................... 6-4
Engine Oil and Filter Replacement .............................. 6-8
Engine Coolant Checking and Replacing .................... 6-9
Changing the Air Cleaner Filter ...................................6-12
Manual Transmission Lubricant ..................................6-15
Automatic Transmission Lubricant ..............................6-16
Brake System Checking ............................................. 6-18
Checking the Clutch Fluid ........................................... 6-19
Air Conditioning System Maintenance ........................ 6-20
Changing the Climate Control Air Filter .. ....................6-22
Checking Engine Drive Belts ...................................... 6-24
Fusible Links ............................................................... 6-25
Battery Mai ntenance ................................................... 6-27
Checking Electric Cooling Fans .................................6-29
Power Steering Fluid Level ......................................... 6-29
Fuel Filter ..................................................................... 6-30
Replacing Headlight Bulbs .......................................... 6-31
Headlight Aiming Adjustment ...................................... 6-33
Bulb Wattages ............................................................. 6-35
Fuse Panel D escription ............................................... 6-36
OWNER MAINTENANCE
6
6