2006 Hyundai Terracan brake light
[x] Cancel search: brake lightPage 364 of 539
1CONTROLS AND EQUIPMENT
56
!
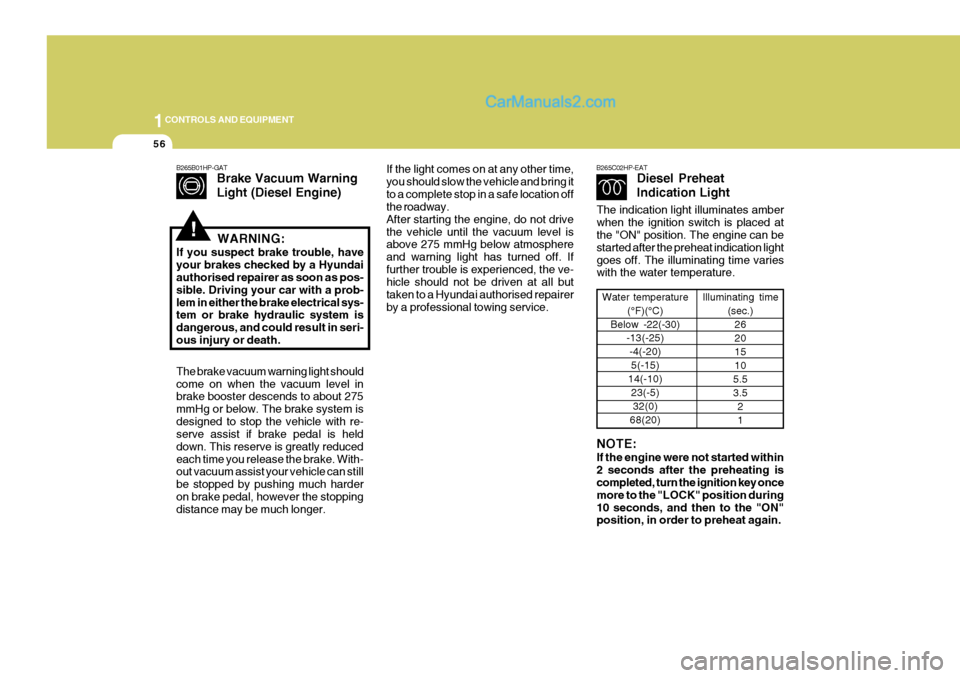
B265B01HP-GAT
Brake Vacuum Warning Light (Diesel Engine)
The brake vacuum warning light should come on when the vacuum level in brake booster descends to about 275 mmHg or below. The brake system isdesigned to stop the vehicle with re- serve assist if brake pedal is held down. This reserve is greatly reducedeach time you release the brake. With- out vacuum assist your vehicle can still be stopped by pushing much harderon brake pedal, however the stopping distance may be much longer. WARNING:
If you suspect brake trouble, have your brakes checked by a Hyundai authorised repairer as soon as pos- sible. Driving your car with a prob-lem in either the brake electrical sys- tem or brake hydraulic system is dangerous, and could result in seri-ous injury or death.If the light comes on at any other time, you should slow the vehicle and bring itto a complete stop in a safe location off the roadway. After starting the engine, do not drivethe vehicle until the vacuum level is above 275 mmHg below atmosphere and warning light has turned off. Iffurther trouble is experienced, the ve- hicle should not be driven at all but taken to a Hyundai authorised repairerby a professional towing service. B265C02HP-EAT
Diesel Preheat Indication Light
Water temperature
(°F)(°C)
Below -22(-30) -13(-25)
-4(-20)5(-15)
14(-10) 23(-5)32(0)
68(20) Illuminating time
(sec.)26 201510
5.53.5 21
NOTE: If the engine were not started within 2 seconds after the preheating is completed, turn the ignition key once more to the "LOCK" position during10 seconds, and then to the "ON" position, in order to preheat again.
The indication light illuminates amber when the ignition switch is placed at the "ON" position. The engine can be started after the preheat indication lightgoes off. The illuminating time varies with the water temperature.
Page 386 of 539
1CONTROLS AND EQUIPMENT
78
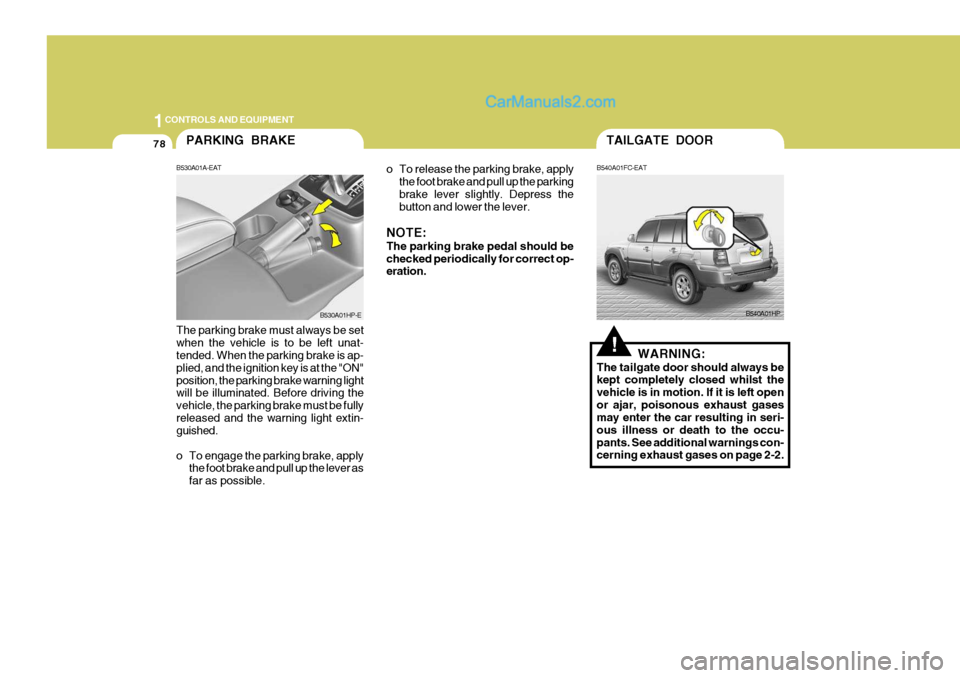
o To release the parking brake, applythe foot brake and pull up the parking brake lever slightly. Depress the button and lower the lever.
NOTE: The parking brake pedal should be checked periodically for correct op- eration.
The parking brake must always be set when the vehicle is to be left unat- tended. When the parking brake is ap- plied, and the ignition key is at the "ON"position, the parking brake warning light will be illuminated. Before driving the vehicle, the parking brake must be fullyreleased and the warning light extin- guished.
o To engage the parking brake, apply the foot brake and pull up the lever as far as possible.PARKING BRAKE
B530A01A-EAT
B530A01HP-E
!
B540A01HP
TAILGATE DOOR
B540A01FC-EAT
WARNING:
The tailgate door should always be
kept completely closed whilst the vehicle is in motion. If it is left openor ajar, poisonous exhaust gases may enter the car resulting in seri- ous illness or death to the occu-pants. See additional warnings con- cerning exhaust gases on page 2-2.
Page 390 of 539

1CONTROLS AND EQUIPMENT
82
!The fuel-filler flap may be opened from inside the vehicle by pulling up on the fuel-filler flap opener located below the left of the driver's side crash pad. NOTE: If the fuel-filler flap will not open because ice has formed around it,lightly tap or push on the lid to break the ice and release it. Do not lever the flap. If necessary, spray around theflap with an approved de-icer fluid (do not use radiator anti-freeze) or move the vehicle to a warmer areaplace and allow the ice to melt. WARNING:
o Fuel vapors are dangerous. Be- fore refueling, always stop the engine and never allow sparks or open flames near the filler area. Ifyou need to replace the filler cap, use a genuine Hyundai replace- ment part.If you open the fuel filler cap dur- ing high ambient temperatures, a slight "pressure sound" may beheard. This is normal and not a cause for concern. Whenever you open the fuel fillercap, turn it slowly.
REMOTE FUEL-FILLER FLAP RELEASE
HPB360A2-E
B560A01HP-EHHP2015-D
In addition to the lower-mounted rear stop lights on either side of the car, the high mounted rear stop light in the centre of the rear window also lightswhen the brakes are applied.
HIGH-MOUNTED REAR STOP LIGHT
B550A01A-EAT
B550A01HP
Page 396 of 539
1CONTROLS AND EQUIPMENT
88
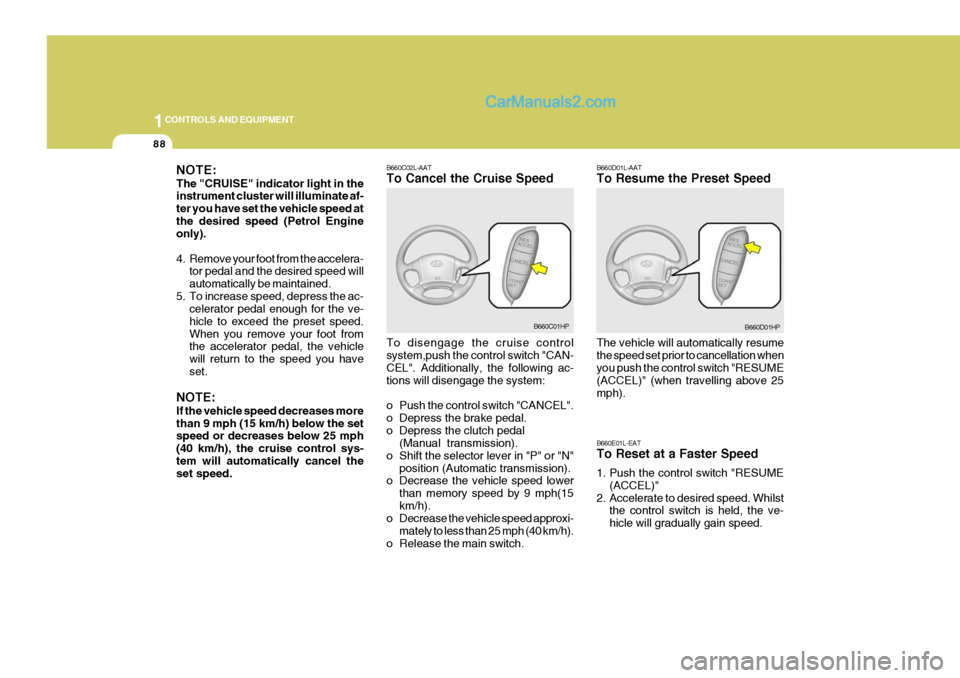
B660C02L-AAT To Cancel the Cruise Speed To disengage the cruise control system,push the control switch "CAN- CEL". Additionally, the following ac- tions will disengage the system:
o Push the control switch "CANCEL".
o Depress the brake pedal.
o Depress the clutch pedal(Manual transmission).
o Shift the selector lever in "P" or "N" position (Automatic transmission).
o Decrease the vehicle speed lower
than memory speed by 9 mph(15km/h).
o Decrease the vehicle speed approxi-
mately to less than 25 mph (40 km/h).
o Release the main switch.
B660C01HP B660D01L-AAT To Resume the Preset Speed The vehicle will automatically resume the speed set prior to cancellation when you push the control switch "RESUME (ACCEL)" (when travelling above 25mph). B660E01L-EAT To Reset at a Faster Speed
1. Push the control switch "RESUME
(ACCEL)"
2. Accelerate to desired speed. Whilst the control switch is held, the ve- hicle will gradually gain speed.B660D01HP
NOTE: The "CRUISE" indicator light in the instrument cluster will illuminate af- ter you have set the vehicle speed atthe desired speed (Petrol Engine only).
4. Remove your foot from the accelera-
tor pedal and the desired speed will automatically be maintained.
5. To increase speed, depress the ac- celerator pedal enough for the ve-hicle to exceed the preset speed.When you remove your foot from the accelerator pedal, the vehicle will return to the speed you haveset.
NOTE: If the vehicle speed decreases more than 9 mph (15 km/h) below the set speed or decreases below 25 mph (40 km/h), the cruise control sys-tem will automatically cancel the set speed.
Page 419 of 539
2
DRIVING YOUR HYUNDAI
3
!WARNING:
Your vehicle is equipped with tyres designed to provide for safe ride and handling capability.Do not use a size and type of tyre and wheel that is different from the one that was originally installed on yourvehicle. It can affect the safety and performance of your vehicle, which could lead to handling failure orrollover and serious injury. When replacing the tyres, be sure to equip all four tyres with the tyre andwheel of the same size, type, tread, brand and load-carrying capacity. If you nevertheless decide to equipyour vehicle with any tyre/wheel com- bination not recommended by Hyundai for off-road driving, youshould not use these tyres for high- way driving.
BEFORE STARTING THE ENGINE
C020A02A-EAT Before you start the engine, you should always:
1. Look around the vehicle to be sure
there are no flat tyres, puddles of oil or water or other indications of pos- sible trouble.
2. After entering the car, check to be
sure the parking brake is engaged.
3. Check that all windows, and lights
are clean.
4. Check that the interior and exterior mirrors are clean and in position.
5. Check your seat, seatback and headrest to be sure they are in theirproper positions.
6. Close all the doors.
7. Fasten your seat belt and be sure that all other occupants have fas-tened theirs.
8. Turn off all lights and accessories that are not needed.
9. When you turn the ignition switch to "ON" check that all appropriate warning lights are operating and that you have sufficient fuel.
10.Check the operation of warning lights and all bulbs when key is inthe "ON" position. WARNING:
Always wear appropriate shoes when operating your vehicle. Unsuitable shoes (high heels, skiboots, etc.) may interfere with your ability to use the brake and accelera- tor pedal, and the clutch (Not allmodels).
!
Page 420 of 539
2 DRIVING YOUR HYUNDAI
4
!WARNING:
The engine must never be turned off and the key removed from the igni-tion key cylinder whilst the vehicle is in motion since the steering lock will operate and control of the vehiclewill be lost.
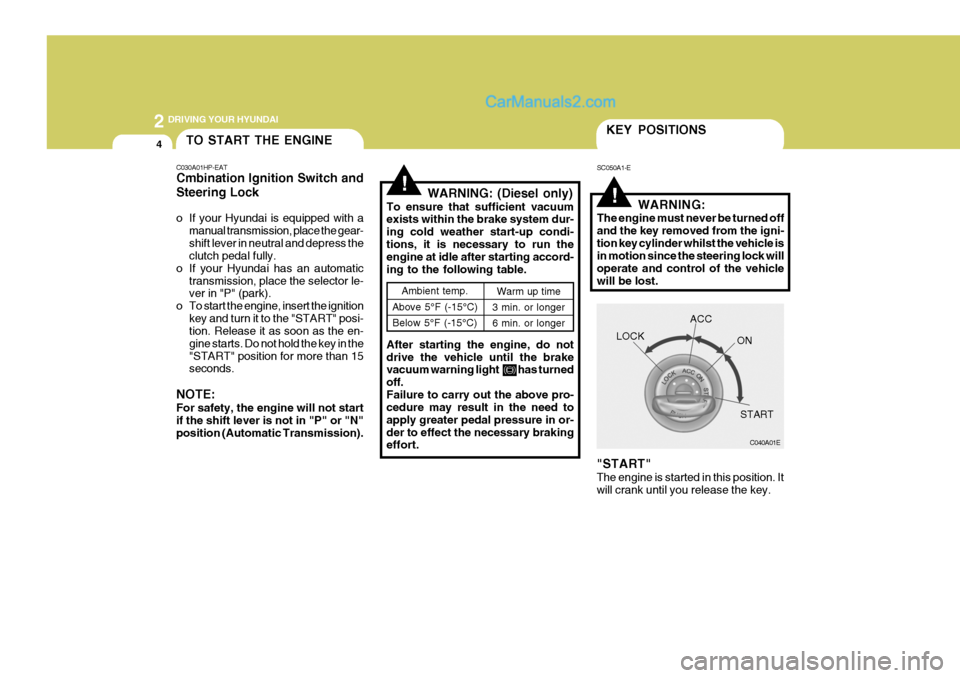
"START" The engine is started in this position. It will crank until you release the key.
Ambient temp.
Above 5°F (-15°C) Below 5°F (-15°C) Warm up time
3 min. or longer 6 min. or longer
!WARNING: (Diesel only)
To ensure that sufficient vacuum exists within the brake system dur- ing cold weather start-up condi-tions, it is necessary to run the engine at idle after starting accord- ing to the following table. After starting the engine, do not drive the vehicle until the brake vacuum warning light has turned off.Failure to carry out the above pro- cedure may result in the need to apply greater pedal pressure in or-der to effect the necessary braking effort.
KEY POSITIONS
SC050A1-E
C040A01E
LOCK
ACC
ON
START
TO START THE ENGINE
C030A01HP-EAT Cmbination Ignition Switch and Steering Lock
o If your Hyundai is equipped with a manual transmission, place the gear- shift lever in neutral and depress the clutch pedal fully.
o If your Hyundai has an automatic transmission, place the selector le-ver in "P" (park).
o To start the engine, insert the ignition
key and turn it to the "START" posi-tion. Release it as soon as the en- gine starts. Do not hold the key in the"START" position for more than 15 seconds.
NOTE: For safety, the engine will not start if the shift lever is not in "P" or "N" position (Automatic Transmission).
Page 426 of 539
2 DRIVING YOUR HYUNDAI
10
!
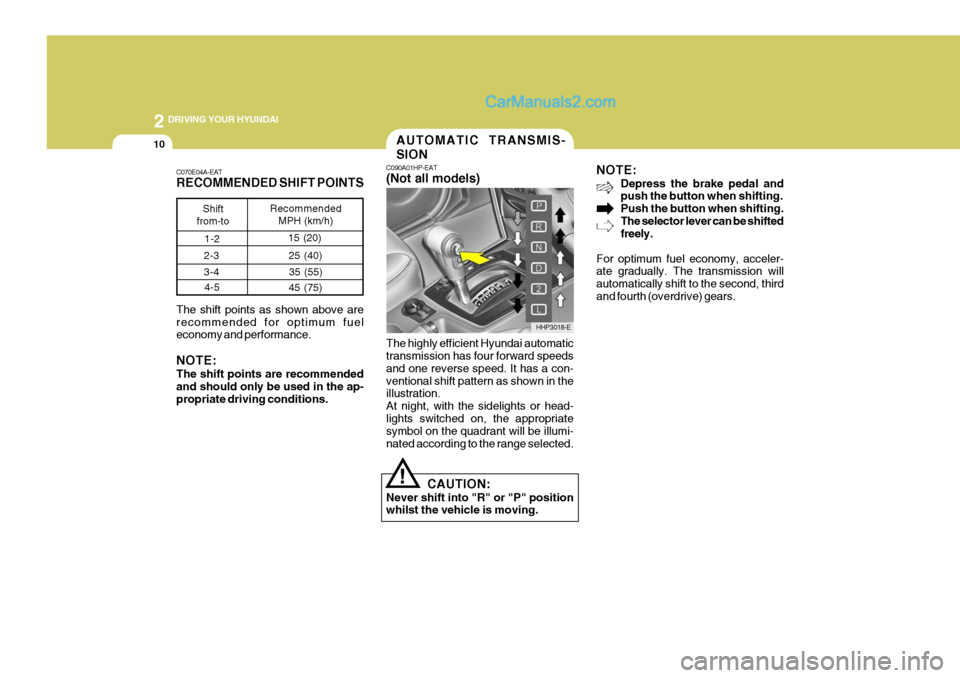
The highly efficient Hyundai automatic transmission has four forward speeds and one reverse speed. It has a con-ventional shift pattern as shown in the illustration. At night, with the sidelights or head-lights switched on, the appropriate symbol on the quadrant will be illumi- nated according to the range selected. NOTE:
Depress the brake pedal and push the button when shifting. Push the button when shifting.The selector lever can be shifted freely.
For optimum fuel economy, acceler-ate gradually. The transmission will automatically shift to the second, thirdand fourth (overdrive) gears.
CAUTION:
Never shift into "R" or "P" position whilst the vehicle is moving.
C070E04A-EAT RECOMMENDED SHIFT POINTS The shift points as shown above are recommended for optimum fuel economy and performance. NOTE: The shift points are recommended and should only be used in the ap- propriate driving conditions.
Shift
from-to Recommended
MPH (km/h)
AUTOMATIC TRANSMIS- SION
C090A01HP-EAT (Not all models)
HHP3018-E
1-2
15 (20)
2-3 3-4 4-5 25 (40)
35 (55)
45 (75)
Page 429 of 539
2
DRIVING YOUR HYUNDAI
13
Therefore, when the overdrive switch is turned "OFF", the transmission per-forms as a three speed unit and the overdrive warning light located in the instrument cluster will be illuminated.When the overdrive switch is turned "ON", the transmission functions as a fully automatic four speed unit with themaximum fuel economy potential of the vehicle being realized. HPC120D2-E General Operating Instructions
o The button in the selector handle
must be depressed before the selec- tor lever can be moved.
o The engine may only be started
when the selector is at position "P"or "N".
o Ensure that the footbrake is firmly
applied when shifting from "P" or"N" to "D", "2" or "L" and vice versa.
o Always engage the parking brake
when the vehicle is unattended,never use the "P" position in place of the parking brake.
o Under normal circumstances, the selector lever should be placed in the"D" position and the transmission allowed to select the most ideal ratiofor the circumstances. In this posi- tion maximum fuel economy will be achieved.
o When descending steep gradients where engine braking is required,the selector lever should be placedat the "2" or "L" position depending upon the vehicle speed. o When climbing steep gradients us-
ing large throttle openings, the trans- mission may repeatedly change be- tween two adjacent ratios. This is a normal characteristic and may beprevented by cancelling the over- drive facility if the shifting occurs between third and fourth ratios, se-lecting position "2" if the shifting occurs between third and second ratios or selecting position "1" if theshifting occurs between first and second ratios.
o Never move the selector lever to or from the "P" or "N" position with theaccelerator depressed.
o Ensure that the overdrive switch is at the "ON" position for maximumeconomy.
o If rapid acceleration is required, fully depress the accelerator pedal. Inthis condition, the kickdown mecha- nism will be operated and the trans-mission will automatically downshift according to the vehicle speed.
o The automatic transaxle may be used to great effect if the vehicle becomesstuck in snow or mud by allowing the vehicle to be rocked to and fro.