Page 149 of 539
1
FEATURES OF YOUR HYUNDAI
135
B290H03HP-GAT The CD auto changer is located in the right side of the luggage compartment.
o To use the CD auto changer.
1. Open the sliding lid of the CD auto changer.
2. To eject the compact disc maga-
zine, press the EJECT button lo- cated inside the CD auto changer.
3. Insert the discs into the magazine.
4. Push the magazine into the CD auto changer and close the sliding lid.
o The CD auto changer can be used when the ignition switch is in either"ON" or "ACC" position.
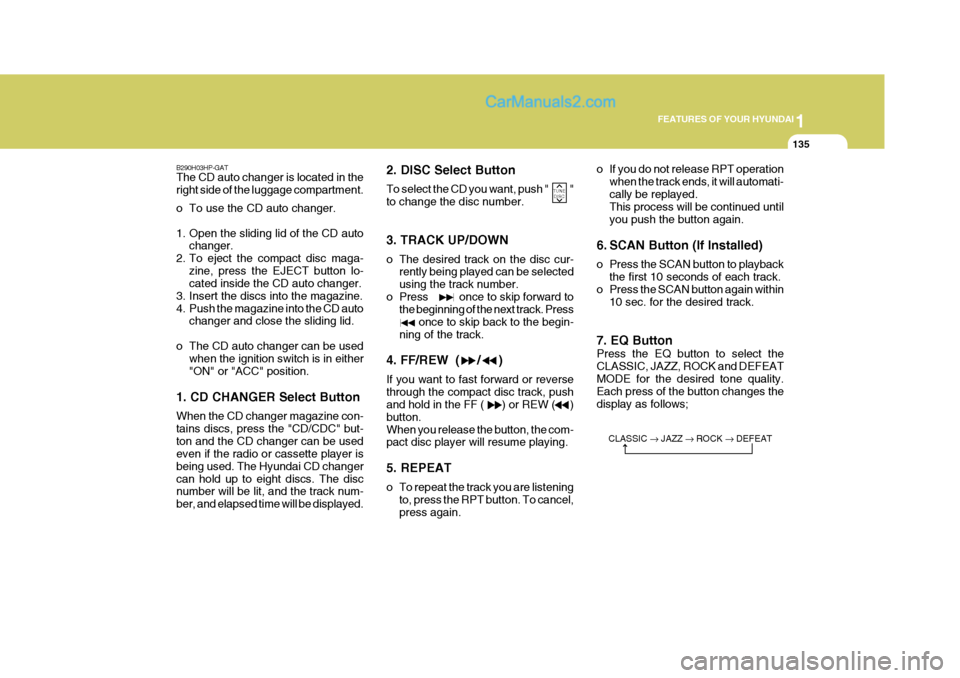
1. CD CHANGER Select Button When the CD changer magazine con- tains discs, press the "CD/CDC" but-ton and the CD changer can be used even if the radio or cassette player is being used. The Hyundai CD changercan hold up to eight discs. The disc number will be lit, and the track num- ber, and elapsed time will be displayed. 2. DISC Select Button To select the CD you want, push " " to change the disc number. 3. TRACK UP/DOWN
o The desired track on the disc cur-
rently being played can be selected using the track number.
o Press once to skip forward to the beginning of the next track. Press once to skip back to the begin-ning of the track.
4. FF/REW ( / ) If you want to fast forward or reverse through the compact disc track, push and hold in the FF ( ) or REW ( ) button.When you release the button, the com- pact disc player will resume playing. 5. REPEAT
o To repeat the track you are listening to, press the RPT button. To cancel, press again. o If you do not release RPT operation
when the track ends, it will automati-cally be replayed. This process will be continued until you push the button again.
6. SCAN Button (If Installed)
o Press the SCAN button to playback the first 10 seconds of each track.
o Press the SCAN button again within 10 sec. for the desired track.
7. EQ Button Press the EQ button to select the CLASSIC, JAZZ, ROCK and DEFEATMODE for the desired tone quality. Each press of the button changes the display as follows;
TUNE DISC
CLASSIC � JAZZ � ROCK � DEFEAT
Page 151 of 539
1
FEATURES OF YOUR HYUNDAI
137
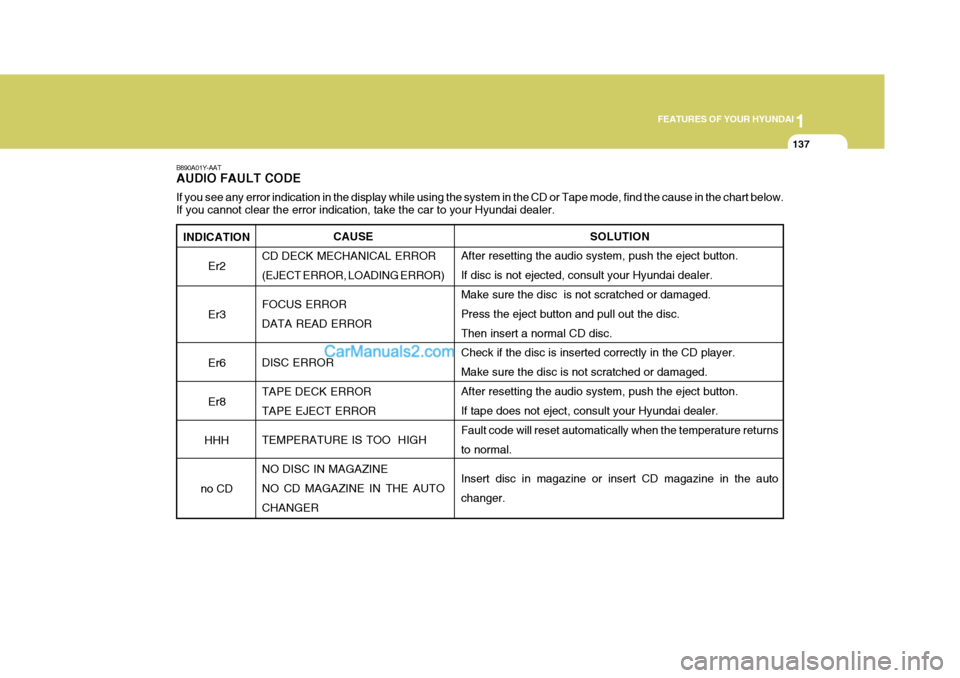
INDICATION Er2 Er3Er6 Er8
HHH
no CD
B890A01Y-AAT AUDIO FAULT CODE If you see any error indication in the display while using the system in the CD or Tape mode, find the cause in the chart below .
If you cannot clear the error indication, take the car to your Hyundai dealer.
SOLUTION
After resetting the audio system, push the eject button. If disc is not ejected, consult your Hyundai dealer.Make sure the disc is not scratched or damaged. Press the eject button and pull out the disc. Then insert a normal CD disc. Check if the disc is inserted correctly in the CD player. Make sure the disc is not scratched or damaged.After resetting the audio system, push the eject button. If tape does not eject, consult your Hyundai dealer. Fault code will reset automatically when the temperature returnsto normal. Insert disc in magazine or insert CD magazine in the auto changer.
CAUSE
CD DECK MECHANICAL ERROR(EJECT ERROR, LOADING ERROR) FOCUS ERROR DATA READ ERROR DISC ERROR TAPE DECK ERROR TAPE EJECT ERROR TEMPERATURE IS TOO HIGH NO DISC IN MAGAZINE NO CD MAGAZINE IN THE AUTO CHANGER
Page 352 of 539
1CONTROLS AND EQUIPMENT
44
!WARNING:
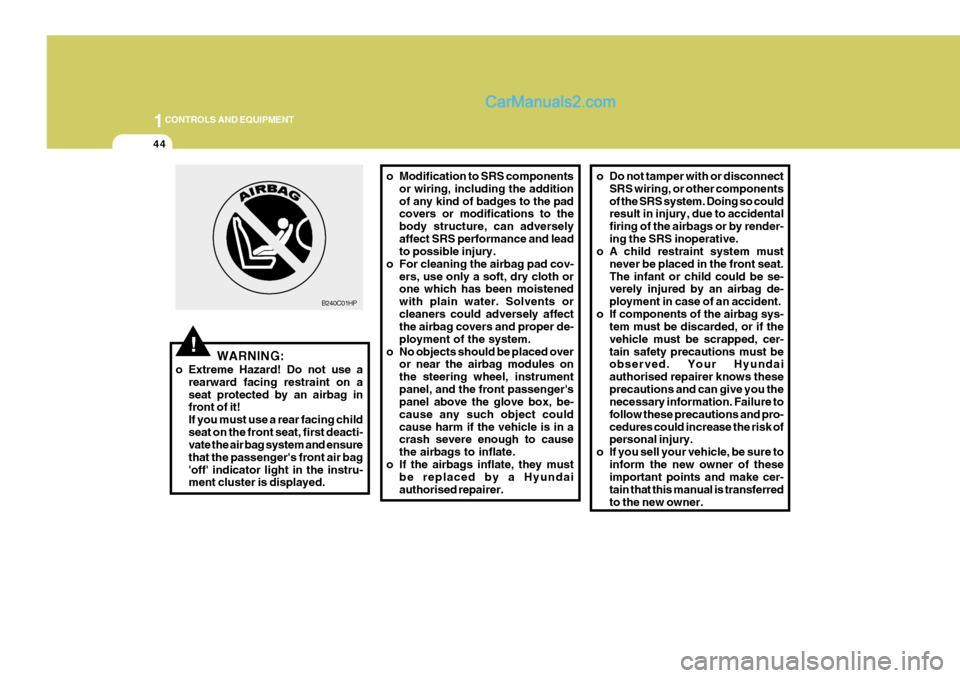
o Extreme Hazard! Do not use a rearward facing restraint on a seat protected by an airbag in front of it! If you must use a rear facing childseat on the front seat, first deacti- vate the air bag system and ensure that the passenger's front air bag'off' indicator light in the instru- ment cluster is displayed. o Modification to SRS components
or wiring, including the addition of any kind of badges to the pad covers or modifications to the body structure, can adverselyaffect SRS performance and lead to possible injury.
o For cleaning the airbag pad cov- ers, use only a soft, dry cloth orone which has been moistened with plain water. Solvents orcleaners could adversely affect the airbag covers and proper de- ployment of the system.
o No objects should be placed over or near the airbag modules onthe steering wheel, instrumentpanel, and the front passenger's panel above the glove box, be- cause any such object couldcause harm if the vehicle is in a crash severe enough to cause the airbags to inflate.
o If the airbags inflate, they must be replaced by a Hyundaiauthorised repairer.
B240C01HP
o Do not tamper with or disconnect
SRS wiring, or other components of the SRS system. Doing so could result in injury, due to accidental firing of the airbags or by render-ing the SRS inoperative.
o A child restraint system must
never be placed in the front seat.The infant or child could be se- verely injured by an airbag de- ployment in case of an accident.
o If components of the airbag sys- tem must be discarded, or if thevehicle must be scrapped, cer-tain safety precautions must be observed. Your Hyundai authorised repairer knows theseprecautions and can give you the necessary information. Failure to follow these precautions and pro-cedures could increase the risk of personal injury.
o If you sell your vehicle, be sure to inform the new owner of theseimportant points and make cer- tain that this manual is transferredto the new owner.
Page 367 of 539
1
CONTROLS AND EQUIPMENT
59
B300A01Y-EAT SPEEDOMETER Your Hyundai's speedometer is cali- brated in miles per hour and kilometers per hour. Petrol Engine
B300A01HP-E B300A03HP-E
Diesel EngineB310A02HP-EAT ODOMETER/TRIP ODOMETER Odometer The digital odometer records the total driving distance in miles, and is usefulfor keeping a record for maintenance intervals. It is normal for a new vehicle to have theodometer indicating less than 30mile. NOTE: Any alteration of the odometer may void your warranty coverage. B310A01HP-E
Trip Odometer
Odometer
B310A02HP-E
Reset Knob
Trip Odometer Pushing in the reset knob under the right side of the speedometer for less than 1 second when the ignition switch is turned "ON" displays the followingsequence:
Page 374 of 539
1CONTROLS AND EQUIPMENT
66DIGITAL CLOCK
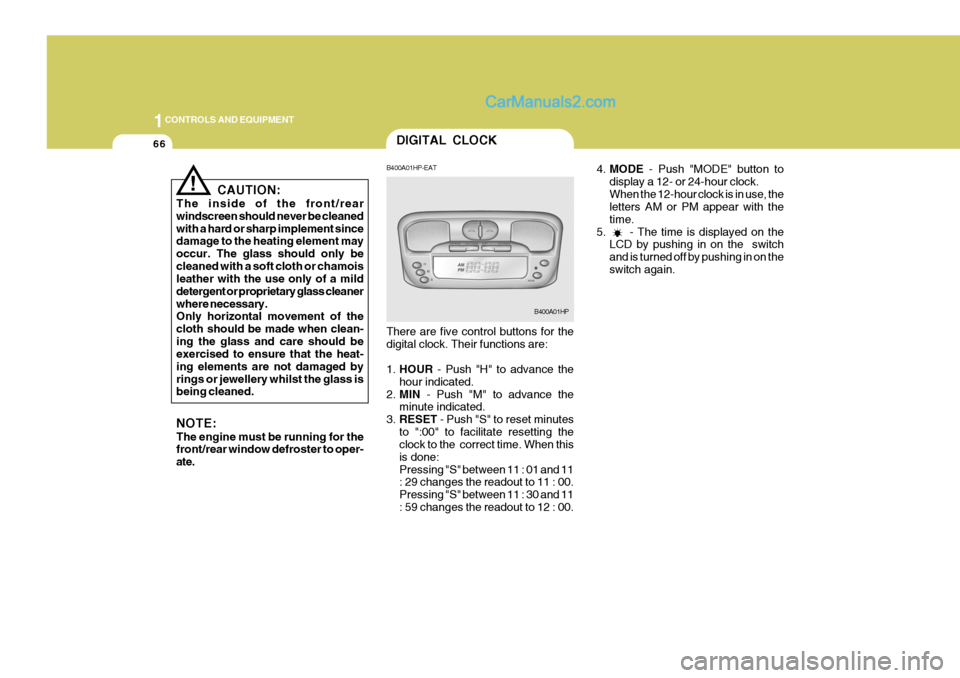
4.MODE - Push "MODE" button to
display a 12- or 24-hour clock. When the 12-hour clock is in use, the letters AM or PM appear with the time.
5. - The time is displayed on the LCD by pushing in on the switchand is turned off by pushing in on theswitch again.
! CAUTION:
The inside of the front/rear windscreen should never be cleanedwith a hard or sharp implement since damage to the heating element may occur. The glass should only becleaned with a soft cloth or chamois leather with the use only of a mild detergent or proprietary glass cleanerwhere necessary. Only horizontal movement of the cloth should be made when clean-ing the glass and care should be exercised to ensure that the heat- ing elements are not damaged byrings or jewellery whilst the glass is being cleaned. NOTE: The engine must be running for the front/rear window defroster to oper- ate. B400A01HP-EAT There are five control buttons for the digital clock. Their functions are: 1.
HOUR - Push "H" to advance the
hour indicated.
2. MIN - Push "M" to advance the
minute indicated.
3. RESET - Push "S" to reset minutes
to ":00" to facilitate resetting the clock to the correct time. When this is done:Pressing "S" between 11 : 01 and 11 : 29 changes the readout to 11 : 00. Pressing "S" between 11 : 30 and 11: 59 changes the readout to 12 : 00.
B400A01HP
Page 407 of 539
1
CONTROLS AND EQUIPMENT
99
B970B01HP-GAT Heating and Cooling Controls
1. Blower Fan Control Switch
2. AUTO (Automatic Control) Switch
3. OFF Switch
4. Display Window
5. Temperature Control Button
6. Defroster Switch
7. Rear Window Defrost Switch 8. Air Flow Control Switch
9. Air Conditioning Switch
10.Ambient Temperature Switch
11. Air Intake Control Switch (Recirculation air)
12. Air Intake Control Switch (Fresh air)B970B01HPAUTOMATIC HEATING AND COOLING CONTROL SYSTEM
B970A01Y-EAT (Not aII models) Your Hyundai is equipped with an au- tomatic heating and cooling controlsystem controlled by simply setting the desired temperature.
Page 408 of 539
1CONTROLS AND EQUIPMENT
100
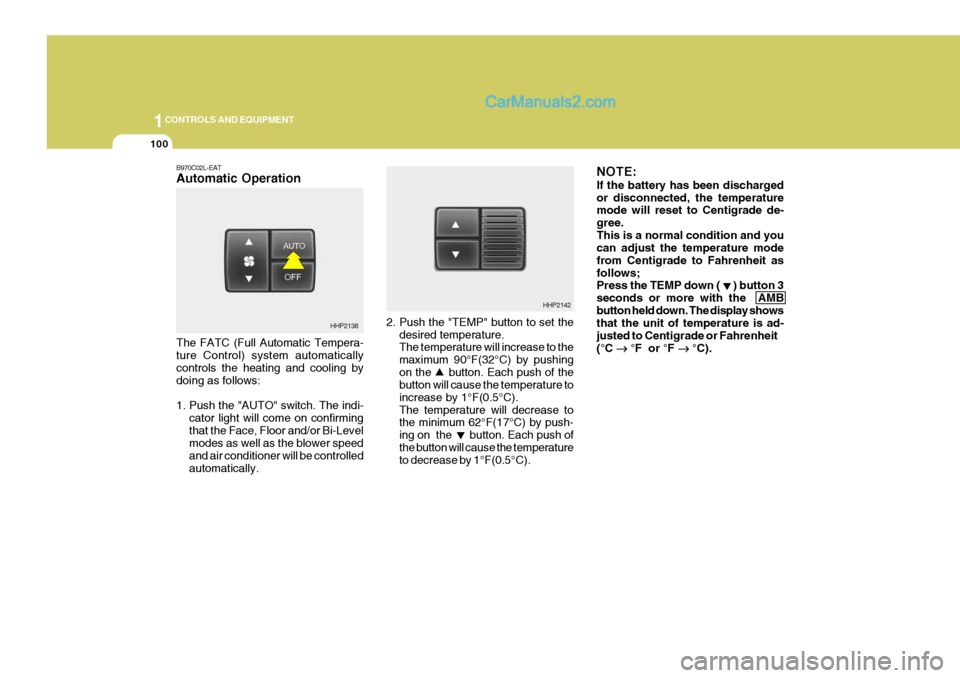
2. Push the "TEMP" button to set thedesired temperature. The temperature will increase to the maximum 90°F(32°C) by pushingon the button. Each push of the button will cause the temperature to increase by 1°F(0.5°C).The temperature will decrease to the minimum 62°F(17°C) by push- ing on the button. Each push ofthe button will cause the temperature to decrease by 1°F(0.5°C). NOTE: If the battery has been discharged or disconnected, the temperature mode will reset to Centigrade de- gree.This is a normal condition and you can adjust the temperature mode from Centigrade to Fahrenheit asfollows; Press the TEMP down ( ) button 3 seconds or more with the AMBbutton held down. The display shows that the unit of temperature is ad- justed to Centigrade or Fahrenheit(°C
� �
� �
� °F or °F
� �
� �
� °C).
HHP2142
B970C02L-EAT Automatic Operation The FATC (Full Automatic Tempera- ture Control) system automatically controls the heating and cooling by doing as follows:
1. Push the "AUTO" switch. The indi-
cator light will come on confirming that the Face, Floor and/or Bi-Level modes as well as the blower speed and air conditioner will be controlledautomatically.
HHP2138
Page 409 of 539
1
CONTROLS AND EQUIPMENT
101
B995A01Y-AAT AMBIENT TEMPERATURE SWITCH Pressing the AMB button displays the ambient temperature on the display. B980A01Y-AAT MANUAL OPERATION The heating and cooling system can be controlled manually as well as by pushing buttons other than the "AUTO" button. In this state, the system se-quentially works according to the order of buttons selected. The function of the buttons which arenot selected will be controlled auto- matically. Press the "AUTO" button in order toconvert to automatic control of the system.
HHP2147
NOTE: Never place anything covering the photo sensor which is located in the car on the instrument panel to en-sure better control of the heating and cooling system.
HHP2096
Photo sensor