2006 Hyundai Terracan airbag off
[x] Cancel search: airbag offPage 308 of 539
YOUR VEHICLE AT A GLANCE
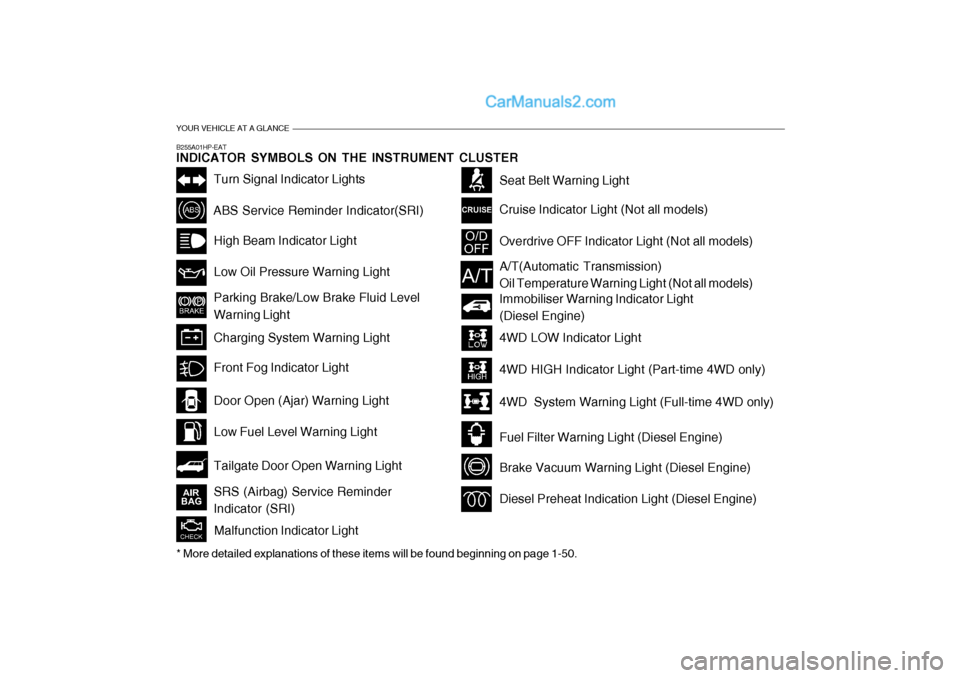
B255A01HP-EAT INDICATOR SYMBOLS ON THE INSTRUMENT CLUSTER
Turn Signal Indicator Lights
ABS Service Reminder Indicator(SRI)High Beam Indicator Light Low Oil Pressure Warning Light Parking Brake/Low Brake Fluid Level Warning Light Charging System Warning Light
Tailgate Door Open Warning Light
Door Open (Ajar) Warning Light Low Fuel Level Warning Light
Front Fog Indicator Light
Overdrive OFF Indicator Light (Not all models)
Immobiliser Warning Indicator Light (Diesel Engine)
Seat Belt Warning Light Cruise Indicator Light (Not all models)
Malfunction Indicator Light
A/T(Automatic Transmission) Oil Temperature Warning Light (Not all models)
4WD LOW Indicator Light 4WD HIGH Indicator Light (Part-time 4WD only)
4WD System Warning Light (Full-time 4WD only)
Fuel Filter Warning Light (Diesel Engine)
Brake Vacuum Warning Light (Diesel Engine)
Diesel Preheat Indication Light (Diesel Engine)
* More detailed explanations of these items will be found beginning on page 1-50.SRS (Airbag) Service Reminder Indicator (SRI)
Page 325 of 539
1
CONTROLS AND EQUIPMENT
17
!
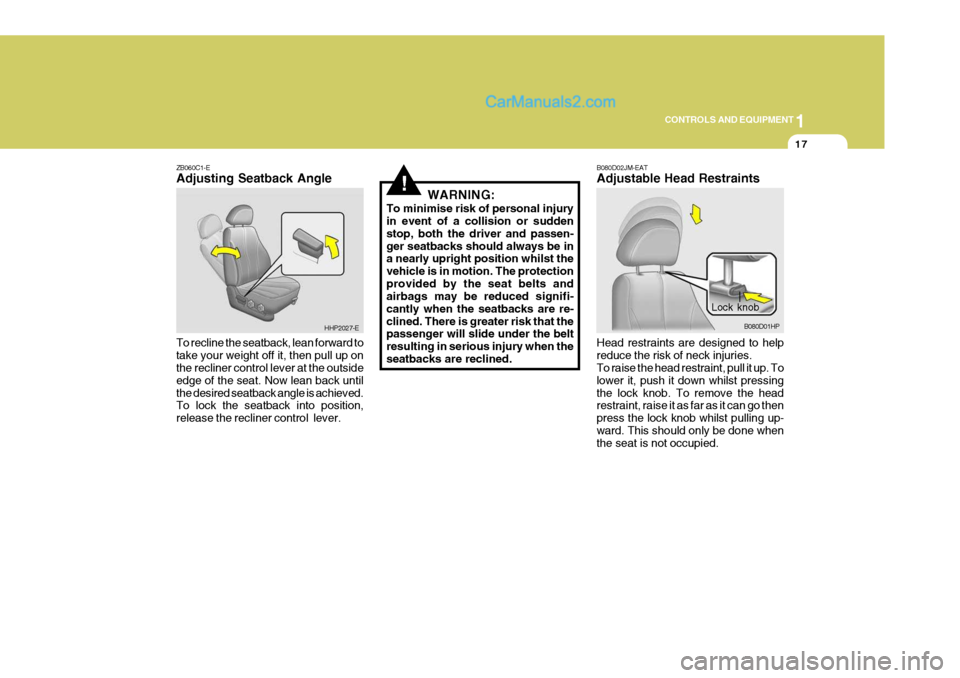
ZB060C1-E Adjusting Seatback Angle To recline the seatback, lean forward to take your weight off it, then pull up on the recliner control lever at the outside edge of the seat. Now lean back untilthe desired seatback angle is achieved. To lock the seatback into position, release the recliner control lever. WARNING:
To minimise risk of personal injury in event of a collision or sudden stop, both the driver and passen-ger seatbacks should always be in a nearly upright position whilst the vehicle is in motion. The protectionprovided by the seat belts and airbags may be reduced signifi- cantly when the seatbacks are re-clined. There is greater risk that the passenger will slide under the belt resulting in serious injury when the seatbacks are reclined.
HHP2027-E
Lock knob
B080D01HP
B080D02JM-EAT Adjustable Head Restraints Head restraints are designed to help reduce the risk of neck injuries. To raise the head restraint, pull it up. To lower it, push it down whilst pressingthe lock knob. To remove the head restraint, raise it as far as it can go then press the lock knob whilst pulling up-ward. This should only be done when the seat is not occupied.
Page 347 of 539
1
CONTROLS AND EQUIPMENT
39
NOTE:
o Both the driver's and front passenger's pre-tensioner seat belts will be activated in certainfrontal collisions. The pre- tensioner seat belts can be acti- vated alone or, where the frontalcollision is severe enough, to- gether with the airbags.
o When the pre-tensioner seat belts are activated, a loud noise may beheard and fine dust, which may appear to be smoke, may be vis-ible in the passenger compart- ment. These are normal operating conditions and are not hazard-ous.
o Although it is harmless, the fine
dust may cause skin irritation andshould not be breathed for pro- longed periods. Wash your hands and face thoroughly after an acci-dent in which the pre-tensioner seat belts were activated.
!!CAUTION:
o Because the sensor that activates the SRS airbag is connected with pre-tensioner seat belt, the SRS airbag warning light on theinstrument panel will blink for ap- proximately 6 seconds after the ignition key has been turned to the"ON" position or after the engine is started, and then it should turn off.
o If a pre-tensioner seat belt is not working properly, this warninglight will illuminate even if there isno malfunction of the SRS airbag. If the SRS airbag warning light does not blink for about 6 secondswhen the ignition key is turned to "ON" or the engine is started, or if it remains illuminated after blink-ing for approximately 6 seconds, or if it illuminates whilst the ve- hicle is being driven, please havea Hyundai authorised repairer in- spect the pre-tensioner seat belts and SRS airbag system as soon aspossible. WARNING:
o Pre-tensioners are designed to operate only one time. After acti- vation, pre-tensioner seat belts must be replaced. All seat belts,of any type, should always be replaced after they have been worn during a collision.
o The pre-tensioner seat belt as- sembly mechanisms become hotduring activation. Do not touchthe pre-tensioner seat belt as- semblies for several minutes af- ter they have been activated.
o Do not attempt to inspect or re-
place the pre-tensioner seat beltsyourself. This must be done by a Hyundai authorised repairer.
o Do not strike the pre-tensioner seat belt assemblies.
o Do not attempt to service or re-
pair the pre-tensioner seat belt system in any manner.
AIR
BAG
Page 348 of 539

1CONTROLS AND EQUIPMENT
40
o Improper handling of the pre-
tensioner seat belt assemblies, and failure to heed the warnings to not strike, modify, inspect, replace, service or repair the pretensionerseat belt assemblies may lead to improper operation or inadvertent activation and serious injury.
o Always wear seat belts when driv- ing or riding in a motor vehicle. belt system alone, in case of a frontalimpact of sufficient severity. NOTE: Be sure to read information about the SRS on the labels provided in the front of the sun visor and in the glovebox.
SUPPLEMENTAL RESTRAINT (AIRBAG) SYSTEM
B240A01HP-EAT
B240A01HP
Your Hyundai is equipped with a Supplemental Restraint (Airbag) Sys- tem. The indications of the system's presence are the letters "SRS AIRBAG" embossed on the airbag pad cover in the steering wheel and the passenger's side front panel pad abovethe glove box. The Hyundai SRS consists of airbags installed under the pad covers in the centre of the steering wheel and the passenger's side front panel above theglove box. The purpose of the SRS is to provide the vehicle's driver and/or the front passenger with additional pro-tection than that offered by the seat
!WARNING:
o As its name implies, the SRS is designed to work with, and be supplemental to, the driver's andthe passenger's three point seat belt systems and is not a substi- tute for them. Therefore your seatbelts must be worn at all times whilst the vehicle is in motion. The airbags deploy only in certainfrontal impact conditions severe enough to likely cause significant injury to the vehicle occupants.
o The SRS is designed to deploy the airbags only when an impact issufficiently severe and when theimpact angle is less than 30° from the forward longitudinal axis of the vehicle and will not deploy in
Page 352 of 539
1CONTROLS AND EQUIPMENT
44
!WARNING:
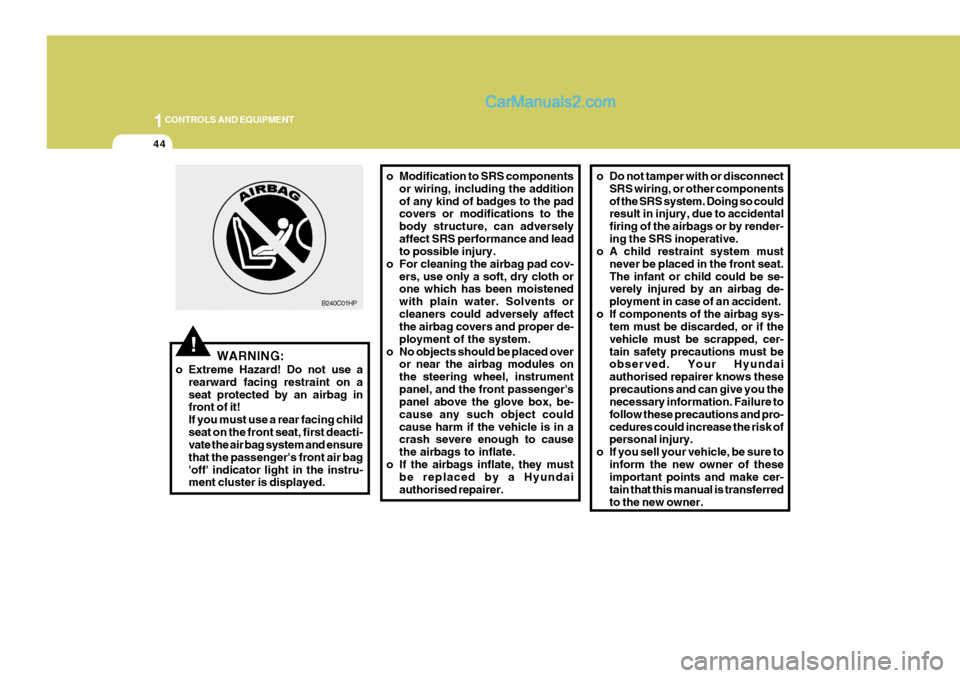
o Extreme Hazard! Do not use a rearward facing restraint on a seat protected by an airbag in front of it! If you must use a rear facing childseat on the front seat, first deacti- vate the air bag system and ensure that the passenger's front air bag'off' indicator light in the instru- ment cluster is displayed. o Modification to SRS components
or wiring, including the addition of any kind of badges to the pad covers or modifications to the body structure, can adverselyaffect SRS performance and lead to possible injury.
o For cleaning the airbag pad cov- ers, use only a soft, dry cloth orone which has been moistened with plain water. Solvents orcleaners could adversely affect the airbag covers and proper de- ployment of the system.
o No objects should be placed over or near the airbag modules onthe steering wheel, instrumentpanel, and the front passenger's panel above the glove box, be- cause any such object couldcause harm if the vehicle is in a crash severe enough to cause the airbags to inflate.
o If the airbags inflate, they must be replaced by a Hyundaiauthorised repairer.
B240C01HP
o Do not tamper with or disconnect
SRS wiring, or other components of the SRS system. Doing so could result in injury, due to accidental firing of the airbags or by render-ing the SRS inoperative.
o A child restraint system must
never be placed in the front seat.The infant or child could be se- verely injured by an airbag de- ployment in case of an accident.
o If components of the airbag sys- tem must be discarded, or if thevehicle must be scrapped, cer-tain safety precautions must be observed. Your Hyundai authorised repairer knows theseprecautions and can give you the necessary information. Failure to follow these precautions and pro-cedures could increase the risk of personal injury.
o If you sell your vehicle, be sure to inform the new owner of theseimportant points and make cer- tain that this manual is transferredto the new owner.
Page 355 of 539

1
CONTROLS AND EQUIPMENT
47
1. Tachometer
2. Turn Signal Indicator Light
3. Coolant Temperature Gauge
4. Fuel Gauge
5. Speedometer
6. ABS Service Reminder Indicator(SRI) (Not all models)
7. Supplemental Restraint (AirBag) System Service Reminder lndicator (SRI)
8. Low Oil Pressure Warning Light
9. Parking Brake/Low Brake Fluid LevelWarning Light
10. Charging System Warning Light
11. A/T Oil Temperature Warning Light (Not all models)
12. Overdrive OFF Indicator Light (Not all models)
13. High Beam Indicator Light 14. Front Fog Indicator Light
15. Automatic Transmission Position Indicator Light (Not all models)
16. Cruise Indicator Light (Not all models)
17. 4WD LOW Indicator Light
18. 4WD HIGH Indicator Light (Part-time 4WD)
/4WD System Warning Light (Full-time 4WD)
19. Malfunction Indicator Light (MIL)
20. Trip Odometer
21. Odometer 22.Trip odometer Reset Knob
23. Tailgate Door Open Warning Light
24. Door Open (Ajar) Warning Light
25. Seat Belt Warning Light
26. Low Fuel Warning Light
Page 357 of 539
1
CONTROLS AND EQUIPMENT
49
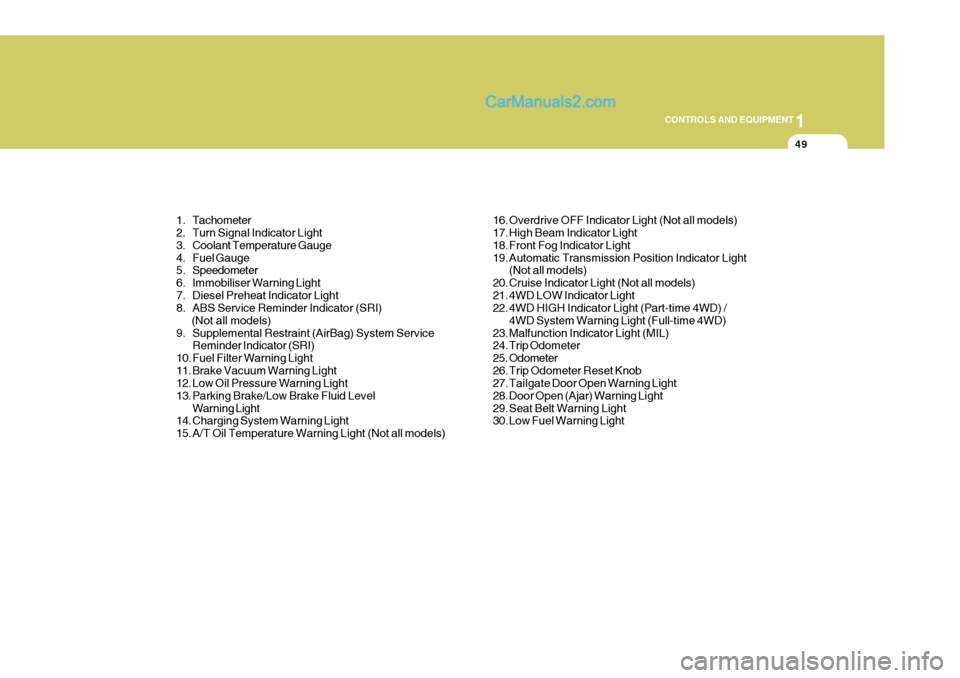
1. Tachometer
2. Turn Signal Indicator Light
3. Coolant Temperature Gauge
4. Fuel Gauge
5. Speedometer
6. Immobiliser Warning Light
7. Diesel Preheat Indicator Light
8. ABS Service Reminder Indicator (SRI) (Not all models)
9. Supplemental Restraint (AirBag) System Service Reminder Indicator (SRI)
10. Fuel Filter Warning Light
11. Brake Vacuum Warning Light
12. Low Oil Pressure Warning Light
13. Parking Brake/Low Brake Fluid Level Warning Light
14. Charging System Warning Light
15. A/T Oil Temperature Warning Light (Not all models) 16. Overdrive OFF Indicator Light (Not all models)
17. High Beam Indicator Light
18. Front Fog Indicator Light
19. Automatic Transmission Position Indicator Light
(Not all models)
20. Cruise Indicator Light (Not all models)
21. 4WD LOW Indicator Light
22. 4WD HIGH Indicator Light (Part-time 4WD) / 4WD System Warning Light (Full-time 4WD)
23. Malfunction Indicator Light (MIL)
24. Trip Odometer
25. Odometer
26. Trip Odometer Reset Knob
27. Tailgate Door Open Warning Light
28. Door Open (Ajar) Warning Light
29. Seat Belt Warning Light
30. Low Fuel Warning Light
Page 360 of 539
1CONTROLS AND EQUIPMENT
52
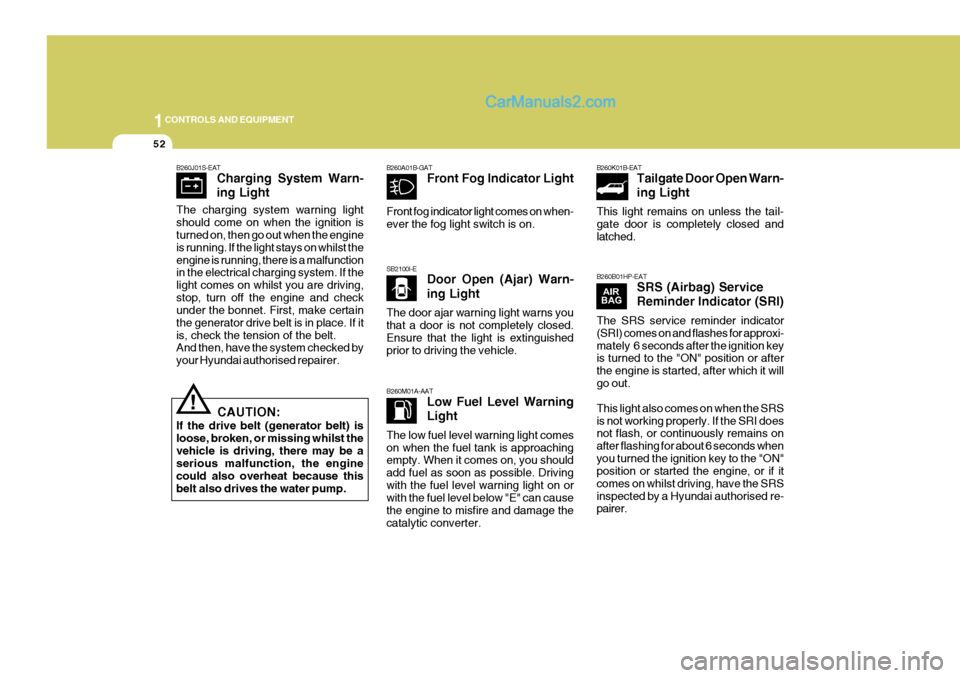
SB2100I-EDoor Open (Ajar) Warn- ing Light
The door ajar warning light warns you that a door is not completely closed. Ensure that the light is extinguished prior to driving the vehicle. B260M01A-AAT Low Fuel Level Warning Light
The low fuel level warning light comes on when the fuel tank is approaching empty. When it comes on, you should add fuel as soon as possible. Drivingwith the fuel level warning light on or with the fuel level below "E" can cause the engine to misfire and damage thecatalytic converter.
B260A01B-GAT
Front Fog Indicator Light
Front fog indicator light comes on when-ever the fog light switch is on. B260K01B-EAT
Tailgate Door Open Warn- ing Light
This light remains on unless the tail-
gate door is completely closed andlatched. B260B01HP-EAT SRS (Airbag) Service Reminder Indicator (SRI)
The SRS service reminder indicator (SRI) comes on and flashes for approxi- mately 6 seconds after the ignition key is turned to the "ON" position or after the engine is started, after which it willgo out. This light also comes on when the SRS is not working properly. If the SRI does not flash, or continuously remains on after flashing for about 6 seconds whenyou turned the ignition key to the "ON" position or started the engine, or if it comes on whilst driving, have the SRSinspected by a Hyundai authorised re- pairer.
!
B260J01S-EAT
Charging System Warn- ing Light
CAUTION:
If the drive belt (generator belt) is loose, broken, or missing whilst thevehicle is driving, there may be a serious malfunction, the engine could also overheat because thisbelt also drives the water pump.
The charging system warning light should come on when the ignition is turned on, then go out when the engine is running. If the light stays on whilst theengine is running, there is a malfunction in the electrical charging system. If the light comes on whilst you are driving,stop, turn off the engine and check under the bonnet. First, make certain the generator drive belt is in place. If itis, check the tension of the belt. And then, have the system checked by your Hyundai authorised repairer.