Page 58 of 320

This section gives inf ormation about
the controls and displays that
contribute to the daily operation of
your vehicle. All the essential
controls are within easy reach............................
Control Locations .56
............................
Instrument Panel .57
..........
Instrument Panel Indicators .59
.............................................
Gauges .67
Controls Near the Steering
...........................................
Wheel .71
........................
Multi-Control Lever .72
...................
Headlight Control Dial .73
........
Instrument Panel Brightness .75
.................
Hazard Warning Button .76
..........
Steering Wheel Adjustment .76
..................................................
Keys .77
........................
Immobilizer System .78
................................
Ignition Switch .79
......................................
Door Locks .80
.......................
Remote Transmitter .86
.......................
Dual-Action Tailgate .89
...............................
In-Bed Trunk .92
.................................................
Seats .95
..................................
Seat Heaters .101
............................
Power Windows .102
.......................................
Moonroof .105
...............................
Parking Brake .106
...........................................
Mirrors .107 .........
Interior Convenience Items .109
.........................
Center Console .110
.......
Console Compartments .110
.........................
Cargo Hooks .111
.................
Beverage Holders .111
..................................
Glove Box .112
................................
Coat Hooks .112
....................
Sunglasses Holder .112
........
Accessory Power Sockets .113
...................................
Sun Visor .114
............................
Vanity Mirror .114
...............................
Interior Lights .115
.....................................
Bed Lights .117
Instruments and Controls
Inst rument s and Cont rols
55
TM
�����—�
���—�����y�
�����������
�y���
�(�����������y���������y
Page 89 of 320

�µ
�µ �µ
Press this button once
to unlock the driver’s door. Push it
twice to unlock the other doors and
the In-Bed Trunk.
Some exterior and interior lights will
f lash twice each time you push the
button.
When you press the UNLOCK
button, the f ront and rear individual
map lights, depending on the interior
light control switch position, will
come on (see page ). If you do not
open any door, the lights stay on f or
about 30 seconds, then go out. If you
relock the doors and the In-Bed
Trunk with the remote transmitter
bef ore 30 seconds have elapsed, the
lights will go of f immediately.
Press this button once to
lock all doors and the In-Bed Trunk.
Some exterior and interior lights will
flash once.
When you push LOCK twice within 5
seconds, you will hear a beep to
verify that the doors and In-Bed
Trunk are locked and the security
system (if equipped) has set. This
button does not work if any door is
not f ully closed or the key is in the
ignition switch. Press and hold this
button for about 1 second to attract
attention; the horn will sound and
the exterior lights will f lash f or about
30 seconds. To cancel panic mode,
press any other button on the remote
transmitter, or turn the ignition
switch to ON (II). Panic mode does
not work when the key is in the
ignition switch. If you do not open any door within 30
seconds, the doors automatically
relock, and the security system sets
(if equipped). The UNLOCK button
does not work when the key is in the
ignition switch.
You can also open all side windows
f rom outside the vehicle with the
remote transmitter (see page ).
115 104
UNL OCK
LOCK PA NIC
Remote Transmitter
86
LED
UNLOCK
BUTTON
PANIC
BUTTON LOCK
BUTTON
�����—�
���—�����y�
�������������y���
�(�����������y�������
�y
Page 113 of 320

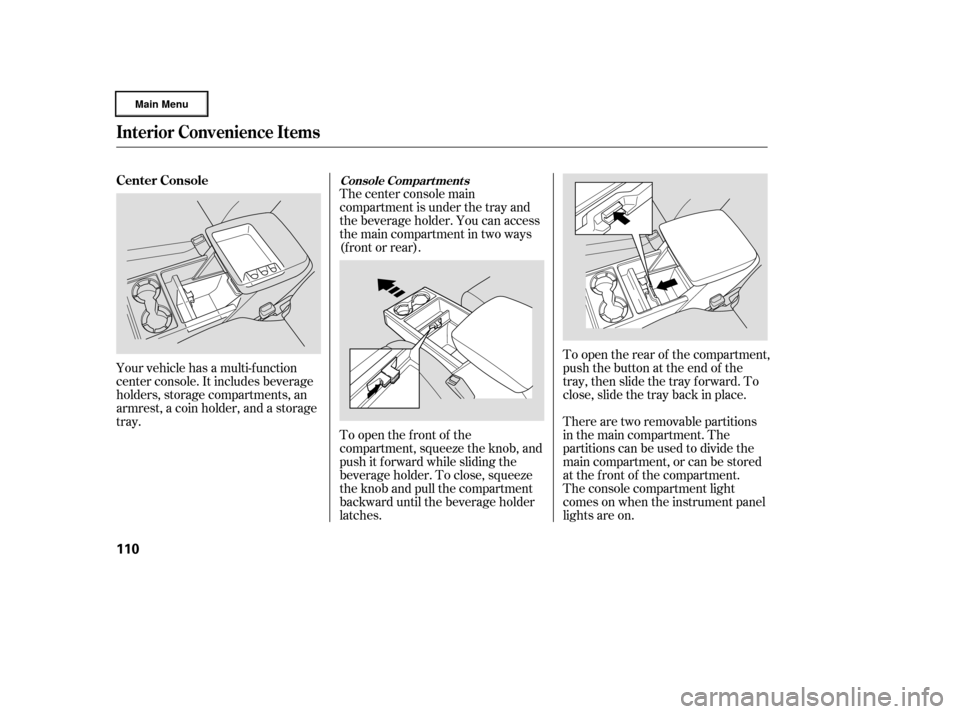
Your vehicle has a multi-f unction
center console. It includes beverage
holders, storage compartments, an
armrest, a coin holder, and a storage
tray.The center console main
compartment is under the tray and
the beverage holder. You can access
the main compartment in two ways
(f ront or rear).
To open the f ront of the
compartment, squeeze the knob, and
push it f orward while sliding the
beverage holder. To close, squeeze
the knob and pull the compartment
backward until the beverage holder
latches.
To open the rear of the compartment,
push the button at the end of the
tray, then slide the tray forward. To
close, slide the tray back in place.
The console compartment light
comesonwhentheinstrumentpanel
lights are on. There are two removable partitions
in the main compartment. The
partitions can be used to divide the
main compartment, or can be stored
at the f ront of the compartment.
Interior Convenience Items
Center ConsoleConsole Compart ment s
110
�����—�
���—�����y�
�������������y���
�(�����������y���
�
���y
Page 115 of 320
Open the glove box by pulling the
handle. Close it with a f irm push.
Lock or unlock the glove box with
the master key.
The glove box light comes on when
the parking lights are on.Some larger styles of sunglasses
may not f it in the holder.
These hooks are not designed f or
large or heavy items.
To open the sunglasses holder, push
on the rear edge. Make sure the
holder is closed while you are driving.
Glove Box
Sunglasses Holder
Coat Hooks
Interior Convenience Items
112
SUNGLASSES HOLDER
An open glove box can cause
serious injury to your passenger
inacrash,evenifthe
passenger is wearing the seat
belt.
Always keep the glove box
closed while driving.
�����—�
���—�����y�
���������
�
�y���
�(�����������y���
�
���y
Page 118 of 320

When the interior light control switch isin the ON position: When the switch is in the OFF position:
When the switch is in the door position:
None of the lights come on when a
door is opened.
The map lights in the f ront can be
turned on and of f by pushing each
lens. The rear map lights cannot
be used.
All the individual map lights and
the rear console light come on and
stay on as long as the switch
remains in the ON position. The individual map lights and the
rear console light come on when
any door is opened, or when the
remote transmitter or the key is
used to unlock the doors. When
the doors are closed, each
individual map light can be turned
on and of f by pushing the lens.
The lights fade out about 30
seconds after all the doors are
closed.
With any door lef t open and the
key is removed f rom the ignition
switch, the lights stay on about 3
minutes, then go out.
Interior Lights
Interior L ight Control Switch
Inst rument s and Cont rols
115
ON
OFF
DOOR POSITION
�����—�
���—�����y�
�������������y���
�(�����������y���
�����y
Page 119 of 320

Turn on a f ront individual map light
by pushing the lens. Push the lens
again to turn it off. With the interior
light control switch in the door
position, a rear map light can be
turned on by pushing the lens. Push
the lens again to turn it off.The courtesy light in each door
comes on when you open that door.
The light around the ignition switch
only comes on when you open the
driver’s door. Af ter you close the
door, the ignition switch light f ades
out in about 30 seconds.
The courtesy light in the back of the
center console comes on when you
open any door with the interior light
control switch in the door position.
Af ter you close the doors, the light
f ades out.
The map lights stay on when the
interior light control switch is in the
door position and the map light
switch is on.
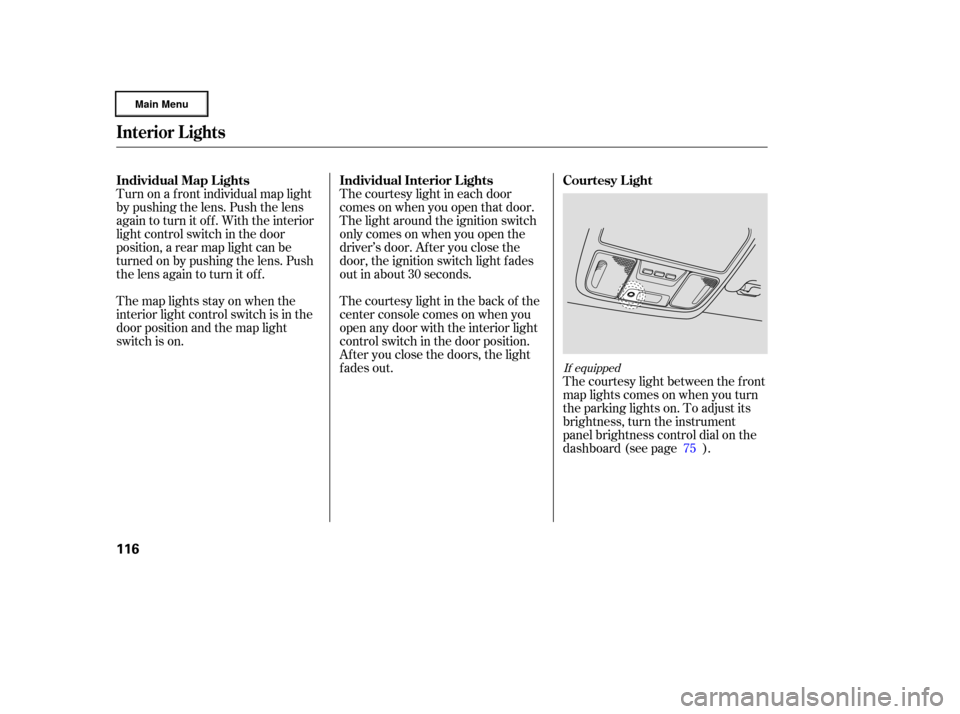
The courtesy light between the f ront
map lights comes on when you turn
the parking lights on. To adjust its
brightness, turn the instrument
panel brightness control dial on the
dashboard (see page ).75
If equipped
Interior Lights
Individual Map L ights Individual Interior L ights Courtesy L ight
116
�����—�
���—�����y�
�������������y���
�(�����������y���
���
�y
Page 285 of 320
Check the smaller f uses in the
under-hood f use boxes and all the
fuses in the interior fuse box by
pulling out each one with the f use
puller provided in the primary
under-hood f use box.
Turn the ignition switch to LOCK
(0). Make sure the headlights and
all other accessories are off.
Remove the cover f rom the f use
box. Check each of the large f uses in
the primary under-hood f use box
by looking through the side
window at the wire inside.
Removing these f uses requires a
Phillips-head screwdriver.4.
3.
1.
2
Fuses
282
BLOWN
FUSE PULLER
BLOWN
FUSE
�����—�
���—�����y�
�������������y���
�(�����������y���������y
Page 288 of 320
�µ
�µ
�µ
�µ
�Î
�Î�Î
�Î
�Î�Î
�Î�Î
�Î�Î
No. No. Amps. Circuits Protected
Amps. Circuits Protected
1
2
3
4
5
6
7
8
9
10
11
12
13
14
15
16
17
If equipped 18
19
20
21
22
23
24
25
26
27
28
29
30
31
32
33
15 A
15 A
7.5 A
7.5 A 10 A
7.5 A 20 A
20 A
20 A
20 A
20 A
7.5 A
7.5 A
7.5 A
(7.5 A) IG ACG
IG Fuel Pump
IG Washer
IG Meter
IG SRS
IGP
Left Rear Window
Right Rear Window
Passenger’s Window
Back Window
Driver’s Window
Not Used
IG HAC
IG VSA/ABS
ACC
HAC Option
7.5 A
15 A
(10 A) 15 A
20 A
10 A
7.5 A 20 A
10 A
7.5 A 30 A
(10 A)
(20 A)
(20 A) Bed Lights
IG Coil
Daytime Running Light
LAF
Radio
Interior Lights
Back Up
Door Lock
Rear Accessory Socket
OPDS
IG, Wiper
Not Used
Not Used
Not Used
: :Canadian models
Driver’s Power Seat Lumbar
Driver’s Power Seat Sliding
Driver’s Power Seat Reclining
Fuse Locations
T aking Care of t he Unexpect ed
285
INTERIOR FUSE BOX
�����—�
���—�
���y�
�����������
�y���
�(�����������y���������y