Page 55 of 320
These labels are in the locations
shown. They warn you of potential
hazards that could cause serious
injury. Read these labels caref ully.
If a label comes of f or becomes hard
to read (except for the U.S.
dashboard label which is removed by
the owner), contact your dealer f or a
replacement.U.S. modelsCanadian models
U.S. models only
U.S. models only
Saf ety L abels
52
RADIATOR CAP SUN VISOR
DASHBOARD
SUN VISOR
�����—�
���—�����y�
�������������y���
�(�����������y���������y
Page 72 of 320

�¶�¶�µ�µ
�µ�µ�µ
�µ�µ�µ
This shows the temperature of the
engine’s coolant. During normal
operation, the pointer should rise
from the bottom white mark to about
the middle of the gauge. In severe
driving conditions, such as very hot
weather or a long period of uphill
driving, the pointer may rise to the
upper zone. If it reaches the red
(hot) mark, pull saf ely to the side of
the road. See page f or
instructions and precautions on
checking the engine’s cooling
system. This indicator displays the outside
temperature in Fahrenheit (U.S.
models) or Centigrade (Canadian
models).
The temperature sensor is in the
f ront bumper. Theref ore, the
temperature reading can be af f ected
by heat ref lection f rom the road
surf ace, engine heat, and the
exhaust f rom surrounding traf f ic.
This can cause an incorrect
temperature reading when your
speed is under 19 mph (30 km/h).
The sensor delays the indicator
update until it reaches the correct
outside temperature. This may take
several minutes.
If the outside temperature is
incorrectly displayed, you can adjust
it up 5°F in U.S. models ( 3°C in
Canadian models) warmer or cooler.NOTE: The temperature must be
stabilized bef ore doing this
procedure.
To adjust the outside temperature
indicator, make sure the outside
temperature indicator is shown in
thedisplay,thenpressandholdthe
RESET button f or 10 seconds (the
TRIP A or B is also reset). The
f ollowing sequence will appear f or 1
secondeach:0,1,2,3,4,5, 5, 4,
3, 2, 1, 0 (U.S.) or 0, 1, 2, 3,
3, 2, 1, 0 (Canada).
When it reaches the desired value,
release the RESET button. You
should see the new outside
temperature displayed.
In certain weather conditions,
temperature readings near f reezing
(32°F, 0°C) could mean that ice is
f orming on the road surf ace.
276
If equipped
Gauges
Temperature Gauge
Outside Temperature Indicator
Inst rument s and Cont rols
69
�����—�
���—�����y�
�����������
�y���
�(�����������y���������y
Page 78 of 320

If you do not insert the key in the
ignition switch af ter opening the
driver’s door, the illumination turns
of f about 30 seconds af ter you close
the door.
If you insert the key but do not turn
the ignition switch to ON (II), the
illumination turns of f in about 10
seconds.
The instrument panel brightness is
dimmedwhenyouturntheheadlight
controldialto‘‘ ’’or
‘‘ ’’ position to reduce glare at
night. To cancel it, turn the
instrument panel brightness control
dial upward f ully until you hear a
click.
The instrument panel will illuminate
with reduced brightness when you
unlock and open the driver’s door.
The brightness will increase slightly
when you insert the key in the
ignitionswitch,thengotonormal brightness when you turn the
ignition switch to ON (II).
The dial on the instrument panel
controls the brightness of the
instrument panel lights and the
console compartment light. Turn the
dial to adjust the brightness.
With the headlight control dial of f ,
the high beam headlights and the
high beam indicator come on with
reduced brightness when you turn
the ignition switch to ON (II) and
release the parking brake. They
remain on until you turn the ignition
switch of f , even if you set the
parking brake.
The headlights revert to normal
operation when you turn them on
with the headlight control dial.
Canadian models only
Instrument Panel Brightness
Daytime Running L ights
Headlights, Instrument Panel Brightness
Inst rument s and Cont rols
75
INSTRUMENT PANEL
BRIGHTNESS CONTROL DIAL
�����—�
���—�����y�
�������������y���
�(�����������y���������y
Page 86 of 320

CONT INUED
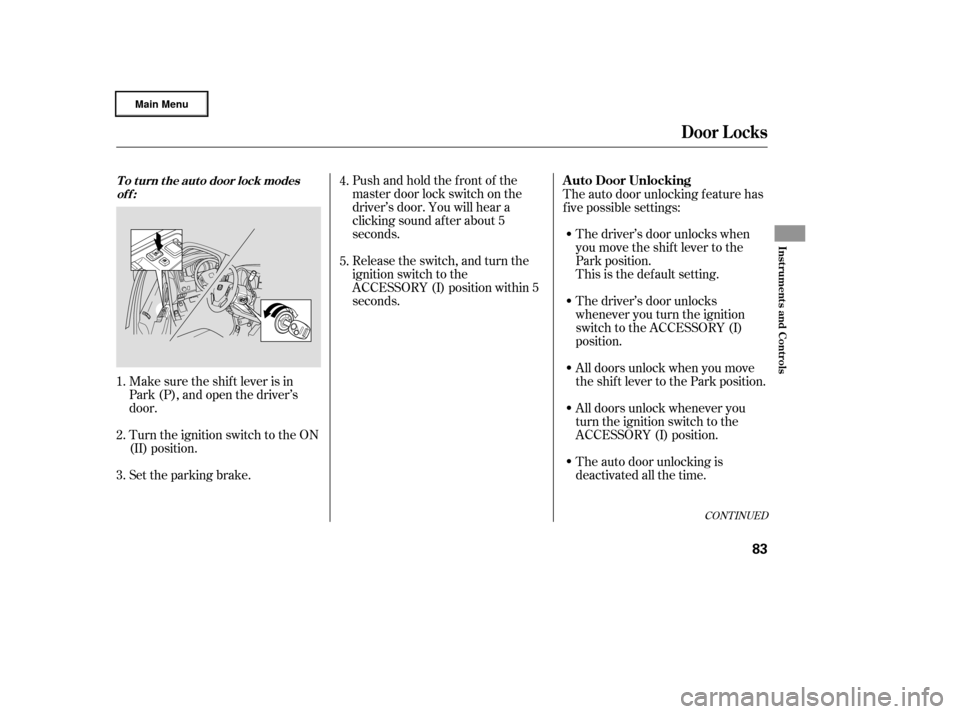
Pushandholdthefrontof the
master door lock switch on the
driver’s door. You will hear a
clicking sound af ter about 5
seconds.
Make sure the shif t lever is in
Park (P), and open the driver’s
door.
Turn the ignition switch to the ON
(II) position. The driver’s door unlocks when
you move the shif t lever to the
Park position.
The auto door unlocking f eature has
f ive possible settings:
Release the switch, and turn the
ignition switch to the
ACCESSORY (I) position within 5
seconds.
Set the parking brake. This is the def ault setting.
The driver’s door unlocks
whenever you turn the ignition
switch to the ACCESSORY (I)
position.
All doors unlock when you move
the shif t lever to the Park position.
All doors unlock whenever you
turn the ignition switch to the
ACCESSORY (I) position.
The auto door unlocking is
deactivated all the time.
1. 5. 4.
2.
3.
Door L ocks
To turn the auto door lock modes off:A uto Door Unlocking
Inst rument s and Cont rols
83
�����—�����—�
���y�
�������������y���
�(�����������y���������y
Page 87 of 320

�µ
�µ
Make sure the shif t lever is in
Park (P), and close the driver’s
door. Turn the ignition switch to the ON
(II) position.
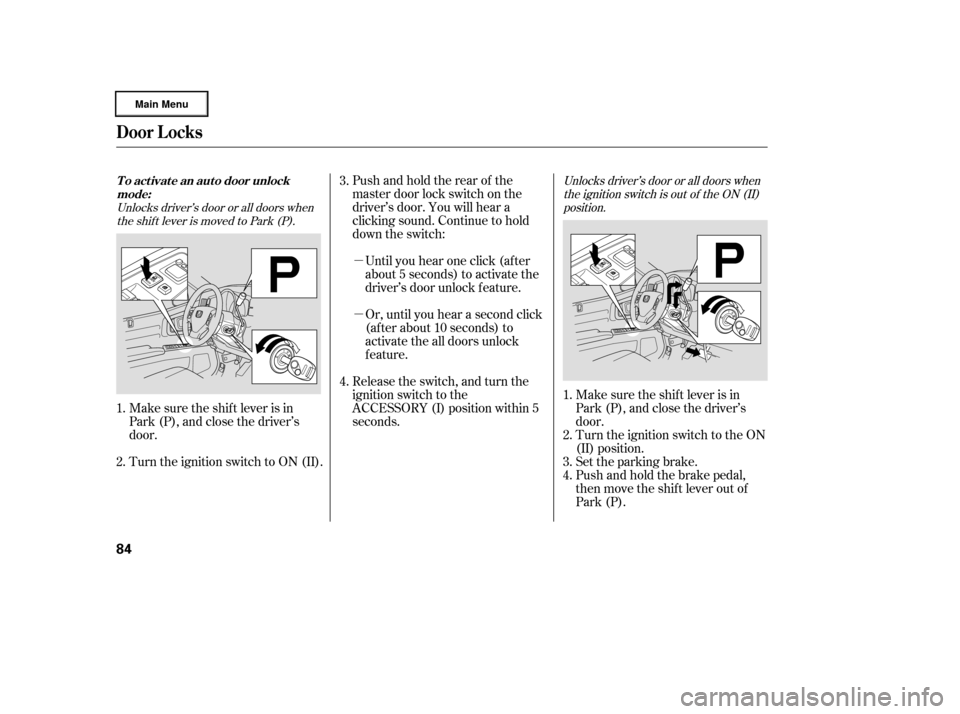
Turn the ignition switch to ON (II). Pushandholdtherearof the
master door lock switch on the
driver’s door. You will hear a
clicking sound. Continue to hold
down the switch:
Until you hear one click (af ter
about 5 seconds) to activate the
driver’s door unlock f eature.
Or, until you hear a second click
(af ter about 10 seconds) to
activate the all doors unlock
feature.
Make sure the shif t lever is in
Park (P), and close the driver’s
door.
Release the switch, and turn the
ignition switch to the
ACCESSORY (I) position within 5
seconds.
Set the parking brake.
Push and hold the brake pedal,
then move the shift lever out of
Park (P).
1.
2.
4. 3.
1.
2.
3.
4.
Unlocks driver’s door or all doors whenthe shift lever is moved to Park (P). Unlocks driver’s door or all doors when
the ignition switch is out of the ON (II)position.
Door L ocks
To activate an auto door unlockmode:
84
�����—�����—�
���y�
�������������y���
�(�����������y���������y
Page 88 of 320

�µ
�µTurn the ignition switch to the ON
(II) position.Pushandholdtherearof the
master door lock switch on the
driver’s door. You will hear a
clicking sound af ter about 5
seconds.
Make sure the shif t lever is in
Park (P), and open the driver’s
door. Release the switch, and turn the
ignition switch to the
ACCESSORY (I) position within 5
seconds.
If your vehicle’s battery is removed
or goes dead, the auto door lock/
unlock setting is reset to the
deactivated mode.
Pushandholdtherearof the
master door lock switch on the
driver’s door. You will hear a
clicking sound. Continue to hold
down the switch:
Until you hear one click (af ter
about 5 seconds) to activate the
driver’s door unlock f eature.
Or, until you hear a second click
(af ter about 10 seconds) to
activate the all doors unlock
feature.
Release the switch, turn the
ignition switch to the
ACCESSORY (I) position within 5
seconds and move the shif t lever
to Park (P).
Set the parking brake.4.
5.
1.
2.
3.
5.
6.
Door L ocks
To turn the auto door unlock modes
off:
Inst rument s and Cont rols
85
�����—�����—�
���y�
�������������y���
�(�����������y���������y
Page 89 of 320

�µ
�µ �µ
Press this button once
to unlock the driver’s door. Push it
twice to unlock the other doors and
the In-Bed Trunk.
Some exterior and interior lights will
f lash twice each time you push the
button.
When you press the UNLOCK
button, the f ront and rear individual
map lights, depending on the interior
light control switch position, will
come on (see page ). If you do not
open any door, the lights stay on f or
about 30 seconds, then go out. If you
relock the doors and the In-Bed
Trunk with the remote transmitter
bef ore 30 seconds have elapsed, the
lights will go of f immediately.
Press this button once to
lock all doors and the In-Bed Trunk.
Some exterior and interior lights will
flash once.
When you push LOCK twice within 5
seconds, you will hear a beep to
verify that the doors and In-Bed
Trunk are locked and the security
system (if equipped) has set. This
button does not work if any door is
not f ully closed or the key is in the
ignition switch. Press and hold this
button for about 1 second to attract
attention; the horn will sound and
the exterior lights will f lash f or about
30 seconds. To cancel panic mode,
press any other button on the remote
transmitter, or turn the ignition
switch to ON (II). Panic mode does
not work when the key is in the
ignition switch. If you do not open any door within 30
seconds, the doors automatically
relock, and the security system sets
(if equipped). The UNLOCK button
does not work when the key is in the
ignition switch.
You can also open all side windows
f rom outside the vehicle with the
remote transmitter (see page ).
115 104
UNL OCK
LOCK PA NIC
Remote Transmitter
86
LED
UNLOCK
BUTTON
PANIC
BUTTON LOCK
BUTTON
�����—�
���—�����y�
�������������y���
�(�����������y�������
�y
Page 130 of 320

�µ
�µ Turning the f an speed control dial all
the way to the left shuts the system
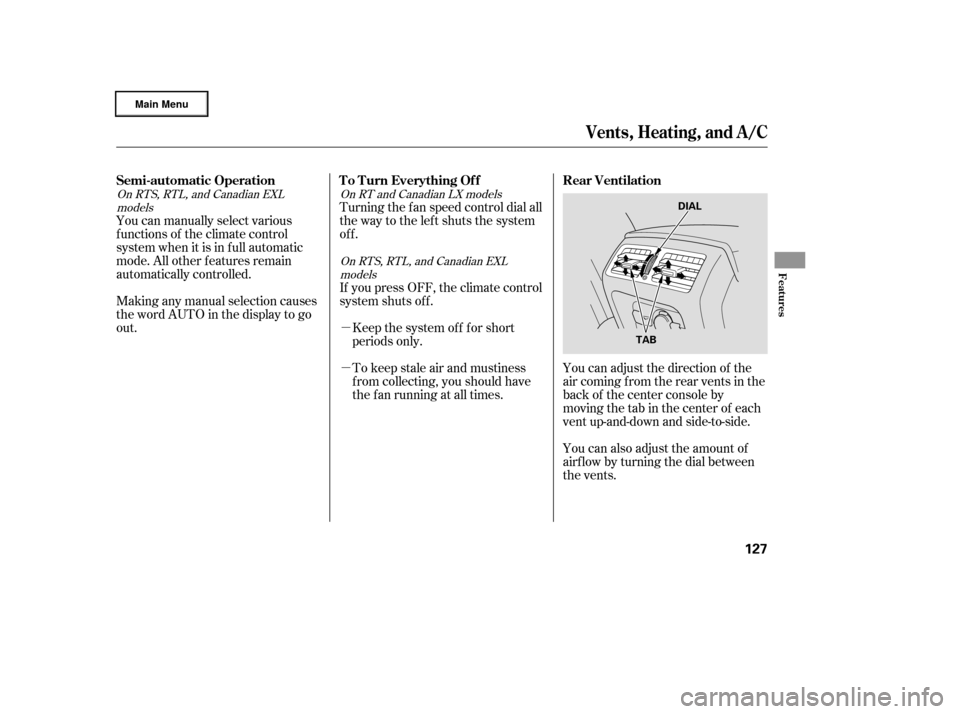
off.You can adjust the direction of the
air coming from the rear vents in the
back of the center console by
moving the tab in the center of each
vent up-and-down and side-to-side.
You can also adjust the amount of
airf low by turning the dial between
the vents.
Making any manual selection causes
thewordAUTOinthedisplaytogo
out. You can manually select various
f unctions of the climate control
system when it is in f ull automatic
mode. All other f eatures remain
automatically controlled.
To keep stale air and mustiness
f rom collecting, you should have
the f an running at all times. Keep the system of f f or short
periods only.
If youpressOFF,theclimatecontrol
system shuts of f .
On RT and Canadian LX models
On RTS, RTL, and Canadian EXL
models
On RTS, RTL, and Canadian EXLmodels
Vents, Heating, and A/C
Semi-automatic Operation T o T urn Everything Of f Rear Ventilation
Features
127
DIAL
TAB
�����—�
���—�����y�
�������������y���
�(�����������y���
�����y