Page 2 of 253
�Î �Î�Î
�Î
�Î
�Î�Î
�Î
To use the horn, press the pad around the ‘‘H’’ logo.
Only on vehicles equipped with navigation system. Ref er to the navigati on system manual.
:
1: 2: If equipped
Your Vehicle at a Glance
Your Vehicle at a Glance
5
HEADLIGHTS/TURN SIGNALS
DISPLAY CHANGE
BUTTON
(P. 65)
SEL/RESET
BUTTON
REMOTE AUDIO
CONTROLS VOICE CONTROL
SWITCHES
STEERING WHEEL
ADJUSTMENT HAZARD WARNING BUTTON
PASSENGER AIRBAG OFF
INDICATOR
HORN REAR WINDOW DEFOGGER
(P. 73)
(P. 72)
(P. 65)
(P. 143)
(P. 152) (P. 73)(P. 71)
(P. 70)
(P. 32)
(P. 72)(P. 97)
(P. 145)
HOOD RELEASE
HANDLE WINDSHIELD WIPERS/WASHERS
HEATED MIRRORS
CRUISE CONTROL BUTTONS
Vehicle with navigation system is shown. INSTRUMENT PANEL
BRIGHTNESS BUTTONS
1
2 1
1
�����—�����—���
�y�
�������������y���
�(�#���������y���������y
Page 54 of 253
The U.S. instrument panel is shown. Dif f erences f or Canadian models are noted inthe text.
Instrument Panel
Inst rument s and Cont rols
59
IMMOBILIZER SYSTEM
INDICATOR
CHARGING SYSTEM
INDICATOR
LOW OIL PRESSURE
INDICATOR SEAT BELT REMINDER
INDICATOR
MAINTENANCE MINDER INDICATOR SUPPLEMENTAL
RESTRAINT SYSTEM
INDICATOR
PARKING BRAKE AND BRAKE SYSTEM
INDICATOR
LIGHTS ON
INDICATOR
CRUISE CONTROL
INDICATOR
CRUISE MAIN
INDICATOR SECURITY SYSTEM INDICATOR
LOW FUEL
INDICATOR
SIDE AIRBAG
OFF INDICATOR
DOOR-OPEN
INDICATOR
TRUNK-OPEN
INDICATOR
ANTI-LOCK BRAKE
SYSTEM INDICATOR
MALFUNCTION INDICATOR
LAMP HIGH BEAM
INDICATOR
(P. 64)
(P. 63) (P. 63)
(P. 61) (P. 61)
(P. 62)
(P. 62) (P. 61)(P. 60)(P. 63)
(P. 61) (P. 60)
(P. 62)
(P. 62)
(P. 63)
(P. 62)
DAYTIME RUNNING
LIGHTS
INDICATOR
(P. 64)(P. 64)
(P. 64)
�����—�����—�����y�
����
����
���y���
�(�#���������y���������y
Page 57 of 253

This indicator comes on if the trunk
lid is not closed tightly.
This indicator comes on if any door
is not closed tightly.
This indicator reminds you that the
exterior lights are on. It comes on
when the light switch is in either the
or position. If you turn the
ignition switch to the ACCESSORY
(I) or LOCK (0) position without
turning of f the light switch, this
indicator will stay on. A reminder
chime will also sound when you open
the driver’s door.
The lef t or right turn signal indicator
blinks when you signal a lane change
or turn. If an indicator does not blink
or blinks rapidly, it usually means
one of the turn signal bulbs is
burned out (see pages and ).
Replace the bulb as soon as possible,
since other drivers cannot see that
you are signaling.
When you press the hazard warning
button, both turn signal indicators
and all turn signals on the outside of
the vehicle f lash. If this indicator comes on when the
ignition switch is turned to the ON
(II) position and the parking brake is
released, it means there is a problem
in a circuit. Have your vehicle
checked by your dealer.
This indicator comes on with the
high beam headlights. For more
inf ormation, see page .
This indicator also comes on with
reduced brightness when the
daytime running lights (DRL) are on
(see page ).
202 203
71
72
Instrument Panel Indicators
Turn Signal and
Hazard Warning
Indicators
Trunk-open Indicator
Door-open Indicator
Lights On Indicator
‘‘Daytime Running
Lights’’ Indicator
High Beam Indicator
62
�����—�����—�����y�
����
��������y���
�(�#���������y���������y
Page 64 of 253
�Î�Î
�Î
�Î
�Î �ÎTo use the horn, press the pad around the ‘‘H’’ logo.
:
1 : If equipped
Controls Near the Steering Wheel
Inst rument s and Cont rols
69
HEADLIGHTS/
TURN SIGNALS
HAZARD WARNING
BUTTON
PASSENGER AIRBAG
OFF INDICATOR
SEL/RESET BUTTON
HORN
HOOD RELEASE HANDLE
(P. 65)
(P. 143)
(P. 152) (P. 71)
(P. 70)
WINDSHIELD
WIPERS/WASHERS
CRUISE CONTROL
BUTTONS (P. 145)
STEERING WHEEL
ADJUSTMENT
REMOTE AUDIO CONTROLS INSTRUMENT PANEL BRIGHTNESS
DISPLAY CHANGE BUTTON (P. 72)
(P. 65)
REAR WINDOW
DEFOGGER
(P. 73)
HEATED MIRRORS
(P. 97)
(P. 73) (P. 32)
(P. 72)
Vehicle with navigation system is shown. 1
1
1
�����—�����—�����y�
����
��������y���
�(�#���������y���������y
Page 66 of 253

�µ
�µ �µ
Push down on the
lef t lever to signal a lef t turn and up
to signal a right turn. To signal a lane
change, push lightly on the lever,
and hold it. The lever will return to
center when you release it or
complete a turn.
Turning the switch to
the ‘‘ ’’ position turns on the
parking lights, taillights, instrument
panel lights, side-marker lights, and
rear license plate lights.
Turn signal
Of f
Parking and interior lights
Headlights
High beams
Flashhighbeams Turning the switch to the ‘‘ ’’
position turns on the headlights. If you leave the lights on with the
key removed f rom the ignition
switch, you will hear a reminder
chime when you open the driver’s
door.
When the light switch is in the
‘‘ ’’ or ‘‘ ’’ position, the
lights on indicator comes on as a
reminder. This indicator stays on if
you leave the light switch on and
turn the ignition switch to the
ACCESSORY (I) or LOCK (0)
position. Push the lever
f orward until you hear a click. The
high beam indicator will come on
(see page ). Pull it back to return
to low beams.
To f lash the high beams, pull the
lever back lightly, then release it.
The high beams will stay on as long
as you hold the lever back.
1.2.3.4.5.6. 62
Turn Signal
Headlights
High Beams
Turn Signal and Headlights
Inst rument s and Cont rols
71
�����—�����—�����y�
����
��������y���
�(�#���������y���������y
Page 67 of 253

�´�µ
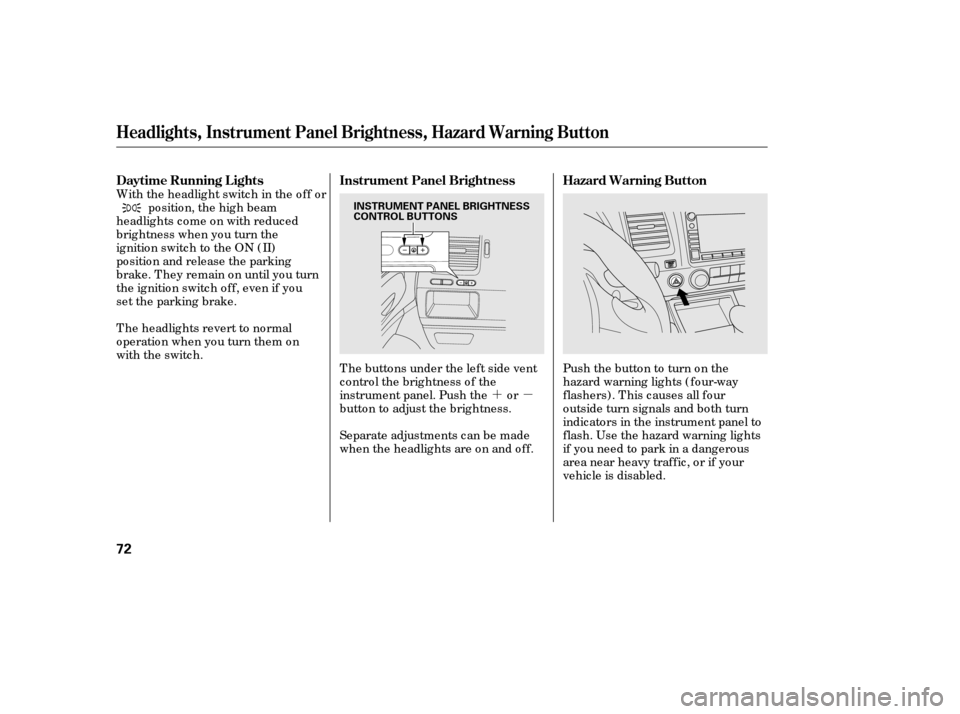
T he butto ns under the left side vent
c o ntro l the brig htness o f the
instrument panel. Push the o r
butto n to adjust the brig htness. Pushthebuttonto turnonthe
hazard warning lig hts ( fo ur-way
flashers) . T his c auses all fo ur
o utside turn sig nals and bo th turn
indicators in the instrument panel to
flash. Use the hazard warning lig hts
if yo u need to park in a dangero us
area near heavy traffic , o r if yo ur
vehic le is disabled.
Separate adjustments c an be made
when the headlights are o n and o ff.
po sitio n, the hig h beam
headlig hts c o me o n with reduc ed
brig htness when yo u turn the
ignition switch to the ON ( II)
po sitio n and release the parking
brake. T hey remain o n until yo u turn
the ig nitio n switc h o ff, even if yo u
set the parking brake.
T he headlig hts revert to no rmal
o peratio n when yo u turn them o n
with the switch.
Headlights, Instrument Panel Brightness, Hazard Warning Button
Daytime Running L ights Instrument Panel Brightness Hazard Warning Button
72
INSTRUMENT PANEL BRIGHTNESS
CONTROL BUTTONS
�����—�����—���
�y�
�������������y���
�(�#���������y���������y
W it h t h e h eadlig ht s w it c h in the off o r
Page 80 of 253

�µ�µ
�µ
�µ
CONT INUED
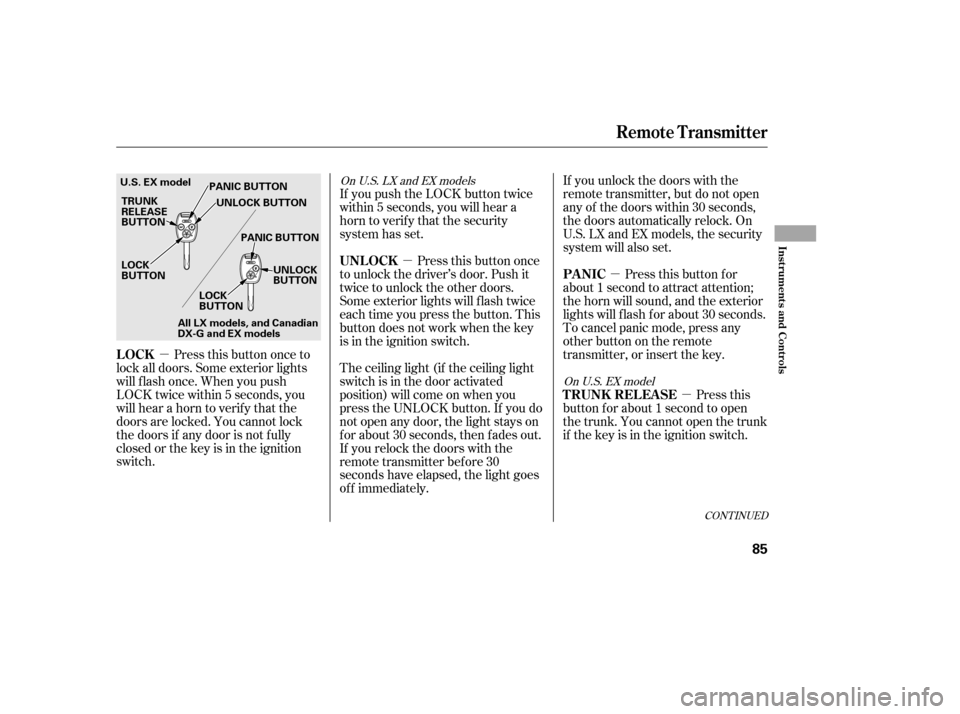
Press this button once to
lock all doors. Some exterior lights
will f lash once. When you push
LOCK twice within 5 seconds, you
will hear a horn to verif y that the
doors are locked. You cannot lock
the doors if any door is not f ully
closed or the key is in the ignition
switch. If you unlock the doors with the
remote transmitter, but do not open
any of the doors within 30 seconds,
the doors automatically relock. On
U.S. LX and EX models, the security
system will also set.
Pressthisbuttonfor
about 1 second to attract attention;
the horn will sound, and the exterior
lights will f lash f or about 30 seconds.
To cancel panic mode, press any
other button on the remote
transmitter, or insert the key.
Press this
button f or about 1 second to open
the trunk. You cannot open the trunk
if the key is in the ignition switch.
The ceiling light (if the ceiling light
switch is in the door activated
position) will come on when you
press the UNLOCK button. If you do
not open any door, the light stays on
f or about 30 seconds, then f ades out.
If you relock the doors with the
remote transmitter before 30
seconds have elapsed, the light goes
of f immediately. Press this button once
to unlock the driver’s door. Push it
twice to unlock the other doors.
Some exterior lights will f lash twice
each time you press the button. This
button does not work when the key
is in the ignition switch.
If you push the LOCK button twice
within 5 seconds, you will hear a
horn to verify that the security
system has set.
On U.S. EX model
On U.S. LX and EX models
Remote Transmitter
LOCK
PA NIC
T RUNK REL EA SE
UNL OCK
Inst rument s and Cont rols
85
LOCK
BUTTON
TRUNK
RELEASE
BUTTON
U.S. EX model
PANIC BUTTON
UNLOCK BUTTON
PANIC BUTTON UNLOCK
BUTTON
LOCK
BUTTON
All LX models, and Canadian
DX-G and EX models
�����—�����—�����y�
����
��������y���
�(�#���������y���������y
Page 91 of 253
Push the appropriate edge of the
adjustment switch to move the
mirrorright,left,up,ordown.
When you f inish, move the
selector switch to the center (off)
position. This turns the
adjustment switch of f to keep your
settings.
Keeptheinsideandoutsidemirrors
clean and adjusted f or best visibility.
Be sure to adjust the mirrors bef ore
you start driving.
The inside mirror has day and night
positions. The night position reduces
glare f rom headlights behind you.
Flip the tab on the bottom edge of
the mirror to select the day or night
position.
Turn the ignition switch to the ON
(II) position.
Move the selector switch to L
(driver’s side) or R (passenger’s
side).
2. 3. 4.
1.On all models except DX
Mirrors
Adjusting the Power Mirrors
96
SELECTOR SWITCH
ADJUSTMENT SWITCH
TAB
�����—�����—�����y�
�����������
�y���
�(�#���������y���������y