Page 185 of 267

If you have the required service
done but do not reset the display, or
reset the display without doing the
service, the system will not show the
proper maintenance intervals. This
canleadtoseriousmechanical
problems because you will no longer
have an accurate record of when
maintenance is needed.
Your authorized Honda dealer
knows your vehicle best and can
provide competent, ef f icient service.However, service at a dealer is not
mandatory to keep your warranties
in ef f ect. Maintenance may be done
by any qualif ied service f acility or
person who is skilled in this type of
automotive service. Make sure to
have the service facility or person
reset the display as previously
described. Keep all receipts as proof
of completion, and have the person
who does the work fill out the
maintenance record. Check your
warranty booklet f or more
inf ormation.
We recommend using Honda parts
and fluids whenever you have
maintenance done. These are
manuf actured to the same high-
quality standards as the original
components, so you can be conf ident
of their performance and durability.
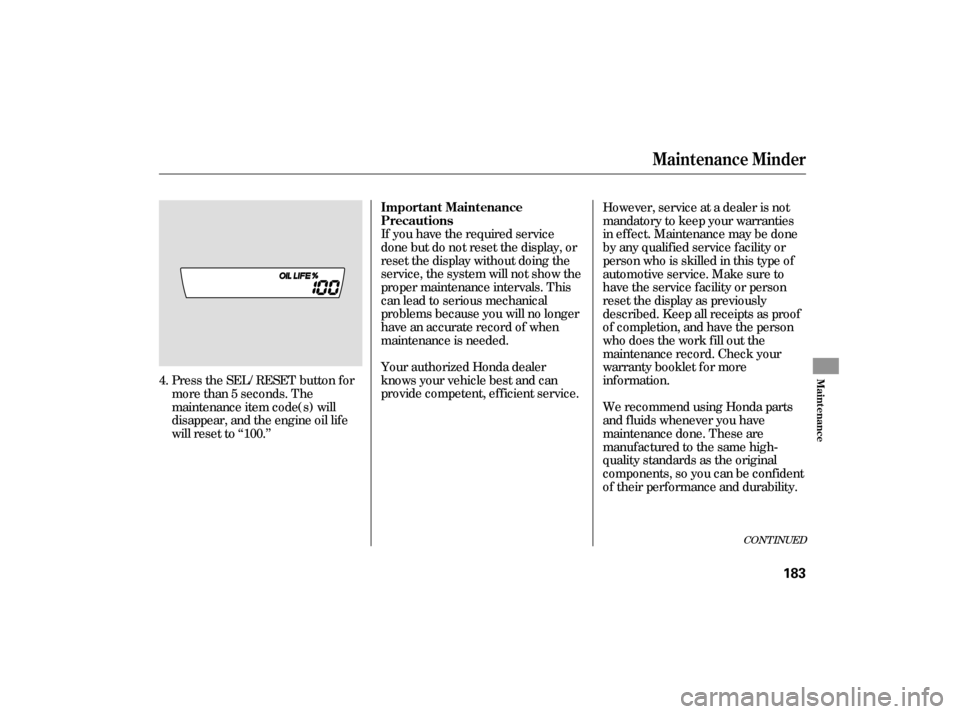
Press the SEL/RESET button f or
more than 5 seconds. The
maintenance item code(s) will
disappear, and the engine oil lif e
will reset to ‘‘100.’’
4.
CONT INUED
Maintenance Minder
Important Maintenance
Precautions
Maint enance
183
�����—�����—�����y�
�������������y���
�(�#���������y���
�����y
Page 192 of 267

Your vehicle does not require any oil
additives. Additives may adversely
af f ect the engine or transmission
perf ormance and durability. You may use a synthetic motor oil if
it meets the same requirements
given f or a conventional motor oil: it
displays the API Certif ication Seal,
and it is the proper weight. You must
f ollow the oil and f ilter change
intervals shown on the information
display.Always change the oil and f ilter
according to the maintenance
messages shown on the inf ormation
display. The oil and f ilter collect
contaminants that can damage your
engine if they are not removed
regularly.
Changing the oil and f ilter requires
special tools and access f rom
underneath the vehicle. The vehicle
should be raised on a service station-
type hydraulic lif t f or this service.
Unless you have the knowledge and
proper equipment, you should have
this maintenance done by a skilled
technician.
Run the engine until it reaches
normal operating temperature,
then shut it off.
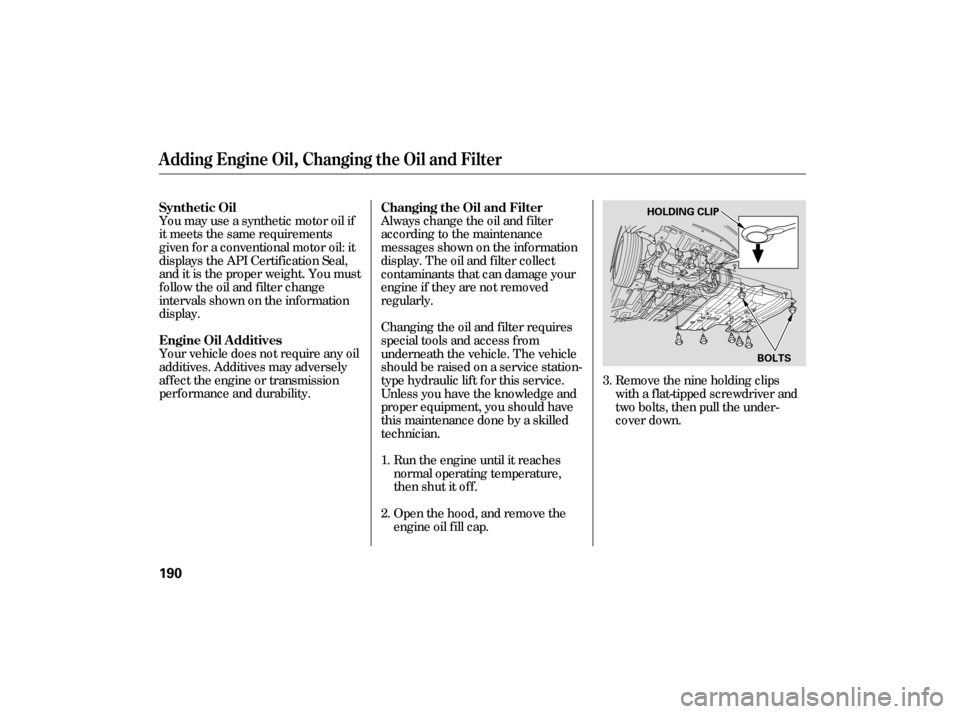
Open the hood, and remove the
engine oil f ill cap. Removethenineholdingclips
with a flat-tipped screwdriver and
two bolts, then pull the under-
cover down.
1.
2. 3.
Changing the Oil and Filter
Synthetic Oil
Engine Oil A dditives
A dding Engine Oil, Changing the Oil and Filter
190
HOLDING CLIP
BOLTS
�����—�����—�
���y�
������
��
���y���
�(�#���������y���
�����y
Page 194 of 267

Turn of f the engine, let it sit f or
several minutes, then check the oil
level on the dipstick. If necessary,
add more oil.
Put the under-cover back in place
and reinstall the nine holding clips.
Locktheclipssecurelybypushing
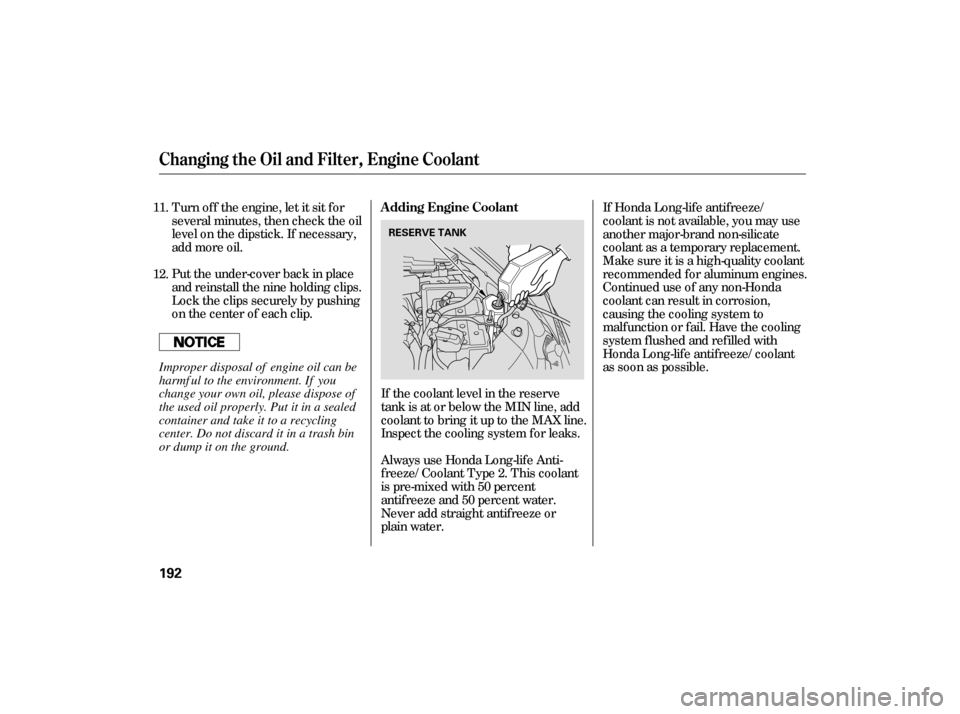
on the center of each clip.If the coolant level in the reserve
tank is at or below the MIN line, add
coolant to bring it up to the MAX line.
Inspect the cooling system f or leaks.
Always use Honda Long-lif e Anti-
f reeze/Coolant Type 2. This coolant
is pre-mixed with 50 percent
antif reeze and 50 percent water.
Never add straight antifreeze or
plain water. If Honda Long-lif e antif reeze/
coolant is not available, you may use
another major-brand non-silicate
coolant as a temporary replacement.
Make sure it is a high-quality coolant
recommended f or aluminum engines.
Continued use of any non-Honda
coolant can result in corrosion,
causingthecoolingsystemto
malf unction or f ail. Have the cooling
system f lushed and ref illed with
Honda Long-lif e antif reeze/coolant
as soon as possible.
11.
12.
A dding Engine Coolant
Changing the Oil and Filter, Engine Coolant
192
RESERVE TANK
Improper disposal of engine oil can be
harmf ul to the environment. If you
change your own oil, please dispose of
the used oil properly. Put it in a sealed
container and take it to a recycling
center. Do not discard it in a trash bin
or dump it on the ground.
�����—�����—�����y�
�������������y���
�(�#���������y���
�����y
Page 244 of 267

�Î
�Î
�Î
�Î
Specif ications
242
Dimensions
Weights
EngineCapacities
176.7 in (4,489 mm)
69.0 in (1,752 mm)
56.3 in (1,430 mm)
106.3 in (2,700 mm)
59.1 in (1,501 mm)
60.2 in (1,529 mm)
2.87 x 3.15 in (73.0 x 80.0 mm) 82 cu-in (1.339 cm
)
10.8
Length
Width
Height
Wheelbase
Track
Gross vehicle weight rating See the certification label attached
to the driver’s doorjamb.
Type
BorexStroke
Displacement
Compression ratio
Spark plugs ILFR6J-11K SK20HPR-L11 Fuel tank
Engine
coolant
Engine oil
Automatic
transmission
fluid
3.0 US qt (2.8
)
5.4 US qt (5.1)
2.6 US qt (2.5
)
4.8 US qt (4.5)
Including the coolant in the reserve tank and that remaining in the
engine
Reserve tank capacity: 0.108 US gal (0.41
)
Excluding the oil remaining in the engine 12.4 US gal (47
)
1.255 US gal (4.75)
1.53 US gal (5.8)
3.4 US qt (3.2
)
3.2 US qt (3.0)
4.0 US qt (3.8)
Water cooled 4-stroke SOHC i-VTEC with Hybrid Electric
Front
Rear
Approx.
1:
2: Change
Total
Change
Without filter
Total
Change
Total
U.S. Vehicles
Canada Vehicles
(NGK) (DENSO)
Windshield
washer reservoir
1
2
Including filter
�����—�����—�����y�
�������������y���
�(�#���������y���������y
Page 245 of 267

�µ�µ�µ�µ
�µ
�µ
�µ
�µ
�µ
�µ
�µ
�µ
�µ
�µ
�µ
�µ
�µ
Specifications
T
echnical Inf ormat ion
243
Air Conditioning Fuses
Alignment
12 Volt Battery Tires
Lights
HFC-134a
(R-134a)
16 18 oz (450 500 g)
SE-10Y
12 V 60 W
12 V 3 CP
12
V 21/5 W
12
V 21 W
7°6’1°39’ 0°3’
0.00
in (0.0 mm)
P195/65R15 89S
2.0
in (2.0 mm)
Refrigerant
type
Charge quantity
Lubricant oil type Interior
Under-hood
Toe-in
Camber
Caster
12
V 21/5 W
12
V 51 W
12 V 21 W
12 V
12 V
12 V
12 V 3CP
8W
8W
5W
Capacity 12 V 35 AH/20 HR T125/70D15
95M
32 psi (220 kPa , 2.2 kgf/cm
)
60 psi (420 kPa , 4.2 kgf/cm)
Size
Pr
essure
Headlights
Front
Parking/Front turn
signal/side marker lights
Rear turn signal lights
Brake/Taillights
Back-up lights
Rear side marker lights
Taillights
License plate lights
Ceiling light
Spotlights
Trunk light 12
V 2 CP See
page 231 or the fuse label
attached to the inside of the fuse
box door under the steering
column.
See page 231 or the fuse box
cover.
Front
Rear
Front
Rear
Front
High
Low
(HB3)
(HB4)
Front/Rear
Spare
Front/Rear
Spare
�����—�����—�����y�
�������������y���
�(�#���������y���������y