Page 384 of 484

B0-1
Vehicle Body
Page
Introduction ................................................................. BO-2
Engine cover ............................................................... BO-3
Front door .................................................................... BO-4
Rear car Door .............................................................. BO-10
Body collision avoidance adhesive strip ...................... BO-20
Wheel-trims ................................................................. BO-24
Wheel-trims wrapping angle and exterior trim panel ... BO-26
Front Windshield ......................................................... BO-32
Side-window glass ...................................................... BO-37
Rear-door glass ........................................................... BO-40
Rear windshield ........................................................... BO-41
Load-compartment baffle ............................................ BO-43
Tail door ....................................................................... BO-45
Instrument panel ......................................................... BO-50
Safety belt ................................................................... BO-57
Seat ............................................................................. BO-60
Spoiler ......................................................................... BO-63
Luggage rack .............................................................. BO-65
Reserve tire bracket .................................................... BO-66
Body dimension ........................................................... BO-68
Frame dimension ........................................................ BO-78
BO
Page 407 of 484
B0-24
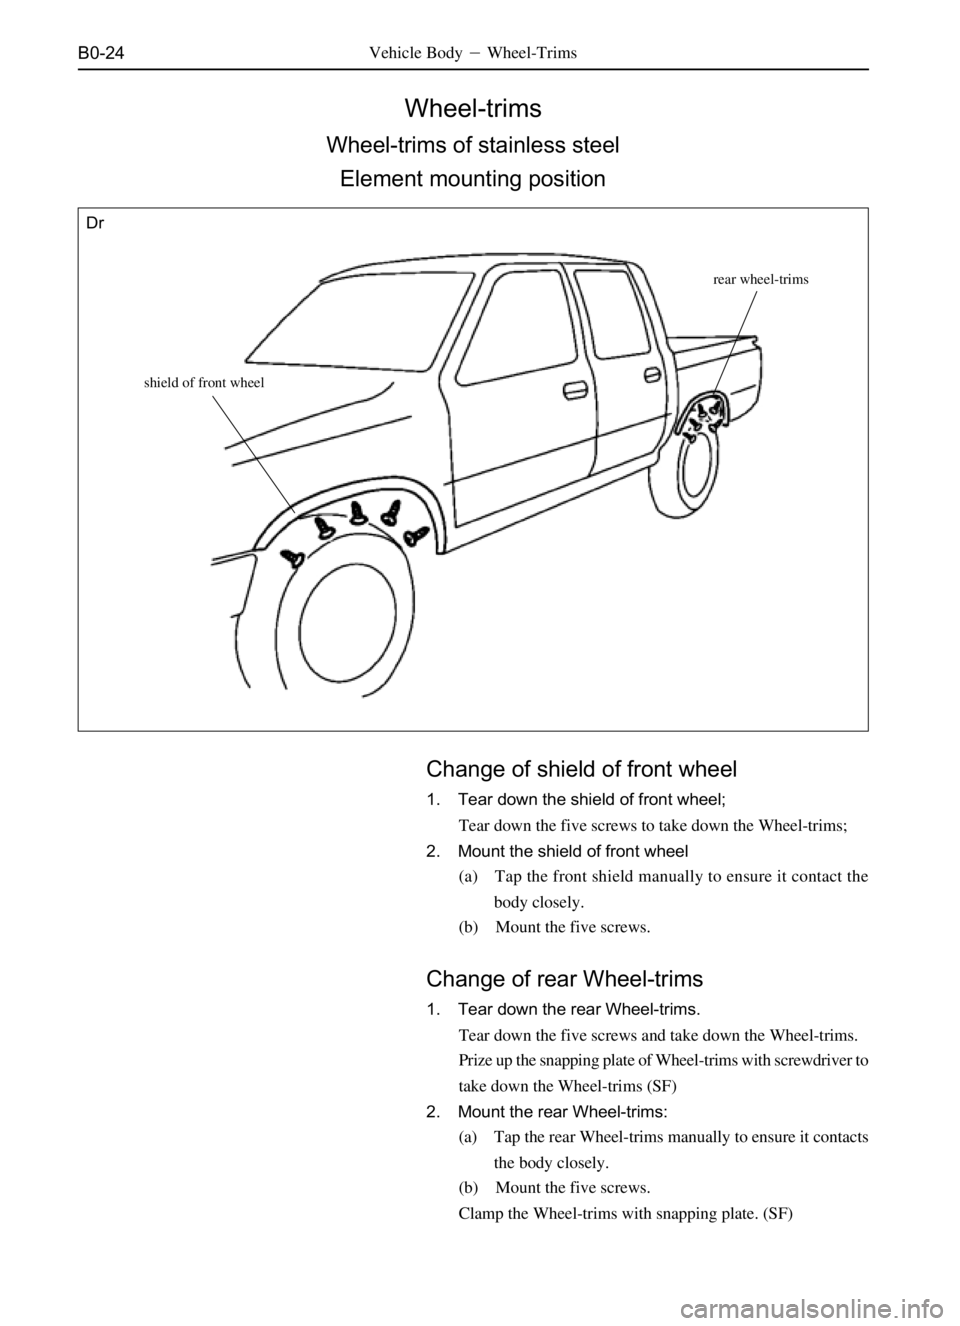
Wheel-trims
Wheel-trims of stainless steel
Element mounting position
Vehicle Body�Wheel-Trims
Change of shield of front wheel
1. Tear down the shield of front wheel;
Tear down the five screws to take down the Wheel-trims;
2. Mount the shield of front wheel
(a) Tap the front shield manually to ensure it contact the
body closely.
(b) Mount the five screws.
shield of front wheel
rear wheel-trims
Dr
Change of rear Wheel-trims
1. Tear down the rear Wheel-trims.
Tear down the five screws and take down the Wheel-trims.
Prize up the snapping plate of Wheel-trims with screwdriver to
take down the Wheel-trims (SF)
2. Mount the rear Wheel-trims:
(a) Tap the rear Wheel-trims manually to ensure it contacts
the body closely.
(b) Mount the five screws.
Clamp the Wheel-trims with snapping plate. (SF)
Page 408 of 484
B0-25
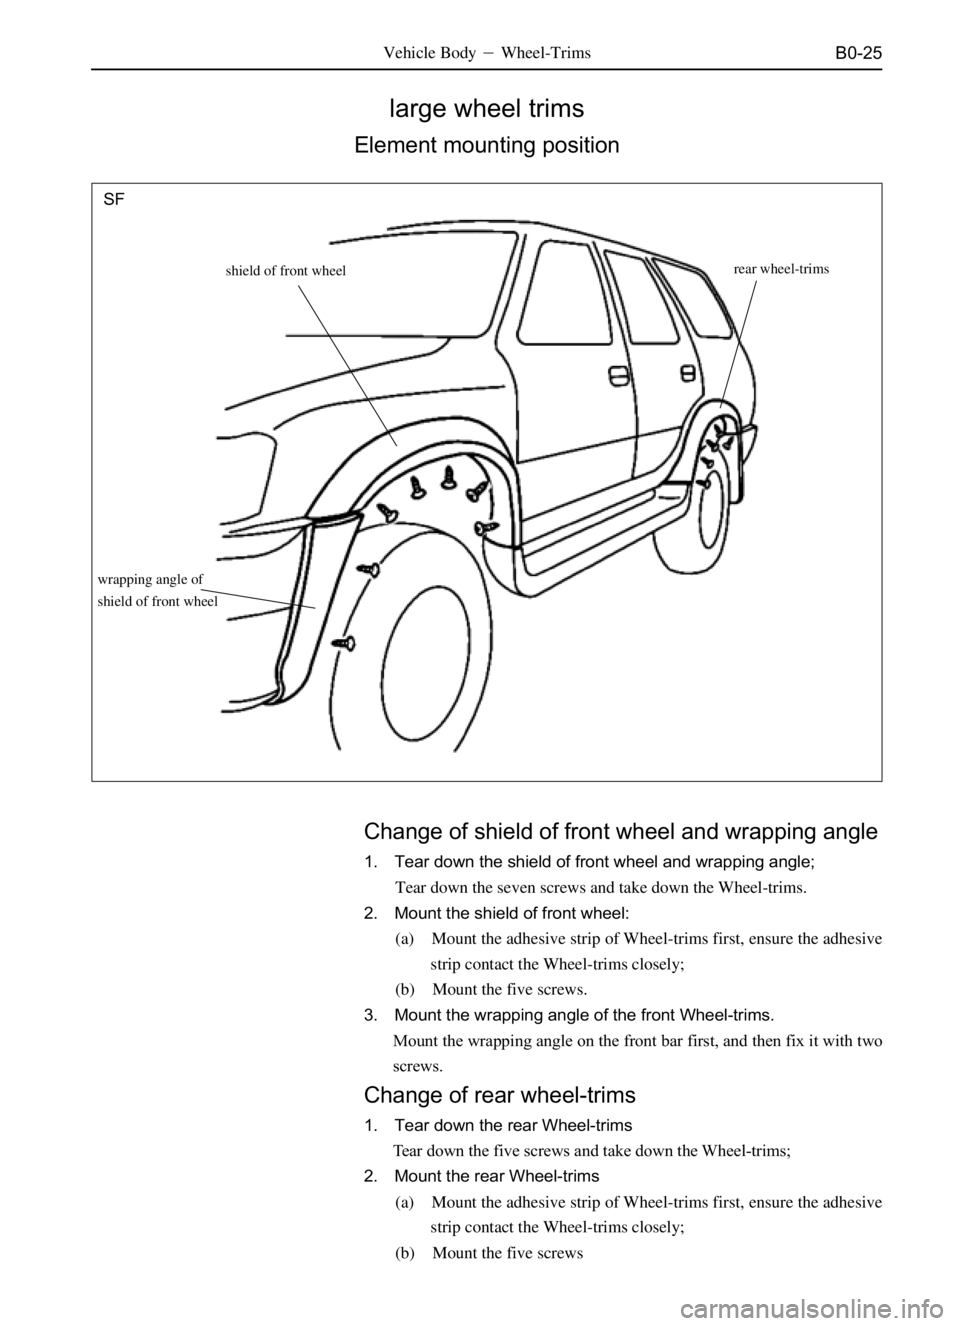
large wheel trims
Element mounting position
Vehicle Body�Wheel-Trims
shield of front wheel
wrapping angle of
shield of front wheel
rear wheel-trims
SF
Change of shield of front wheel and wrapping angle
1. Tear down the shield of front wheel and wrapping angle;
Tear down the seven screws and take down the Wheel-trims.
2. Mount the shield of front wheel:
(a) Mount the adhesive strip of Wheel-trims first, ensure the adhesive
strip contact the Wheel-trims closely;
(b) Mount the five screws.
3. Mount the wrapping angle of the front Wheel-trims.
Mount the wrapping angle on the front bar first, and then fix it with two
screws.
Change of rear wheel-trims
1. Tear down the rear Wheel-trims
Tear down the five screws and take down the Wheel-trims;
2. Mount the rear Wheel-trims
(a) Mount the adhesive strip of Wheel-trims first, ensure the adhesive
strip contact the Wheel-trims closely;
(b) Mount the five screws
Page 409 of 484
B0-26
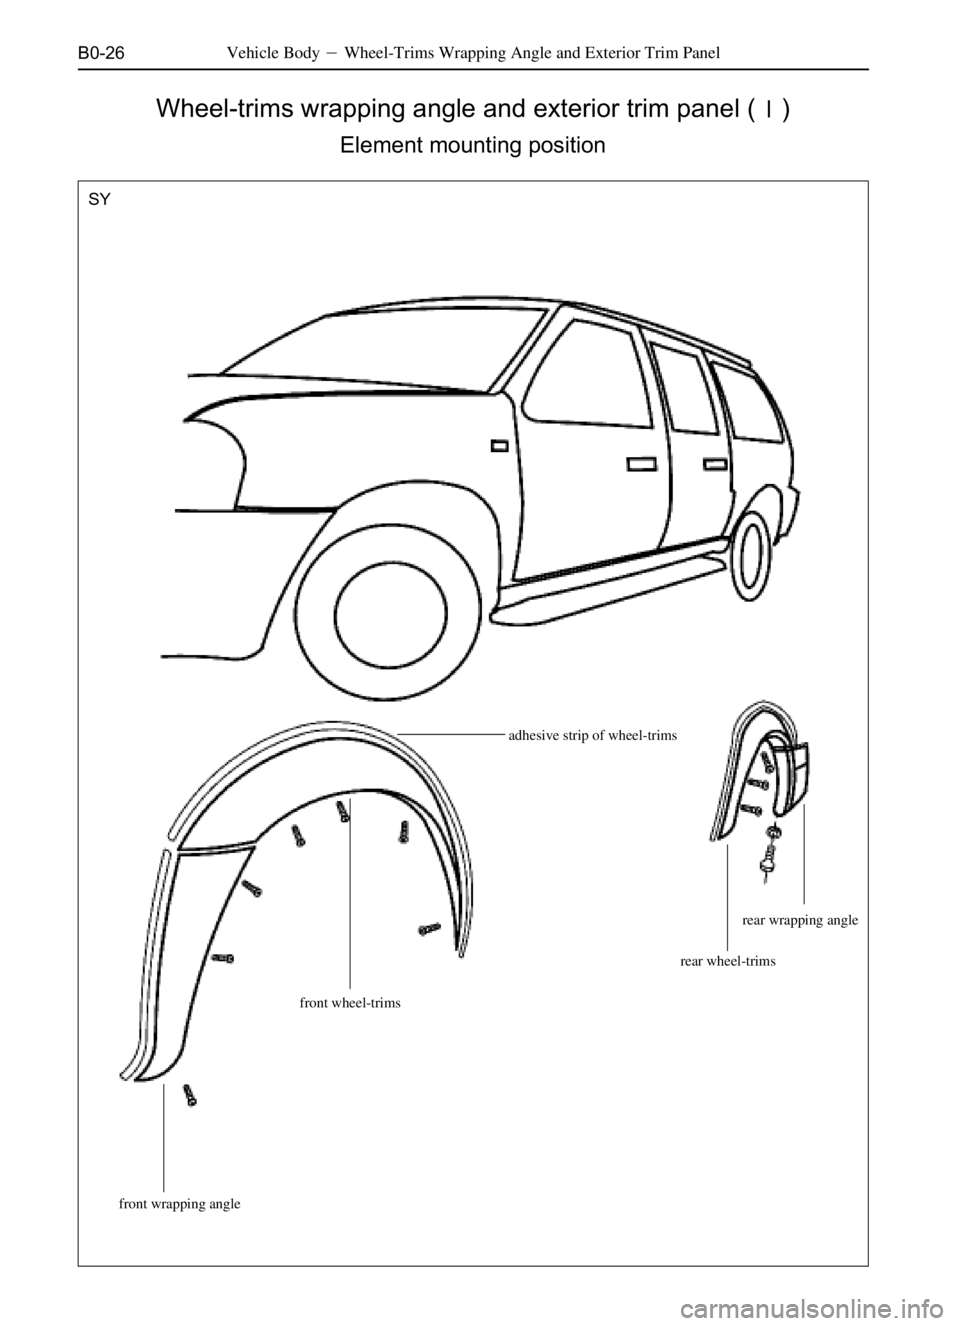
Wheel-trims wrapping angle and exterior trim panel (�)
Element mounting position
Vehicle Body�Wheel-Trims Wrapping Angle and Exterior Trim Panel
adhesive strip of wheel-trims
front wheel-trimsrear wheel-trims
front wrapping anglerear wrapping angle
SY
Page 410 of 484
B0-27
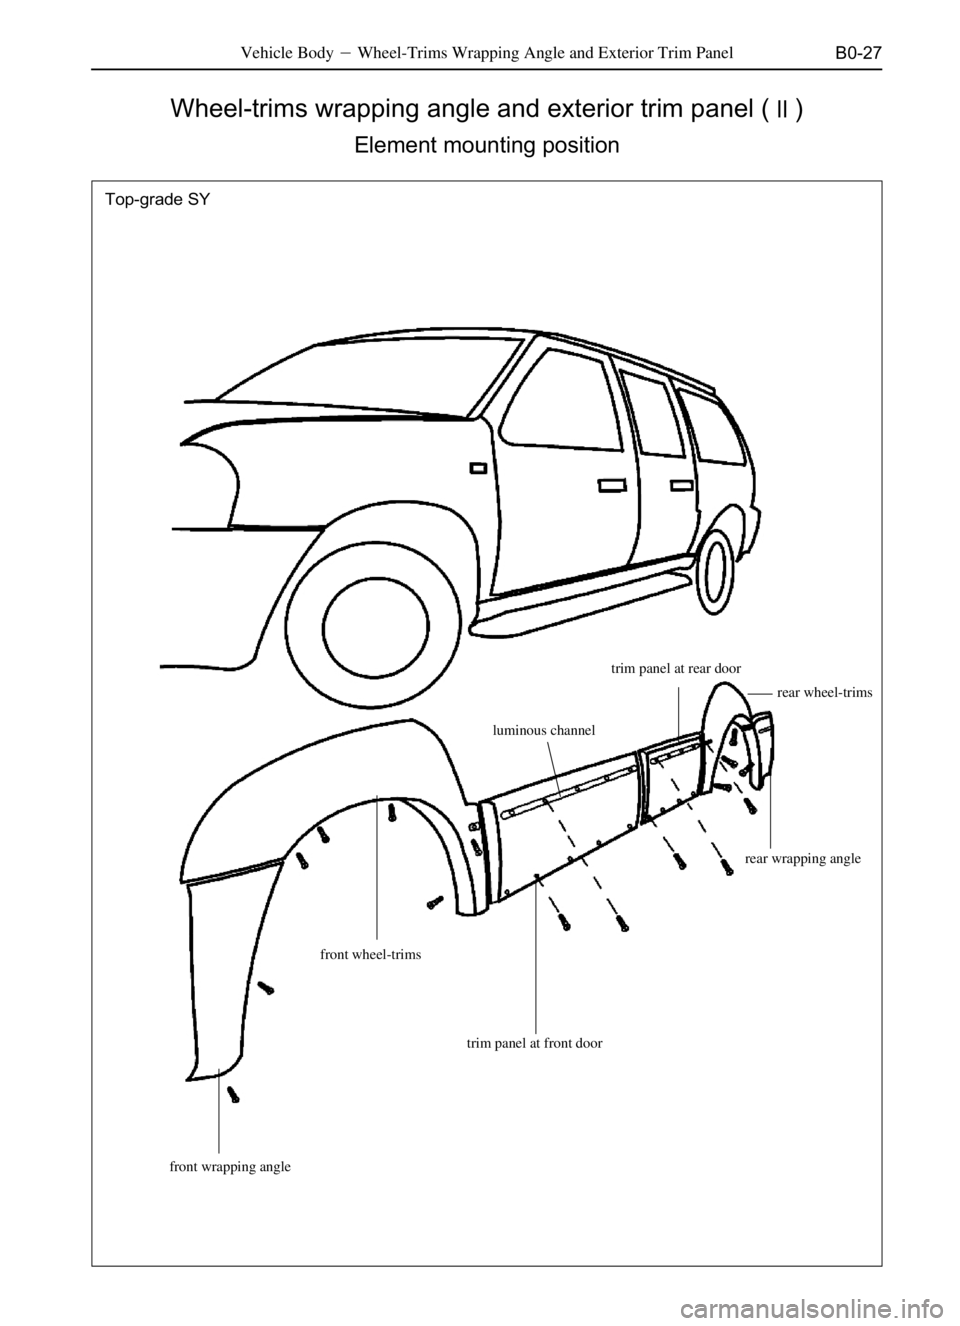
Wheel-trims wrapping angle and exterior trim panel (�)
Element mounting position
Vehicle Body�Wheel-Trims Wrapping Angle and Exterior Trim Panel
trim panel at front door front wheel-trimsrear wheel-trims
front wrapping anglerear wrapping angle
Top-grade SY
trim panel at rear door
luminous channel
Page 411 of 484
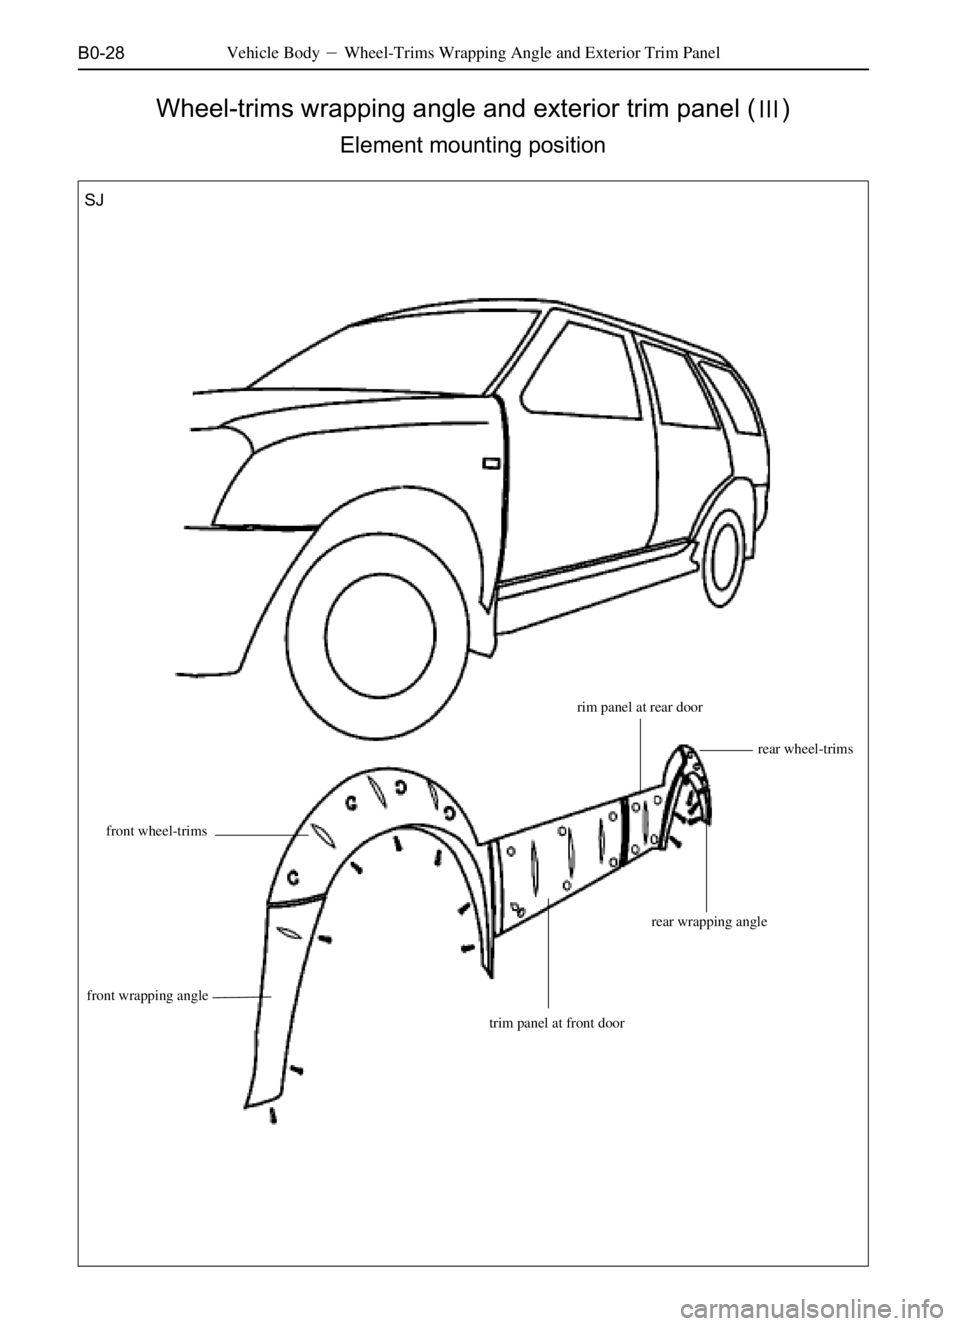
B0-28
Wheel-trims wrapping angle and exterior trim panel (�)
Element mounting position
Vehicle Body�Wheel-Trims Wrapping Angle and Exterior Trim Panel
front wheel-trimsrear wheel-trims
front wrapping anglerear wrapping angle
SJ
rim panel at rear door
trim panel at front door
Page 412 of 484

B0-29
SJSJ
SJVehicle Body�Wheel-Trims Wrapping Angle and Exterior Trim Panel
Change of trim panel at front door
1. Tear down the trim panel at front door;
Prize up the clip of trim panel at front door and take down the
trim panel at front door. (SJ)
Uncover the luminous strip to tear down the five screws, then
open the front door and take down the trim panel at front door
after tearing down the five screws. (top-grade SY)
Change of front wrapping angle
1. Tear down the front wrapping angle;
Tear down the three screws and take down the front wrapping
angle and adhesive strip of wrapping angle lightly (there is two
screws in top-grade SY vehicle)
2. Mount the front wrapping angle
(a) Mount on the three screws (mount two screws for top-
grade SY vehicle)
(b) Contact the front wrapping angle with the front bar
closely, and the seam between the front wrapping angle
and the front Wheel-trims should be even with a smooth
transmission (by the way, the adhesive strip of wrapping
angle should be pressed tightly and evenly)
Change of front Wheel-trims
1. Tear down the front Wheel-trims
Tear down the four screws and the pressing plate of mudguard,
and take down the front Wheel-trims and adhesive strip of
Wheel-trims tightly (SY)
Tear down the five screws and the pressing plate of mudguard,
and take down the front Wheel-trims and adhesive strip of
Wheel-trims tightly (SJ)
Tear down the four screws and uncover the lighting channel of
the front Wheel-trims, take down the front Wheel-trims after
tearing down one screw (top-grade SY).
2. Mount the front Wheel-trims
(a) Flush the front end of front Wheel-trims with the lower
edge of wing panel; the adhesive strip of wheel-trims
should be pressed tightly and evenly. (SY)
Flush the front end of front Wheel-trims with the lower
edge of wing panel, the rear end of front Wheel-trims
with rear edge of wing panel. (top-grade SY SJ)
(b) Mount the four screws (five screws for SJ model) and the
pressing plate of mud guard and stick the lighting strip.
(top-grade SY)
Page 413 of 484
 Flush the arc lines of the front and rear ends of trim")
B0-30
Top-grade SY
SJ
SJ Top-grade SYVehicle Body�Wheel-Trims Wrapping Angle and Exterior Trim Panel
2. Mount the trim panel at front door;
(a) Flush the arc lines of the front and rear ends of trim panel
at front door in consistent with the door waist line, and the
rear end should flush with the rear end of front door, but
the front end should not interfere with the wing panel.
(b) Tap the positions of six clipes of trim panel at front door
manually to mount it on.(SJ)
Mount the five screws at upper part after aligning the
holes, and mount the five screws at lower part from the
inside, then stick the luminous strip. (top-grade SY)
Change of rear Wheel-trims
1. Tear down the rear Wheel-trims;
Tear down the three screws and take down the rear Wheel-
trims and the adhesive strip of Wheel-trims. (SY)
Take down the rear Wheel-trims after tearing down the three
screws. (SJ)
Tear down the three screws and uncover the luminous strip on
rear Wheel-trims, take down the rear Wheel-trims after tearing
down the two screws. (top-grade SY)
Change of trim panel at rear door
1. Tear down the trim panel at rear door
Take down the trim panel at rear door after tearing down one
screw and four clipes. (SJ)
Uncover the luminous strip to tear down the four screws, and
then open the rear door to tear down the four screws inside so
as to take down the trim panel at rear door. (top-grade SY)
Top-grade SY
2. Mount the trim panel at rear door
Tap the positions of four clipes of trim panel at rear door
manually to mount it on, meanwhile mount the one screw at
upper part of rear edge. (SJ)
Mount the four screws at upper part after aligning the holes,
and mount the four screws at lower part from the inside, then
stick the luminous strip. (top-grade SY)
2. Mount the front Wheel-trims
(a) Flush the front end of rear Wheel-trims with the edge line
of rear door, the rear end of the Wheel-trims with the rear
wrapping angle, the seam should be smooth with even
transmission. (top-grade SY SJ)
(b) Mount the three screws (and mount two screws at the
position where the luminous strip is stickled).