2006 GMC SIERRA traction control
[x] Cancel search: traction controlPage 124 of 600

Range Selection Mode
(Allison Transmission®)
If your truck has an Allison Transmission®your vehicle
is equipped with a Range Selection System.
To use this feature, do the following:
1. Move the shift lever to the MANUAL MODE (M).
When in the MANUAL MODE, the transmission’s
current gear range will be the highest attainable
range with all the lower gears available.
2. Press the plus/minus buttons to upshift or downshift
selecting the desired range of gears for your current
driving conditions.The Range Selection Mode allows you to control the
vehicle’s engine and vehicle speed while driving
down hill by allowing you to select a desired gear.
The DIC shows the six available ranges with the
highest attainable range shown in brackets. See
Driver Information Center (DIC) on page 3-52and
DIC Operation and Displays on page 3-53for more
information.
While using the Range Selection mode feature, cruise
control and the Tow/Haul mode can be used.
Low Traction Mode
(Allison Transmission®)
If your vehicle has the DURAMAX®diesel engine and the
Allison Transmission®, it is equipped with a Low Traction
Mode that assists in vehicle acceleration when road
conditions are slippery, such as ice or snow. While at a
stop, selecting the second gear range using the Range
Selection system, will allow the Allison Transmission
®
to limit torque to the wheels after it detects wheel slip,
preventing the tires from spinning.
Notice:Spinning the tires or holding the vehicle in
one place on a hill using only the accelerator pedal
may damage the transmission. If you are stuck, do
not spin the tires. When stopping on a hill, use the
brakes to hold the vehicle in place.
2-30
Page 179 of 600

Instrument Panel Overview...............................3-4
Hazard Warning Flashers................................3-6
Other Warning Devices...................................3-6
Horn.............................................................3-6
Tilt Wheel.....................................................3-6
Turn Signal/Multifunction Lever.........................3-7
Turn and Lane-Change Signals........................3-7
Headlamp High/Low-Beam Changer..................3-8
Flash-to-Pass.................................................3-9
Windshield Wipers..........................................3-9
Windshield Washer.......................................3-10
Cruise Control..............................................3-10
Headlamps..................................................3-14
Headlamps on Reminder................................3-14
Daytime Running Lamps (DRL).......................3-15
Automatic Headlamp System..........................3-15
Fog Lamps..................................................3-17
Auxiliary Roof Mounted Lamp.........................3-18
Instrument Panel Brightness...........................3-18
Dome Lamps...............................................3-18
Dome Lamp Override....................................3-19
Entry Lighting...............................................3-19
Exit Lighting.................................................3-19
Front Reading Lamps....................................3-19
Cargo Lamp.................................................3-19
Accessory Power Outlet(s).............................3-20
Ashtray(s) and Cigarette Lighter......................3-20Climate Controls............................................3-21
Climate Control System.................................3-21
Dual Climate Control System..........................3-22
Dual Automatic Climate Control System...........3-25
Outlet Adjustment.........................................3-30
Warning Lights, Gages, and Indicators............3-31
Instrument Panel Cluster................................3-32
Speedometer and Odometer...........................3-33
Trip Odometer..............................................3-33
Tachometer.................................................3-34
Safety Belt Reminder Light.............................3-34
Airbag Readiness Light..................................3-35
Airbag Off Light............................................3-35
Passenger Airbag Status Indicator...................3-37
Battery Warning Light....................................3-40
Voltmeter Gage............................................3-40
Up-Shift Light (Manual Transmission)...............3-41
Brake System Warning Light..........................3-41
Anti-Lock Brake System Warning Light...............3-42
Traction Off Light..........................................3-43
Engine Coolant Temperature Gage..................3-43
Transmission Temperature Gage.....................3-44
Malfunction Indicator Lamp.............................3-46
Oil Pressure Gage........................................3-48
Security Light...............................................3-49
Cruise Control Light......................................3-49
Section 3 Instrument Panel
3-1
Page 183 of 600

The main components of your instrument panel are the
following:
A. Dome Lamp Override Button. SeeDome Lamp
Override on page 3-19.
B. Headlamp Controls. SeeHeadlamps on page 3-14.
C. Air Outlets. SeeOutlet Adjustment on page 3-30.
D. Automatic Transfer Case/Electronic Transfer
Case/Traction Assist System (TAS). SeeFour-Wheel
Drive on page 2-38andTraction Assist System (TAS)
on page 4-8.
E. Multifunction Lever. SeeTurn Signal/Multifunction
Lever on page 3-7.
F. Instrument Panel Cluster. SeeInstrument Panel
Cluster on page 3-32.
G. Range Selection Mode (Allison Transmission
®only)
Button (If Equipped). SeeAutomatic Transmission
Operation on page 2-26.
H. Gearshift Lever. SeeAutomatic Transmission
Operation on page 2-26orManual Transmission
Operation on page 2-34for manual transmissions.
I. Tow/Haul Selector Button (If Equipped).
SeeTow/Haul Mode on page 2-31.
J. Audio System. SeeAudio System(s) on page 3-70.
K. Climate Control System. SeeClimate Control System
on page 3-21,Dual Climate Control System on
page 3-22andDual Automatic Climate Control
System on page 3-25.L. Instrument Panel Fuse Block.Instrument Panel Fuse
Block on page 5-124.
M. Cargo Lamp Button. SeeCargo Lamp on page 3-19.
N. Hood Release. SeeHood Release on page 5-13.
O. Steering Wheel Control Buttons (If Equipped).
SeeDriver Information Center (DIC) on page 3-52
orAudio Steering Wheel Controls on page 3-129.
P. Center Instrument Panel Fuse Block. SeeCenter
Instrument Panel Fuse Block on page 5-126.
Q. Parking Brake Release. SeeParking Brake on
page 2-52.
R. Tilt Wheel Lever. SeeTilt Wheel on page 3-6.
S. Cigarette Lighter. SeeAshtray(s) and Cigarette
Lighter on page 3-20.
T. Accessory Power Outlet. SeeAccessory Power
Outlet(s) on page 3-20.
U. Manual Selectable Ride Control (If Equipped).
SeeManual Selectable Ride on page 4-10.
V. Auxiliary Roof Mounted Lamp Button (If Equipped).
SeeAuxiliary Roof Mounted Lamp on page 3-18.
W. Passenger Airbag Off Switch (If Equipped).
SeeAirbag Off Switch on page 1-78.
X. Glove Box. SeeGlove Box on page 2-79.
3-5
Page 189 of 600

With cruise control, you can maintain a speed of about
25 mph (40 km/h) or more without keeping your foot on
the accelerator. This can really help on long trips.
Cruise control does not work at speeds below about
25 mph (40 km/h).
If you apply your brakes, the cruise control will shut off.
{CAUTION:
Cruise control can be dangerous where you
cannot drive safely at a steady speed. So, do
not use your cruise control on winding roads
or in heavy traffic.
Cruise control can be dangerous on slippery
roads. On such roads, fast changes in tire
traction can cause needless wheel spinning,
and you could lose control. Do not use cruise
control on slippery roads.
Setting Cruise Control
{CAUTION:
If you leave your cruise control on when you
are not using cruise, you might hit a button
and go into cruise when you do not want to.
You could be startled and even lose control.
Keep the cruise control switch off until you
want to use cruise control.
1. Move the cruise control switch to on.
2. Get up to the speed you want.
3. Press in the set button at the end of the lever and
release it.
4. Take your foot off the accelerator pedal.
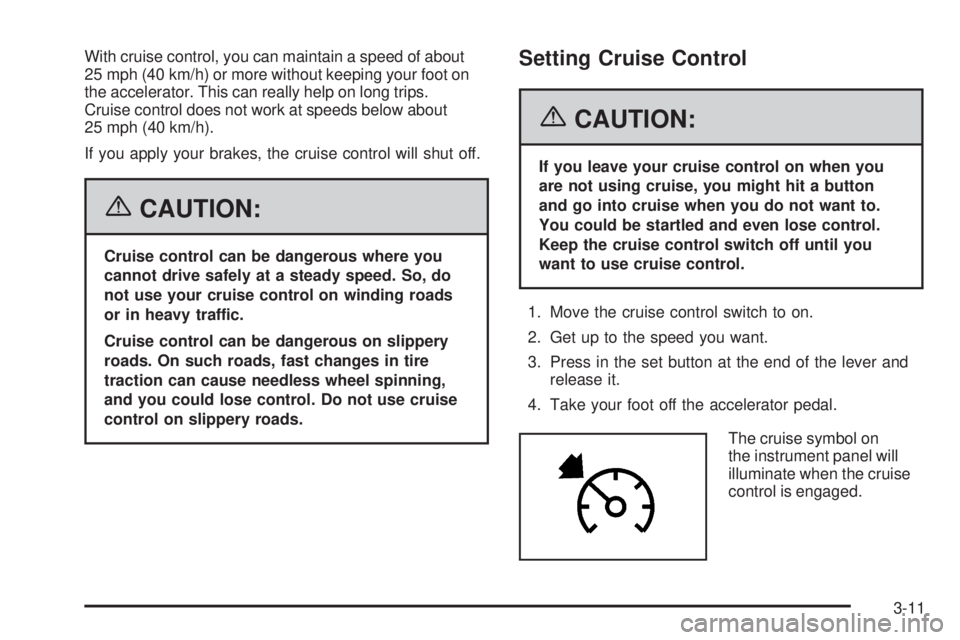
The cruise symbol on
the instrument panel will
illuminate when the cruise
control is engaged.
3-11
Page 240 of 600

If the message is displayed immediately after starting
the vehicle or the message appears while driving,
your Supplemental Brake Assist system needs service.
See your GM dealer. SeeBrake System Warning
Light on page 3-41for additional information.
SERVICE BRAKE SYSTEM
If there is a problem with the brake system, this
message will be displayed on the DIC. If this message
appears, stop as soon as possible and turn off the
vehicle. Restart the vehicle and check for the message
on the DIC display. If the message is still displayed
or appears again when you begin driving, the brake
system needs service. See your GM dealer.
SERVICE CHARGING SYSTEM
On some vehicles, if there is a problem with the battery
charging system, this message will appear on the DIC.
Under certain conditions, the battery warning light may
also turn on in the instrument panel cluster. SeeBattery
Warning Light on page 3-40. The battery will not be
charging at an optimal rate and the vehicle will lose the
ability to enter the fuel economy mode. The vehicle is
safe to drive, however you should have the electrical
system checked by your GM dealer. Pressing any of the
four DIC buttons will acknowledge the message and clear
it from the DIC display. If your vehicle does not have the
four DIC buttons, pressing the trip odometer reset stem
will acknowledge the message and clear it from the
DIC display.
TIGHTEN FUEL CAP
If the vehicle’s fuel cap is not tightened properly, this
message may appear along with the check engine light
on the instrument panel. SeeMalfunction Indicator Lamp
on page 3-46. Fully reinstall the fuel cap. SeeFilling the
Tank on page 5-10. The diagnostic system can determine
if the fuel cap has been left off or improperly installed.
A loose or missing fuel cap will allow fuel to evaporate
into the atmosphere. A few driving trips with the cap
properly installed should turn the light and message off.
TRACTION ACTIVE
When the traction control system had detected that any
of the vehicle’s wheels are slipping, the traction control
system will activate and this message will appear on the
DIC. For more information, seeTraction Assist
System (TAS) on page 4-8.
TRANS (Transmission)
HOT IDLE ENGINE
Notice:If you drive your vehicle while the
transmission �uid is overheating and the
transmission temperature warning is displayed on
the instrument panel cluster and/or DIC, you can
damage the transmission. This could lead to costly
repairs that would not be covered by your warranty.
3-62
Page 248 of 600

Audio System(s)
Determine which radio your vehicle has and then read the
pages following to familiarize yourself with its features.
Driving without distraction is a necessity for a safer
driving experience. SeeDefensive Driving on page 4-2.
By taking a few moments to read this manual and get
familiar with your vehicle’s audio system, you can use it
with less effort, as well as take advantage of its features.
While your vehicle is parked, set up your audio system
by presetting your favorite radio stations, setting the
tone and adjusting the speakers. Then, when driving
conditions permit, you can tune to your favorite
stations using the presets and steering wheel controls
(if equipped).
{CAUTION:
This system provides you with a far greater
access to audio stations and song listings.
Giving extended attention to entertainment
tasks while driving can cause a crash and you
or others can be injured or killed. Always keep
your eyes on the road and your mind on the
drive — avoid engaging in extended searching
while driving.Keeping your mind on the drive is important for safe
driving. For more information, seeDefensive Driving
on page 4-2
Here are some ways in which you can help avoid
distraction while driving.
While your vehicle is parked:
Familiarize yourself with all of its controls.
Familiarize yourself with its operation.
Set up your audio system by presetting your favorite
radio stations, setting the tone, and adjusting the
speakers. Then, when driving conditions permit, you
can tune to your favorite radio stations using the
presets and steering wheel controls (if equipped).
Notice:Before adding any sound equipment to your
vehicle, such as an audio system, CD player, CB
radio, mobile telephone, or two-way radio, make sure
that it can be added by checking with your dealer.
Also, check federal rules covering mobile radio and
telephone units. If sound equipment can be added,
it is very important to do it properly. Added sound
equipment may interfere with the operation of your
vehicle’s engine, radio, or other systems, and even
damage them. Your vehicle’s systems may interfere
with the operation of sound equipment that has been
added.
3-70
Page 313 of 600

Your Driving, the Road, and Your Vehicle..........4-2
Defensive Driving...........................................4-2
Drunken Driving.............................................4-3
Control of a Vehicle........................................4-5
Braking.........................................................4-5
Anti-Lock Brake System (ABS).........................4-6
Braking in Emergencies...................................4-8
Traction Assist System (TAS)...........................4-8
Manual Selectable Ride.................................4-10
Locking Rear Axle........................................4-11
Steering......................................................4-11
Off-Road Recovery.......................................4-13
Passing.......................................................4-14
Loss of Control.............................................4-15
Off-Road Driving...........................................4-16
Driving at Night............................................4-32
Driving in Rain and on Wet Roads..................4-33
City Driving..................................................4-36
Freeway Driving...........................................4-37Before Leaving on a Long Trip.......................4-38
Highway Hypnosis........................................4-39
Hill and Mountain Roads................................4-40
Winter Driving..............................................4-42
If Your Vehicle is Stuck in Sand, Mud,
Ice or Snow..............................................4-46
Rocking Your Vehicle to Get It Out.................4-46
Recovery Hooks...........................................4-47
Loading Your Vehicle....................................4-48
Adding a Snow Plow or Similar Equipment.......4-54
Truck-Camper Loading Information..................4-59
Pickup Conversion to Chassis Cab..................4-61
Towing..........................................................4-62
Towing Your Vehicle.....................................4-62
Recreational Vehicle Towing...........................4-62
Towing a Trailer...........................................4-67
Trailer Recommendations...............................4-96
Power Take-Off (PTO)...................................4-97
Section 4 Driving Your Vehicle
4-1
Page 317 of 600

There is something else about drinking and driving that
many people do not know. Medical research shows
that alcohol in a person’s system can make crash
injuries worse, especially injuries to the brain, spinal
cord, or heart. This means that when anyone who has
been drinking — driver or passenger — is in a crash,
that person’s chance of being killed or permanently
disabled is higher than if the person had not been
drinking.
{CAUTION:
Drinking and then driving is very dangerous.
Your re�exes, perceptions, attentiveness,
and judgment can be affected by even a small
amount of alcohol. You can have a serious — or
even fatal — collision if you drive after drinking.
Please do not drink and drive or ride with a
driver who has been drinking. Ride home in a
cab; or if you are with a group, designate a
driver who will not drink.
Control of a Vehicle
You have three systems that make your vehicle go where
you want it to go. They are the brakes, the steering, and
the accelerator. All three systems have to do their work at
the places where the tires meet the road.
Sometimes, as when you are driving on snow or ice, it is
easy to ask more of those control systems than the tires
and road can provide. That means you can lose control
of your vehicle. SeeTraction Assist System (TAS) on
page 4-8.
Adding non-GM accessories can affect your vehicle’s
performance. SeeAccessories and Modi�cations
on page 5-4.
Braking
SeeBrake System Warning Light on page 3-41.
Braking action involves perception time and
reaction time.
First, you have to decide to push on the brake pedal.
That is perception time. Then you have to bring up
your foot and do it. That is reaction time.
4-5