2006 GMC SIERRA 1500 automatic transmission
[x] Cancel search: automatic transmissionPage 210 of 600
Instrument Panel Cluster
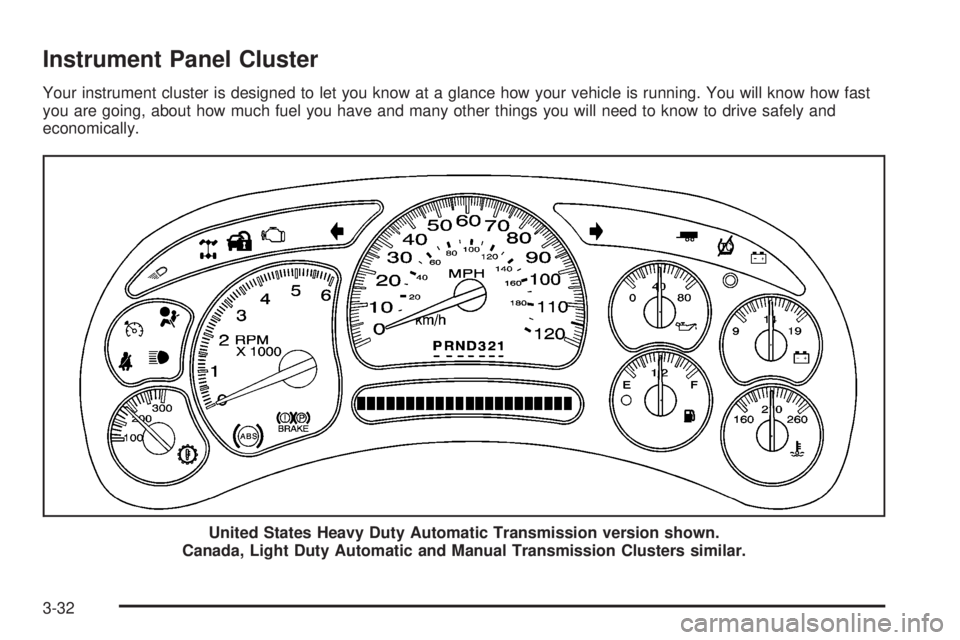
Your instrument cluster is designed to let you know at a glance how your vehicle is running. You will know how fast
you are going, about how much fuel you have and many other things you will need to know to drive safely and
economically.
United States Heavy Duty Automatic Transmission version shown.
Canada, Light Duty Automatic and Manual Transmission Clusters similar.
3-32
Page 230 of 600
Driver Information Center (DIC)
The Driver Information Center (DIC) display is located on
the instrument panel cluster, below the speedometer. If
your vehicle has DIC buttons, they are located on the
steering wheel. The DIC can display information such as
the trip odometer, fuel economy, customization features,
and warning/status messages.
If your vehicle does not have DIC steering wheel buttons,
you will not have all of the features listed. Scroll through
the odometer, trip odometer, engine hours, and selected
range if your vehicle has an Allison Transmission
®by
pressing the trip odometer reset stem located on the
instrument panel cluster. Turn off, or acknowledge, DIC
messages by pressing the trip odometer reset stem. See
Speedometer and Odometer on page 3-33for information
on features for vehicles without DIC buttons.
If your vehicle has an Allison Transmission
®and the shift
lever is in the MANUAL MODE (M) position, the DIC will
display the current gear range. The DIC will also display
the gear range as it is shifted up or down. For example,
if the gear range is currently set to 6, the DIC will display
(6)54321.When the gear range is shifted down one
time, the DIC will display 6 (5)4321.SeeAutomatic
Transmission Operation on page 2-26for more
information.
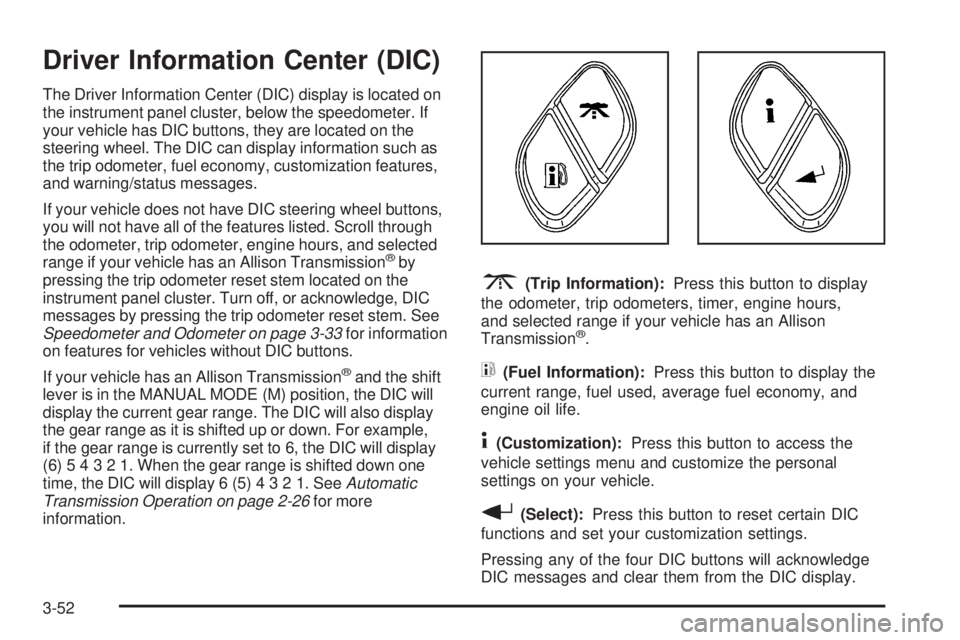
3(Trip Information):Press this button to display
the odometer, trip odometers, timer, engine hours,
and selected range if your vehicle has an Allison
Transmission
®.
t(Fuel Information):Press this button to display the
current range, fuel used, average fuel economy, and
engine oil life.
4(Customization):Press this button to access the
vehicle settings menu and customize the personal
settings on your vehicle.
r(Select):Press this button to reset certain DIC
functions and set your customization settings.
Pressing any of the four DIC buttons will acknowledge
DIC messages and clear them from the DIC display.
3-52
Page 232 of 600
Engine Hours:Press the trip information button until
ENGINE HOURS appears on the display. This mode
shows the total number of hours the engine has run.
Pressing and holding the reset stem located on the
instrument cluster for about four seconds will also
display the engine hour information after the odometer
is displayed when the vehicle is off.
Selected Range:If your vehicle has an Allison
Transmission
®and the vehicle is in the MANUAL
MODE (M) position, press the trip information button
until SELECTED RANGE: M# appears on the display.
The DIC will display the current gear range. For
example, if the gear range is set to 6, the DIC will display
SELECTED RANGE: M6. SeeAutomatic Transmission
Operation on page 2-26for more information.
Fuel Information Button
t
(Fuel Information):Press the fuel information
button to scroll through the range, fuel used, average
fuel economy, and the engine oil life system.
Fuel Range:Press the fuel information button until
RANGE appears on the display. This mode shows the
remaining distance you can drive without refueling. It is
based on fuel economy and the fuel remaining in the fuel
tank. The display will show LOW if the fuel level is low.The fuel economy data used to determine fuel range is
an average of recent driving conditions. As your driving
conditions change, this data is gradually updated. Fuel
range cannot be reset.
Fuel Used:Press the fuel information button until
FUEL USED appears on the display. This mode shows
the number of gallons or liters of fuel used since the
last reset of this menu item. To reset the fuel used
information, press and hold the select button for
one second while FUEL USED is displayed.
Average Fuel Economy:Press the fuel information
button until AVG ECON appears on the display. This
mode shows how many miles per gallon (MPG) or liters
per 100 kilometers (L/100 km) your vehicle is getting
based on current and past driving conditions.
Press and hold the select button for one second while
AVG ECON is displayed to reset the average fuel
economy. Average fuel economy will then be calculated
starting from that point. If the average fuel economy is not
reset, it will be continually updated each time you drive.
Engine Oil Life System:Press the fuel information
button until ENGINE OIL LIFE appears on the display.
The engine oil life system shows an estimate of the
oil’s remaining useful life. It will show 100% when the
system is reset after an oil change. It will alert you
to change your oil on a schedule consistent with your
driving conditions.
3-54
Page 242 of 600
TRANS (Transmission) IN WARM UP
(Allison Transmission®Only)
When temperatures are very cold, the transmission
will prevent certain operations such as shifts to certain
ranges and engaging the torque converter clutch to
protect against damage. When active, the DIC will
display the message TRANS IN WARM UP.
TURN SIGNAL ON
If a turn signal is left on for 3/4 of a mile (1.2 km), this
message will appear on the display and you will hear a
chime. Move the turn signal/multifunction lever to the
off position. Pressing any of the four DIC buttons will
acknowledge the message and clear it from the DIC
display. If your vehicle does not have the four DIC
buttons, pressing the trip odometer reset stem will
acknowledge the message and clear it from the
DIC display.
DIC Vehicle Customization
Your vehicle may have customization capabilities that
allow you to program some features to one setting based
on your preference. All of the customizable options listed
may not be available on your vehicle. Only the options
available will be displayed on your Driver Information
Center (DIC).The default settings for the customization features were
set when your vehicle left the factory, but may have been
changed from their default state since then.
To change feature preferences, make sure the
ignition is on and the vehicle is in PARK (P). Press
the customization button to scroll through the available
customizable options.
After pressing the customization button, VEHICLE
SETTINGS will momentarily display before going to a
customization option.
Lock Doors (Automatic Transmission only)
If you have an automatic transmission vehicle, press the
customization button until LOCK DOORS appears in the
display. To select your preference for automatic locking,
press the select button while LOCK DOORS is displayed
on the DIC. Pressing the select button will scroll through
the following choices:
LOCK DOORS: IN GEAR (default):The doors will lock
when the vehicle is shifted out of PARK (P).
LOCK DOORS: WITH SPEED:The doors will lock
when the vehicle speed is above 8 mph (13 km/h) for
three seconds.
Choose one of the available options and press the
customization button while it is displayed on the DIC
to select it and move on to the next feature. For
more information on automatic door locks, see
Programmable Automatic Door Locks on page 2-10.
3-64
Page 243 of 600
Unlock Doors (Automatic
Transmission only)
If you have an automatic transmission vehicle, press the
customization button until UNLOCK DOORS appears
in the display. To select your preference for automatic
unlocking, press the select button while UNLOCK
DOORS is displayed on the DIC. Pressing the select
button will scroll through the following choices:
UNLOCK DOORS: IN PARK (default):All of the doors
will unlock when the vehicle is shifted into PARK (P).
UNLOCK DRIVER: IN PARK:The driver’s door will be
unlocked when the vehicle is shifted into PARK (P).
UNLOCK DOORS: KEY OUT:All of the doors
will unlock when the key is taken out of the ignition.
UNLOCK DOORS: MANUALLY:The doors will not be
unlocked automatically.
Choose one of the available options and press the
customization button while it is displayed on the DIC
to select it and move on to the next feature. For
more information on automatic door locks, see
Programmable Automatic Door Locks on page 2-10.
Door Lock Delay (Crew Cab only)
If your DIC does not have this feature, you still may be
able to program the delayed locking feature. SeeDelayed
Locking on page 2-10for more information.
When locking the doors with the power lock switch or
the keyless entry transmitter and a door is open, the
delayed locking feature will delay locking the doors until
�ve seconds after the last door is closed.
Press the customization button until DOOR LOCK
DELAY appears in the display. To select your preference
for delayed locking, press the select button while DOOR
LOCK DELAY is displayed on the DIC. Pressing the
select button will scroll through the following choices:
DOOR LOCK DELAY: OFF (default):The doors will
lock immediately when pressing the power lock switch
or the lock button on the keyless entry transmitter.
DOOR LOCK DELAY: ON:The doors will not lock until
�ve seconds after the last door is closed. You will hear
three chimes to signal that the delayed locking feature is
in use. You can temporarily override delayed locking by
pressing the lock button on the door or keyless entry
transmitter a second time.
Choose one of the available options and press the
customization button while it is displayed on the DIC
to select it and move on to the next feature.
This feature will not operate if the key is in the ignition.
3-65
Page 320 of 600
Remember: Anti-lock does not change the time you need
to get your foot up to the brake pedal or always decrease
stopping distance. If you get too close to the vehicle in
front of you, you will not have time to apply your brakes
if that vehicle suddenly slows or stops. Always leave
enough room up ahead to stop, even though you have
anti-lock brakes.
Using Anti-Lock
Do not pump the brakes. Just hold the brake pedal down
�rmly and let anti-lock work for you. You may feel the
brakes vibrate, or you may notice some noise, but this
is normal.
Braking in Emergencies
With anti-lock brakes, you can steer and brake at the
same time. In many emergencies, steering can help
you more than even the very best braking.
Traction Assist System (TAS)
Your vehicle may have a Traction Assist System (TAS)
that limits wheel spin. This is especially useful in slippery
road conditions. The system operates only if it senses
that one or both of the rear wheels are spinning or
beginning to lose traction. When this happens, the
system reduces engine power to limit wheel spin.
The traction control system is enabled every time your
vehicle is started. The system will activate if it senses
that any of the wheels are spinning or beginning to lose
traction.
You may hear or feel the system working or notice
a lack of accelerator response, but this is normal.
The Traction Assist System may operate on dry roads
under some conditions. When this happens, you may
notice a reduction in acceleration. This is normal
and doesn’t mean there’s a problem with your vehicle.
Examples of these conditions include a hard acceleration
in a turn, an abrupt upshift or downshift of the
transmission or driving on rough roads.
If your vehicle is in cruise control when the TAS begins
to limit wheel spin, the cruise control will automatically
disengage. When road conditions allow you to safely
use it again, you may re-engage the cruise control.
SeeCruise Control on page 3-10.
4-8
Page 321 of 600
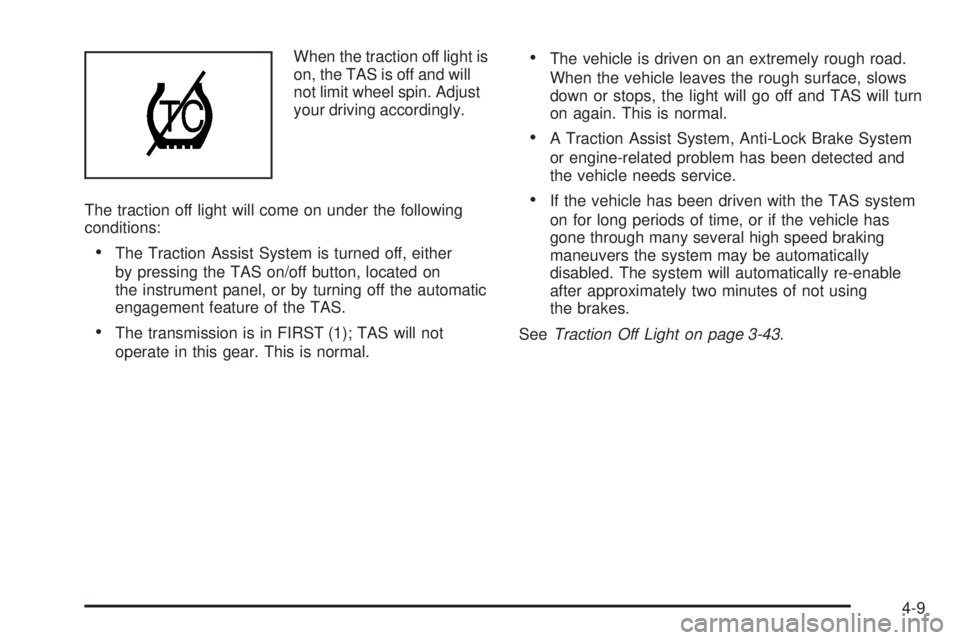
When the traction off light is
on, the TAS is off and will
not limit wheel spin. Adjust
your driving accordingly.
The traction off light will come on under the following
conditions:
The Traction Assist System is turned off, either
by pressing the TAS on/off button, located on
the instrument panel, or by turning off the automatic
engagement feature of the TAS.
The transmission is in FIRST (1); TAS will not
operate in this gear. This is normal.
The vehicle is driven on an extremely rough road.
When the vehicle leaves the rough surface, slows
down or stops, the light will go off and TAS will turn
on again. This is normal.
A Traction Assist System, Anti-Lock Brake System
or engine-related problem has been detected and
the vehicle needs service.
If the vehicle has been driven with the TAS system
on for long periods of time, or if the vehicle has
gone through many several high speed braking
maneuvers the system may be automatically
disabled. The system will automatically re-enable
after approximately two minutes of not using
the brakes.
SeeTraction Off Light on page 3-43.
4-9
Page 375 of 600
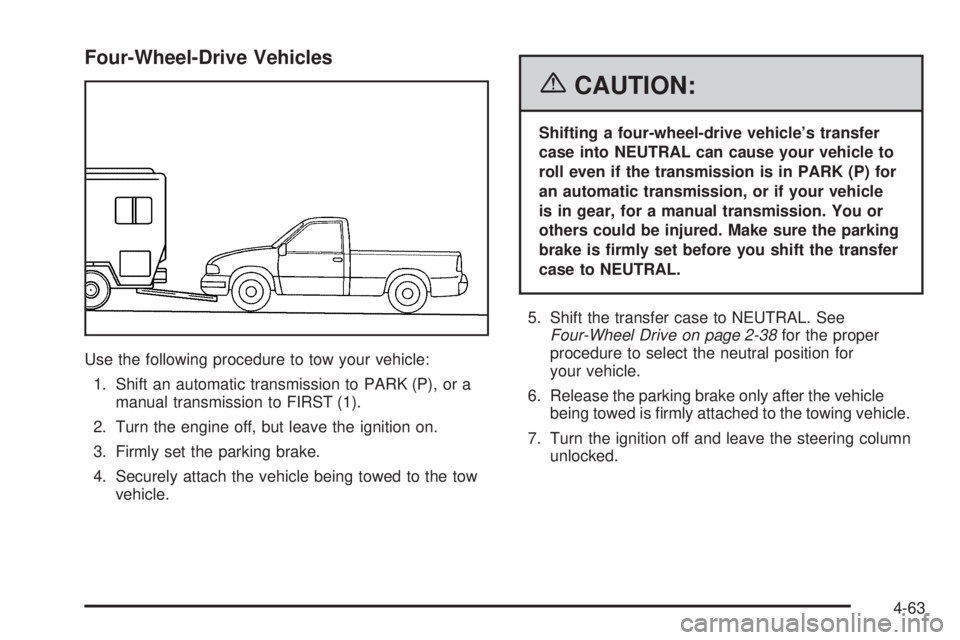
Four-Wheel-Drive Vehicles
Use the following procedure to tow your vehicle:
1. Shift an automatic transmission to PARK (P), or a
manual transmission to FIRST (1).
2. Turn the engine off, but leave the ignition on.
3. Firmly set the parking brake.
4. Securely attach the vehicle being towed to the tow
vehicle.
{CAUTION:
Shifting a four-wheel-drive vehicle’s transfer
case into NEUTRAL can cause your vehicle to
roll even if the transmission is in PARK (P) for
an automatic transmission, or if your vehicle
is in gear, for a manual transmission. You or
others could be injured. Make sure the parking
brake is �rmly set before you shift the transfer
case to NEUTRAL.
5. Shift the transfer case to NEUTRAL. See
Four-Wheel Drive on page 2-38for the proper
procedure to select the neutral position for
your vehicle.
6. Release the parking brake only after the vehicle
being towed is �rmly attached to the towing vehicle.
7. Turn the ignition off and leave the steering column
unlocked.
4-63