Page 8 of 232
These are some of the symbols you may see on your vehicle.
Vehicle Symbol Glossary
Safety Alert
See Owner’s Guide
Fasten Safety BeltAir Bag-Front
Air Bag-SideChild Seat
Child Seat Installation
WarningChild Seat Lower
Anchor
Child Seat Tether
AnchorBrake System
Anti-Lock Brake SystemBrake Fluid -
Non-Petroleum Based
Powertrain MalfunctionSpeed Control
Master Lighting SwitchHazard Warning Flasher
Fog Lamps-FrontFuse Compartment
Fuel Pump ResetWindshield Wash/Wipe
Windshield
Defrost/DemistRear Window
Defrost/Demist
2006 Taurus(tau)
Owners Guide (post-2002-fmt)
USA(fus)
Introduction
8
Page 11 of 232

Brake system warning light:To
confirm the brake system warning
light is functional, it will
momentarily illuminate when the
ignition is turned to the ON position
when the engine is not running, or in a position between ON and START,
or by applying the parking brake when the ignition is turned to the ON
position. If the brake system warning light does not illuminate at this
time, seek service immediately from your dealership. Illumination after
releasing the parking brake indicates low brake fluid level and the brake
system should be inspected immediately by your servicing dealership.
Driving a vehicle with the brake system warning light on is
dangerous. A significant decrease in braking performance may
occur. It will take you longer to stop the vehicle. Have the vehicle
checked by your dealer immediately.
Anti-lock brake system (if
equipped):If the ABS light stays
illuminated or continues to flash, a
malfunction has been detected, have
the system serviced immediately.
Normal braking is still functional unless the brake warning light also is
illuminated.
Air bag readiness:If this light fails
to illuminate when ignition is turned
to ON, continues to flash or remains
on, have the system serviced
immediately. A chime will also sound when a malfunction in the
supplemental restraint system has been detected.
Safety belt:Reminds you to fasten
your safety belt. A chime will also
sound to remind you to fasten your
safety belt.
Charging system:Illuminates when
the battery is not charging properly.
P!
BRAKE
ABS
2006 Taurus(tau)
Owners Guide (post-2002-fmt)
USA(fus)
Instrument Cluster
11
Page 29 of 232

HEADLAMP CONTROL
Turns the lamps off.
Turns on the parking lamps,
instrument panel lamps, license
plate lamps and tail lamps.
Turns the headlamps on.
Autolamp control (if equipped)
The autolamp system provides light
sensitive automatic on-off control of
the exterior lights normally
controlled by the headlamp control.
The autolamp system also keeps the
lights on for a fixed period of time
after the ignition switch is turned to
OFF.
•To turn autolamps on, rotate the control counterclockwise to
.
•To turn autolamps off, rotate the control clockwise to
.
Daytime running lamps (DRL) (if equipped)
Turns the headlamps on with a reduced output.
To activate:
•the ignition must be in the ON position,
•the headlamp control is in the OFF or parking lamp position and
•the parking brake must be disengaged.
Always remember to turn on your headlamps at dusk or during
inclement weather. The Daytime Running Lamp (DRL) system
does not activate the tail lamps and generally may not provide
adequate lighting during these conditions. Failure to activate your
headlamps under these conditions may result in a collision.
A
2006 Taurus(tau)
Owners Guide (post-2002-fmt)
USA(fus)
Lights
29
Page 34 of 232
FunctionNumber
of bulbsTrade number
Front park/turn lamp 2 3457 AK (amber)
Headlamp 2 9007 QL (9007 LL optional)
Tail lamp/brake/turn lamp 2 3157K
Backup lamp 2 921
License plate lamp 2 168
High-mount brake lampMust replace the hi-mount brake lamp
assembly
Dome lamp 1 12V6W
Dome/map lamp 3 578
Visor vanity lamp
(passenger/driver)2 DE 3021
Luggage compartment lamp 1 212–2
Ashtray lamp 1 161
Glove box lamp 1 161
All replacement bulbs are clear in color except where noted.
To replace all instrument panel lights - see your dealer.
2006 Taurus(tau)
Owners Guide (post-2002-fmt)
USA(fus)
Lights
34
Page 38 of 232

5. Carefully pull bulb straight out of
the socket and push in the new
bulb.
6. Install the bulb socket into the
lamp assembly by rotating it
clockwise.
7. Carefully position the headlamp
assembly onto the vehicle.
8. Hold the headlamp assembly snugly against the vehicle and install the
retainer pins straight down to lock the lamp into place.
9. Before reinstalling the bolt, make sure the retainer pins are fully
seated, and install bolt on headlamp housing.
10. Turn the headlamps on and make sure they work properly. If the
headlamp was correctly aligned before you changed the bulb, you should
not need to align it again.
Replacing high-mount brakelamp assembly
To change the high-mount brake
lamp assembly:
1. Pry the light assembly away from
its housing and push rearward to
disengage it from the retaining clips.
2. Lift the front of the light
assembly from the parcel shelf.
3. Disconnect the light assembly
wiring and replace the light
assembly.
4. To complete installation, follow the removal procedure in reverse
order.
Replacing high-mount brakelamp bulbs — Decklid spoiler
Your vehicle may be equipped with a decklid spoiler that has a high
mount stop lamp module containing integral multiple light emitting
diodes (LED). If one or more LEDs burn out, the complete lamp module
has to be replaced. See your dealer for the replacement LED module.
2006 Taurus(tau)
Owners Guide (post-2002-fmt)
USA(fus)
Lights
38
Page 40 of 232

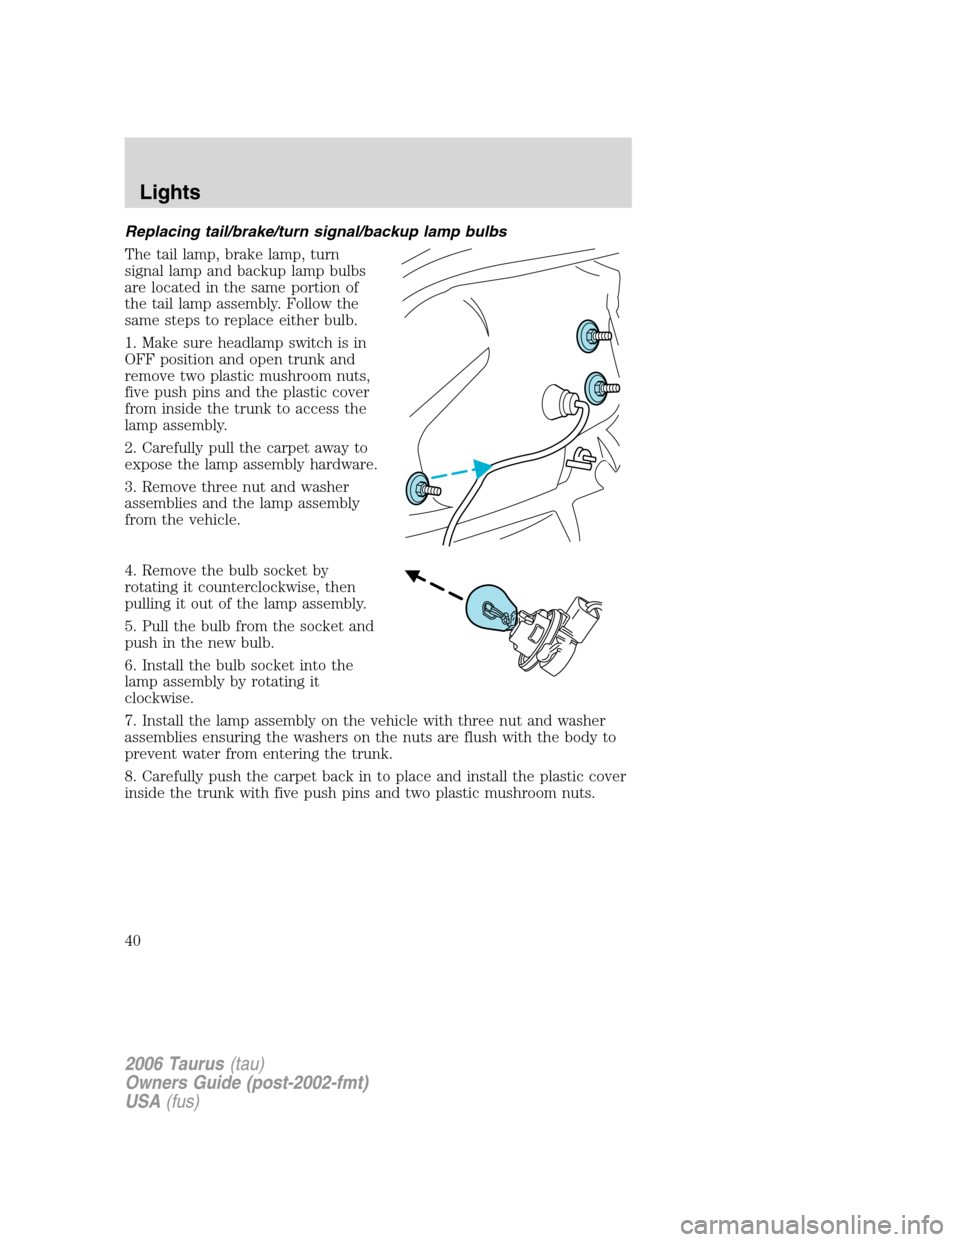
Replacing tail/brake/turn signal/backup lamp bulbs
The tail lamp, brake lamp, turn
signal lamp and backup lamp bulbs
are located in the same portion of
the tail lamp assembly. Follow the
same steps to replace either bulb.
1. Make sure headlamp switch is in
OFF position and open trunk and
remove two plastic mushroom nuts,
five push pins and the plastic cover
from inside the trunk to access the
lamp assembly.
2. Carefully pull the carpet away to
expose the lamp assembly hardware.
3. Remove three nut and washer
assemblies and the lamp assembly
from the vehicle.
4. Remove the bulb socket by
rotating it counterclockwise, then
pulling it out of the lamp assembly.
5. Pull the bulb from the socket and
push in the new bulb.
6. Install the bulb socket into the
lamp assembly by rotating it
clockwise.
7. Install the lamp assembly on the vehicle with three nut and washer
assemblies ensuring the washers on the nuts are flush with the body to
prevent water from entering the trunk.
8. Carefully push the carpet back in to place and install the plastic cover
inside the trunk with five push pins and two plastic mushroom nuts.
2006 Taurus(tau)
Owners Guide (post-2002-fmt)
USA(fus)
Lights
40
Page 46 of 232

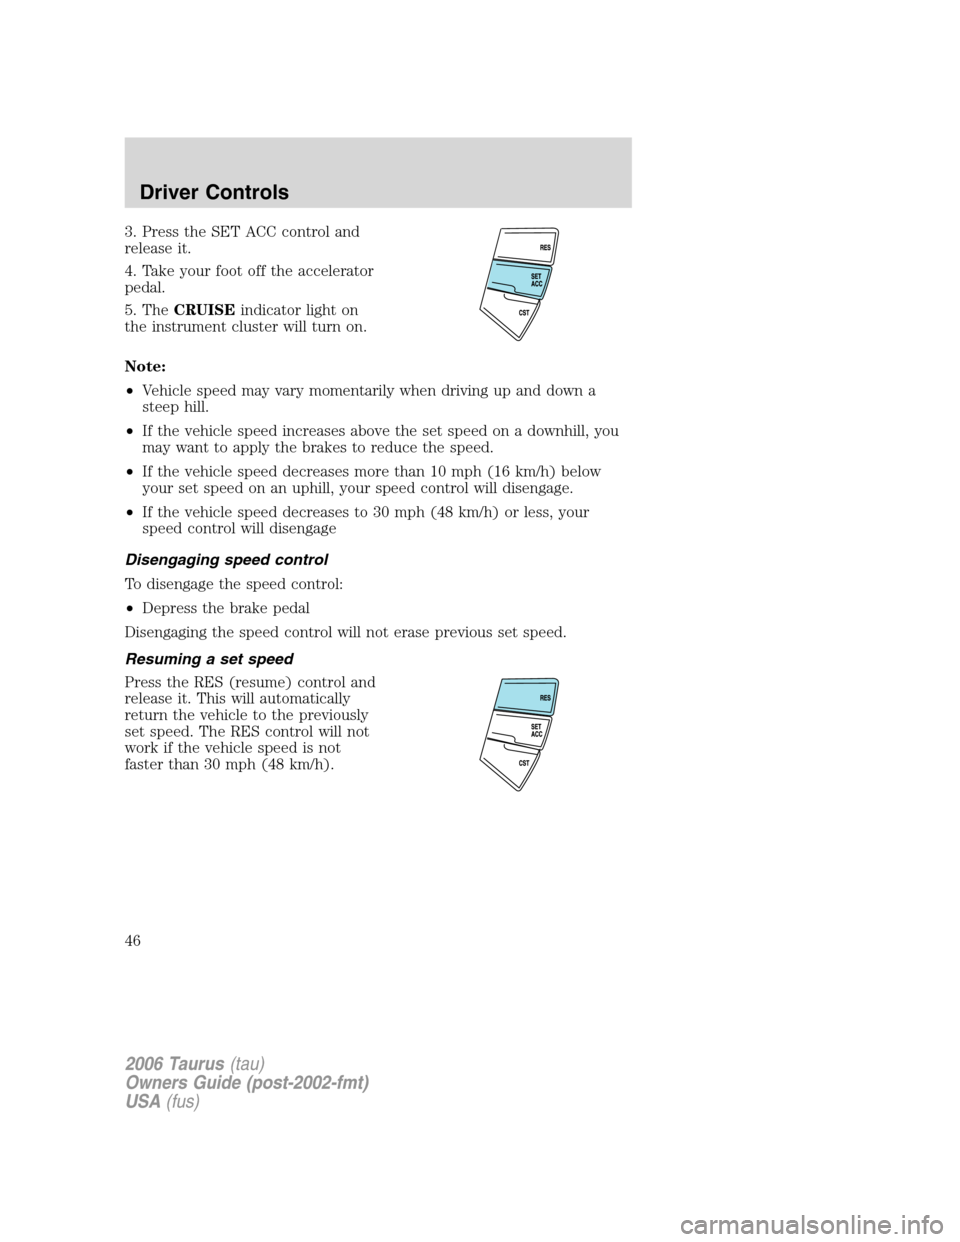
3. Press the SET ACC control and
release it.
4. Take your foot off the accelerator
pedal.
5. TheCRUISEindicator light on
the instrument cluster will turn on.
Note:
•Vehicle speed may vary momentarily when driving up and down a
steep hill.
•If the vehicle speed increases above the set speed on a downhill, you
may want to apply the brakes to reduce the speed.
•If the vehicle speed decreases more than 10 mph (16 km/h) below
your set speed on an uphill, your speed control will disengage.
•If the vehicle speed decreases to 30 mph (48 km/h) or less, your
speed control will disengage
Disengaging speed control
To disengage the speed control:
•Depress the brake pedal
Disengaging the speed control will not erase previous set speed.
Resuming a set speed
Press the RES (resume) control and
release it. This will automatically
return the vehicle to the previously
set speed. The RES control will not
work if the vehicle speed is not
faster than 30 mph (48 km/h).
2006 Taurus(tau)
Owners Guide (post-2002-fmt)
USA(fus)
Driver Controls
46
Page 62 of 232
POSITIVE RETENTION FLOOR MAT
Position the driver floor mat so that
the eyelet is over the pointed end of
the retention post and rotate
forward to lock in. Make sure that
the mat does not interfere with the
operation of the accelerator or the
brake pedal. To remove the floor
mat, reverse the installation
procedure.
INTERIOR TRUNK CONTROL
Press the remote trunk release
control on the instrument panel to
the left of the steering wheel.
CARGO AREA FEATURES
Cargo utility hooks
The utility hooks located inside the trunk can be used to attach a cargo
net to secure lightweight objects or hang small items on. Do not hang
more than 20 lbs (12 kg) on the hooks.
The hooks are not designed to restrain objects during a collision.
2006 Taurus(tau)
Owners Guide (post-2002-fmt)
USA(fus)
Driver Controls
62