Page 52 of 198
Downloaded from www.Manualslib.com manuals search engine REAR WINDOW WIPER
AND WASHERS
Intermittent wiping
Pull the lever towards the steeringwheel.
Reverse gear wipe
The rear wiper will be activatedautomatically when selecting reversegear, if
•the rear wiper is not alreadyswitched on,
•the wiper lever is in position C, orD
•in position B and the front wipersare operating.
The rear wiper will follow the frontwiper interval (at intermittent ornormal speed).
Washer
WARNING
Do not operate the washer formore than 10 seconds at a time,and never when the reservoir isempty.
Pull the lever fully towards thesteering wheel and hold it to operatethe washer.
The washer will operate inconjunction with the wipers.
The washer jet for the rear windowis located on the roof above the rearwindow.
50
Wipers and washersE72175 E72176
Page 55 of 198
Downloaded from www.Manualslib.com manuals search engine LIGHTING CONTROL
Lighting control positions
OffA
Side and tail lampsB
HeadlampsC
Parking lampsD
Parking lamps
Push in and turn anticlockwise.
Autolamps
WARNING
The autolamps feature is anauxiliary system which is notintended to relieve the driver of hisresponsibility for the vehicle’s exteriorlighting.
When the switch is set to AUTO, thedipped beam headlamps will switchon and off automatically dependingon the ambient light.
Note: Main beam can be activatedonly when the autolamps feature hasturned on the headlamps.
If the headlamps switch offautomatically with main beamactivated, the next time theautolamps feature switches on theheadlamps, main beam will still be on.Dipped beam may be selected bypulling the multi-function levertowards the steering wheel.
Main/dipped beam
To switch over pull the lever towardsthe steering wheel.
53
LightingABCE72161 E72162 E72168
Page 56 of 198

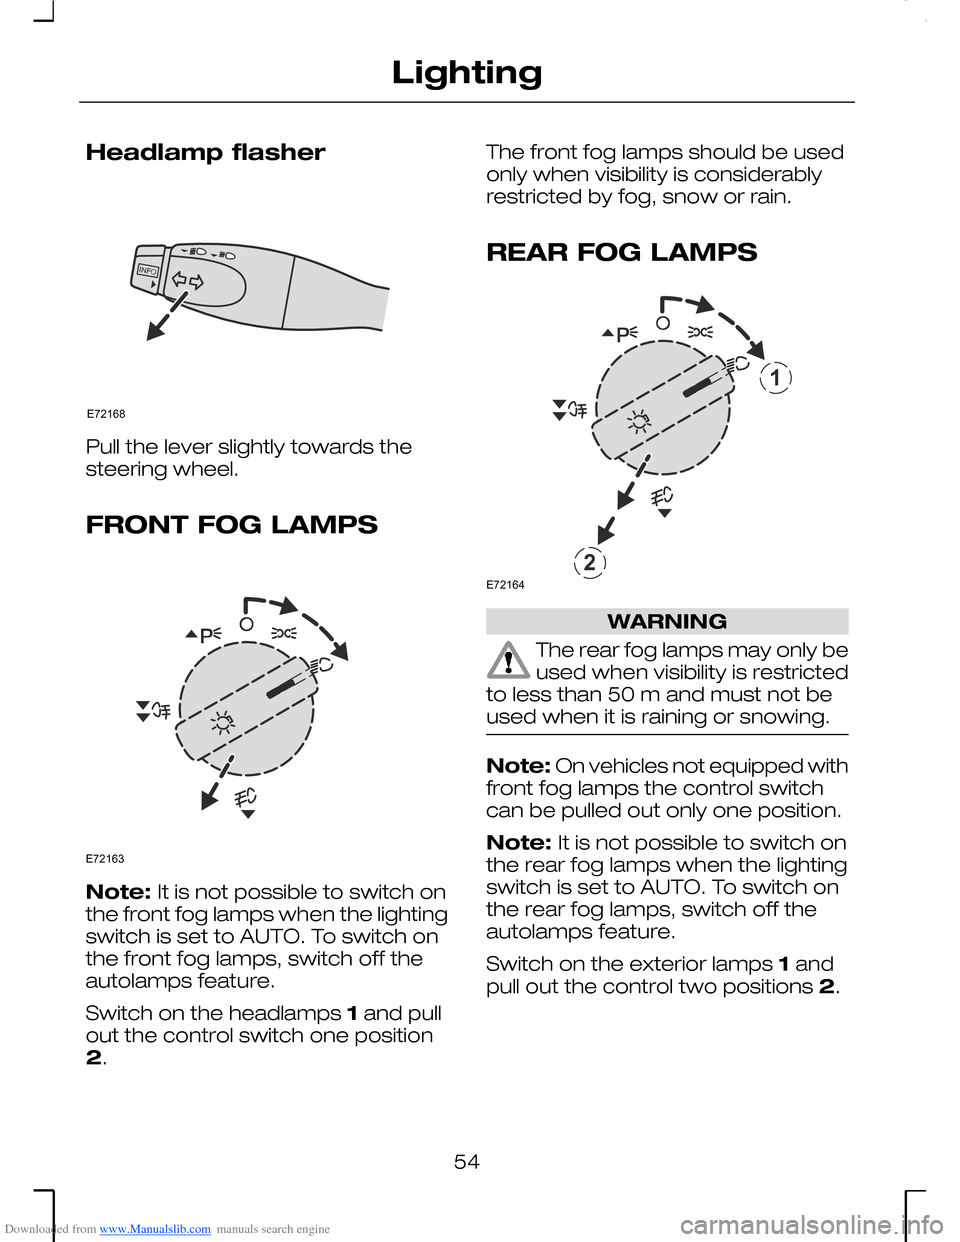
Downloaded from www.Manualslib.com manuals search engine Headlamp flasher
Pull the lever slightly towards thesteering wheel.
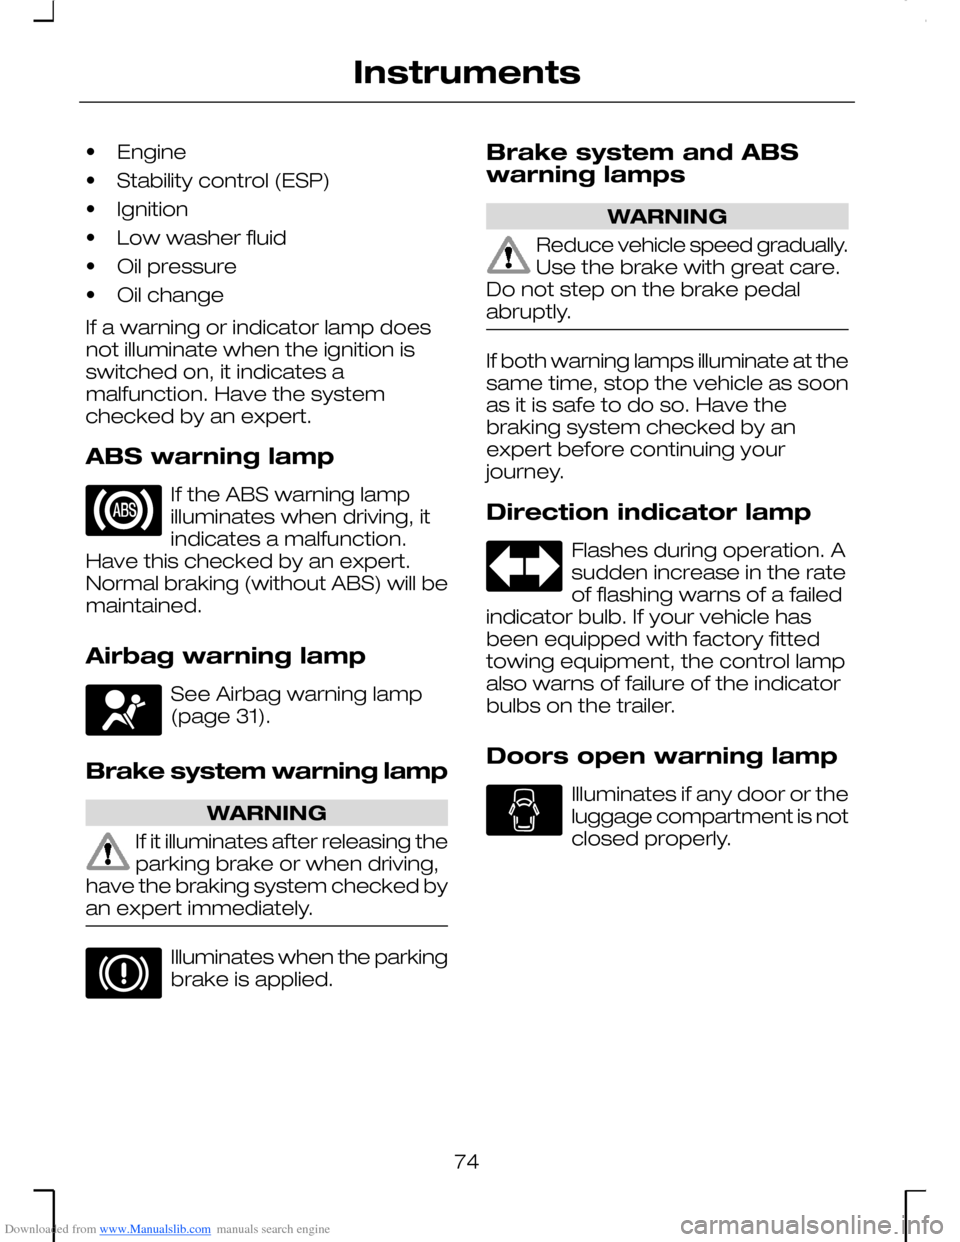
FRONT FOG LAMPS
Note: It is not possible to switch onthe front fog lamps when the lightingswitch is set to AUTO. To switch onthe front fog lamps, switch off theautolamps feature.
Switch on the headlamps 1 and pullout the control switch one position2.
The front fog lamps should be usedonly when visibility is considerablyrestricted by fog, snow or rain.
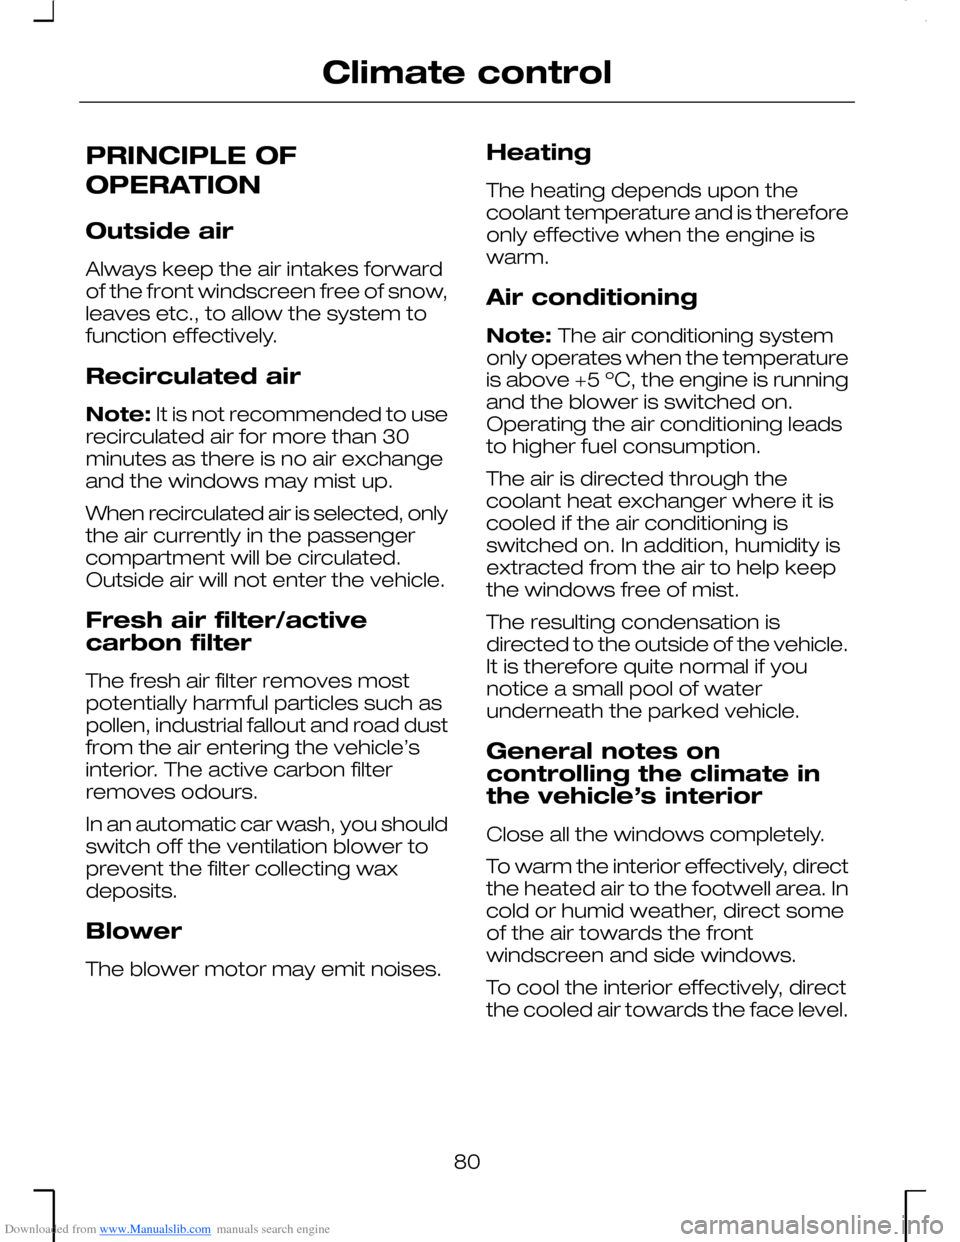
REAR FOG LAMPS
WARNING
The rear fog lamps may only beused when visibility is restrictedto less than 50 m and must not beused when it is raining or snowing.
Note: On vehicles not equipped withfront fog lamps the control switchcan be pulled out only one position.
Note: It is not possible to switch onthe rear fog lamps when the lightingswitch is set to AUTO. To switch onthe rear fog lamps, switch off theautolamps feature.
Switch on the exterior lamps 1 andpull out the control two positions 2.
54
LightingE72168 E72163 12E72164
Page 58 of 198
Downloaded from www.Manualslib.com manuals search engine Recommended headlamp levelling control positions
Control positionLoad
EstateSaloonLoad inluggagecompart-ment1
Persons
with self-level. susp.withoutself-level.susp.
Rear seatsFront seats
000--1-2
01212-31-2
02222max.131-2
123232max.1-1
1 See Technical specifications (page 173).
2Control position must be increased by 0.5 on vehicles with 2.0 l Duratorq-TDCi
or 2.5 l Duratec-VE engines and automatic transmission. Higher controlpositions (+1) may be necessary when towing a trailer.
HAZARD WARNING
FLASHERS
Press the switch to turn on or off. Thehazard warning flashers can also beoperated when the ignition is off.
DIRECTION INDICATORS
56
LightingE72166 E72167
Page 64 of 198
Downloaded from www.Manualslib.com manuals search engine From inside the luggagecompartment, release the rotary clipsof the rear light assembly cover.
Remove the cover.
Press the two red tabs towardseacht other and separate theassembly from the light housing.
Remove the wiring connector.
Direction indicator 21 wattA
Brake/tail lamp 21/4 wattB
Tail lamp 5 wattC
Reversing lamp H1 halogenbulbD
Tail lamp 5 wattE
Rear fog lamp 21 wattF
Turn the bulb anticlockwise underslight pressure, and remove it.
Replace the bulb.
Install in the reverse order. Afterinstallation, check that the lightsoperate correctly.
Rear lamps (Estate)
Open the tailgate.
From inside the luggagecompartment, remove the top rearlight assembly cover. The bottomcover is fastened with clips. Removethe cover.
Unscrew the two wing nuts from thelight assembly. Make sure the wingnuts do not fall into the opening.
Gently pull out the light assembly.
62
LightingE72548 E72549 E72550
Page 76 of 198

Downloaded from www.Manualslib.com manuals search engine •Engine
•Stability control (ESP)
•Ignition
•Low washer fluid
•Oil pressure
•Oil change
If a warning or indicator lamp doesnot illuminate when the ignition isswitched on, it indicates amalfunction. Have the systemchecked by an expert.
ABS warning lamp
If the ABS warning lampilluminates when driving, itindicates a malfunction.Have this checked by an expert.Normal braking (without ABS) will bemaintained.
Airbag warning lamp
See Airbag warning lamp(page 31).
Brake system warning lamp
WARNING
If it illuminates after releasing theparking brake or when driving,have the braking system checked byan expert immediately.
Illuminates when the parkingbrake is applied.
Brake system and ABSwarning lamps
WARNING
Reduce vehicle speed gradually.Use the brake with great care.Do not step on the brake pedalabruptly.
If both warning lamps illuminate at thesame time, stop the vehicle as soonas it is safe to do so. Have thebraking system checked by anexpert before continuing yourjourney.
Direction indicator lamp
Flashes during operation. Asudden increase in the rateof flashing warns of a failedindicator bulb. If your vehicle hasbeen equipped with factory fittedtowing equipment, the control lampalso warns of failure of the indicatorbulbs on the trailer.
Doors open warning lamp
Illuminates if any door or theluggage compartment is notclosed properly.
74
Instruments
Page 82 of 198

Downloaded from www.Manualslib.com manuals search engine PRINCIPLE OF
OPERATION
Outside air
Always keep the air intakes forwardof the front windscreen free of snow,leaves etc., to allow the system tofunction effectively.
Recirculated air
Note: It is not recommended to userecirculated air for more than 30minutes as there is no air exchangeand the windows may mist up.
When recirculated air is selected, onlythe air currently in the passengercompartment will be circulated.Outside air will not enter the vehicle.
Fresh air filter/activecarbon filter
The fresh air filter removes mostpotentially harmful particles such aspollen, industrial fallout and road dustfrom the air entering the vehicle’sinterior. The active carbon filterremoves odours.
In an automatic car wash, you shouldswitch off the ventilation blower toprevent the filter collecting waxdeposits.
Blower
The blower motor may emit noises.
Heating
The heating depends upon thecoolant temperature and is thereforeonly effective when the engine iswarm.
Air conditioning
Note: The air conditioning systemonly operates when the temperatureis above +5 ºC, the engine is runningand the blower is switched on.Operating the air conditioning leadsto higher fuel consumption.
The air is directed through thecoolant heat exchanger where it iscooled if the air conditioning isswitched on. In addition, humidity isextracted from the air to help keepthe windows free of mist.
The resulting condensation isdirected to the outside of the vehicle.It is therefore quite normal if younotice a small pool of waterunderneath the parked vehicle.
General notes oncontrolling the climate inthe vehicle’s interior
Close all the windows completely.
To warm the interior effectively, directthe heated air to the footwell area. Incold or humid weather, direct someof the air towards the frontwindscreen and side windows.
To cool the interior effectively, directthe cooled air towards the face level.
80
Climate control
Page 99 of 198
Downloaded from www.Manualslib.com manuals search engine SUN VISORS
The sun visors can be released fromthe retention clips and swivelledtowards the side window.
The mirror cover can be slid open.
INSTRUMENT LIGHTING
DIMMER
CLOCK
The time is adjusted by pressing thebutton. To advance the minutes,press the button briefly. To advancerapidly, hold the button pressed.
CIGAR LIGHTER
WARNING
Never hold the lighter in as thiswill result in damage. Alwaysremove the lighter as a precautionwhen children are left alone in thevehicle.
To use the lighter press it in and waituntil it pops out automatically.
97
Convenience featuresE70419 E70454 E70421 E70426