2006 FORD F SERIES MOTORHOME AND COMMERCIAL CHASSIS ESP
[x] Cancel search: ESPPage 4 of 128
SAFETY AND ENVIRONMENT PROTECTION
Warning symbols in this guide
How can you reduce the risk of personal injury to yourself or others? In
this guide, answers to such questions are contained in comments
highlighted by the warning triangle symbol. These comments should be
read and observed.
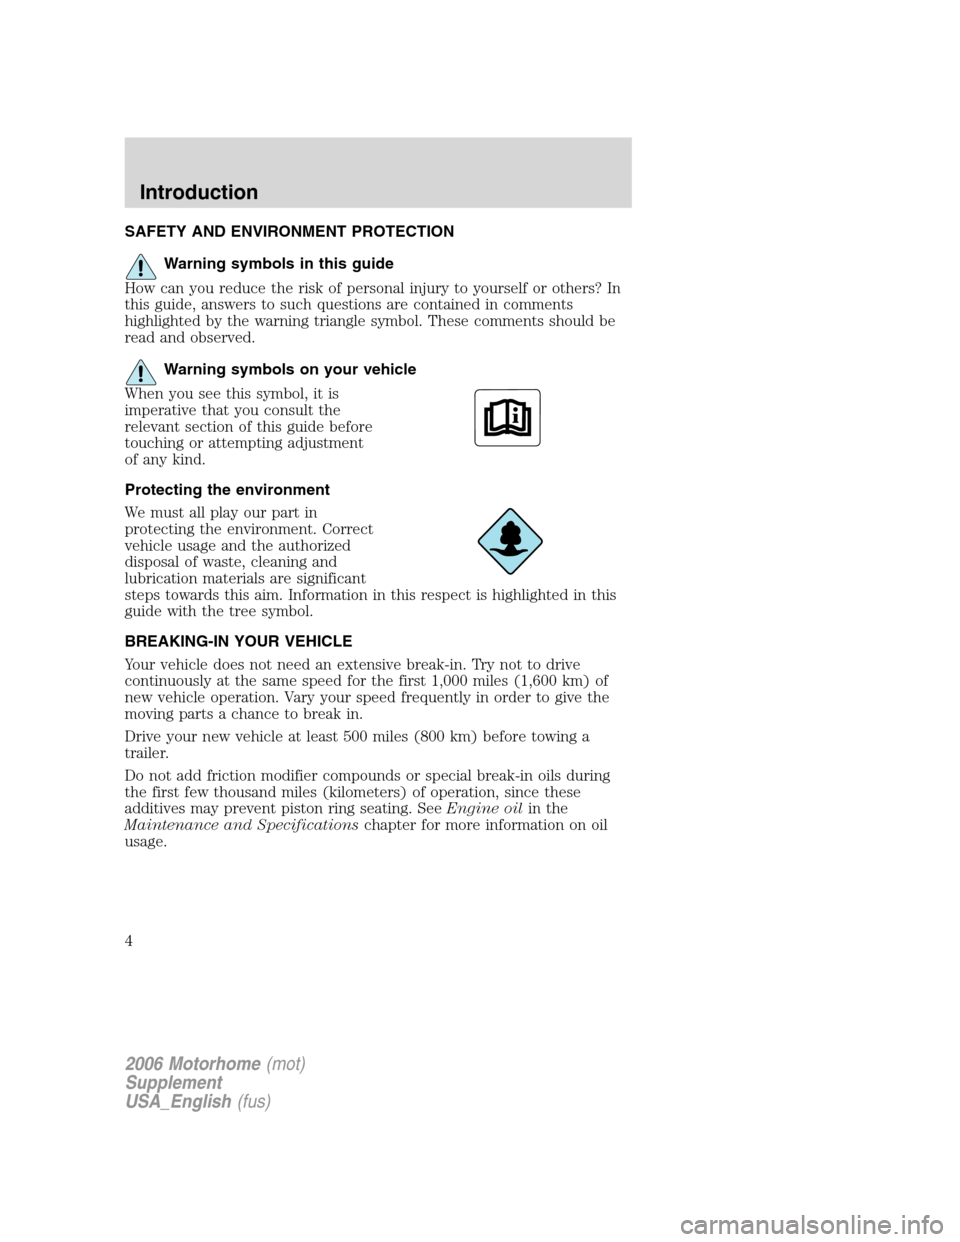
Warning symbols on your vehicle
When you see this symbol, it is
imperative that you consult the
relevant section of this guide before
touching or attempting adjustment
of any kind.
Protecting the environment
We must all play our part in
protecting the environment. Correct
vehicle usage and the authorized
disposal of waste, cleaning and
lubrication materials are significant
steps towards this aim. Information in this respect is highlighted in this
guide with the tree symbol.
BREAKING-IN YOUR VEHICLE
Your vehicle does not need an extensive break-in. Try not to drive
continuously at the same speed for the first 1,000 miles (1,600 km) of
new vehicle operation. Vary your speed frequently in order to give the
moving parts a chance to break in.
Drive your new vehicle at least 500 miles (800 km) before towing a
trailer.
Do not add friction modifier compounds or special break-in oils during
the first few thousand miles (kilometers) of operation, since these
additives may prevent piston ring seating. SeeEngine oilin the
Maintenance and Specificationschapter for more information on oil
usage.
2006 Motorhome(mot)
Supplement
USA_English(fus)
Introduction
4
Page 8 of 128
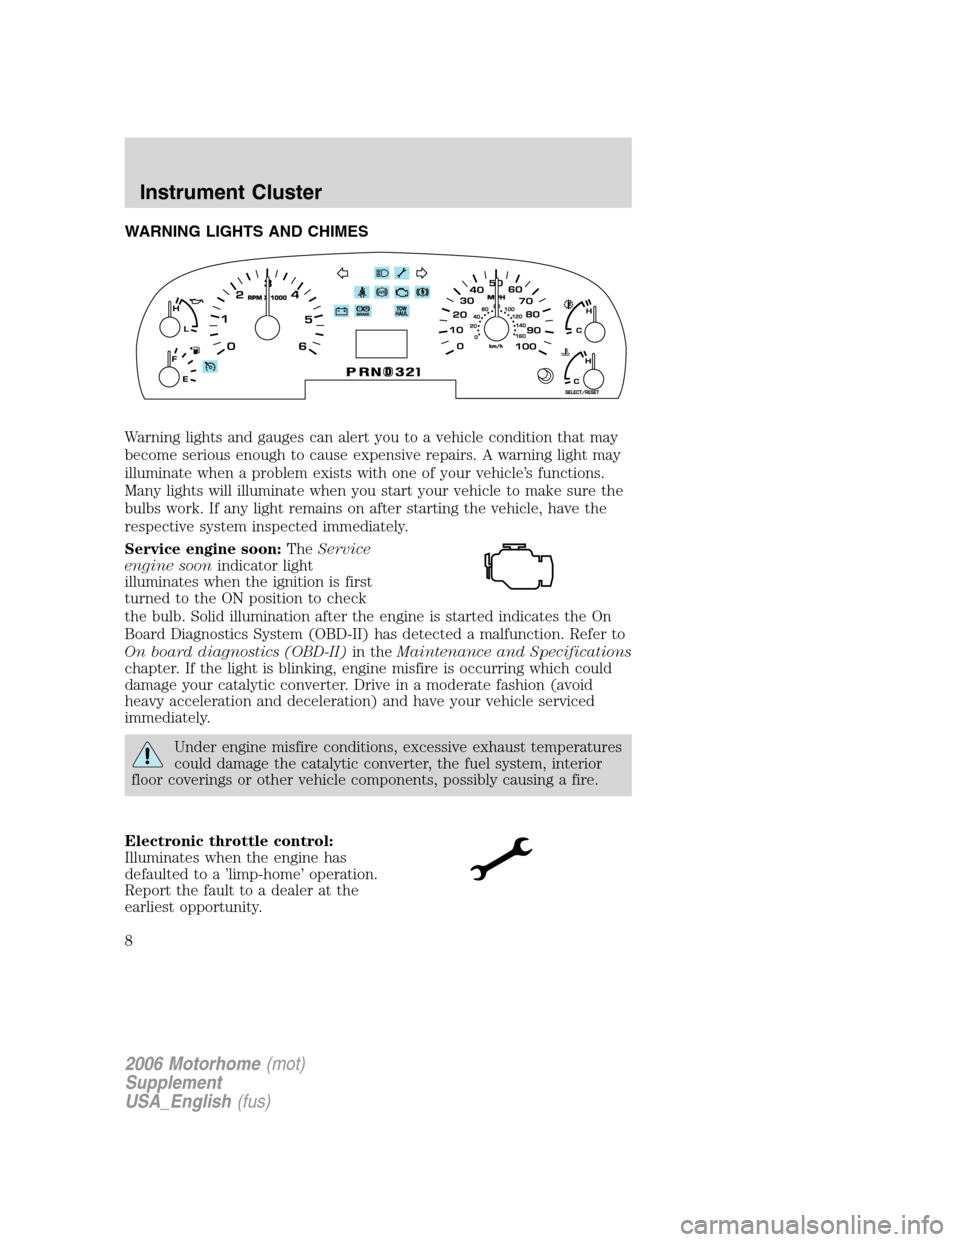
WARNING LIGHTS AND CHIMES
Warning lights and gauges can alert you to a vehicle condition that may
become serious enough to cause expensive repairs. A warning light may
illuminate when a problem exists with one of your vehicle’s functions.
Many lights will illuminate when you start your vehicle to make sure the
bulbs work. If any light remains on after starting the vehicle, have the
respective system inspected immediately.
Service engine soon:TheService
engine soonindicator light
illuminates when the ignition is first
turned to the ON position to check
the bulb. Solid illumination after the engine is started indicates the On
Board Diagnostics System (OBD-II) has detected a malfunction. Refer to
On board diagnostics (OBD-II)in theMaintenance and Specifications
chapter. If the light is blinking, engine misfire is occurring which could
damage your catalytic converter. Drive in a moderate fashion (avoid
heavy acceleration and deceleration) and have your vehicle serviced
immediately.
Under engine misfire conditions, excessive exhaust temperatures
could damage the catalytic converter, the fuel system, interior
floor coverings or other vehicle components, possibly causing a fire.
Electronic throttle control:
Illuminates when the engine has
defaulted to a ’limp-home’ operation.
Report the fault to a dealer at the
earliest opportunity.
2006 Motorhome(mot)
Supplement
USA_English(fus)
Instrument Cluster
Instrument Cluster
8
Page 22 of 128
The traction grade assigned to this tire is based on
straight-ahead braking traction tests, and does not include
acceleration, cornering, hydroplaning or peak traction characteristics.
Temperature A B C
The temperature grades are A (the highest), B and C, representing the
tire’s resistance to the generation of heat and its ability to dissipate heat
when tested under controlled conditions on a specified indoor laboratory
test wheel. Sustained high temperature can cause the material of the tire
to degenerate and reduce tire life, and excessive temperature can lead to
sudden tire failure. The grade C corresponds to a level of performance
which all passenger car tires must meet under the Federal Motor Vehicle
Safety Standard No. 109. Grades B and A represent higher levels of
performance on the laboratory test wheel than the minimum required by
law.
The temperature grade for this tire is established for a tire that
is properly inflated and not overloaded. Excessive speed,
underinflation, or excessive loading, either separately or in
combination, can cause heat buildup and possible tire failure.
TIRES
Tires are designed to give many thousands of miles of service, but they
must be maintained in order to get the maximum benefit from them.
Glossary of tire terminology
•Tire label:A label showing the OE (Original Equipment) tire sizes,
recommended inflation pressure and the maximum weight the vehicle
can carry.
•Tire Identification Number (TIN):A number on the sidewall of
each tire providing information about the tire brand and
manufacturing plant, tire size and date of manufacture.
•Inflation pressure:A measure of the amount of air in a tire.
•Standard load:A class of P-metric or Metric tires designed to carry a
maximum load at 35 psi [37 psi (2.5 bar) for Metric tires]. Increasing
the inflation pressure beyond this pressure will not increase the tire’s
load carrying capability.
•Extra load:A class of P-metric or Metric tires designed to carry a
heavier maximum load at 41 psi [43 psi (2.9 bar) for Metric tires].
2006 Motorhome(mot)
Supplement
USA_English(fus)
Tires, Wheels and Loading
22
Page 25 of 128
When weather temperature changes occur, tire inflation pressures also
change. A 10° F (6° C) temperature drop can cause a corresponding
drop of 1 psi (7 kPa) in inflation pressure. Check your tire pressures
frequently and adjust them to the proper pressure which can be found
on the tire label or certification label.
If you are checking tire pressure when the tire is hot, (i.e. driven more
than 1 mile [1.6 km]), never “bleed” or reduce air pressure. The tires are
hot from driving and it is normal for pressures to increase above
recommended cold pressures. A hot tire at or below recommended cold
inflation pressure could be significantly under-inflated.
To check the pressure in your tire(s):
1. Make sure the tires are cool, meaning they are not hot from driving
even a mile.
Note:If you have to drive a distance to get air for your tire(s), check
and record the tire pressure first and add the appropriate air pressure
when you get to the pump. It is normal for tires to heat up and the air
pressure inside to go up as you drive. Never “bleed” or reduce air
pressure when tires are hot.
2. Remove the cap from the valve on one tire, then firmly press the tire
gauge onto the valve and measure the pressure with the tire gauge.
3. Add enough air to reach the recommended air pressure
Note:If you overfill the tire, release air by pushing on the metal stem in
the center of the valve. Then recheck the pressure with your tire gauge.
4. Replace the valve cap.
5. Repeat this procedure for each tire, including the spare.
Note:Some spare tires require higher inflation pressure than the other
tires. Check the tire label for the recommended spare tire pressure. See
the completed vehicle’s owners guide for location of tire label.
6. Visually inspect the tires to make sure there are no nails or other
objects embedded that could poke a hole in the tire and cause an air
leak.
7. Check the sidewalls to make sure there are no gouges, cuts or bulges.
2006 Motorhome(mot)
Supplement
USA_English(fus)
Tires, Wheels and Loading
25
Page 52 of 128
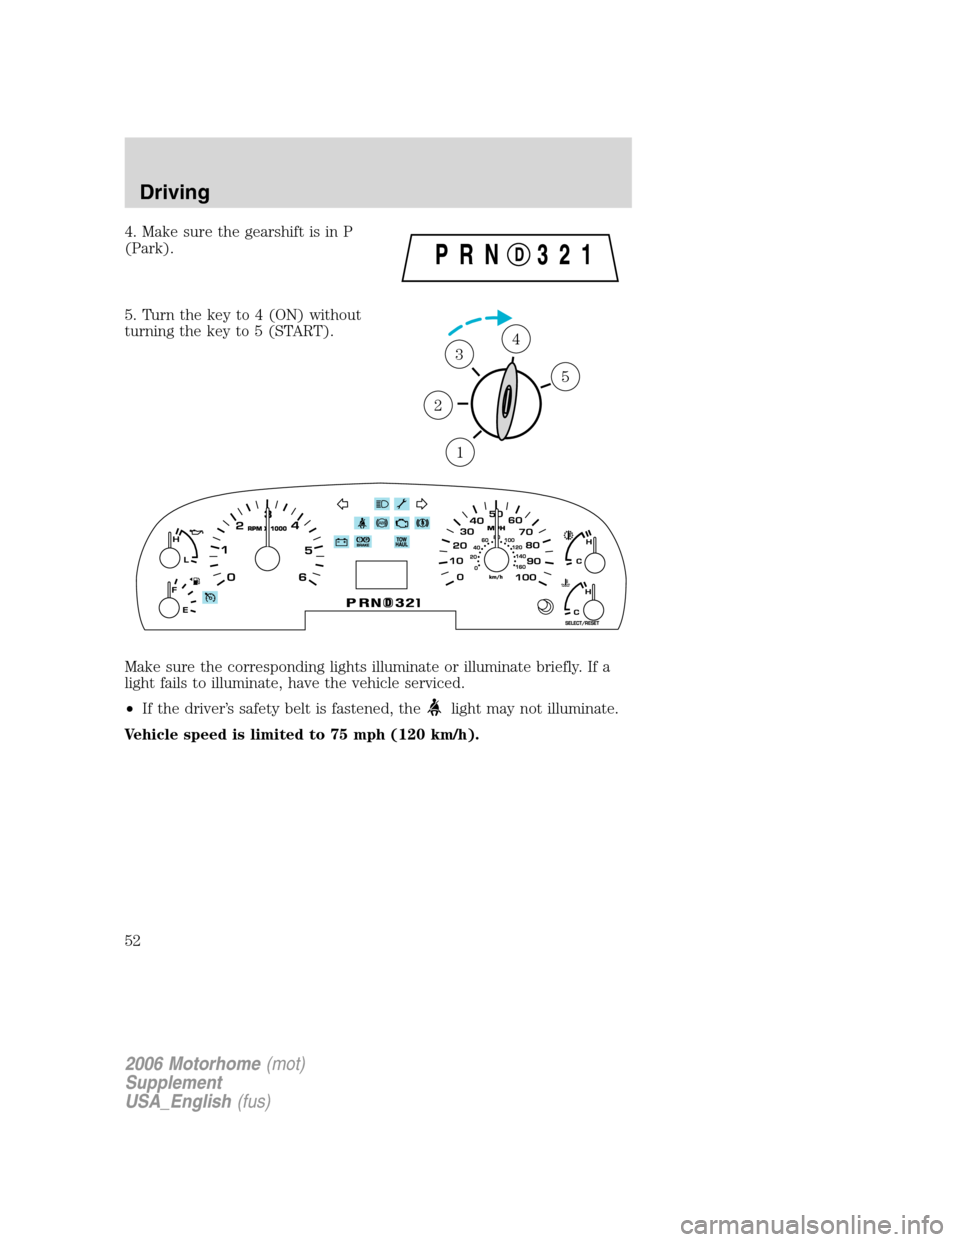
4. Make sure the gearshift is in P
(Park).
5. Turn the key to 4 (ON) without
turning the key to 5 (START).
Make sure the corresponding lights illuminate or illuminate briefly. If a
light fails to illuminate, have the vehicle serviced.
•If the driver’s safety belt is fastened, the
light may not illuminate.
Vehicle speed is limited to 75 mph (120 km/h).
1
2
34
5
2006 Motorhome(mot)
Supplement
USA_English(fus)
Driving
52
Page 55 of 128
For Hydromax-equipped vehicles operating under normal
conditions,the noise of the fluid flowing through the booster may be
heard whenever the brake is applied. This condition is normal. Vehicle
service is not required.
If braking performance or pedal response becomes very poor, even when
the pedal is strongly depressed, it may indicate the presence of air in the
hydraulic system or leakage of fluid. Stop the vehicle safely as soon as
possible and seek service immediately.
Anti-lock brake system (ABS)
On vehicles equipped with an anti-lock braking system (ABS), a noise
from the hydraulic pump motor and pulsation in the pedal may be
observed during ABS braking events. Pedal pulsation coupled with noise
while braking under panic conditions or on loose gravel, bumps, wet or
snowy roads is normal and indicates proper functioning of the vehicle’s
anti-lock brake system. The ABS performs a self-check after you start
the engine and begin to drive away. A brief mechanical noise may be
heard during this test. This is normal. If a malfunction is found, the ABS
warning light will come on. If the vehicle has continuous vibration or
shudder in the steering wheel while braking, the vehicle should be
inspected by a qualified service technician.
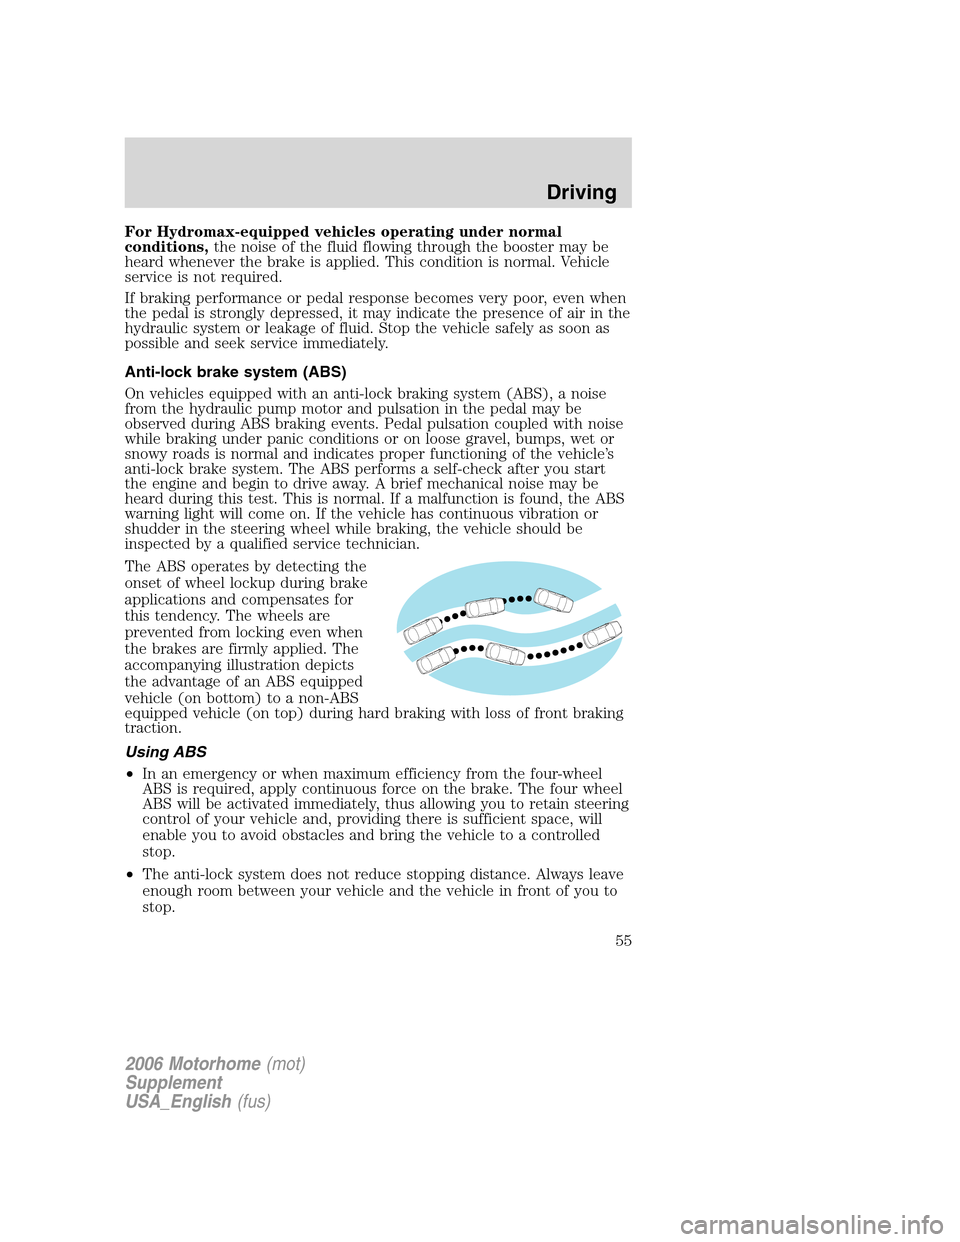
The ABS operates by detecting the
onset of wheel lockup during brake
applications and compensates for
this tendency. The wheels are
prevented from locking even when
the brakes are firmly applied. The
accompanying illustration depicts
the advantage of an ABS equipped
vehicle (on bottom) to a non-ABS
equipped vehicle (on top) during hard braking with loss of front braking
traction.
Using ABS
•In an emergency or when maximum efficiency from the four-wheel
ABS is required, apply continuous force on the brake. The four wheel
ABS will be activated immediately, thus allowing you to retain steering
control of your vehicle and, providing there is sufficient space, will
enable you to avoid obstacles and bring the vehicle to a controlled
stop.
•The anti-lock system does not reduce stopping distance. Always leave
enough room between your vehicle and the vehicle in front of you to
stop.
2006 Motorhome(mot)
Supplement
USA_English(fus)
Driving
55
Page 62 of 128
Forced downshifts
•Allowed in D (Overdrive) with the Tow/Haul feature on or off.
•Depress the accelerator to the floor.
•Allows transmission to select an appropriate gear.
If your vehicle gets stuck in mud or snow
If your vehicle gets stuck in mud or snow, it may be rocked out by
shifting between forward and reverse gears, stopping between shifts in a
steady pattern. Press lightly on the accelerator in each gear.
Do not rock the vehicle if the engine is not at normal operating
temperature or damage to the transmission may occur.
Do not rock the vehicle for more than a minute or damage to the
transmission and tires may occur, or the engine may overheat.
DRIVING THROUGH WATER
Do not drive quickly through standing water, especially if the depth is
unknown. Traction or brake capability may be limited and if the ignition
system gets wet, your engine may stall. Water may also enter your
engine’s air intake and severely damage your engine.
If driving through deep or standing water is unavoidable, proceed very
slowly. Never drive through water that is higher than the bottom of the
hubs (for trucks) or the bottom of the wheel rims (for cars).
Once through the water, always try the brakes. Wet brakes do not stop
the vehicle as effectively as dry brakes. Drying can be improved by
moving your vehicle slowly while applying light pressure on the brake
pedal.
Driving through deep water where the transmission vent tube is
submerged may allow water into the transmission and cause
internal transmission damage. Have the fluid checked and, if
water is found, replace the fluid.
2006 Motorhome(mot)
Supplement
USA_English(fus)
Driving
62
Page 63 of 128
GETTING ROADSIDE ASSISTANCE
To fully assist if you should have a vehicle concern, Ford Motor Company
offers a complimentary roadside assistance program. This program is
separate from the New Vehicle Limited Warranty. The service is available:
•24–hours, seven days a week
•for the New Vehicle Limited Warranty period of three years or
36,000 miles (60,000 km), whichever occurs first.
Roadside assistance will cover:
•a flat tire change with a good spare
•battery jump start
•lock-out assistance (key replacement cost is the customer’s
responsibility)
•fuel delivery (fuel cost is the customer’s responsibility)
•towing of your disabled vehicle to the nearest Ford Motor Company
dealership, or authorized repair location
Canadian customers refer to your Owner Information Guide for
information on:
•coverage period
•exact fuel amounts
•towing of your disabled vehicle
USING ROADSIDE ASSISTANCE
Customers in the U.S. and Canada who require roadside assistance, may
contact 1–800–444–3311.
HAZARD LIGHTS CONTROL
Use only in an emergency to warn traffic of vehicle breakdown,
approaching danger, etc. The hazard flashers can be operated when the
ignition is off.
2006 Motorhome(mot)
Supplement
USA_English(fus)
Roadside Emergencies
Roadside Emergencies
63