2006 FORD EXPLORER steering wheel
[x] Cancel search: steering wheelPage 232 of 328

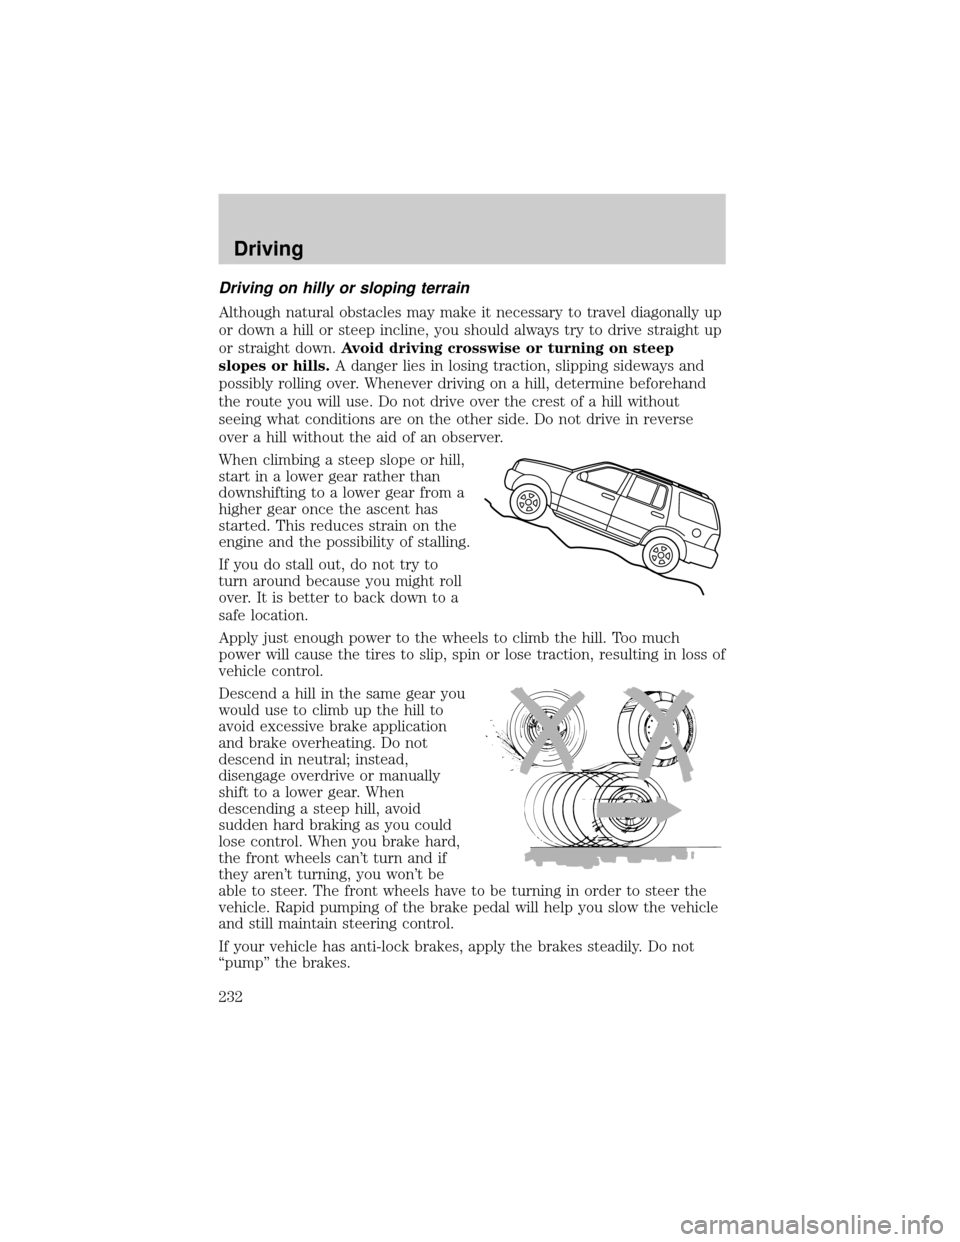
Driving on hilly or sloping terrain
Although natural obstacles may make it necessary to travel diagonally up
or down a hill or steep incline, you should always try to drive straight up
or straight down.Avoid driving crosswise or turning on steep
slopes or hills.A danger lies in losing traction, slipping sideways and
possibly rolling over. Whenever driving on a hill, determine beforehand
the route you will use. Do not drive over the crest of a hill without
seeing what conditions are on the other side. Do not drive in reverse
over a hill without the aid of an observer.
When climbing a steep slope or hill,
start in a lower gear rather than
downshifting to a lower gear from a
higher gear once the ascent has
started. This reduces strain on the
engine and the possibility of stalling.
If you do stall out, do not try to
turn around because you might roll
over. It is better to back down to a
safe location.
Apply just enough power to the wheels to climb the hill. Too much
power will cause the tires to slip, spin or lose traction, resulting in loss of
vehicle control.
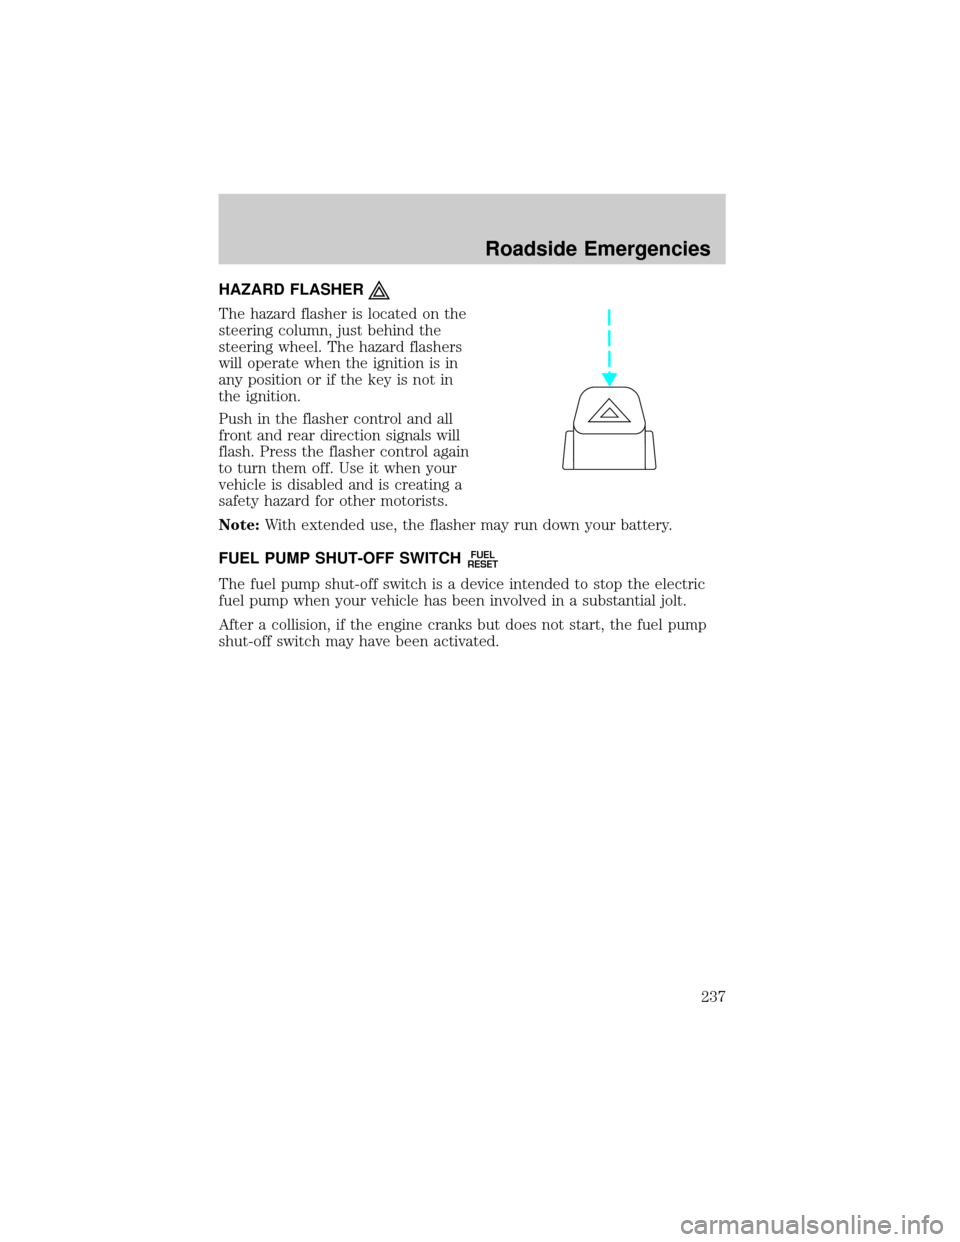
Descend a hill in the same gear you
would use to climb up the hill to
avoid excessive brake application
and brake overheating. Do not
descend in neutral; instead,
disengage overdrive or manually
shift to a lower gear. When
descending a steep hill, avoid
sudden hard braking as you could
lose control. When you brake hard,
the front wheels can't turn and if
they aren't turning, you won't be
able to steer. The front wheels have to be turning in order to steer the
vehicle. Rapid pumping of the brake pedal will help you slow the vehicle
and still maintain steering control.
If your vehicle has anti-lock brakes, apply the brakes steadily. Do not
ªpumpº the brakes.
Driving
232
Page 233 of 328

Driving on snow and ice
4WD vehicles have advantages over 2WD vehicles in snow and ice but
can skid like any other vehicle.
Should you start to slide while driving on snowy or icy roads, turn the
steering wheel in the direction of the slide until you regain control.
Avoid sudden applications of power and quick changes of direction on
snow and ice. Apply the accelerator slowly and steadily when starting
from a full stop.
Avoid sudden braking as well. Although a 4WD vehicle may accelerate
better than a two-wheel drive vehicle in snow and ice, it won't stop any
faster, because as in other vehicles, braking occurs at all four wheels. Do
not become overconfident as to road conditions.
Make sure you allow sufficient distance between you and other vehicles
for stopping. Drive slower than usual and consider using one of the lower
gears. In emergency stopping situations, avoid locking of the wheels. Use
a ªsqueezeº technique, push on the brake pedal with a steadily increasing
force which allows the wheels to brake yet continue to roll so that you
may steer in the direction you want to travel. If you lock the wheels,
release the brake pedal and repeat the squeeze technique. If your vehicle
is equipped with a Four Wheel Anti-Lock Brake System (ABS), apply the
brake steadily. Do not ªpumpº the brakes. Refer to theBrakessection of
this chapter for additional information on the operation of the anti-lock
brake system.
Never drive with chains on the front tires of 4WD vehicles without also
putting them on the rear tires. This could cause the rear to slide and
swing around during braking.
Maintenance and Modifications
The suspension and steering systems on your vehicle have been designed
and tested to provide predictable performance whether loaded or empty
and durable load carrying capability. For this reason, Ford Motor
Company strongly recommends that you do not make modifications such
as adding or removing parts (such as lift kits or stabilizer bars) or by
using replacement parts not equivalent to the original factory equipment.
Any modifications to a vehicle that raise the center of gravity can make
it more likely the vehicle will roll over as a result of a loss of control.
Ford Motor Company recommends that caution be used with any vehicle
equipped with a high load or device (such as ladder racks or pickup box
cover).
Driving
233
Page 237 of 328

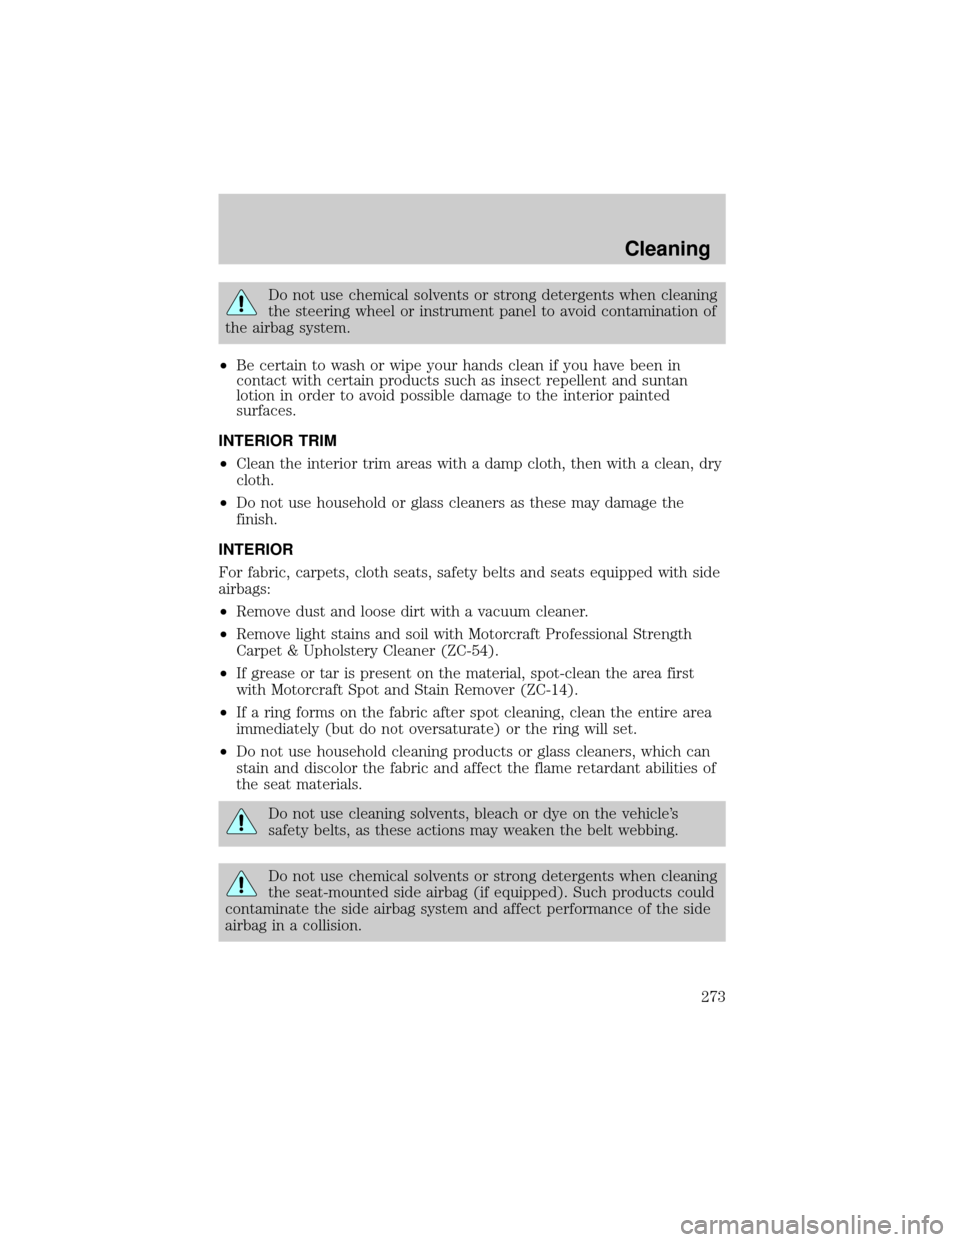
HAZARD FLASHER
The hazard flasher is located on the
steering column, just behind the
steering wheel. The hazard flashers
will operate when the ignition is in
any position or if the key is not in
the ignition.
Push in the flasher control and all
front and rear direction signals will
flash. Press the flasher control again
to turn them off. Use it when your
vehicle is disabled and is creating a
safety hazard for other motorists.
Note:With extended use, the flasher may run down your battery.
FUEL PUMP SHUT-OFF SWITCH
FUEL
RESET
The fuel pump shut-off switch is a device intended to stop the electric
fuel pump when your vehicle has been involved in a substantial jolt.
After a collision, if the engine cranks but does not start, the fuel pump
shut-off switch may have been activated.
Roadside Emergencies
237
Page 246 of 328

Fuse/Relay
LocationFuse Amp
RatingPower Distribution Box
Description
42 15A* Redundant brake switch, EVMV,
MAFS, HEGO, EVR, VCT1, VCT2,
CMCV, CMS
43 15A* Coil on plug (4.6L engine only),
Coil tower (4.0L engine only)
44 15A* Injectors
45A Ð Not used
45B Ð GCC fan relay
46A Ð Not used
46B Ð Not used
47 Ð Front wiper
48 Ð PCM relay
49 Ð Fuel pump
50A Ð Fog lamps
50B Ð AC clutch
51 Ð Not used
52 Ð A/C clutch (diode)
53 Ð Not used
54 Ð Trailer battery charger
55 Ð Starter
56 Ð Blower
* Mini Fuses ** Cartridge Fuses
CHANGING THE TIRES
If you get a flat tire while driving:
²do not brake heavily.
²gradually decrease the vehicle's speed.
²hold the steering wheel firmly.
²slowly move to a safe place on the side of the road.
Note:The tire pressure monitoring system (TPMS) indicator light will
illuminate when the spare is in use. To restore the full functionality of
the monitoring system, all road wheels equipped with tire pressure
monitoring sensors must be mounted on the vehicle.
Roadside Emergencies
246
Page 249 of 328

When driving with the full-size dissimilar spare tire/wheel additional
caution should be given to:
²Towing a trailer
²Driving vehicles equipped with a camper body
²Driving vehicles with a load on the cargo rack
Drive cautiously when using a full-size dissimilar spare tire/wheel and
seek service as soon as possible.
Stopping and securing the vehicle
1. If you get a flat tire while driving,
do not apply the brake heavily;
instead, gradually decrease your
speed. Hold the steering wheel
firmly and slowly move to a safe
place on the side of the road.
2. Park on a level surface, activate
the hazard flashers and set the
parking brake.
3. Place gearshift lever in P (Park)
and turn engine OFF.
When one of the rear wheels is off the ground, the transmission
alone will not prevent the vehicle from moving or slipping off the
jack, even if the transmission is in P (Park).
Note:Passengers should not remain
in the vehicle when the vehicle is
being jacked.
4. Block the wheel that is diagonally
opposite of the flat tire using the
wheel chock provided with your
vehicle.
Location of the spare tire and tools
Note:If your vehicle is equipped with the tire pressure monitoring
system (TPMS), the system indicator light will illuminate when the spare
is in use. To restore the full functionality of the TPMS system, all road
wheels equipped with the tire pressure monitoring sensors must be
mounted on the vehicle
Roadside Emergencies
249
Page 273 of 328

Do not use chemical solvents or strong detergents when cleaning
the steering wheel or instrument panel to avoid contamination of
the airbag system.
²Be certain to wash or wipe your hands clean if you have been in
contact with certain products such as insect repellent and suntan
lotion in order to avoid possible damage to the interior painted
surfaces.
INTERIOR TRIM
²Clean the interior trim areas with a damp cloth, then with a clean, dry
cloth.
²Do not use household or glass cleaners as these may damage the
finish.
INTERIOR
For fabric, carpets, cloth seats, safety belts and seats equipped with side
airbags:
²Remove dust and loose dirt with a vacuum cleaner.
²Remove light stains and soil with Motorcraft Professional Strength
Carpet & Upholstery Cleaner (ZC-54).
²If grease or tar is present on the material, spot-clean the area first
with Motorcraft Spot and Stain Remover (ZC-14).
²If a ring forms on the fabric after spot cleaning, clean the entire area
immediately (but do not oversaturate) or the ring will set.
²Do not use household cleaning products or glass cleaners, which can
stain and discolor the fabric and affect the flame retardant abilities of
the seat materials.
Do not use cleaning solvents, bleach or dye on the vehicle's
safety belts, as these actions may weaken the belt webbing.
Do not use chemical solvents or strong detergents when cleaning
the seat-mounted side airbag (if equipped). Such products could
contaminate the side airbag system and affect performance of the side
airbag in a collision.
Cleaning
273
Page 304 of 328

Readiness for Inspection/Maintenance (I/M) testing
In some localities, it may be a legal requirement to pass an I/M test of
the on-board diagnostics system. If your
indicator is on, refer to
the description in theWarning lights and chimessection of the
Instrument Clusterchapter. Your vehicle may not pass the I/M test with
the
indicator on.
If the vehicle's powertrain system or its battery has just been serviced,
the on-board diagnostics system is reset to a ªnot ready for I/M testº
condition. To ready the on-board diagnostics system for I/M testing, a
minimum of 30 minutes of city and highway driving is necessary as
described below:
²First, at least 10 minutes of driving on an expressway or highway.
²Next, at least 20 minutes driving in stop-and-go, city-type traffic with
at least four idle periods.
Allow the vehicle to sit for at least eight hours without starting the
engine. Then, start the engine and complete the above driving cycle. The
engine must warm up to its normal operating temperature. Once started,
do not turn off the engine until the above driving cycle is complete.
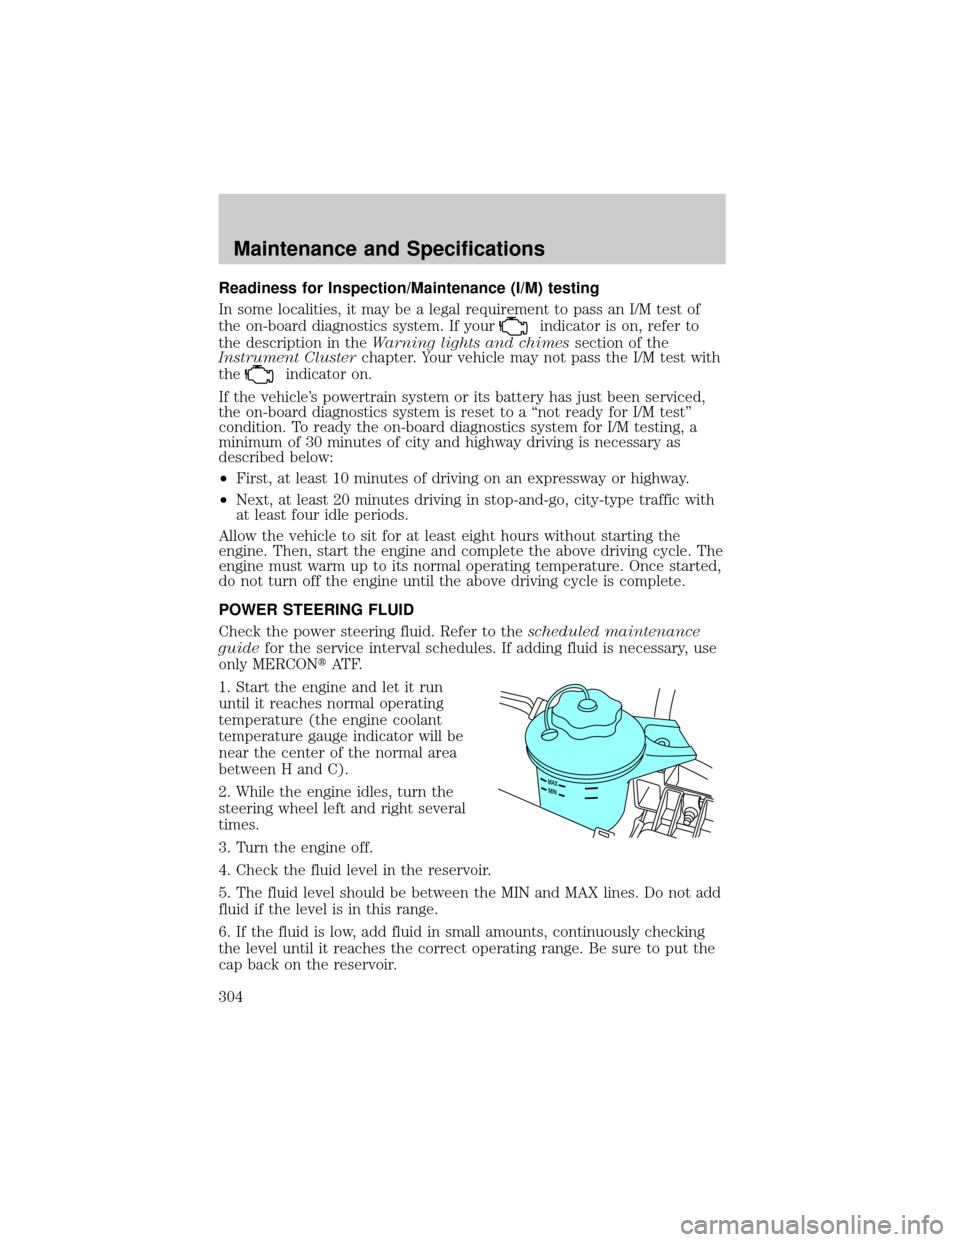
POWER STEERING FLUID
Check the power steering fluid. Refer to thescheduled maintenance
guidefor the service interval schedules. If adding fluid is necessary, use
only MERCONtAT F.
1. Start the engine and let it run
until it reaches normal operating
temperature (the engine coolant
temperature gauge indicator will be
near the center of the normal area
between H and C).
2. While the engine idles, turn the
steering wheel left and right several
times.
3. Turn the engine off.
4. Check the fluid level in the reservoir.
5. The fluid level should be between the MIN and MAX lines. Do not add
fluid if the level is in this range.
6. If the fluid is low, add fluid in small amounts, continuously checking
the level until it reaches the correct operating range. Be sure to put the
cap back on the reservoir.
Maintenance and Specifications
304
Page 321 of 328

wheels ......................................270
wiper blades ............................272
Climate control (see Air
conditioning or Heating) ............37
Clock adjust
6-CD in dash .............................29
Compass, electronic ....................75
calibration .................................77
set zone adjustment ...........76, 89
Console ........................................56
overhead ....................................54
rear ............................................56
Controls
power seat ...............................116
steering column ........................62
Coolant
checking and adding ..............288
refill capacities ................292, 308
specifications ..................310, 313
Cruise control
(see Speed control) ....................60
Customer Assistance ................235
Ford Extended Service
Plan ..........................................266
Getting assistance outside
the U.S. and Canada ..............267
Getting roadside assistance ...235
Getting the service you
need .........................................262
Ordering additional owner's
literature .................................267
Utilizing the
Mediation/Arbitration
Program ...................................265
D
Daytime running lamps
(see Lamps) ................................43Defrost
rear window ..............................41
Dipstick
automatic transmission
fluid ..........................................305
engine oil .................................281
Doors
lubricant specifications ..........310
Driveline universal joint and
slip yoke ....................................306
Driving under special
conditions ..................224, 228, 232
sand .........................................230
snow and ice ...........................233
through water .................231, 234
Dual automatic temperature
control (DATC) ...........................37
DVD system .................................34
E
Electronic message center ...69, 80
Emergencies, roadside
jump-starting ..........................256
Emergency Flashers .................237
Emission control system ..........302
Engine ........................................313
cleaning ...................................270
coolant .....................................288
fail-safe cooling .......................293
idle speed control ...................286
lubrication
specifications ..................310, 313
refill capacities ........................308
service points ..................278±279
starting after a collision .........237
Engine block heater .................209
Engine oil ..................................281
Index
321