Page 15 of 360
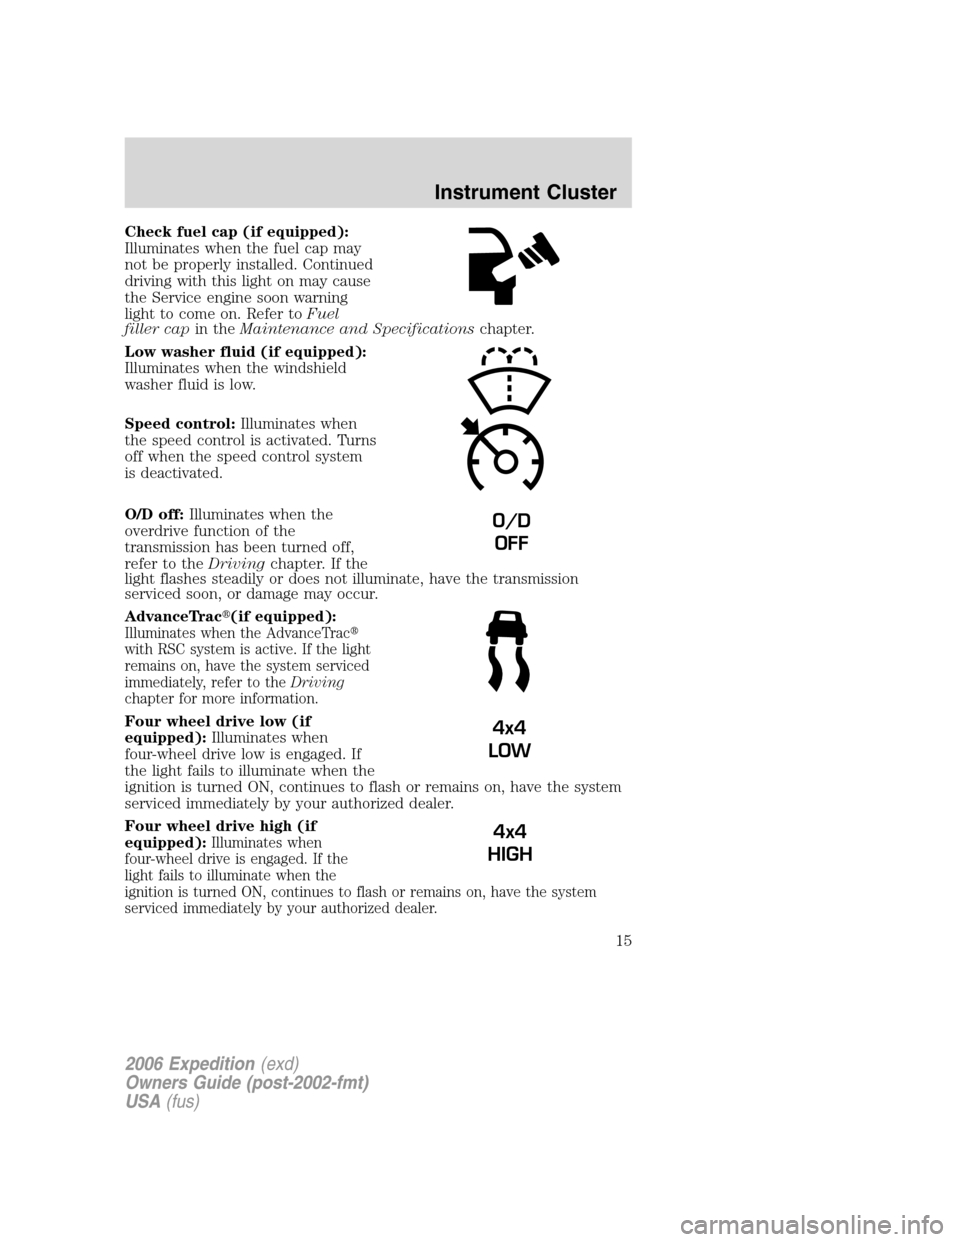
Check fuel cap (if equipped):
Illuminates when the fuel cap may
not be properly installed. Continued
driving with this light on may cause
the Service engine soon warning
light to come on. Refer toFuel
filler capin theMaintenance and Specificationschapter.
Low washer fluid (if equipped):
Illuminates when the windshield
washer fluid is low.
Speed control:Illuminates when
the speed control is activated. Turns
off when the speed control system
is deactivated.
O/D off:Illuminates when the
overdrive function of the
transmission has been turned off,
refer to theDrivingchapter. If the
light flashes steadily or does not illuminate, have the transmission
serviced soon, or damage may occur.
AdvanceTrac�(if equipped):
Illuminates when the AdvanceTrac�
with RSC system is active. If the light
remains on, have the system serviced
immediately, refer to theDriving
chapter for more information.
Four wheel drive low (if
equipped):Illuminates when
four-wheel drive low is engaged. If
the light fails to illuminate when the
ignition is turned ON, continues to flash or remains on, have the system
serviced immediately by your authorized dealer.
Four wheel drive high (if
equipped):
Illuminates when
four-wheel drive is engaged. If the
light fails to illuminate when the
ignition is turned ON, continues to flash or remains on, have the system
serviced immediately by your authorized dealer.
O/D
OFF
4x4
LOW
4x4
HIGH
2006 Expedition(exd)
Owners Guide (post-2002-fmt)
USA(fus)
Instrument Cluster
15
Page 17 of 360
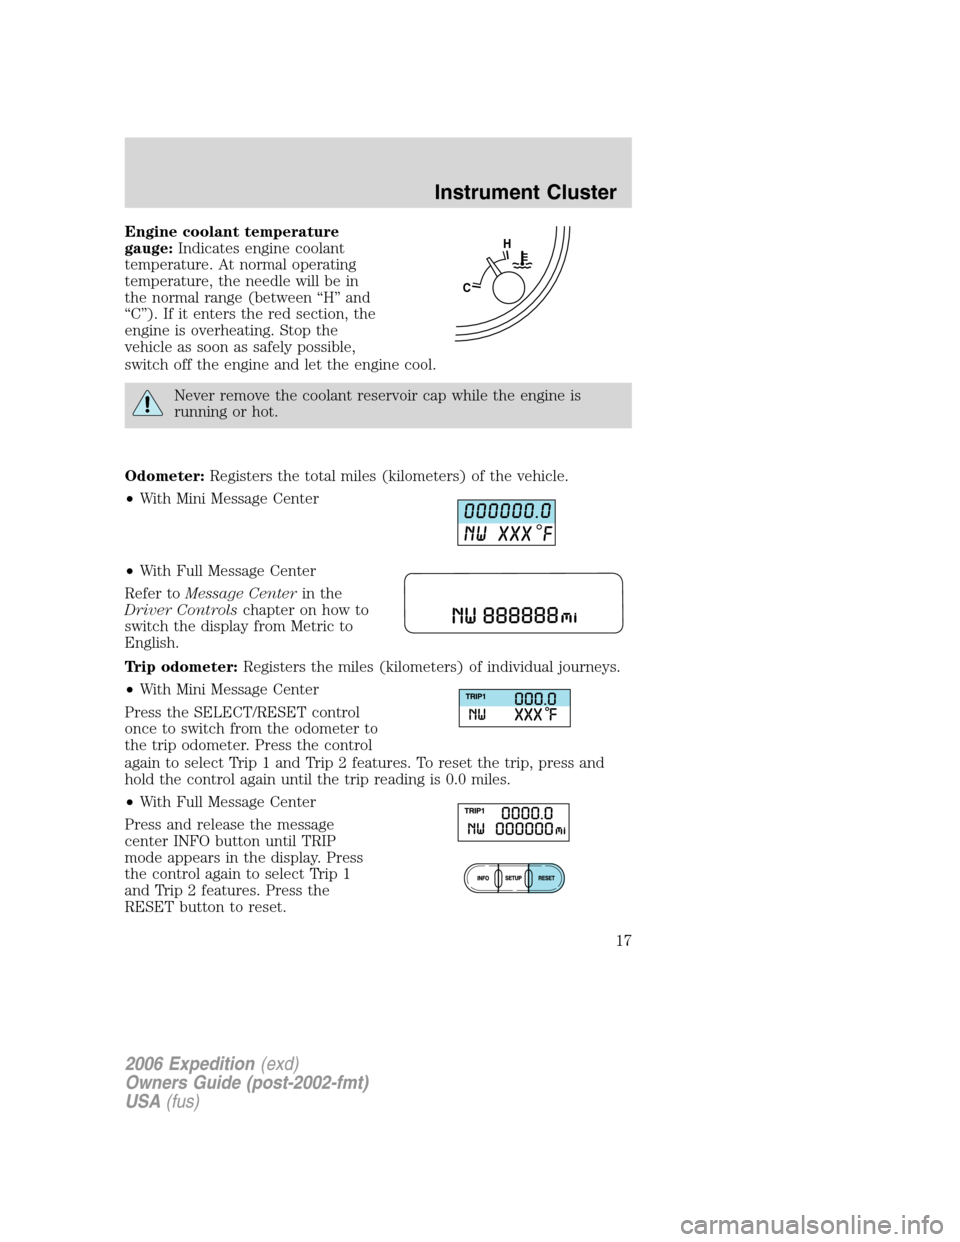
Engine coolant temperature
gauge:Indicates engine coolant
temperature. At normal operating
temperature, the needle will be in
the normal range (between “H” and
“C”). If it enters the red section, the
engine is overheating. Stop the
vehicle as soon as safely possible,
switch off the engine and let the engine cool.
Never remove the coolant reservoir cap while the engine is
running or hot.
Odometer:Registers the total miles (kilometers) of the vehicle.
•With Mini Message Center
•With Full Message Center
Refer toMessage Centerin the
Driver Controlschapter on how to
switch the display from Metric to
English.
Trip odometer:Registers the miles (kilometers) of individual journeys.
•With Mini Message Center
Press the SELECT/RESET control
once to switch from the odometer to
the trip odometer. Press the control
again to select Trip 1 and Trip 2 features. To reset the trip, press and
hold the control again until the trip reading is 0.0 miles.
•With Full Message Center
Press and release the message
center INFO button until TRIP
mode appears in the display. Press
the control again to select Trip 1
and Trip 2 features. Press the
RESET button to reset.
CH
2006 Expedition(exd)
Owners Guide (post-2002-fmt)
USA(fus)
Instrument Cluster
17
Page 18 of 360
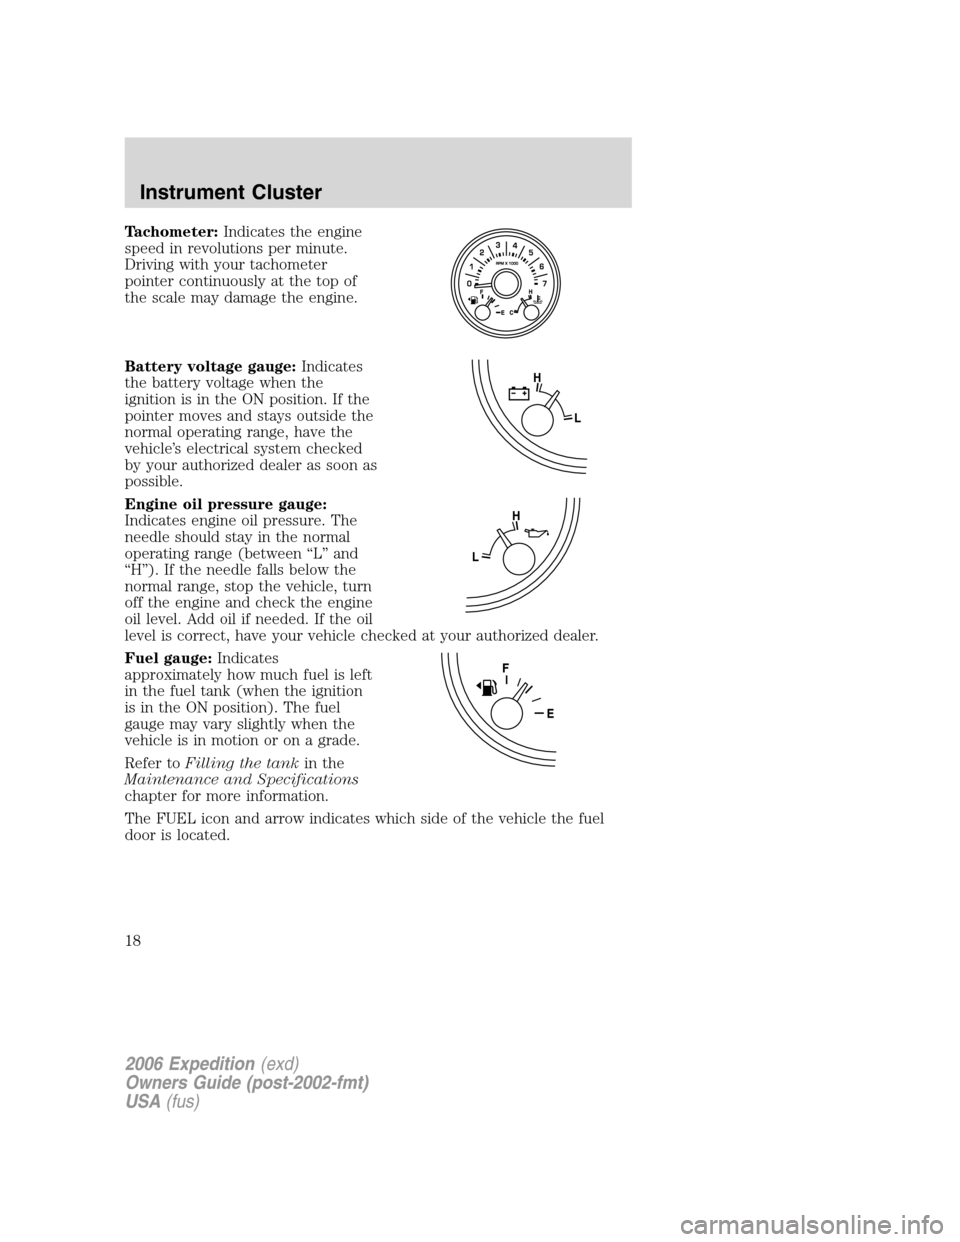
Tachometer:Indicates the engine
speed in revolutions per minute.
Driving with your tachometer
pointer continuously at the top of
the scale may damage the engine.
Battery voltage gauge:Indicates
the battery voltage when the
ignition is in the ON position. If the
pointer moves and stays outside the
normal operating range, have the
vehicle’s electrical system checked
by your authorized dealer as soon as
possible.
Engine oil pressure gauge:
Indicates engine oil pressure. The
needle should stay in the normal
operating range (between “L” and
“H”). If the needle falls below the
normal range, stop the vehicle, turn
off the engine and check the engine
oil level. Add oil if needed. If the oil
level is correct, have your vehicle checked at your authorized dealer.
Fuel gauge:Indicates
approximately how much fuel is left
in the fuel tank (when the ignition
is in the ON position). The fuel
gauge may vary slightly when the
vehicle is in motion or on a grade.
Refer toFilling the tankin the
Maintenance and Specifications
chapter for more information.
The FUEL icon and arrow indicates which side of the vehicle the fuel
door is located.
L H
LH
2006 Expedition(exd)
Owners Guide (post-2002-fmt)
USA(fus)
Instrument Cluster
18
Page 42 of 360
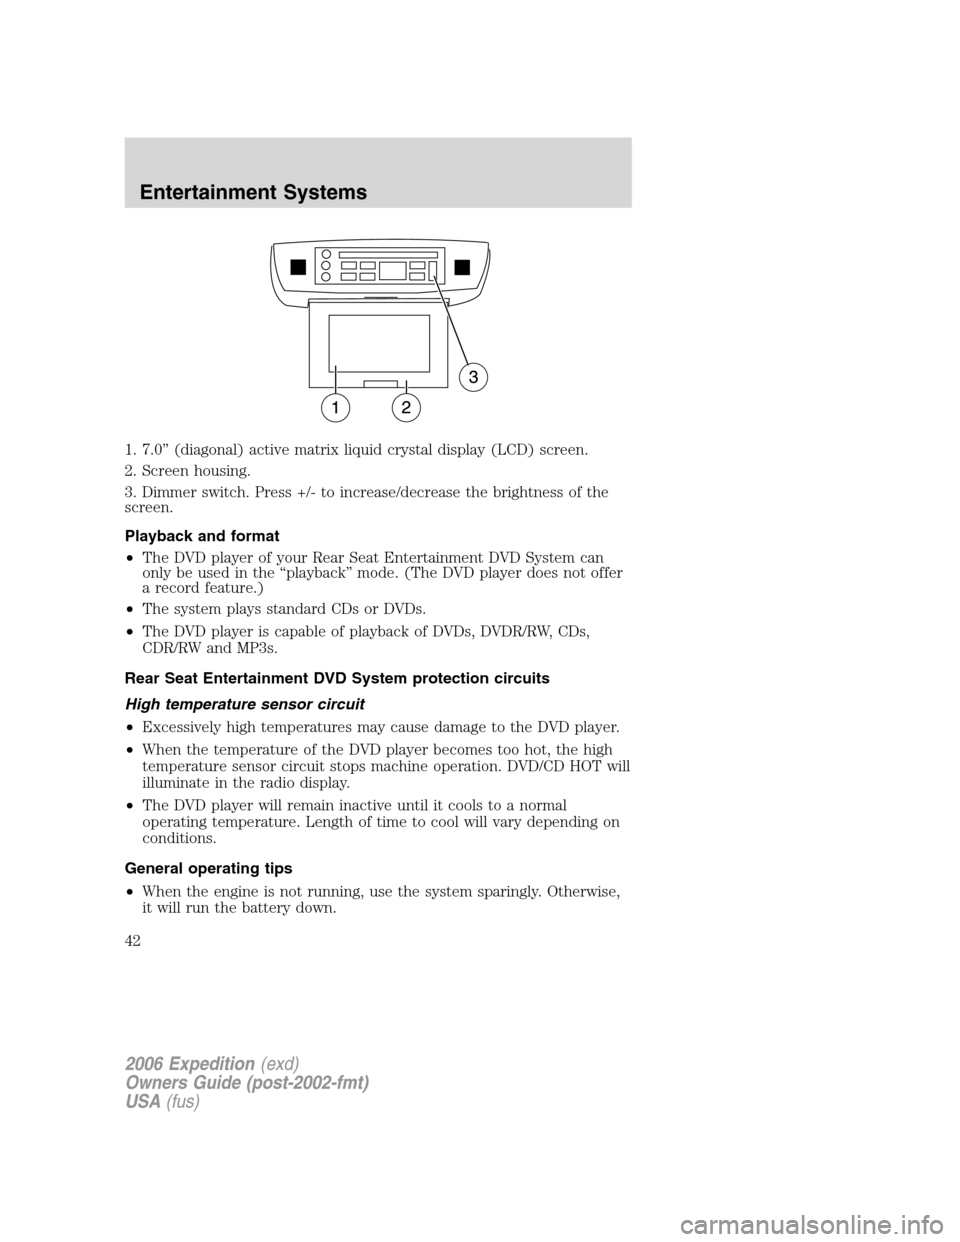
1. 7.0” (diagonal) active matrix liquid crystal display (LCD) screen.
2. Screen housing.
3. Dimmer switch. Press +/- to increase/decrease the brightness of the
screen.
Playback and format
•The DVD player of your Rear Seat Entertainment DVD System can
only be used in the “playback” mode. (The DVD player does not offer
a record feature.)
•The system plays standard CDs or DVDs.
•The DVD player is capable of playback of DVDs, DVDR/RW, CDs,
CDR/RW and MP3s.
Rear Seat Entertainment DVD System protection circuits
High temperature sensor circuit
•Excessively high temperatures may cause damage to the DVD player.
•When the temperature of the DVD player becomes too hot, the high
temperature sensor circuit stops machine operation. DVD/CD HOT will
illuminate in the radio display.
•The DVD player will remain inactive until it cools to a normal
operating temperature. Length of time to cool will vary depending on
conditions.
General operating tips
•When the engine is not running, use the system sparingly. Otherwise,
it will run the battery down.
2006 Expedition(exd)
Owners Guide (post-2002-fmt)
USA(fus)
Entertainment Systems
42
Page 48 of 360

Ford Motor Company shall not be liable for any damages of any
type arising from failure to follow these guidelines.
Do not attempt to service, repair or modify the system. See your Ford or
Lincoln Mercury dealer.
The driver must not attempt to operate any detailed operation of
the navigation system while the vehicle is in motion. Give full
attention to driving and to the road. Pull off the road and park in a
safe place before performing detailed operations.
A safety screen will be displayed
each time the navigation system is
turned on as a reminder. Ensure
that you are familiar with the
system’s features and functionality,
including the following:
•Do not turn the ignition key or start the engine while the software is
updating.
•Do not apply pressure to the display screen.
•The navigation system is not a substitute for your personal judgement.
•Route suggestions should not supersede local traffic regulations or
safe driving practices.
•Do not follow route suggestions if they direct you to perform an
unsafe or illegal maneuver, would place you in an unsafe situation, or
would route you into an area that you consider unsafe.
•Drivers should not rely on screen displays while their vehicle is in
motion. Let the voice guide you. If viewing is necessary, pull off the
road to a safe location.
•Do not use the navigation system to locate emergency services.
•For road safety reasons, the driver should program the system only
when the vehicle is stationary. Certain functions will therefore not
operate while the vehicle is in motion.
•The navigation CD does not reflect road detours, closures or
construction, road characteristics such as rough road surface, slope or
grade, weight or height restrictions, traffic congestion, weather or
similar conditions.
2006 Expedition(exd)
Owners Guide (post-2002-fmt)
USA(fus)
Entertainment Systems
48
Page 103 of 360
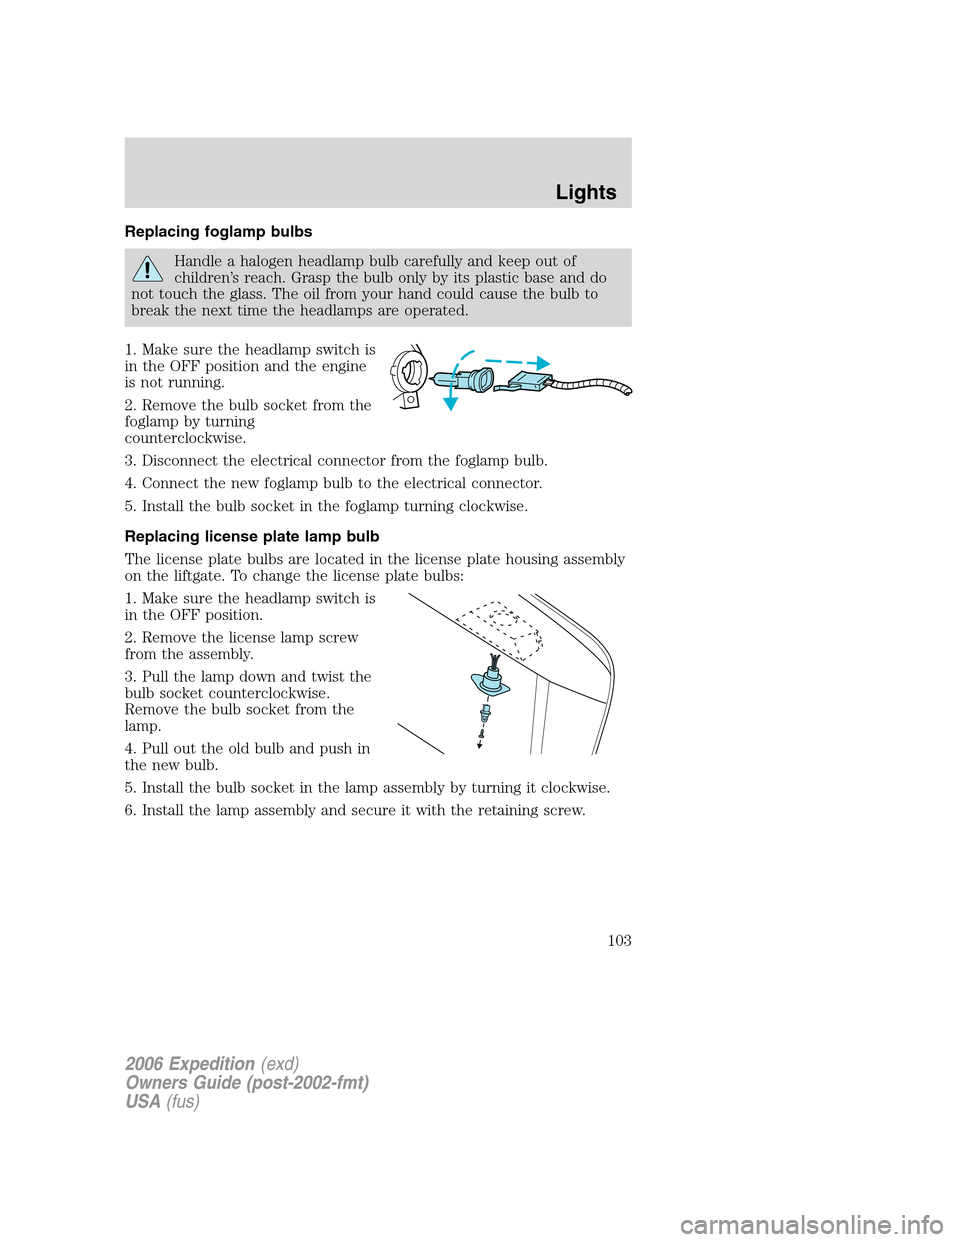
Replacing foglamp bulbs
Handle a halogen headlamp bulb carefully and keep out of
children’s reach. Grasp the bulb only by its plastic base and do
not touch the glass. The oil from your hand could cause the bulb to
break the next time the headlamps are operated.
1. Make sure the headlamp switch is
in the OFF position and the engine
is not running.
2. Remove the bulb socket from the
foglamp by turning
counterclockwise.
3. Disconnect the electrical connector from the foglamp bulb.
4. Connect the new foglamp bulb to the electrical connector.
5. Install the bulb socket in the foglamp turning clockwise.
Replacing license plate lamp bulb
The license plate bulbs are located in the license plate housing assembly
on the liftgate. To change the license plate bulbs:
1. Make sure the headlamp switch is
in the OFF position.
2. Remove the license lamp screw
from the assembly.
3. Pull the lamp down and twist the
bulb socket counterclockwise.
Remove the bulb socket from the
lamp.
4. Pull out the old bulb and push in
the new bulb.
5. Install the bulb socket in the lamp assembly by turning it clockwise.
6. Install the lamp assembly and secure it with the retaining screw.
2006 Expedition(exd)
Owners Guide (post-2002-fmt)
USA(fus)
Lights
103
Page 109 of 360
Do not use the power point for
operating the cigarette lighter
element (if equipped).
To prevent the fuse from being
blown, do not use the power
point(s) over the vehicle capacity of
12 VDC/180W.
To prevent the battery from being
discharged, do not use the power
point longer than necessary when
the engine is not running.
Always keep the power point caps closed when not being used.
The third auxiliary power point on
the center console is accessible from
the rear seats.
The rear auxiliary power point is located on the right rear quarter panel.
The power point is accessible from the liftgate or the third row seat.
Equipped with rear climate
control
4 3 2 1 0
2006 Expedition(exd)
Owners Guide (post-2002-fmt)
USA(fus)
Driver Controls
109
Page 124 of 360
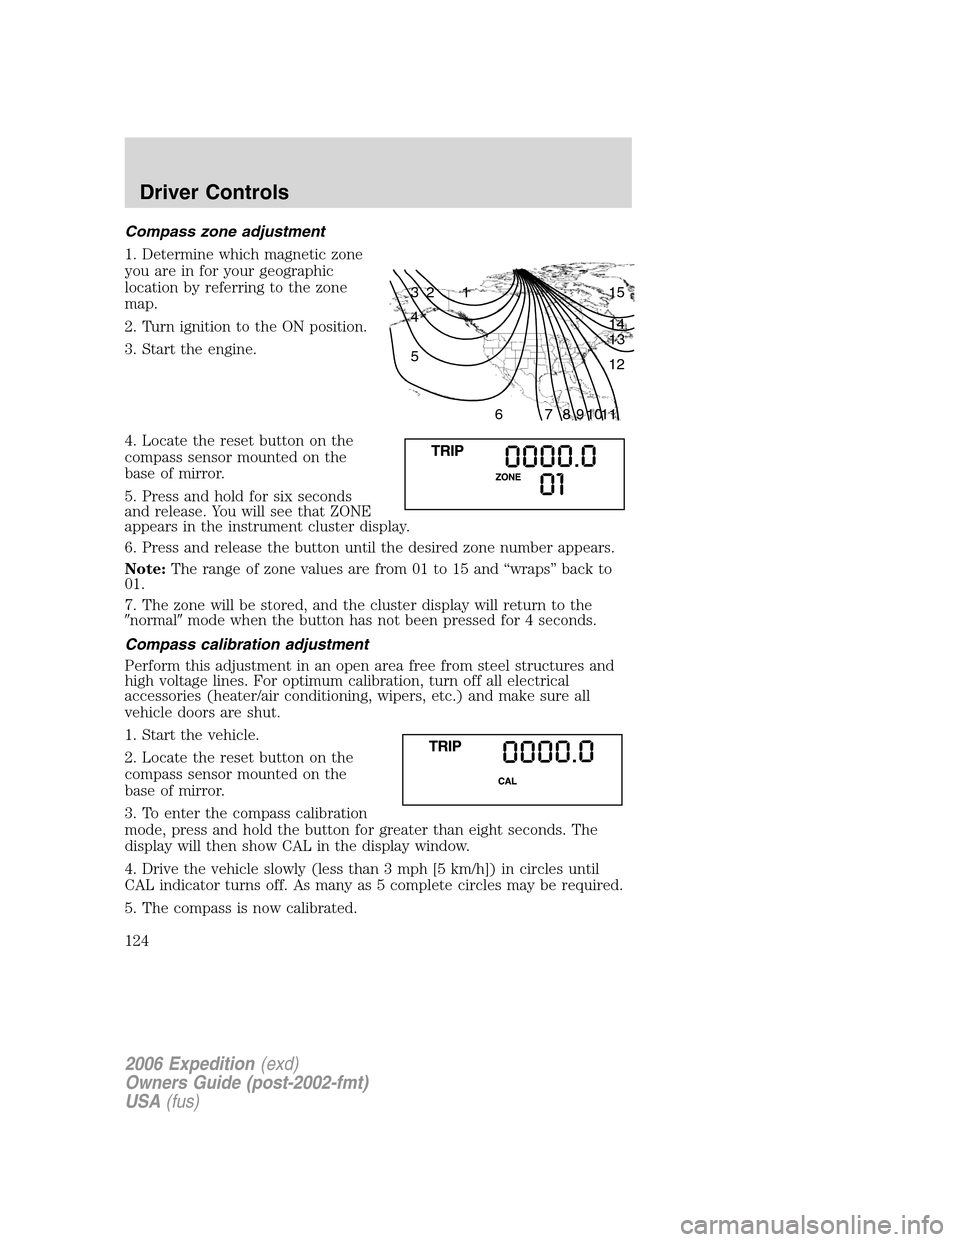
Compass zone adjustment
1. Determine which magnetic zone
you are in for your geographic
location by referring to the zone
map.
2. Turn ignition to the ON position.
3. Start the engine.
4. Locate the reset button on the
compass sensor mounted on the
base of mirror.
5. Press and hold for six seconds
and release. You will see that ZONE
appears in the instrument cluster display.
6. Press and release the button until the desired zone number appears.
Note:The range of zone values are from 01 to 15 and “wraps” back to
01.
7. The zone will be stored, and the cluster display will return to the
�normal�mode when the button has not been pressed for 4 seconds.
Compass calibration adjustment
Perform this adjustment in an open area free from steel structures and
high voltage lines. For optimum calibration, turn off all electrical
accessories (heater/air conditioning, wipers, etc.) and make sure all
vehicle doors are shut.
1. Start the vehicle.
2. Locate the reset button on the
compass sensor mounted on the
base of mirror.
3. To enter the compass calibration
mode, press and hold the button for greater than eight seconds. The
display will then show CAL in the display window.
4. Drive the vehicle slowly (less than 3 mph [5 km/h]) in circles until
CAL indicator turns off. As many as 5 complete circles may be required.
5. The compass is now calibrated.
1 2 3
4
5
6 7 8 9 101112 13 14 15
2006 Expedition(exd)
Owners Guide (post-2002-fmt)
USA(fus)
Driver Controls
124