2006 FORD EXPEDITION ECO mode
[x] Cancel search: ECO modePage 12 of 360
WARNING LIGHTS AND CHIMES
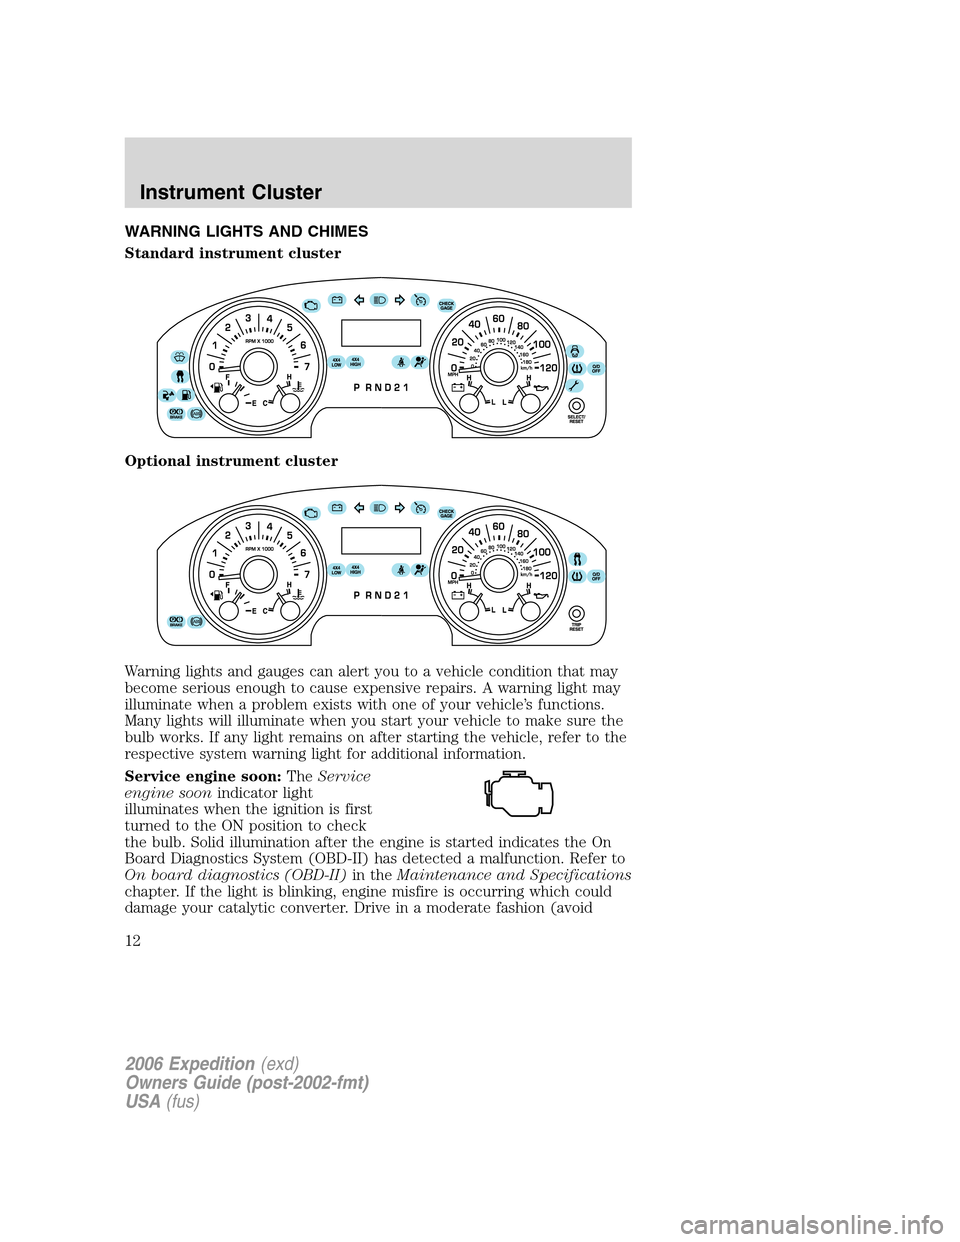
Standard instrument cluster
Optional instrument cluster
Warning lights and gauges can alert you to a vehicle condition that may
become serious enough to cause expensive repairs. A warning light may
illuminate when a problem exists with one of your vehicle’s functions.
Many lights will illuminate when you start your vehicle to make sure the
bulb works. If any light remains on after starting the vehicle, refer to the
respective system warning light for additional information.
Service engine soon:TheService
engine soonindicator light
illuminates when the ignition is first
turned to the ON position to check
the bulb. Solid illumination after the engine is started indicates the On
Board Diagnostics System (OBD-II) has detected a malfunction. Refer to
On board diagnostics (OBD-II)in theMaintenance and Specifications
chapter. If the light is blinking, engine misfire is occurring which could
damage your catalytic converter. Drive in a moderate fashion (avoid
2006 Expedition(exd)
Owners Guide (post-2002-fmt)
USA(fus)
Instrument Cluster
12
Page 21 of 360
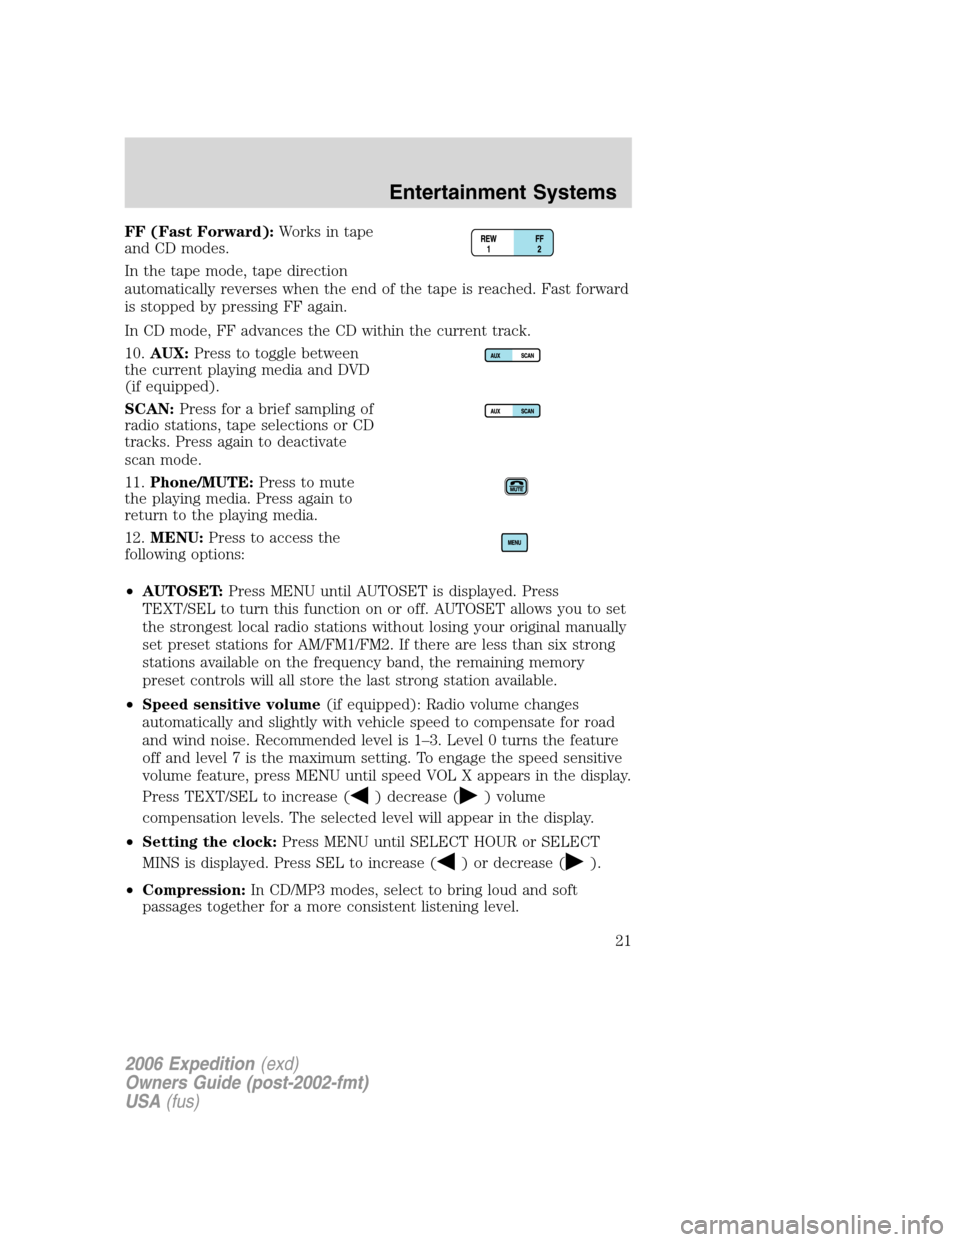
FF (Fast Forward):Works in tape
and CD modes.
In the tape mode, tape direction
automatically reverses when the end of the tape is reached. Fast forward
is stopped by pressing FF again.
In CD mode, FF advances the CD within the current track.
10.AUX:Press to toggle between
the current playing media and DVD
(if equipped).
SCAN:Press for a brief sampling of
radio stations, tape selections or CD
tracks. Press again to deactivate
scan mode.
11.Phone/MUTE:Press to mute
the playing media. Press again to
return to the playing media.
12.MENU:Press to access the
following options:
•AUTOSET:Press MENU until AUTOSET is displayed. Press
TEXT/SEL to turn this function on or off. AUTOSET allows you to set
the strongest local radio stations without losing your original manually
set preset stations for AM/FM1/FM2. If there are less than six strong
stations available on the frequency band, the remaining memory
preset controls will all store the last strong station available.
•Speed sensitive volume(if equipped): Radio volume changes
automatically and slightly with vehicle speed to compensate for road
and wind noise. Recommended level is 1–3. Level 0 turns the feature
off and level 7 is the maximum setting. To engage the speed sensitive
volume feature, press MENU until speed VOL X appears in the display.
Press TEXT/SEL to increase (
) decrease () volume
compensation levels. The selected level will appear in the display.
•Setting the clock:Press MENU until SELECT HOUR or SELECT
MINS is displayed. Press SEL to increase (
) or decrease ().
•Compression:In CD/MP3 modes, select to bring loud and soft
passages together for a more consistent listening level.
2006 Expedition(exd)
Owners Guide (post-2002-fmt)
USA(fus)
Entertainment Systems
21
Page 25 of 360
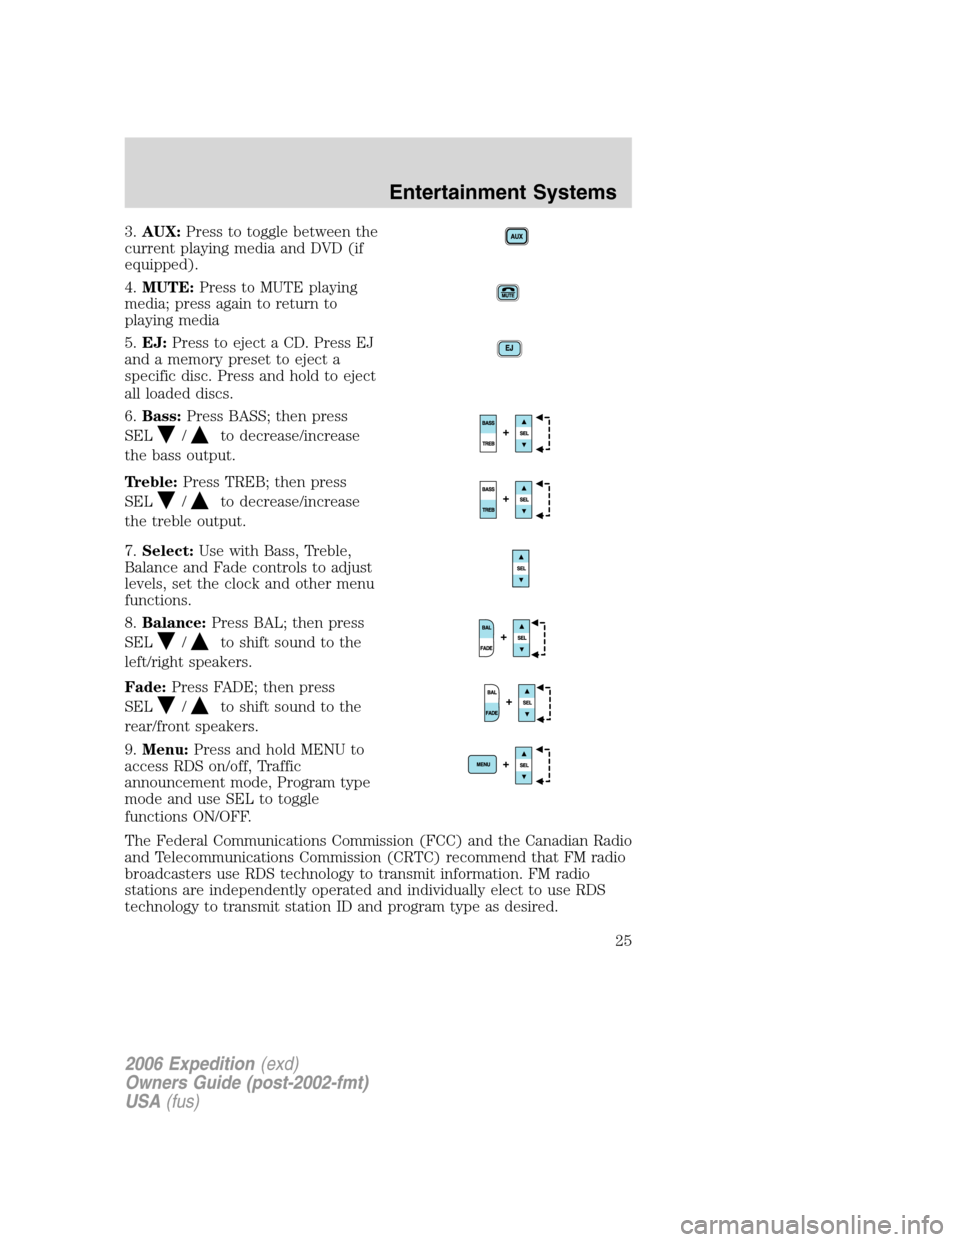
3.AUX:Press to toggle between the
current playing media and DVD (if
equipped).
4.MUTE:Press to MUTE playing
media; press again to return to
playing media
5.EJ:Press to eject a CD. Press EJ
and a memory preset to eject a
specific disc. Press and hold to eject
all loaded discs.
6.Bass:Press BASS; then press
SEL
/to decrease/increase
the bass output.
Treble:Press TREB; then press
SEL
/to decrease/increase
the treble output.
7.Select:Use with Bass, Treble,
Balance and Fade controls to adjust
levels, set the clock and other menu
functions.
8.Balance:Press BAL; then press
SEL
/to shift sound to the
left/right speakers.
Fade:Press FADE; then press
SEL
/to shift sound to the
rear/front speakers.
9.Menu:Press and hold MENU to
access RDS on/off, Traffic
announcement mode, Program type
mode and use SEL to toggle
functions ON/OFF.
The Federal Communications Commission (FCC) and the Canadian Radio
and Telecommunications Commission (CRTC) recommend that FM radio
broadcasters use RDS technology to transmit information. FM radio
stations are independently operated and individually elect to use RDS
technology to transmit station ID and program type as desired.
2006 Expedition(exd)
Owners Guide (post-2002-fmt)
USA(fus)
Entertainment Systems
25
Page 26 of 360
Traffic (if equipped):Allows you to hear traffic broadcasts. With the
feature ON, press SEEK or SCAN to find a station broadcasting a traffic
report (if it is broadcasting RDS data).Traffic information is not
available in most U.S. markets.
FIND Program type (if equipped):Allows you to search
RDS-equipped stations for a certain category of music format: Classic,
Country, Info, Jazz, Oldies, R&B, Religious, Rock, Soft, Top 40.
Show TYPE (if equipped):Displays the station’s call letters and
format.
Compression:Brings soft and loud CD passages together for a more
consistent listening level when in CD mode. Press MENU until
compression status is displayed. Press the SEL control to enable the
compression feature when COMPRESS OFF is displayed. Press the SEL
control again to disable the feature when COMPRESS ON is displayed.
Occupancy mode (if equipped):Press SEL to select ALL, DRIVER or
REAR SEAT occupancy mode.
Folder/Track Mode:In MP3 mode, press MENU until MODE appears in
the display. Use SEL to toggle between FOLDER (only tracks within
selected folder are accessible) or TRACK (all tracks on the disc are
accessible).
Autoset:Allows you to set the strongest local radio stations without
losing your original manually set preset stations for AM/FM1/FM2 . Press
MENU until AUTOSET appears in the display. Press SEL to toggle
ON/OFF. When the six strongest stations are filled, the station stored in
preset 1 will begin playing. If there are less than six strong stations, the
system will store the last one in the remaining presets. Press again to
disengage.
Speed sensitive volume:Radio volume changes automatically and
slightly with vehicle speed to compensate for road and wind noise.
Recommended level is 1–3. Level 0 turns the feature off and level 7 is
the maximum setting.
Press MENU until SPEED VOL X appears in the display. Then press SEL
to increase (
) or decrease () the volume setting. The level will
appear in the display.
Setting the clock:Press MENU until SELECT HOUR or SELECT
MINUTE is displayed. Use SEL to manually increase (
) or decrease
(
) the hours/minutes. Press MENU again to disengage clock mode.
2006 Expedition(exd)
Owners Guide (post-2002-fmt)
USA(fus)
Entertainment Systems
26
Page 28 of 360
20.Load:Press to load a CD. Press
and hold to load up to six discs.
21.CD:Press to enter CD mode.
CD units are designed to play commercially pressed 4.75 in (12 cm)
audio compact discs only. Due to technical incompatibility, certain
recordable and re-recordable compact discs may not function
correctly when used in Ford CD players. Irregular shaped CDs, CDs
with a scratch protection film attached, and CDs with homemade
paper (adhesive) labels should not be inserted into the CD player.
The label may peel and cause the CD to become jammed. It is
recommended that homemade CDs be identified with permanent felt
tip marker rather than adhesive labels. Ballpoint pens may damage
CDs. Please contact your authorized dealer for further information.
22.Scan:Press SCAN to hear a
brief sampling of radio stations or
CD/MP3 tracks. Press again to stop.
23.Disc/Tune:Press
orto
manually tune down/up the radio
frequency band, or to listen to the
previous/next CD.
CAT:CAT is only available when equipped with Satellite Radio. Your
Audiophile radio comes equipped with Satellite ready capability. The kit
to enable Satellite reception is available through your authorized dealer.
Detailed Satellite instructions are included with the dealer installed kit.
Dealer installed satellite kit only available in the continental United
States.
For information regarding SIRIUS Satellite Radio, please call toll-free
888-539-SIRIUS (888-539-7474) or visit the SIRIUS website at
www.siriusradio.com
2006 Expedition(exd)
Owners Guide (post-2002-fmt)
USA(fus)
Entertainment Systems
28
Page 29 of 360

Rear seat radio controls (if equipped)
If your vehicle is equipped with a
front row console, then it is also
equipped with rear seat radio
controls.
If your vehicle is equipped with the
Vehicle Navigation Radio, then it
may also be equipped with rear seat
radio controls.
This feature allows front and middle seat passengers to listen to different
media sources (radio, cassette, CD or DVD) simultaneously. (However,
the front and middle-seat passengers cannot listen to two different radio
stations at the same time.)
When the rear seat controls are activated, rear seat passengers can use
the controls to change the playing media for all passengers (Single Play
mode). In this mode, all speakers will play audio from the same media
source for all passengers to hear. To activate the rear seat radio controls:
•Press the memory preset controls
3 and 5 at the same time. A
headphone icon
will illuminate
in the radio display, indicating the rear seat radio controls are active.
•Press memory preset controls 3 and 5 a second time to deactivate the
rear seat controls. The headphone icon
will turn off in the radio
display.
If there is a discrepancy between the rear seat controls and the front
audio controls (such as both trying to listen to the same playing media),
the front audio system will receive the desired selection.
- VOLUME +
MODE
SEEK MEMORY
2006 Expedition(exd)
Owners Guide (post-2002-fmt)
USA(fus)
Entertainment Systems
29
Page 33 of 360
GENERAL AUDIO INFORMATION
Radio frequencies:AM and FM frequencies are established by the
Federal Communications Commission (FCC) and the Canadian Radio and
Telecommunications Commission (CRTC). Those frequencies are:
AM - 530, 540–1700, 1710 kHz
FM- 87.7, 87.9–107.7, 107.9 MHz
Radio reception factors:There are three factors that can affect radio
reception:
•Distance/strength: The further you travel from a station, the weaker
the signal and the weaker the reception.
•Terrain: Hills, mountains, tall buildings, power lines, electric fences,
traffic lights and thunderstorms can interfere with your reception.
•Station overload: When you pass a broadcast tower, a stronger signal
may overtake a weaker one and play while the weak station frequency
is displayed.
Cassette/player care:
Do:
•Use only cassettes that are 90 minutes long or less.
•Tighten very loose tapes by inserting a finger or pencil into the hole
and turning the hub.
•Remove loose labels before inserting tapes.
•Allow tapes which have been subjected to extreme heat, humidity or
cold to reach a moderate temperature before playing.
•Clean the cassette player head with a cassette cleaning cartridge after
10–12 hours of play to maintain good sound/operation.
Don’t:
•Expose tapes to direct sunlight, extreme humidity, heat or cold.
•Leave tapes in the cassette player for a long time when not being
played.
CD/CD player care:
Do:
•Handle discs by their edges only. Never touch the playing surface.
•Inspect discs before playing. Clean only with an approved CD cleaner
and wipe from the center out.
2006 Expedition(exd)
Owners Guide (post-2002-fmt)
USA(fus)
Entertainment Systems
33
Page 35 of 360
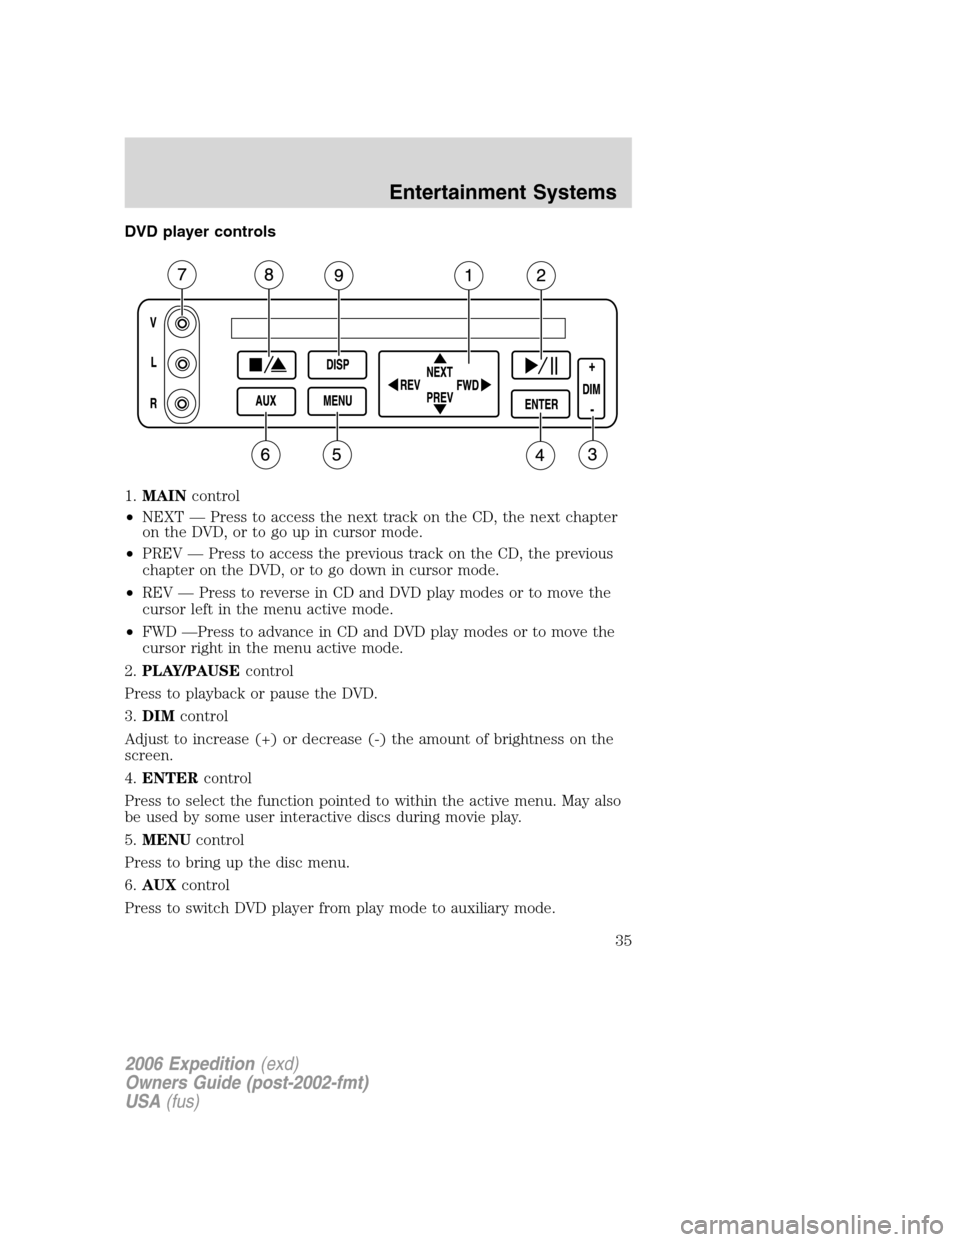
DVD player controls
1.MAINcontrol
•NEXT — Press to access the next track on the CD, the next chapter
on the DVD, or to go up in cursor mode.
•PREV — Press to access the previous track on the CD, the previous
chapter on the DVD, or to go down in cursor mode.
•REV — Press to reverse in CD and DVD play modes or to move the
cursor left in the menu active mode.
•FWD —Press to advance in CD and DVD play modes or to move the
cursor right in the menu active mode.
2.PLAY/PAUSEcontrol
Press to playback or pause the DVD.
3.DIMcontrol
Adjust to increase (+) or decrease (-) the amount of brightness on the
screen.
4.ENTERcontrol
Press to select the function pointed to within the active menu. May also
be used by some user interactive discs during movie play.
5.MENUcontrol
Press to bring up the disc menu.
6.AUXcontrol
Press to switch DVD player from play mode to auxiliary mode.
2006 Expedition(exd)
Owners Guide (post-2002-fmt)
USA(fus)
Entertainment Systems
35