2006 CHEVROLET TAHOE bulb
[x] Cancel search: bulbPage 1 of 540

Seats and Restraint Systems........................... 1-1
Front Seats
............................................... 1-2
Rear Seats
............................................... 1-9
Safety Belts
.............................................1-29
Child Restraints
.......................................1-48
Airbag System
.........................................1-74
Restraint System Check
............................1-87
Features and Controls..................................... 2-1
Keys
........................................................ 2-3
Doors and Locks
....................................... 2-8
Windows
.................................................2-14
Theft-Deterrent Systems
............................2-16
Starting and Operating Your Vehicle
...........2-18
Mirrors
....................................................2-37
OnStar
®System
......................................2-50
Universal Home Remote System
................2-52
Storage Areas
.........................................2-56
Sunroof
..................................................2-60
Vehicle Personalization
.............................2-60
Instrument Panel............................................. 3-1
Instrument Panel Overview
.......................... 3-4
Climate Controls
......................................3-21
Warning Lights, Gages, and Indicators
........3-34
Driver Information Center (DIC)
..................3-51
Audio System(s)
.......................................3-72Driving Your Vehicle....................................... 4-1
Your Driving, the Road, and Your Vehicle
..... 4-2
Towing
...................................................4-58
Service and Appearance Care.......................... 5-1
Service
..................................................... 5-3
Fuel
......................................................... 5-5
Checking Things Under the Hood
...............5-10
All-Wheel Drive
........................................5-47
Rear Axle
...............................................5-47
Four-Wheel Drive
.....................................5-48
Front Axle
...............................................5-50
Bulb Replacement
....................................5-51
Windshield Wiper Blade Replacement
.........5-58
Tires
......................................................5-59
Appearance Care
.....................................5-99
Vehicle Identi�cation
...............................5-108
Electrical System
....................................5-109
Capacities and Speci�cations
...................5-118
Maintenance Schedule..................................... 6-1
Maintenance Schedule
................................ 6-2
Customer Assistance and Information.............. 7-1
Customer Assistance and Information
........... 7-2
Reporting Safety Defects
...........................7-14
Index................................................................ 1
2006 Chevrolet Tahoe, Suburban Owner ManualM
Page 164 of 540
To signal a lane change, raise or lower the lever until
the arrow starts to �ash. Hold it there until you complete
your lane change. The lever will return by itself when
you release it.
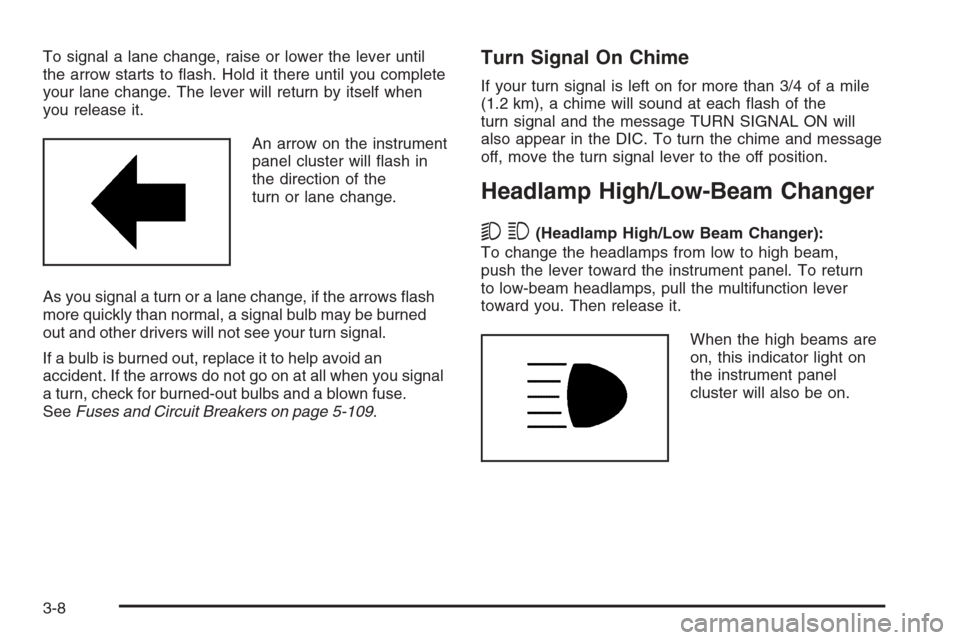
An arrow on the instrument
panel cluster will �ash in
the direction of the
turn or lane change.
As you signal a turn or a lane change, if the arrows �ash
more quickly than normal, a signal bulb may be burned
out and other drivers will not see your turn signal.
If a bulb is burned out, replace it to help avoid an
accident. If the arrows do not go on at all when you signal
a turn, check for burned-out bulbs and a blown fuse.
SeeFuses and Circuit Breakers on page 5-109.Turn Signal On Chime
If your turn signal is left on for more than 3/4 of a mile
(1.2 km), a chime will sound at each �ash of the
turn signal and the message TURN SIGNAL ON will
also appear in the DIC. To turn the chime and message
off, move the turn signal lever to the off position.
Headlamp High/Low-Beam Changer
53(Headlamp High/Low Beam Changer):
To change the headlamps from low to high beam,
push the lever toward the instrument panel. To return
to low-beam headlamps, pull the multifunction lever
toward you. Then release it.
When the high beams are
on, this indicator light on
the instrument panel
cluster will also be on.
3-8
Page 363 of 540
Following Distance
Stay at least twice as far behind the vehicle ahead as
you would when driving your vehicle without a trailer.
This can help you avoid situations that require
heavy braking and sudden turns.
Passing
You’ll need more passing distance up ahead when
you’re towing a trailer. And, because you’re a good deal
longer, you’ll need to go much farther beyond the
passed vehicle before you can return to your lane.
Backing Up
Hold the bottom of the steering wheel with one hand.
Then, to move the trailer to the left, just move that hand
to the left. To move the trailer to the right, move your
hand to the right. Always back up slowly and, if possible,
have someone guide you.
Making Turns
Notice:Making very sharp turns while trailering
could cause the trailer to come in contact with the
vehicle. Your vehicle could be damaged. Avoid
making very sharp turns while trailering.
When you’re turning with a trailer, make wider turns
than normal. Do this so your trailer won’t strike
soft shoulders, curbs, road signs, trees or other objects.
Avoid jerky or sudden maneuvers. Signal well in
advance.
Turn Signals When Towing a Trailer
The arrows on your instrument panel will �ash whenever
you signal a turn or lane change. Properly hooked up,
the trailer lamps will also �ash, telling other drivers
you’re about to turn, change lanes or stop.
When towing a trailer, the arrows on your instrument
panel will �ash for turns even if the bulbs on the trailer
are burned out. Thus, you may think drivers behind
you are seeing your signal when they are not. It’s
important to check occasionally to be sure the trailer
bulbs are still working.
4-73
Page 371 of 540

Service............................................................5-3
Accessories and Modi�cations..........................5-3
California Proposition 65 Warning.....................5-3
Doing Your Own Service Work.........................5-4
Adding Equipment to the Outside
of Your Vehicle...........................................5-4
Fuel................................................................5-5
Gasoline Octane............................................5-5
Gasoline Speci�cations....................................5-5
California Fuel...............................................5-5
Additives.......................................................5-6
Fuel E85 (85% Ethanol)..................................5-7
Fuels in Foreign Countries...............................5-8
Filling the Tank..............................................5-8
Filling a Portable Fuel Container.....................5-10
Checking Things Under the Hood....................5-10
Hood Release..............................................5-11
Engine Compartment Overview.......................5-12
Engine Oil...................................................5-15
Engine Oil Life System..................................5-18
Engine Air Cleaner/Filter................................5-20
Automatic Transmission Fluid.........................5-22
Engine Coolant.............................................5-25
Coolant Surge Tank Pressure Cap..................5-28
Engine Overheating.......................................5-28
Overheated Engine Protection Operating Mode . . .5-30Cooling System............................................5-30
Engine Fan Noise.........................................5-35
Power Steering Fluid.....................................5-36
Windshield Washer Fluid................................5-37
Brakes........................................................5-38
Battery........................................................5-41
Jump Starting...............................................5-42
All-Wheel Drive..............................................5-47
Rear Axle.......................................................5-47
Four-Wheel Drive............................................5-48
Front Axle......................................................5-50
Bulb Replacement..........................................5-51
Halogen Bulbs..............................................5-51
Headlamps..................................................5-51
Front Turn Signal, Sidemarker and
Daytime Running Lamps.............................5-52
Side Identi�cation Marker Lamps.....................5-54
Roof Marker Lamps......................................5-54
Taillamps, Turn Signal, Stoplamps and
Back-up Lamps.........................................5-56
Replacement Bulbs.......................................5-57
Windshield Wiper Blade Replacement..............5-58
Tires..............................................................5-59
Tire Sidewall Labeling...................................5-60
Tire Terminology and De�nitions.....................5-63
Section 5 Service and Appearance Care
5-1
Page 421 of 540
Bulb Replacement
For the proper type of replacement bulbs, see
Replacement Bulbs on page 5-57.
For any bulb changing procedure not listed in this
section, contact your dealer.
Halogen Bulbs
{CAUTION:
Halogen bulbs have pressurized gas inside
and can burst if you drop or scratch the bulb.
You or others could be injured. Be sure to
read and follow the instructions on the bulb
package.
Headlamps
To replace a headlamp bulb, do the following:
1. Open the hood. SeeHood Release on page 5-11
for more information.
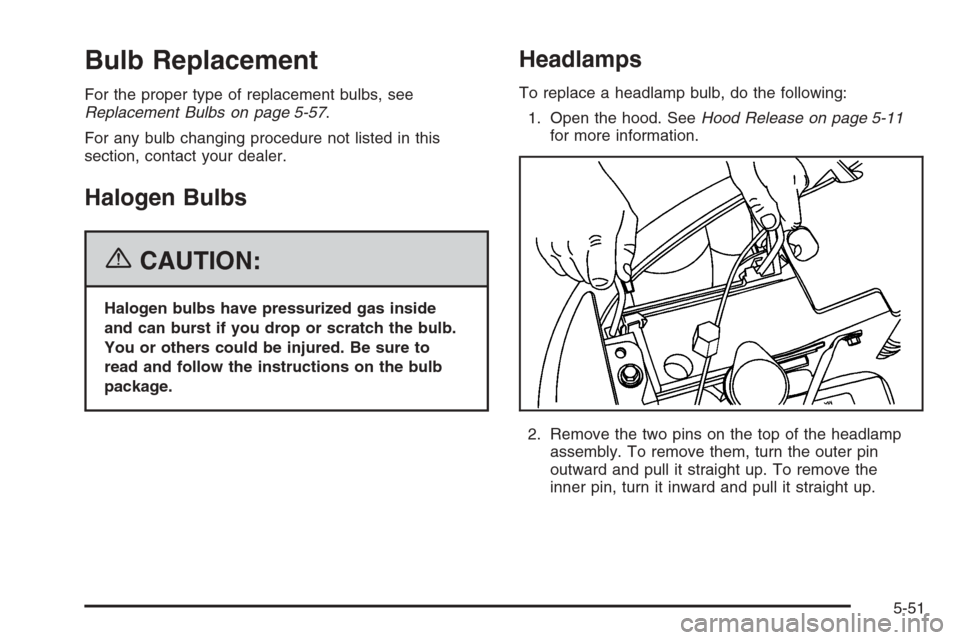
2. Remove the two pins on the top of the headlamp
assembly. To remove them, turn the outer pin
outward and pull it straight up. To remove the
inner pin, turn it inward and pull it straight up.
5-51
Page 422 of 540
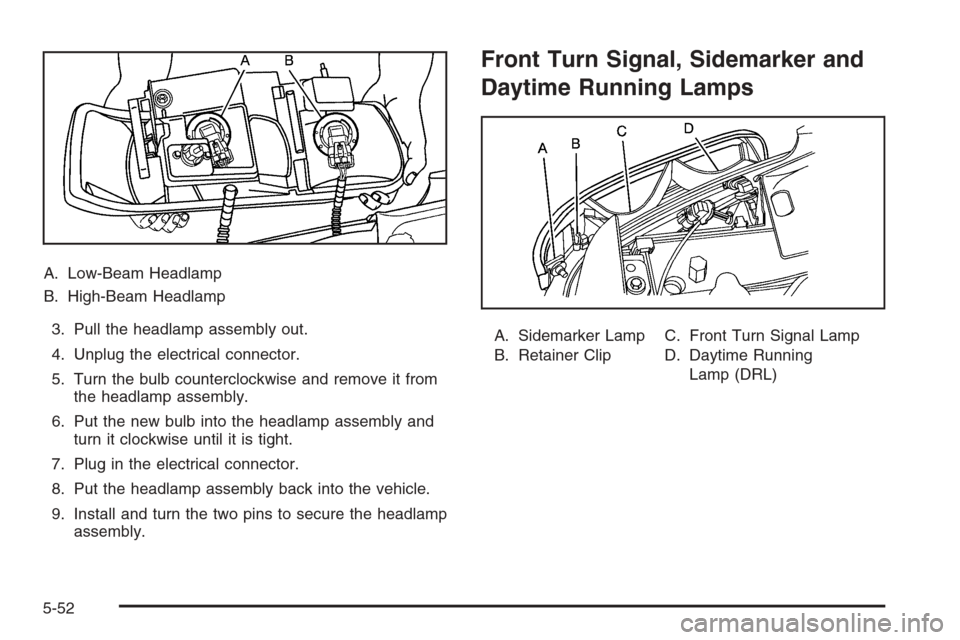
A. Low-Beam Headlamp
B. High-Beam Headlamp
3. Pull the headlamp assembly out.
4. Unplug the electrical connector.
5. Turn the bulb counterclockwise and remove it from
the headlamp assembly.
6. Put the new bulb into the headlamp assembly and
turn it clockwise until it is tight.
7. Plug in the electrical connector.
8. Put the headlamp assembly back into the vehicle.
9. Install and turn the two pins to secure the headlamp
assembly.
Front Turn Signal, Sidemarker and
Daytime Running Lamps
A. Sidemarker Lamp
B. Retainer ClipC. Front Turn Signal Lamp
D. Daytime Running
Lamp (DRL)
5-52
Page 423 of 540
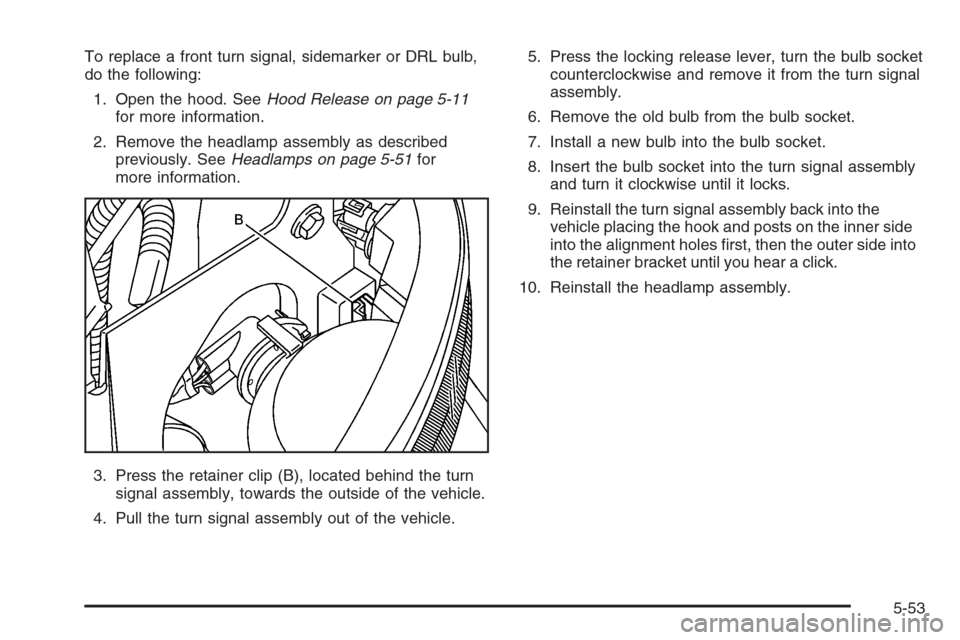
To replace a front turn signal, sidemarker or DRL bulb,
do the following:
1. Open the hood. SeeHood Release on page 5-11
for more information.
2. Remove the headlamp assembly as described
previously. SeeHeadlamps on page 5-51for
more information.
3. Press the retainer clip (B), located behind the turn
signal assembly, towards the outside of the vehicle.
4. Pull the turn signal assembly out of the vehicle.5. Press the locking release lever, turn the bulb socket
counterclockwise and remove it from the turn signal
assembly.
6. Remove the old bulb from the bulb socket.
7. Install a new bulb into the bulb socket.
8. Insert the bulb socket into the turn signal assembly
and turn it clockwise until it locks.
9. Reinstall the turn signal assembly back into the
vehicle placing the hook and posts on the inner side
into the alignment holes �rst, then the outer side into
the retainer bracket until you hear a click.
10. Reinstall the headlamp assembly.
5-53
Page 424 of 540
Side Identi�cation Marker Lamps
To replace a side identi�cation marker bulb, do
the following:
1. Locate the lamp gasket near the rear wheel to
expose the service slot and pull back the edge.
2. Using a �at tool, push into the slot to release the
lamp housing.
3. Pull the housing out to expose the wiring harness
and connector.
4. Unplug the lamp assembly harness from the
housing.
5. Unplug the lamp.
6. Put in a new lamp and snap it into the housing.
7. Reinstall the lamp housing.
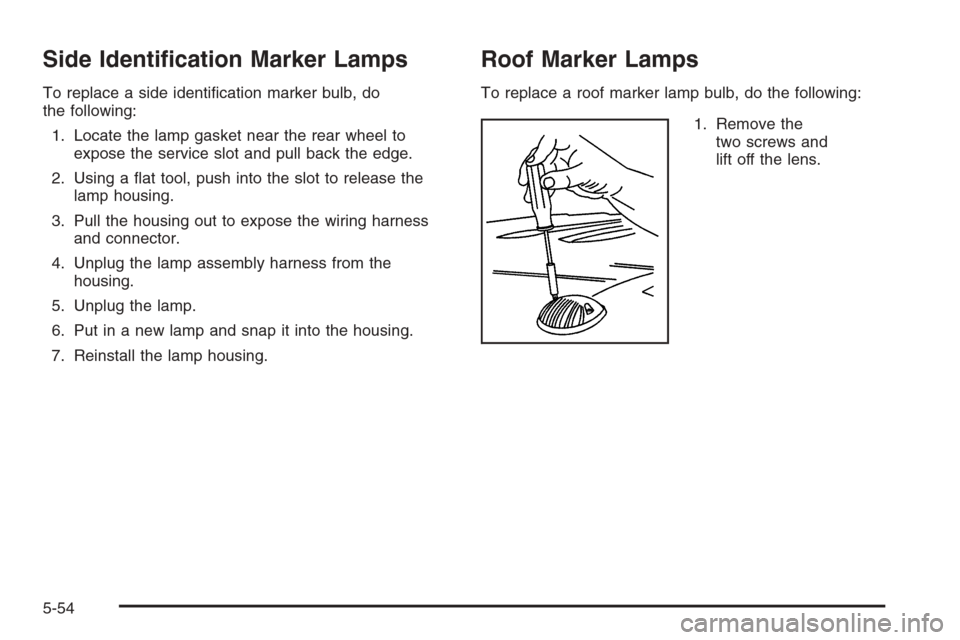
Roof Marker Lamps
To replace a roof marker lamp bulb, do the following:
1. Remove the
two screws and
lift off the lens.
5-54