2006 CHEVROLET SILVERADO radio
[x] Cancel search: radioPage 303 of 594
Audio Steering Wheel Controls
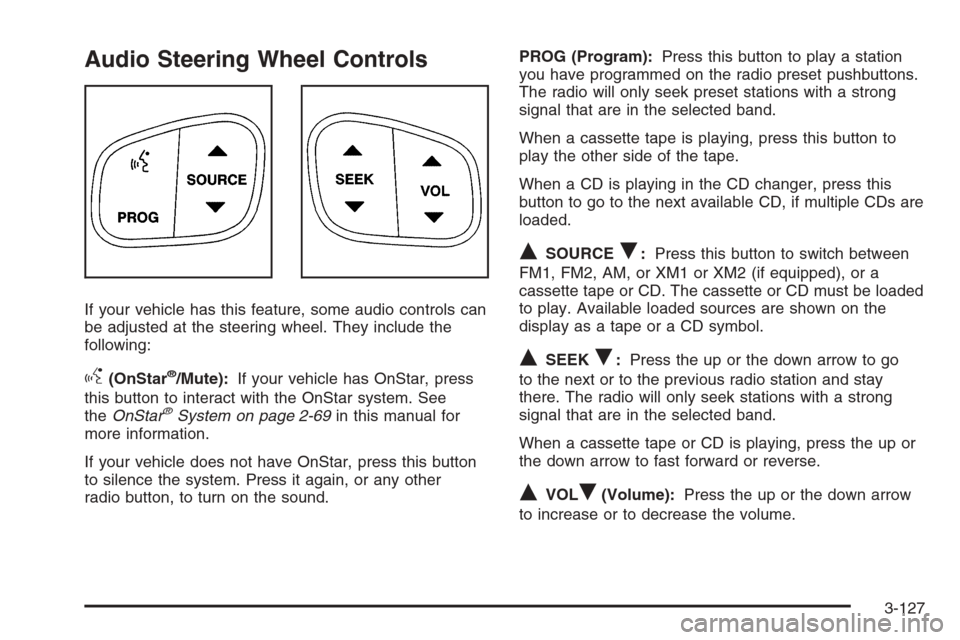
If your vehicle has this feature, some audio controls can
be adjusted at the steering wheel. They include the
following:
g(OnStar®/Mute):If your vehicle has OnStar, press
this button to interact with the OnStar system. See
theOnStar
®System on page 2-69in this manual for
more information.
If your vehicle does not have OnStar, press this button
to silence the system. Press it again, or any other
radio button, to turn on the sound.PROG (Program):Press this button to play a station
you have programmed on the radio preset pushbuttons.
The radio will only seek preset stations with a strong
signal that are in the selected band.
When a cassette tape is playing, press this button to
play the other side of the tape.
When a CD is playing in the CD changer, press this
button to go to the next available CD, if multiple CDs are
loaded.
QSOURCER:Press this button to switch between
FM1, FM2, AM, or XM1 or XM2 (if equipped), or a
cassette tape or CD. The cassette or CD must be loaded
to play. Available loaded sources are shown on the
display as a tape or a CD symbol.
QSEEKR:Press the up or the down arrow to go
to the next or to the previous radio station and stay
there. The radio will only seek stations with a strong
signal that are in the selected band.
When a cassette tape or CD is playing, press the up or
the down arrow to fast forward or reverse.
QVOLR(Volume):Press the up or the down arrow
to increase or to decrease the volume.
3-127
Page 304 of 594
Radio Reception
You may experience frequency interference and static
during normal radio reception if items such as cellphone
chargers, vehicle convenience accessories, and
external electronic devices are plugged into the
accessory power outlet. If there is interference or static,
unplug the item from the accessory power outlet.
AM
The range for most AM stations is greater than for FM,
especially at night. The longer range can cause
station frequencies to interfere with each other. For
better radio reception, most AM radio stations will boost
the power levels during the day, and then reduce
these levels during the night. Static can also occur when
things like storms and power lines interfere with radio
reception. When this happens, try reducing the treble on
your radio.
FM Stereo
FM stereo will give the best sound, but FM signals will
reach only about 10 to 40 miles (16 to 65 km). Tall
buildings or hills can interfere with FM signals, causing
the sound to fade in and out.
XM™ Satellite Radio Service
XM™ Satellite Radio Service gives digital radio
reception from coast-to-coast in the 48 contiguous
United States, and in Canada (if available). Just as with
FM, tall buildings or hills can interfere with satellite
radio signals, causing the sound to fade in and out.
In addition, traveling or standing under heavy foliage,
bridges, garages, or tunnels may cause loss of the XM™
signal for a period of time. The radio may display
NO SIGNAL to indicate interference.
Care of the Cassette Tape Player
A tape player that is not cleaned regularly can cause
reduced sound quality, ruined cassettes, or a damaged
mechanism. Cassette tapes should be stored in their
cases away from contaminants, direct sunlight, and
extreme heat. If they are not, they may not operate
properly or may cause failure of the tape player.
The tape player should be cleaned regularly after every
50 hours of use. The radio may display CLEAN to
indicate that the tape player has been used for 50 hours
without resetting the tape clean timer. If this message
appears on the display, the cassette tape player
needs to be cleaned. It will still play tapes, but it should
be cleaned as soon as possible to prevent damage
to the tapes and player.
3-128
Page 305 of 594
If there is a reduction in sound quality, try a known good
cassette to see if the tape or the tape player is at
fault. If this other cassette has no improvement in sound
quality, clean the tape player.
For best results, use a scrubbing action, non-abrasive
cleaning cassette with pads which scrub the tape
head as the hubs of the cleaner cassette turn. The
recommended cleaning cassette is available through
your dealer.
When cleaning the cassette tape player with the
recommended non-abrasive cleaning cassette, it is
possible that the cassette may eject, because the cut
tape detection feature on the radio may recognize it as a
broken tape, in error. To prevent the cleaning cassette
from being ejected, use the following steps:
1. Turn the ignition on.
2. Turn the radio off.
3. Press and hold the TAPE DISC button for
�ve seconds. READY will appear on the display
and the cassette symbol will �ash for �ve seconds.
4. Insert the scrubbing action cleaning cassette.
5. Eject the cleaning cassette after the manufacturer’s
recommended cleaning time.
When the cleaning cassette has been ejected, the
cut tape detection feature will be active again.A non-scrubbing action, wet-type cleaner which uses a
cassette with a fabric belt to clean the tape head
can be used. This type of cleaning cassette will not
eject on its own. A non-scrubbing action cleaner may not
clean as thoroughly as the scrubbing type cleaner.
The use of a non-scrubbing action, dry-type cleaning
cassette is not recommended.
After the player is cleaned, press and hold the eject
button for �ve seconds to reset the CLEAN indicator.
The radio will display --- or CLEANED to show the
indicator was reset.
Cassettes are subject to wear and the sound quality
may degrade over time. Always make sure the cassette
tape is in good condition before the tape player is
serviced.
Care of Your CDs and DVDs
Handle CDs carefully. Store them in their original cases
or other protective cases and away from direct
sunlight and dust. The CD player scans the bottom
surface of the disc. If the surface of a CD is damaged,
such as cracked, broken, or scratched, the CD will
not play properly or not at all. If the surface of a CD is
soiled, take a soft, lint free cloth or dampen a clean, soft
cloth in a mild, neutral detergent solution mixed with
water, and clean it. Make sure the wiping process starts
from the center to the edge.
3-129
Page 306 of 594
Do not touch the bottom side of a CD while handling it;
this could damage the surface. Pick up CDs by
grasping the outer edges or the edge of the hole and
the outer edge.
Care of the CD and DVD Player
The use of CD lens cleaners for CDs is not advised,
due to the risk of contaminating the lens of the CD optics
with lubricants internal to the CD mechanism.
Fixed Mast Antenna
The �xed mast antenna can withstand most car washes
without being damaged. If the mast should ever become
slightly bent, straighten it out by hand. If the mast is badly
bent, replace it.
Check occasionally to make sure the mast is still
tightened to the cowl. If tightening is required, tighten
by hand, then with a wrench one quarter turn.
XM™ Satellite Radio Antenna
System
The XM™ Satellite Radio antenna is located on the roof
of your vehicle. Keep this antenna clear of snow and
ice build up for clear radio reception.
If your vehicle has a sunroof, the performance of the
XM™ system may be affected if the sunroof is open.
Loading items onto the roof of your vehicle can interfere
with the performance of the XM™ system. Make sure
the XM™ Satellite Radio antenna is not obstructed.
Chime Level Adjustment
The radio is used to adjust the vehicle’s chime level.
To change the volume level of the chime, press and hold
pushbutton 6 with the ignition on and the radio power off.
The volume level will change from the normal level to
loud, and LOUD will appear on the radio display. To
change back to the default or normal setting, press and
hold pushbutton 6 again. The volume level will change
from the loud level to normal, and NORMAL will appear
on the radio display. Each time the chime volume is
changed, three chimes will sound as an example of the
new volume selected. Removing the radio and not
replacing it with a factory radio or chime module will
disable vehicle chimes.
3-130
Page 317 of 594
Manual Selectable Ride
The main function of this system is to provide superior
ride comfort while trailering or fully loaded, as well
as for unloaded driving. This system also helps
to provide:
Improved trailering stability
Improved handling response when trailering or fully
loaded
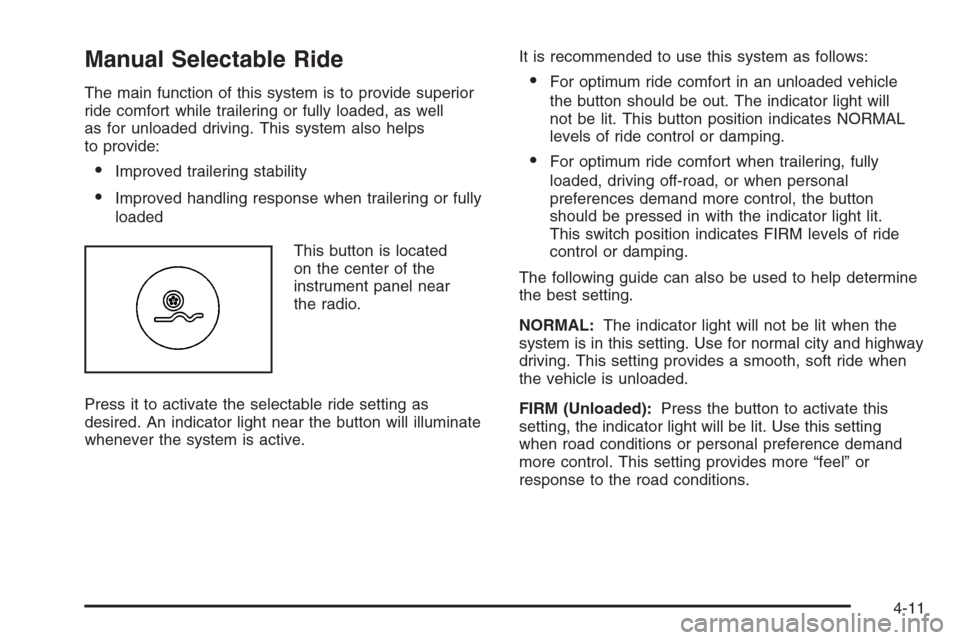
This button is located
on the center of the
instrument panel near
the radio.
Press it to activate the selectable ride setting as
desired. An indicator light near the button will illuminate
whenever the system is active.It is recommended to use this system as follows:
For optimum ride comfort in an unloaded vehicle
the button should be out. The indicator light will
not be lit. This button position indicates NORMAL
levels of ride control or damping.
For optimum ride comfort when trailering, fully
loaded, driving off-road, or when personal
preferences demand more control, the button
should be pressed in with the indicator light lit.
This switch position indicates FIRM levels of ride
control or damping.
The following guide can also be used to help determine
the best setting.
NORMAL:The indicator light will not be lit when the
system is in this setting. Use for normal city and highway
driving. This setting provides a smooth, soft ride when
the vehicle is unloaded.
FIRM (Unloaded):Press the button to activate this
setting, the indicator light will be lit. Use this setting
when road conditions or personal preference demand
more control. This setting provides more “feel” or
response to the road conditions.
4-11
Page 457 of 594
3. Get the vehicles close enough so the jumper cables
can reach, but be sure the vehicles are not touching
each other. If they are, it could cause a ground
connection you do not want. You would not be able
to start your vehicle, and the bad grounding
could damage the electrical systems.
To avoid the possibility of the vehicles rolling, set
the parking brake �rmly on both vehicles involved
in the jump start procedure. Put an automatic
transmission in PARK (P) or a manual transmission
in NEUTRAL before setting the parking brake. If
you have a four-wheel-drive vehicle, be sure
the transfer case is in a drive gear, not in
NEUTRAL.
Notice:If you leave your radio or other accessories
on during the jump starting procedure, they could
be damaged. The repairs would not be covered
by your warranty. Always turn off your radio and
other accessories when jump starting your vehicle.
4. Turn off the ignition on both vehicles. Unplug
unnecessary accessories plugged into the cigarette
lighter or accessory power outlets. Turn off the
radio and all lamps that are not needed. This will
avoid sparks and help save both batteries. And
it could save the radio!5. Open the hoods and locate the positive (+) and
negative (−) terminal locations of the other vehicle.
Your vehicle has a remote positive (+) jump
starting terminal and a remote negative (−) jump
starting terminal. You should always use these
remote terminals instead of the terminals on the
battery.
The remote positive (+) terminal is located behind a
red plastic cover, if equipped, near the engine
accessory drive bracket. To uncover the remote
positive (+) terminal, open the red plastic cover, if
equipped.
The remote negative (−) terminal is located on the
engine drive bracket on all V8 and diesel engines,
and on the thermostat housing on the 8.1L engine.
On V8 engines it is marked GND (Ground).
On V6 engines the remote negative (−) terminal is
located on a tab attached to the engine accessory
drive bracket where it is marked GND (Ground).
SeeEngine Compartment Overview on page 5-14
for more information on the location of the
remote positive (+) and remote negative (−)
terminals.
5-53
Page 530 of 594
Power Windows and Other
Power Options
Circuit breakers protect the power windows and other
power accessories. When the current load is too heavy,
the circuit breaker opens and closes, protecting the
circuit until the problem is �xed or goes away.
Fuses and Circuit Breakers
The wiring circuits in your vehicle are protected from
short circuits by a combination of fuses, circuit breakers
and fusible thermal links. This greatly reduces the
chance of �res caused by electrical problems.
Look at the silver-colored band inside the fuse. If the
band is broken or melted, replace the fuse. Be sure you
replace a bad fuse with a new one of the identical
size and rating.
If you ever have a problem on the road and don’t have
a spare fuse, you can borrow one that has the same
amperage. Just pick some feature of your vehicle
that you can get along without — like the radio or
cigarette lighter — and use its fuse, if it is the correct
amperage. Replace it as soon as you can.
Instrument Panel Fuse Block
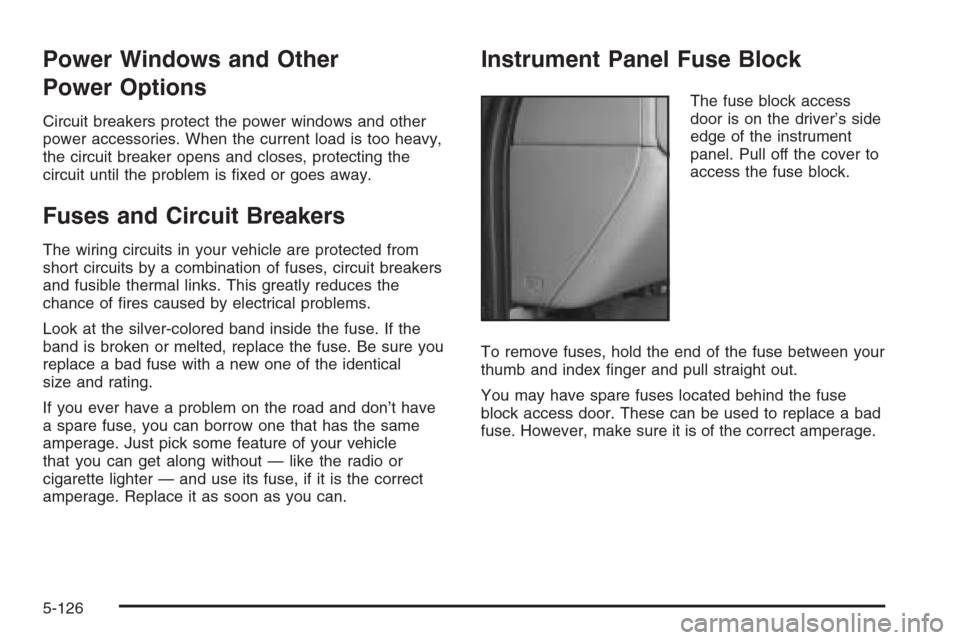
The fuse block access
door is on the driver’s side
edge of the instrument
panel. Pull off the cover to
access the fuse block.
To remove fuses, hold the end of the fuse between your
thumb and index �nger and pull straight out.
You may have spare fuses located behind the fuse
block access door. These can be used to replace a bad
fuse. However, make sure it is of the correct amperage.
5-126
Page 536 of 594

Fuses Usage
SEO B2 Off-Road Lamps
4WS Not Used
AUX PWRAuxiliary Power
Outlet — Console
PCM 1 Powertrain Control Module
ETC/ECMElectronic Throttle Control,
Electronic Brake
Controller-Gasoline Engine,
Fan Clutch-Diesel Engines
IGN EInstrument Panel Cluster, Air
Conditioning Relay, Turn
Signal/Hazard Switch,
Starter Relay
RTD Ride Control
TRL B/U Backup Lamps Trailer Wiring
F/PMP Fuel Pump (Relay)
B/U LPBack-up Lamps, Automatic
Transmission Shift Lock
Control System
RR DEFOG Rear Window Defogger
HDLP-HI Headlamp High Beam Relay
PRIME Not Used
AIRBAGSupplemental In�atable
Restraint System
FRT PARKFront Parking Lamps,
Sidemarker LampsFuses Usage
DRLDaytime Running
Lamps (Relay)
SEO IGN Rear Defog Relay
TBC IGN1 Truck Body Controller Ignition
HI HDLP-LT High Beam Headlamp-Left
LH HID Not Used
DRL Daytime Running Lamps
RVC Regulated Voltage Control
IPC/DICInstrument Panel
Cluster/Driver Information
Center
HVAC/ECAS Climate Control Controller
CIG LTR Cigarette Lighter
HI HDLP-RT High Beam Headlamp-Right
HDLP-LOW Headlamp Low Beam Relay
A/C COMPAir Conditioning
Compressor Relay
A/C COMP Air Conditioning Compressor
TCMB Transmission Control Module
RR WPR Not Used
RADIO Audio System
SEO B1Mid Bussed Electrical Center,
Rear Heated Seats,
Universal Home Remote
System
5-132