2006 CHEVROLET MALIBU park assist
[x] Cancel search: park assistPage 102 of 442
Retained Accessory Power (RAP)
Your vehicle is equipped with a Retained Accessory
Power (RAP) feature which will allow the radio to
continue to work up to 10 minutes after the ignition is
turned to OFF.
Your radio will work when the ignition key is in ON or
ACC. Once the key is turned from ON to OFF, the radio
will continue to work for up to 10 minutes or until the
driver’s door is opened.
Your vehicle’s sunroof and heated seats, if equipped,
and the power windows also work this way. They
will turn off after 10 minutes or if any door is opened.
Starting the Engine
Move your shift lever to PARK (P) or NEUTRAL (N).
Your engine will not start in any other position — that
is a safety feature. To restart when you are already
moving, use NEUTRAL (N) only.
Notice:Shifting into PARK (P) with the vehicle
moving could damage the transaxle. Shift into
PARK (P) only when your vehicle is stopped.
1. With your foot off the accelerator pedal, turn the
ignition key to START. When the engine starts,
let go of the key. The idle speed will go down as
your engine gets warm.Your vehicle has a Computer-Controlled Cranking
System. This feature assists in starting the engine
and protects the electrical system. If the ignition key
is turned to the START position, and then released
when the engine begins cranking, the engine will
continue cranking until the vehicle starts or until it
exceeds the maximum cranking time allowed,
approximately 15 seconds to prevent cranking motor
damage. To prevent starter-motor gear damage,
this system also prevents cranking if the engine is
already running. The engine cranking can be stopped
by turning the ignition switch to the ACC or OFF.
Notice:Repeated attempts to start your engine, will
cause your battery to drain much sooner. Excessive
heat can damage your starter motor. Wait about
15 seconds between each try to help avoid draining
your battery or damaging your starter.
2. If it does not start within 10 seconds, turn the key
back from START to ON. Holding the key in START
will not cause the vehicle to keep cranking. Then
push the accelerator pedal all the way to the �oor,
while you turn the ignition key to START. When the
engine starts, let go of the key and let up on the
accelerator pedal. Wait about 15 seconds between
each try.
2-24
Page 103 of 442
Use the same instructions as stated earlier, when
starting your engine in very cold weather. It is
recommended that you use the engine block heater,
if equipped, to assist in starting your engine in very
cold weather.
Notice:Your engine is designed to work with the
electronics in your vehicle. If you add electrical
parts or accessories, you could change the way the
engine operates. Before adding electrical equipment,
check with your dealer. If you do not, your engine
might not perform properly. Any resulting damage
would not be covered by your vehicle’s warranty.
Adjustable Throttle and Brake Pedal
If your vehicle has this feature, you can change the
position of the throttle and brake pedals. This feature is
designed for shorter drivers, since the pedals cannot
move farther away from the standard position, but can
move rearward for better pedal reach.
The vehicle must be in PARK (P) or have the ignition off
for this feature to operate. If the system senses unusually
high resistance while the pedals are being adjusted, such
as a driver’s foot pushing the brake pedal, it is designed
to disable the switch. Simply remove the obstruction and
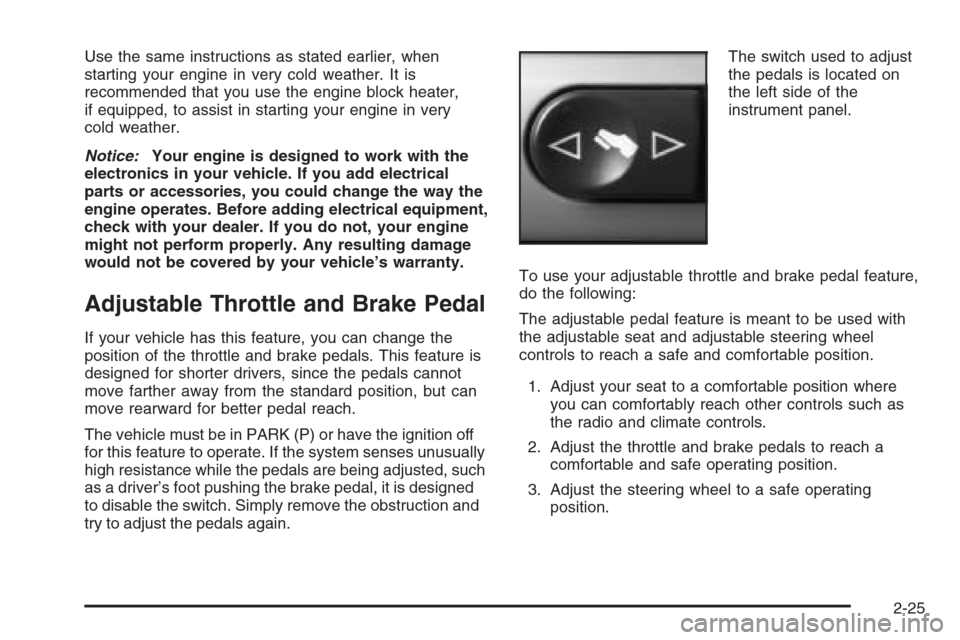
try to adjust the pedals again.The switch used to adjust
the pedals is located on
the left side of the
instrument panel.
To use your adjustable throttle and brake pedal feature,
do the following:
The adjustable pedal feature is meant to be used with
the adjustable seat and adjustable steering wheel
controls to reach a safe and comfortable position.
1. Adjust your seat to a comfortable position where
you can comfortably reach other controls such as
the radio and climate controls.
2. Adjust the throttle and brake pedals to reach a
comfortable and safe operating position.
3. Adjust the steering wheel to a safe operating
position.
2-25
Page 125 of 442
Universal Home Remote System
Operation
Do not use the Universal Home Remote with any garage
door opener that does not have the stop and reverse
feature. This includes any garage door opener model
manufactured before April 1, 1982. If you have a newer
garage door opener with rolling codes, please be sure to
follow Steps 6 through 8 to complete the programming of
your Universal Home Remote Transmitter.
Read the instructions completely before attempting to
program the Universal Home Remote. Because of
the steps involved, it may be helpful to have another
person available to assist you in the programming steps.
Keep the original hand-held transmitter for use in
other vehicles as well as for future Universal Home
Remote programming. It is also recommended that
upon the sale of the vehicle, the programmed Universal
Home Remote buttons should be erased for security
purposes. See “Erasing Universal Home Remote
Buttons” later in this section or, for assistance, see
Customer Assistance Offices on page 7-4.
Be sure that people and objects are clear of the garage
door or gate operator you are programming. When
programming a garage door, it is advised to park outside
of the garage.It is recommended that a new battery be installed in
your hand-held transmitter for quicker and more
accurate transmission of the radio-frequency signal.Programming Universal Home Remote
Follow these steps to program up to three channels:
1. Press and hold down the two outside Universal
Home Remote buttons, releasing only when the
Universal Home Remote indicator light begins
to �ash, after 20 seconds. Do not hold down the
buttons for longer than 30 seconds and do not
repeat this step to program a second and/or
third hand-held transmitter to the remaining
two Universal Home Remote buttons.
2. Position the end of your hand-held transmitter
about 1 to 3 inches (3 to 8 cm) away from the
Universal Home Remote buttons while keeping
the indicator light in view.
3. Simultaneously press and hold both the desired
Universal Home Remote button and the hand-held
transmitter button. Do not release the buttons
until Step 4 has been completed.
Some entry gates and garage door openers
may require you to substitute Step 3 with the
procedure noted in “Gate Operator and Canadian
Programming” later in this section.
2-47
Page 427 of 442
Reporting Safety Defects to the
Canadian Government
If you live in Canada, and you believe that your vehicle
has a safety defect, you should immediately notify
Transport Canada, in addition to notifying General
Motors of Canada Limited. You may call them at
1-800-333-0510 or write to:
Transport Canada
Place de Ville Tower C
330 Sparks Street
Ottawa, Ontario K1A 0N5
Reporting Safety Defects to
General Motors
In addition to notifying NHTSA (or Transport Canada)
in a situation like this, we certainly hope you will
notify General Motors. Please call the Chevrolet
Customer Assistance Center at 1-800-222-1020,
or write:
Chevrolet Motor Division
Chevrolet Customer Assistance Center
P.O. Box 33170
Detroit, MI 48232-5170In Canada, please call us at 1-800-263-3777 (English)
or 1-800-263-7854 (French). Or, write:
General Motors of Canada Limited
Customer Communication Centre, 163-005
1908 Colonel Sam Drive
Oshawa, Ontario L1H 8P7
Service Publications Ordering
Information
Service Manuals
Service Manuals have the diagnosis and repair
information on engines, transmission, axle suspension,
brakes, electrical, steering, body, etc.
Transmission, Transaxle, Transfer
Case Unit Repair Manual
This manual provides information on unit repair service
procedures, adjustments, and speci�cations for GM
transmissions, transaxles, and transfer cases.
7-15
Page 438 of 442
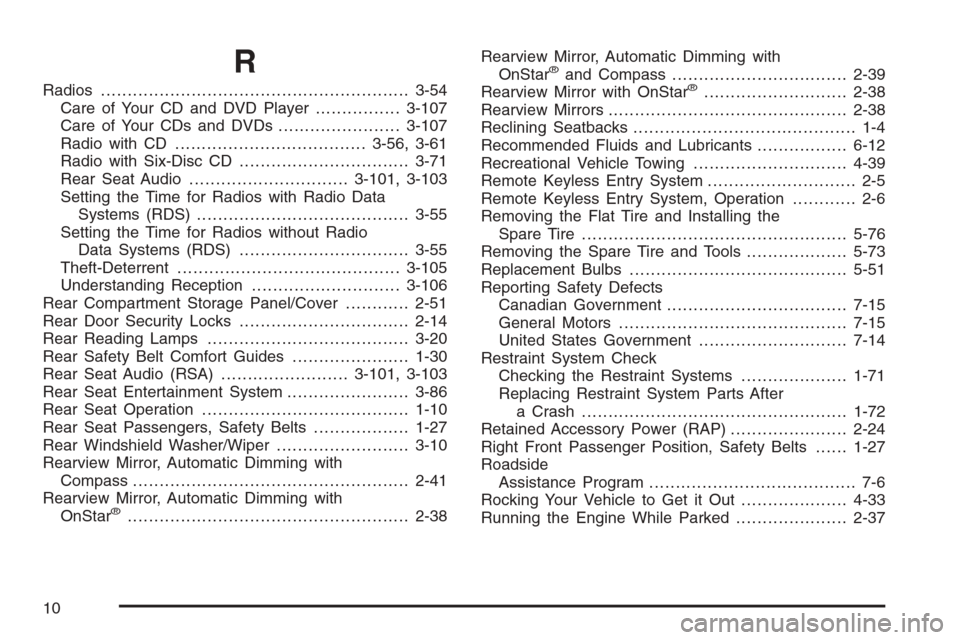
R
Radios..........................................................3-54
Care of Your CD and DVD Player................3-107
Care of Your CDs and DVDs .......................3-107
Radio with CD....................................3-56, 3-61
Radio with Six-Disc CD................................3-71
Rear Seat Audio..............................3-101, 3-103
Setting the Time for Radios with Radio Data
Systems (RDS)........................................3-55
Setting the Time for Radios without Radio
Data Systems (RDS)................................3-55
Theft-Deterrent..........................................3-105
Understanding Reception............................3-106
Rear Compartment Storage Panel/Cover............2-51
Rear Door Security Locks................................2-14
Rear Reading Lamps......................................3-20
Rear Safety Belt Comfort Guides......................1-30
Rear Seat Audio (RSA)........................3-101, 3-103
Rear Seat Entertainment System.......................3-86
Rear Seat Operation.......................................1-10
Rear Seat Passengers, Safety Belts..................1-27
Rear Windshield Washer/Wiper.........................3-10
Rearview Mirror, Automatic Dimming with
Compass....................................................2-41
Rearview Mirror, Automatic Dimming with
OnStar
®.....................................................2-38Rearview Mirror, Automatic Dimming with
OnStar
®and Compass.................................2-39
Rearview Mirror with OnStar®...........................2-38
Rearview Mirrors.............................................2-38
Reclining Seatbacks.......................................... 1-4
Recommended Fluids and Lubricants.................6-12
Recreational Vehicle Towing.............................4-39
Remote Keyless Entry System............................ 2-5
Remote Keyless Entry System, Operation............ 2-6
Removing the Flat Tire and Installing the
Spare Tire..................................................5-76
Removing the Spare Tire and Tools...................5-73
Replacement Bulbs.........................................5-51
Reporting Safety Defects
Canadian Government..................................7-15
General Motors...........................................7-15
United States Government............................7-14
Restraint System Check
Checking the Restraint Systems....................1-71
Replacing Restraint System Parts After
a Crash..................................................1-72
Retained Accessory Power (RAP)......................2-24
Right Front Passenger Position, Safety Belts......1-27
Roadside
Assistance Program....................................... 7-6
Rocking Your Vehicle to Get it Out....................4-33
Running the Engine While Parked.....................2-37
10