Page 203 of 406

Care of the CD Player
The use of CD lens cleaners for CD players is not
advised, due to the risk of contaminating the internal
lens of the CD optics with lubricants.
Fixed Mast Antenna
The fixed mast antenna can withstand most car washes
without being damaged. If the mast should ever
become slightly bent, straighten it out by hand. If the
mast is badly bent, replace it.
Check occasionally to make sure the mast is still
tightened to the fender. If tightening is required, tighten
by hand, then with a wrench one quarter turn.
Chime Level Adjustment
The radio is used to adjust the vehicle’s chime level.
To change the volume level of the chime, press and hold
pushbutton 6 with the ignition on and the radio power off.
The volume level will change from the normal level to
loud, and LOUD will appear on the radio display.
To change back to the default or normal setting, press
and hold pushbutton 6 again. The volume level will
change from the loud level to normal, and NORMAL will
appear on the radio display. Each time the chime volume
is changed, three chimes will sound to indicate the
change. Removing the radio and not replacing it with a
factory radio or chime module will disable vehicle chimes.
3-79
Page 228 of 406

Hill and Mountain Roads
Driving on steep hills or mountains is different from
driving in flat or rolling terrain.
If you drive regularly in steep country, or if you are
planning to visit there, here are some tips that can make
your trips safer and more enjoyable.
•Keep your vehicle in good shape. Check all fluid
levels and also the brakes, tires, cooling system,
and transmission. These parts can work hard
on mountain roads.
{CAUTION:
If you do not shift down, your brakes could
get so hot that they would not work well.
You would then have poor braking or even
none going down a hill. You could crash. Shift
down to let your engine assist your brakes on
a steep downhill slope.
{CAUTION:
Coasting downhill in NEUTRAL (N) or with
the ignition off is dangerous. Your brakes will
have to do all the work of slowing down. They
could get so hot that they would not work well.
You would then have poor braking or even
none going down a hill. You could crash.
Always have your engine running and your
vehicle in gear when you go downhill.
4-24
Page 241 of 406

4. Follow the dolly manufacturer’s instructions to
attach and secure the vehicle being towed to
the dolly and then the loaded dolly to the tow
vehicle. Make sure the wheels are straight
before towing.
Use an adequate clamping device to ensure that
the front wheels are locked into the straight position.
5. Release the parking brake only after the vehicle
being towed is firmly attached to the tow vehicle.
6. Turn the ignition to LOCK.
If the tow vehicle will not be started or driven for
six weeks or more, remove the battery cable
from the negative terminal (post) of the battery to
prevent your battery from draining while towing.
All-Wheel-Drive Vehicles
Your vehicle was not designed to be towed with
two wheels on the ground. To properly tow these
vehicles, they should be placed on a platform trailer
with all four wheels off the ground.
Notice:Towing an all-wheel-drive vehicle with all
four wheels on the ground, or even with only two of
its wheels on the ground, will damage drivetrain
components. Do not tow an all-wheel-drive vehicle if
any of its wheels will be on the ground.
Towing a Trailer
{CAUTION:
If you do not use the correct equipment and
drive properly, you can lose control when you
pull a trailer. For example, if the trailer is too
heavy, the brakes may not work well — or even
at all. You and your passengers could be
seriously injured. Pull a trailer only if you have
followed all the steps in this section. Ask your
dealer for advice and information about towing
a trailer with your vehicle.
Notice:Pulling a trailer improperly can damage
your vehicle and result in costly repairs that would
not be covered by your warranty. Always follow
the instructions in this section and check with your
dealer for more information about towing a trailer
with your vehicle.
To identify the trailering capacity of your vehicle, you
should read the information in “Weight of the Trailer” that
appears later in this section.
4-37
Page 243 of 406

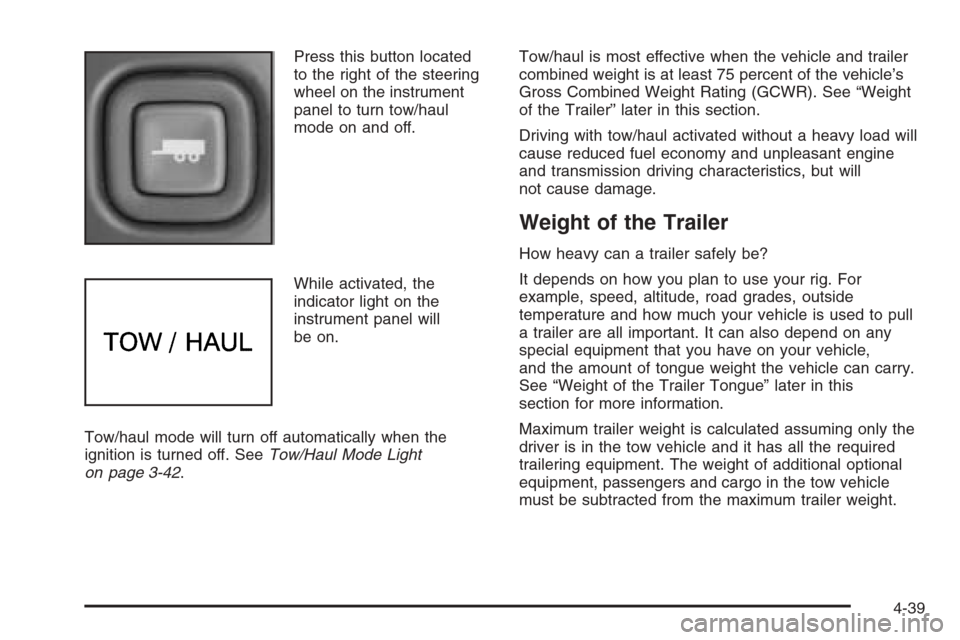
Press this button located
to the right of the steering
wheel on the instrument
panel to turn tow/haul
mode on and off.
While activated, the
indicator light on the
instrument panel will
be on.
Tow/haul mode will turn off automatically when the
ignition is turned off. SeeTow/Haul Mode Light
on page 3-42.Tow/haul is most effective when the vehicle and trailer
combined weight is at least 75 percent of the vehicle’s
Gross Combined Weight Rating (GCWR). See “Weight
of the Trailer” later in this section.
Driving with tow/haul activated without a heavy load will
cause reduced fuel economy and unpleasant engine
and transmission driving characteristics, but will
not cause damage.
Weight of the Trailer
How heavy can a trailer safely be?
It depends on how you plan to use your rig. For
example, speed, altitude, road grades, outside
temperature and how much your vehicle is used to pull
a trailer are all important. It can also depend on any
special equipment that you have on your vehicle,
and the amount of tongue weight the vehicle can carry.
See “Weight of the Trailer Tongue” later in this
section for more information.
Maximum trailer weight is calculated assuming only the
driver is in the tow vehicle and it has all the required
trailering equipment. The weight of additional optional
equipment, passengers and cargo in the tow vehicle
must be subtracted from the maximum trailer weight.
4-39
Page 273 of 406

How to Reset the Engine Oil Life
System
The Engine Oil Life System calculates when to change
your engine oil and filter based on vehicle use. Anytime
your oil is changed, reset the system so it can calculate
when the next oil change is required. If a situation occurs
where you change your oil prior to a change engine oil
light being turned on, reset the system.
To reset the change engine oil light, do the following:
1. Turn the ignition key to RUN with the engine off.
2. Fully press and release the accelerator pedal slowly
three times within five seconds.
3. If the Change Engine Oil light flashes for
five seconds, the system is reset.
4. Turn the key to LOCK.
If the change engine oil light comes back on when you
start your vehicle, the engine oil life system has not
reset. Repeat the procedure. If it still does not reset, see
your dealer for service. SeeChange Engine Oil Light
on page 3-40.
What to Do with Used Oil
Used engine oil contains certain elements that may be
unhealthy for your skin and could even cause cancer.
Do not let used oil stay on your skin for very long. Clean
your skin and nails with soap and water, or a good
hand cleaner. Wash or properly dispose of clothing or
rags containing used engine oil. See the manufacturer’s
warnings about the use and disposal of oil products.
Used oil can be a threat to the environment. If you
change your own oil, be sure to drain all the oil from the
filter before disposal. Never dispose of oil by putting it in
the trash, pouring it on the ground, into sewers, or into
streams or bodies of water. Instead, recycle it by taking it
to a place that collects used oil. If you have a problem
properly disposing of your used oil, ask your dealer, a
service station, or a local recycling center for help.
5-17
Page 296 of 406

Notice:If you leave your radio or other accessories
on during the jump starting procedure, they could
be damaged. The repairs would not be covered
by your warranty. Always turn off your radio and
other accessories when jump starting your vehicle.
3. Turn off the ignition on both vehicles. Unplug
unnecessary accessories plugged into the cigarette
lighter or the accessory power outlet. Turn off
the radio and all lamps that are not needed.
This will avoid sparks and help save both batteries.
And it could save the radio!
4. Open the hoods and locate the positive (+) and
negative (−) terminal locations of the other vehicle.
Your vehicle has a remote positive (+) jump
starting terminal and a remote negative (−) jump
starting terminal. You should always use these
remote terminals instead of the terminals on the
battery.
The remote positive (+) terminal is located behind
a red plastic cover near the engine accessory
drive bracket on the driver’s side of the engine
compartment, below the alternator. To uncover
the remote positive (+) terminal, open the red
plastic cover.The remote negative (−) terminal is located on the
engine drive bracket on all V8 engines and is
marked GND (Ground).
On V6 engines the remote negative (−) terminal is
located on a tab attached to the engine accessory
drive bracket and is marked GND (Ground).
{CAUTION:
Using a match near a battery can cause battery
gas to explode. People have been hurt doing
this, and some have been blinded. Use a
�ashlight if you need more light.
Be sure the battery has enough water. You do
not need to add water to the battery installed
in your new vehicle. But if a battery has �ller
caps, be sure the right amount of �uid is there.
If it is low, add water to take care of that �rst.
If you do not, explosive gas could be present.
Battery �uid contains acid that can burn you.
Do not get it on you. If you accidentally get it
in your eyes or on your skin, �ush the place
with water and get medical help immediately.
5-40
Page 353 of 406

Fuse Usage
6 Ignition 0
7 Stoplamp
8 Rear Defogger/Heated Mirror
9Right Daytime Running Lamp/
Turn Signal
10Left Daytime Running Lamp/
Turn Signal
11 Truck Body Control Module 4
12 Fuel Pump
13 Trailer
14 Hazard Flashers
15 Horn
16 Truck Body Control Module 3
17 Trailer Stop/Turn Signal
18 Truck Body Control Module 2
19 Truck Body Control Module
20 Remote Function Actuator
21 Engine 2 (Gas), Spare (Diesel)
22 Ignition E
23 Engine 1
24 Truck Body Control Module Ignition 1
25 Spare (Gas), Fuel Heater (Diesel)
26 Inside Rearview Mirror
27 CrankcaseFuse Usage
28Brake Transmission Shift Interlock
System
29 Auxiliary Power Outlets
30 Cigarette Lighter
31 Instrument Panel Cluster
32 Air Conditioning
33Spare (Gas), Engine Control
Module (Diesel)
34Canister Vent Solenoid (Gas),
Rear Fog Lamps (Diesel)
35 Spare
36Brake Transmission Shift Interlock,
Vehicle Back-Up
37 Airbag
38Powertrain Control Module Ignition 1
(Gas), Engine Control Module,
Transmission Control Module, Glow
Plug Control Module Ignition 1
(Diesel)
39Oxygen Sensor B (Gas),
Spare (Diesel)
40 Oxygen Sensor A
41 Windshield Wipers
42 Right Headlamp - Low Beam
43 Left Headlamp - Low Beam
44 Left Headlamp - High Beam
5-97
Page 354 of 406
Fuse Usage
45 Right Headlamp - High Beam
46Truck Body Controller- Accessory
(Gas), Truck Body Controller,
Transmission Control Module
Accessory (Diesel)
47 Front Windshield Wiper
48Anti-lock Brakes, Vehicle Stability
Enhancement System
49 Ignition A
50 Trailer
51 Climate Control Blower
52 Ignition B
63Spare (Gas), Engine Control Module
Actuator (Diesel)
64 SpareRelays Usage
53 Windshield Wiper
54 Air Conditioning
55Spare (Gas), Rear Fog
Lamps (Diesel)
56 Headlamp - High Beam
57 Fuel Pump
58 Headlamp - Low Beam
59 Horn
SPARE (G),
ECM (D)Spare (Gas), Engine Control
Module (Diesel)
STRTR Starter
Circuit Breaker Usage
PWR SEAT Power Seat
5-98