2006 CHEVROLET EXPRESS CARGO VAN check oil
[x] Cancel search: check oilPage 126 of 406
Oil Pressure Gage........................................3-39
Change Engine Oil Light................................3-40
Security Light...............................................3-40
Cruise Control Light......................................3-41
Reduced Engine Power Light.........................3-41
Highbeam On Light.......................................3-42
Daytime Running Lamps (DRL)
Indicator Light...........................................3-42
Tow/Haul Mode Light....................................3-42
Check Gages Warning Light...........................3-42
Fuel Gage...................................................3-43
Audio System(s).............................................3-44
Setting the Time for Radios without
Radio Data Systems (RDS)........................3-45
Setting the Time for Radios with
Radio Data Systems (RDS)........................3-45AM-FM Radio...............................................3-46
Radio with CD..............................................3-48
Radio with Cassette and CD..........................3-53
Radio with Six-Disc CD.................................3-65
Theft-Deterrent Feature (Non-RDS Radios).......3-76
Theft-Deterrent Feature (RDS Radios).............3-76
Radio Reception...........................................3-77
Care of the Cassette Tape Player...................3-77
Care of Your CDs.........................................3-78
Care of the CD Player...................................3-79
Fixed Mast Antenna......................................3-79
Chime Level Adjustment................................3-79
Section 3 Instrument Panel
3-2
Page 163 of 406
This can happen if you have recently replaced your
battery or if your battery has run down. The diagnostic
system is designed to evaluate critical emission control
systems during normal driving. This may take several
days of routine driving. If you have done this and your
vehicle still does not pass the inspection for lack of OBD
system readiness, your GM dealer can prepare the
vehicle for inspection.
Oil Pressure Gage
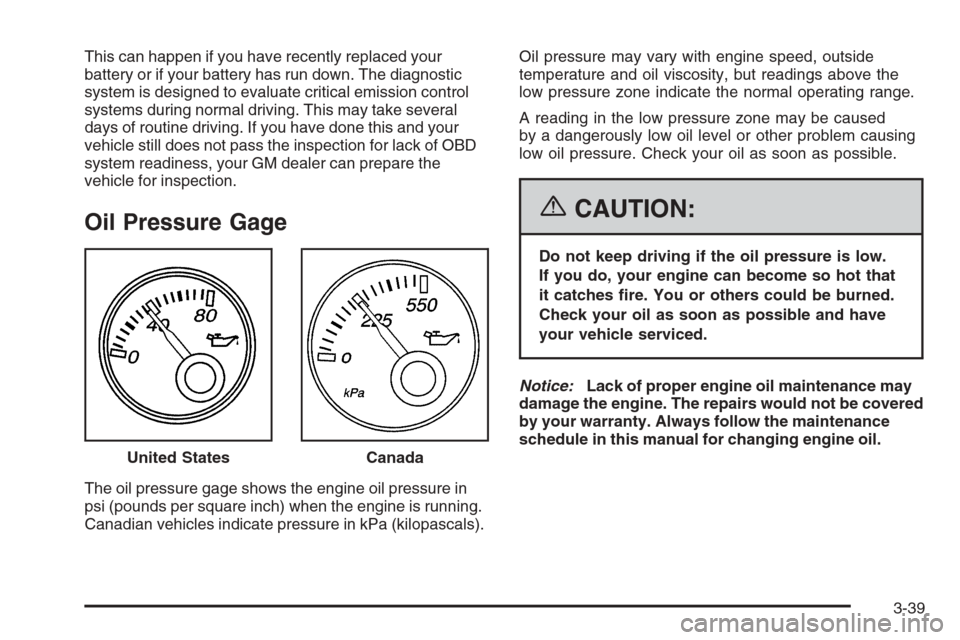
The oil pressure gage shows the engine oil pressure in
psi (pounds per square inch) when the engine is running.
Canadian vehicles indicate pressure in kPa (kilopascals).Oil pressure may vary with engine speed, outside
temperature and oil viscosity, but readings above the
low pressure zone indicate the normal operating range.
A reading in the low pressure zone may be caused
by a dangerously low oil level or other problem causing
low oil pressure. Check your oil as soon as possible.
{CAUTION:
Do not keep driving if the oil pressure is low.
If you do, your engine can become so hot that
it catches �re. You or others could be burned.
Check your oil as soon as possible and have
your vehicle serviced.
Notice:Lack of proper engine oil maintenance may
damage the engine. The repairs would not be covered
by your warranty. Always follow the maintenance
schedule in this manual for changing engine oil.
United States
Canada
3-39
Page 166 of 406
Highbeam On Light
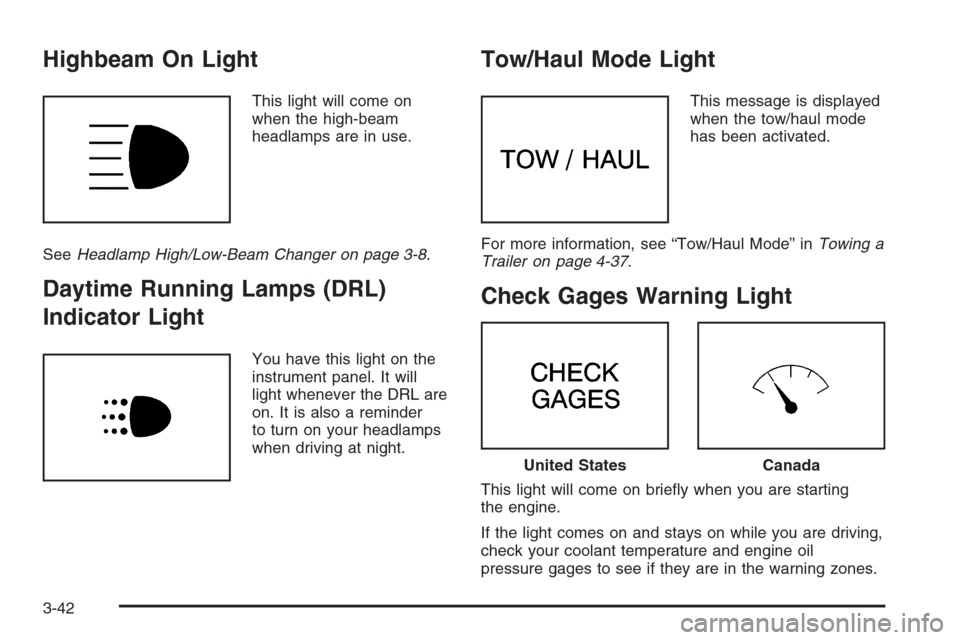
This light will come on
when the high-beam
headlamps are in use.
SeeHeadlamp High/Low-Beam Changer on page 3-8.
Daytime Running Lamps (DRL)
Indicator Light
You have this light on the
instrument panel. It will
light whenever the DRL are
on. It is also a reminder
to turn on your headlamps
when driving at night.
Tow/Haul Mode Light
This message is displayed
when the tow/haul mode
has been activated.
For more information, see “Tow/Haul Mode” inTowing a
Trailer on page 4-37.
Check Gages Warning Light
This light will come on briefly when you are starting
the engine.
If the light comes on and stays on while you are driving,
check your coolant temperature and engine oil
pressure gages to see if they are in the warning zones.
United StatesCanada
3-42
Page 175 of 406
If you insert a CD with the radio off and the ignition on,
it will start to play
If the ignition or radio is turned off, with a CD in the
player, it will stay in the player. When the ignition
or radio is turned on, the CD will start playing where it
stopped, if it was the last selected audio source.
As each new track starts to play, the track number will
appear on the display.
The CD player can play the smaller 3 inch (8 cm) single
CDs with an adapter ring. Full-size CDs and the
smaller CDs are loaded in the same manner.
If playing a CD-R, the sound quality may be reduced
due to CD-R quality, the method of recording, the quality
of the music that has been recorded, and the way the
CD-R has been handled. There may be an increase
in skipping, difficulty in finding tracks, and/or difficulty in
loading and ejecting. If these problems occur, check
the bottom surface of the CD. If the surface of the CD is
damaged, such as cracked, broken, or scratched, the
CD will not play properly. If the surface of the CD
is soiled, seeCare of Your CDs on page 3-78for more
information.
If there is no apparent damage, try a known good CD.Do not add any label to a CD, it could get caught in the
CD player. If a CD is recorded on a personal computer
and a description label is needed, try labeling the top of
the recorded CD with a marking pen instead.
Notice:If you add any label to a CD, insert more
than one CD into the slot at a time, or attempt
to play scratched or damaged CDs, you could
damage the CD player. When using the CD player,
use only CDs in good condition without any
label, load one CD at a time, and keep the CD player
and the loading slot free of foreign materials,
liquids, and debris.
If an error appears on the display, see “CD Messages”
later in this section.
1 PREV (Previous):Press this pushbutton to go to the
beginning of the current track if more than eight seconds
have played. The track number will appear on the display.
If this pushbutton is held or pressed more than once, the
player will continue moving backward through the CD.
2 NEXT:Press this pushbutton to go to the next track.
The track number will appear on the display. If this
pushbutton is held or pressed more than once, the
player will continue moving forward through the CD.
3-51
Page 186 of 406
Playing a CD
Insert a CD part way into the slot, label side up.
The player will pull it in and the CD should begin playing.
If you want to insert a CD with the ignition off, first
press the eject button or the INFO knob.
If the ignition or radio is turned off with the CD in the
player, it will stay in the player. When the ignition
or radio is turned on, the CD will start playing where it
stopped, if it was the last selected audio source.
When a CD is inserted, the CD symbol will appear on
the display. As each new track starts to play, the
track number will appear on the display.
The CD player can play the smaller 3 inch (8 cm)
single CDs with an adapter ring. Full-size CDs and the
smaller CDs are loaded in the same manner.
If playing a CD-R, the sound quality may be reduced
due to CD-R quality, the method of recording, the quality
of the music that has been recorded, and the way the
CD-R has been handled. There may be an increase
in skipping, difficulty in finding tracks, and/or difficulty in
loading and ejecting. If these problems occur, check
the bottom surface of the CD. If the surface of the CD
is damaged, such as cracked, broken, or scratched,
the CD will not play properly. If the surface of the CD is
soiled, seeCare of Your CDs on page 3-78for more
information.If there is no apparent damage, try a known good CD.
Do not add any label to a CD, it could get caught in the
CD player. If a CD is recorded on a personal computer
and a description label is needed, try labeling the top
of the recorded CD with a marking pen instead.
Notice:If you add any label to a CD, insert more
than one CD into the slot at a time, or attempt
to play scratched or damaged CDs, you could
damage the CD player. When using the CD player,
use only CDs in good condition without any
label, load one CD at a time, and keep the CD player
and the loading slot free of foreign materials,
liquids, and debris.
If an error appears on the display, see “CD Messages”
later in this section.
1 PREV (Previous):Press this pushbutton to go to the
beginning of the current track if more than eight seconds
have played. TRACK and the track number will appear on
the display. If this pushbutton is held or pressed more
than once, the player will continue moving backward
through the CD.
2 NEXT:Press this pushbutton to go to the next track.
TRACK and the track number will appear on the
display. If this pushbutton is held or pressed more than
once, the player will continue moving forward through
the CD.
3-62
Page 194 of 406
RDS Messages
INFO (Information):If the current station has a
message, INFO will appear on the display. Press this
button to see the message. The message may display
the artist, song title, call in phone numbers, etc.
If the entire message is not displayed, parts of the
message will appear every three seconds. To scroll
through the message, press and release the INFO button.
A new group of words will appear on the display after
every press of this button. Once the complete message
has been displayed, INFO will disappear from the display
until another new message is received. The last message
can be displayed by pressing the INFO button. You can
view the last message until a new message is received or
a different station is tuned to.
Radio Messages
CAL ERR (Calibration Error):The audio system
has been calibrated for your vehicle from the factory.
If CAL ERR appears on the display, it means that the
radio has not been configured properly for the vehicle
and must be returned to your GM dealer for service.
LOCKED:This message is displayed when the
THEFTLOCK
®system has locked up. Take the vehicle
to your GM dealer for service.
If any error occurs repeatedly, or if an error cannot be
corrected, contact your GM dealer.
Playing a CD
If the ignition or radio is turned off, with a CD in the
player, it will stay in the player. When the ignition
or radio is turned on, the CD will start playing where it
stopped, if it was the last selected audio source.
When a CD is inserted, the CD symbol will appear on
the display. As each new track starts to play, the
track number will appear on the display.
The CD player can play the smaller 3 inch (8 cm) single
CDs with an adapter ring. Full-size CDs and the
smaller CDs are loaded in the same manner.
If playing a CD-R, the sound quality may be reduced
due to CD-R quality, the method of recording, the quality
of the music that has been recorded, and the way the
CD-R has been handled. There may be an increase
in skipping, difficulty in finding tracks, and/or difficulty in
loading and ejecting. If these problems occur, check
the bottom surface of the CD. If the surface of the CD is
damaged, such as cracked, broken, or scratched, the
CD will not play properly. If the surface of the CD
is soiled, seeCare of Your CDs on page 3-78for more
information.
If there is no apparent damage, try a known good CD.
3-70
Page 227 of 406
Here are some things you can check before a trip:
•Windshield Washer Fluid:Is the reservoir full?
Are all windows clean inside and outside?
•Wiper Blades:Are they in good shape?
•Fuel, Engine Oil, Other Fluids:Have you checked
all levels?
•Lamps:Are they all working? Are the lenses clean?
•Tires:They are vitally important to a safe,
trouble-free trip. Is the tread good enough for
long-distance driving? Are the tires all inflated to
the recommended pressure?
•Weather Forecasts:What is the weather outlook
along your route? Should you delay your trip a
short time to avoid a major storm system?
•Maps:Do you have up-to-date maps?
Highway Hypnosis
Is there actually such a condition as highway hypnosis?
Or is it just plain falling asleep at the wheel? Call it
highway hypnosis, lack of awareness, or whatever.
There is something about an easy stretch of road with
the same scenery, along with the hum of the tires on the
road, the drone of the engine, and the rush of the wind
against the vehicle that can make you sleepy. Do not
let it happen to you! If it does, your vehicle can leave the
road in less than a second, and you could crash and
be injured.
What can you do about highway hypnosis? First, be
aware that it can happen.
Then here are some tips:
•Make sure your vehicle is well ventilated, with a
comfortably cool interior.
•Keep your eyes moving. Scan the road ahead and
to the sides. Check your mirrors and your
instruments frequently.
•If you get sleepy, pull off the road into a rest,
service, or parking area and take a nap, get some
exercise, or both. For safety, treat drowsiness
on the highway as an emergency.
4-23
Page 254 of 406
Making Turns
Notice:Making very sharp turns while trailering
could cause the trailer to come in contact with the
vehicle. Your vehicle could be damaged. Avoid
making very sharp turns while trailering.
When you’re turning with a trailer, make wider turns
than normal. Do this so your trailer won’t strike soft
shoulders, curbs, road signs, trees or other objects.
Avoid jerky or sudden maneuvers. Signal well in
advance.
Turn Signals When Towing a Trailer
When you tow a trailer, your vehicle has to have extra
wiring and a heavy-duty turn signal flasher (included
in the optional trailering package).
The arrows on your instrument panel will flash whenever
you signal a turn or lane change. Properly hooked up,
the trailer lamps will also flash, telling other drivers
you’re about to turn, change lanes or stop.
When towing a trailer, the arrows on your instrument
panel will flash for turns even if the bulbs on the trailer
are burned out. Thus, you may think drivers behind
you are seeing your signal when they are not. It’s
important to check occasionally to be sure the trailer
bulbs are still working.
Driving On Grades
Reduce speed and shift to a lower gearbeforeyou start
down a long or steep downgrade. If you don’t shift
down, you might have to use your brakes so much that
they would get hot and no longer work well.
You can tow in DRIVE (D). You may want to shift the
transmission to THIRD (3) or a lower gear under heavy
loads and/or hilly conditions.
When towing at high altitude on steep uphill grades,
consider the following: Engine coolant will boil at a lower
temperature than at normal altitudes. If you turn your
engine off immediately after towing at high altitude
on steep uphill grades, your vehicle may show signs
similar to engine overheating. To avoid this, let the
engine run while parked (preferably on level ground)
with the automatic transmission in PARK (P) for a
few minutes before turning the engine off. If you do
get the overheat warning, seeEngine Overheating
on page 5-25.
4-50