2006 CHEVROLET EPICA maintenance schedule
[x] Cancel search: maintenance schedulePage 1 of 368
Seats and Restraint Systems........................... 1-1
Front Seats
............................................... 1-2
Rear Seats
............................................... 1-8
Safety Belts
.............................................1-10
Child Restraints
.......................................1-28
Airbag System
.........................................1-50
Restraint System Check
............................1-63
Features and Controls..................................... 2-1
Keys
........................................................ 2-2
Doors and Locks
....................................... 2-7
Windows
.................................................2-12
Theft-Deterrent Systems
............................2-14
Starting and Operating Your Vehicle
...........2-17
Mirrors
....................................................2-31
Storage Areas
.........................................2-34
Sunroof
..................................................2-36
Instrument Panel............................................. 3-1
Instrument Panel Overview
.......................... 3-4
Climate Controls
......................................3-19
Warning Lights, Gages, and Indicators
........3-29
Audio System(s)
.......................................3-46Driving Your Vehicle....................................... 4-1
Your Driving, the Road, and Your Vehicle
..... 4-2
Towing
...................................................4-33
Service and Appearance Care.......................... 5-1
Service
..................................................... 5-3
Fuel
......................................................... 5-5
Checking Things Under the Hood
...............5-11
Headlamp Aiming
.....................................5-38
Bulb Replacement
....................................5-39
Windshield Wiper Blade Replacement
.........5-45
Tires
......................................................5-46
Appearance Care
.....................................5-68
Vehicle Identification
.................................5-75
Electrical System
......................................5-76
Capacities and Specifications
.....................5-83
Normal Maintenance Replacement Parts
......5-84
Maintenance Schedule..................................... 6-1
Maintenance Schedule
................................ 6-2
Customer Assistance and Information.............. 7-1
Customer Assistance and Information
........... 7-2
Reporting Safety Defects
...........................7-13
Index................................................................ 1
2006 Chevrolet Epica Owner ManualM
Page 149 of 368
Oil Pressure Light
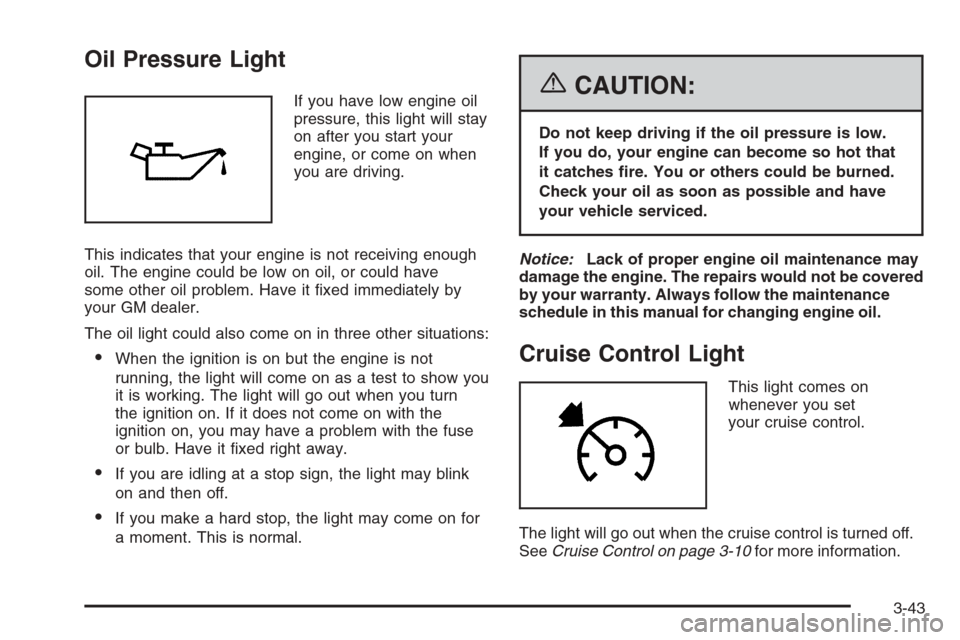
If you have low engine oil
pressure, this light will stay
on after you start your
engine, or come on when
you are driving.
This indicates that your engine is not receiving enough
oil. The engine could be low on oil, or could have
some other oil problem. Have it fixed immediately by
your GM dealer.
The oil light could also come on in three other situations:
•When the ignition is on but the engine is not
running, the light will come on as a test to show you
it is working. The light will go out when you turn
the ignition on. If it does not come on with the
ignition on, you may have a problem with the fuse
or bulb. Have it fixed right away.
•If you are idling at a stop sign, the light may blink
on and then off.
•If you make a hard stop, the light may come on for
a moment. This is normal.
{CAUTION:
Do not keep driving if the oil pressure is low.
If you do, your engine can become so hot that
it catches �re. You or others could be burned.
Check your oil as soon as possible and have
your vehicle serviced.
Notice:Lack of proper engine oil maintenance may
damage the engine. The repairs would not be covered
by your warranty. Always follow the maintenance
schedule in this manual for changing engine oil.
Cruise Control Light
This light comes on
whenever you set
your cruise control.
The light will go out when the cruise control is turned off.
SeeCruise Control on page 3-10for more information.
3-43
Page 240 of 368
When to Change Engine Oil
If any one of these is true for you, use the short trip/city
maintenance schedule:
•Most trips are less than 5 miles (8 km). This is
particularly important when outside temperatures
are below freezing.
•Most trips include extensive idling, such as frequent
driving in stop-and-go traffic.
•You frequently tow a trailer or use a carrier on top
of your vehicle.
•The vehicle is used for delivery service, police, taxi,
or other commercial application.
Driving under these conditions causes engine oil to
break down sooner. If any one of these is true for your
vehicle, then you need to change your oil and filter
every 3,000 miles (5 000 km) or 3 months — whichever
occurs first.
If none of them is true, use the long trip/highway
maintenance schedule. Change oil and filter every
7,500 miles (12 500 km) or 12 months — whichever
occurs first. Driving a vehicle with a fully warmed engine
under highway conditions will cause engine oil to
break down slower.
What to Do with Used Oil
Used engine oil contains certain elements that may be
unhealthy for your skin and could even cause cancer.
Do not let used oil stay on your skin for very long. Clean
your skin and nails with soap and water, or a good
hand cleaner. Wash or properly dispose of clothing or
rags containing used engine oil. See the manufacturer’s
warnings about the use and disposal of oil products.
Used oil can be a threat to the environment. If you
change your own oil, be sure to drain all the oil from
the filter before disposal. Never dispose of oil by putting
it in the trash, pouring it on the ground, into sewers,
or into streams or bodies of water. Instead, recycle it
by taking it to a place that collects used oil. If you
have a problem properly disposing of your used oil,
ask your dealer, a service station or a local recycling
center for help.
5-16
Page 242 of 368
How to Inspect the Engine
Air Cleaner/Filter
To inspect the engine air cleaner/filter, remove the filter
from the vehicle and lightly shake the filter to release
loose dust and dirt. If the filter remains caked with dirt,
a new filter is required.
To inspect or replace the filter, do the following:
1. Open the latches that hold the cover on.
2. Lift off the cover.
3. Inspect or replace the engine air cleaner/filter.
4. Put the cover back on tightly and close the latches.
SeePart A: Scheduled Maintenance Services on
page 6-4for replacement intervals.
{CAUTION:
Operating the engine with the air cleaner/�lter
off can cause you or others to be burned.
The air cleaner not only cleans the air; it
helps to stop �ames if the engine back�res.
If it is not there and the engine back�res,
you could be burned. Do not drive with it off,
and be careful working on the engine with
the air cleaner/�lter off.
Notice:If the air cleaner/�lter is off, a back�re can
cause a damaging engine �re. And, dirt can easily get
into your engine, which will damage it. Always have
the air cleaner/�lter in place when you are driving.
5-18
Page 255 of 368
Brakes
Brake Fluid
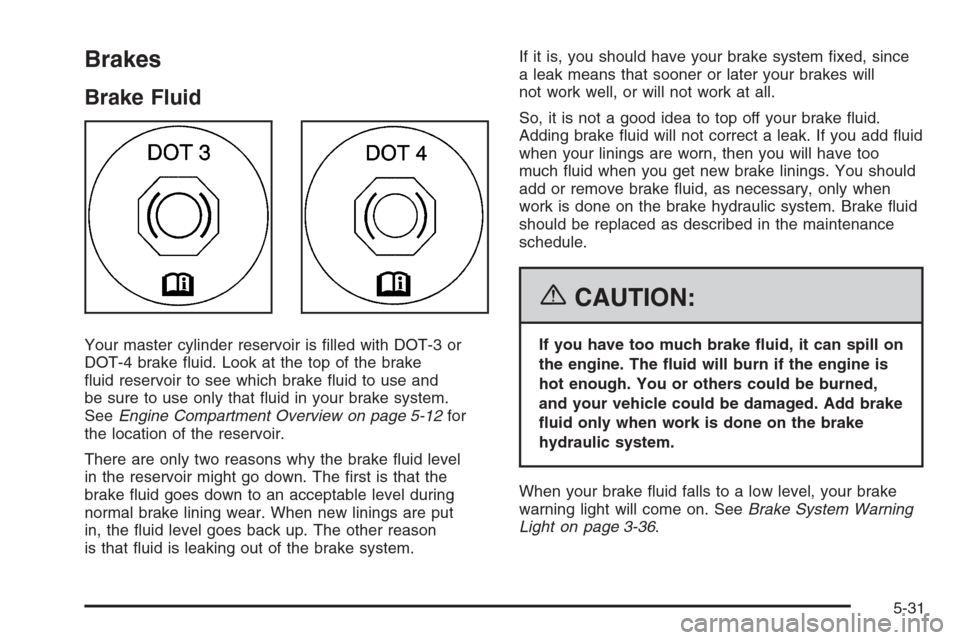
Your master cylinder reservoir is filled with DOT-3 or
DOT-4 brake fluid. Look at the top of the brake
fluid reservoir to see which brake fluid to use and
be sure to use only that fluid in your brake system.
SeeEngine Compartment Overview on page 5-12for
the location of the reservoir.
There are only two reasons why the brake fluid level
in the reservoir might go down. The first is that the
brake fluid goes down to an acceptable level during
normal brake lining wear. When new linings are put
in, the fluid level goes back up. The other reason
is that fluid is leaking out of the brake system.If it is, you should have your brake system fixed, since
a leak means that sooner or later your brakes will
not work well, or will not work at all.
So, it is not a good idea to top off your brake fluid.
Adding brake fluid will not correct a leak. If you add fluid
when your linings are worn, then you will have too
much fluid when you get new brake linings. You should
add or remove brake fluid, as necessary, only when
work is done on the brake hydraulic system. Brake fluid
should be replaced as described in the maintenance
schedule.
{CAUTION:
If you have too much brake �uid, it can spill on
the engine. The �uid will burn if the engine is
hot enough. You or others could be burned,
and your vehicle could be damaged. Add brake
�uid only when work is done on the brake
hydraulic system.
When your brake fluid falls to a low level, your brake
warning light will come on. SeeBrake System Warning
Light on page 3-36.
5-31
Page 277 of 368
How to Check
Use a good quality pocket-type gage to check tire
pressure. You cannot tell if your tires are properly
inflated simply by looking at them. Radial tires may look
properly inflated even when they are under-inflated.
Check the tire’s inflation pressure when the tires
are cold. Cold means your vehicle has been sitting
for at least three hours or driven no more than
1 mile (1.6 km).
Remove the valve cap from the tire valve stem. Press
the tire gage firmly onto the valve to get a pressure
measurement. If the cold tire inflation pressure matches
the recommended pressure on the Tire and Loading
Information label, no further adjustment is necessary.
If the inflation pressure is low, add air until you reach
the recommended amount.
If you overfill the tire, release air by pushing on the
metal stem in the center of the tire valve. Re-check
the tire pressure with the tire gage.
Be sure to put the valve caps back on the valve stems.
They help prevent leaks by keeping out dirt and
moisture.
Tire Inspection and Rotation
Tires should be rotated every 5,000 to 8,000 miles
(8 000 to 13 000 km).
Any time you notice unusual wear, rotate your tires as
soon as possible and check wheel alignment. Also
check for damaged tires or wheels. SeeWhen It Is Time
for New Tires on page 5-54andWheel Replacement
on page 5-58for more information.
The purpose of regular rotation is to achieve more
uniform wear for all tires on the vehicle. The first rotation
is the most important. SeePart A: Scheduled
Maintenance Services on page 6-4.
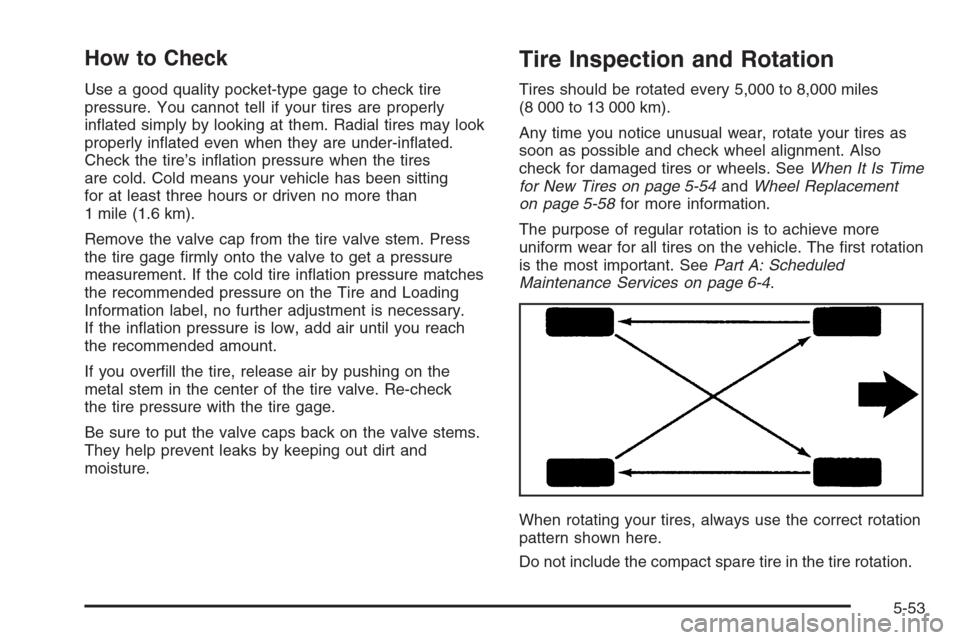
When rotating your tires, always use the correct rotation
pattern shown here.
Do not include the compact spare tire in the tire rotation.
5-53
Page 309 of 368
Maintenance Schedule......................................6-2
Introduction...................................................6-2
Maintenance Requirements..............................6-2
Your Vehicle and the Environment....................6-2
How This Section is Organized.........................6-3
Part A: Scheduled Maintenance Services...........6-4
Using the Maintenance Schedule......................6-4
Selecting the Right Schedule...........................6-5
Short Trip/City Scheduled Maintenance..............6-7
Long Trip/Highway Scheduled Maintenance......6-14
Part B: Owner Checks and Services................6-19
At Each Fuel Fill..........................................6-19
At Least Once a Month.................................6-19At Least Twice a Year...................................6-20
At Least Once a Year...................................6-20
Part C: Periodic Maintenance Inspections.........6-23
Steering, Suspension and Front Drive Axle
Boot and Seal Inspection............................6-23
Exhaust System Inspection............................6-23
Fuel System Inspection..................................6-24
Engine Cooling System Inspection...................6-24
Throttle System Inspection.............................6-24
Brake System Inspection................................6-24
Part D: Recommended Fluids and
Lubricants................................................6-25
Part E: Maintenance Record...........................6-27
Section 6 Maintenance Schedule
6-1
Page 310 of 368
Maintenance Schedule
Introduction
Important: Keep engine oil at the proper level and
change as recommended.
Have you purchased the GM Protection Plan? The Plan
supplements your new vehicle warranties. See your
Warranty and Owner Assistance booklet or your dealer
for details.
Maintenance Requirements
Maintenance intervals, checks, inspections and
recommended fluids and lubricants as prescribed in
this manual are necessary to keep your vehicle in good
working condition. Any damage caused by failure to
follow scheduled maintenance may not be covered
by warranty.
Your Vehicle and the Environment
Proper vehicle maintenance not only helps to keep your
vehicle in good working condition, but also helps the
environment. Improper vehicle maintenance can
even affect the quality of the air we breathe. Improper
fluid levels or the wrong tire inflation can increase
the level of emissions from your vehicle. To help protect
our environment, and to keep your vehicle in good
condition, be sure to maintain your vehicle properly.
6-2