2006 CHEVROLET COLORADO fuel cap
[x] Cancel search: fuel capPage 1 of 434

Seats and Restraint Systems........................... 1-1
Front Seats
............................................... 1-2
Rear Seats
..............................................1-10
Safety Belts
.............................................1-13
Child Restraints
.......................................1-35
Airbag System
.........................................1-66
Restraint System Check
............................1-81
Features and Controls..................................... 2-1
Keys
........................................................ 2-2
Doors and Locks
....................................... 2-7
Windows
.................................................2-12
Theft-Deterrent Systems
............................2-15
Starting and Operating Your Vehicle
...........2-17
Mirrors
....................................................2-36
OnStar
®System
......................................2-41
Storage Areas
.........................................2-42
Sunroof
..................................................2-45
Instrument Panel............................................. 3-1
Instrument Panel Overview
.......................... 3-4
Climate Controls
......................................3-19
Warning Lights, Gages, and Indicators
........3-22
Driver Information Center (DIC)
..................3-38
Audio System(s)
.......................................3-45Driving Your Vehicle....................................... 4-1
Your Driving, the Road, and Your Vehicle
..... 4-2
Towing
...................................................4-50
Service and Appearance Care.......................... 5-1
Service
..................................................... 5-3
Fuel
......................................................... 5-5
Checking Things Under the Hood
...............5-10
Rear Axle
...............................................5-44
Four-Wheel Drive
.....................................5-44
Front Axle
...............................................5-45
Bulb Replacement
....................................5-46
Windshield Wiper Blade Replacement
.........5-50
Tires
......................................................5-52
Appearance Care
.....................................5-89
Vehicle Identi�cation
.................................5-97
Electrical System
......................................5-98
Capacities and Speci�cations
...................5-103
Maintenance Schedule..................................... 6-1
Maintenance Schedule
................................ 6-2
Customer Assistance and Information.............. 7-1
Customer Assistance and Information
........... 7-2
Reporting Safety Defects
...........................7-14
Index................................................................ 1
2006 Chevrolet Colorado Owner ManualM
Page 168 of 434

If the Light Is On Steady
You may be able to correct the emission system
malfunction by considering the following:
Did you recently put fuel into your vehicle?
If so, reinstall the fuel cap, making sure to fully install
the cap. SeeFilling the Tank on page 5-8. The
diagnostic system can determine if the fuel cap has
been left off or improperly installed. A loose or missing
fuel cap will allow fuel to evaporate into the atmosphere.
A few driving trips with the cap properly installed
should turn the light off.
Did you just drive through a deep puddle of water?
If so, your electrical system may be wet. The condition
will usually be corrected when the electrical system
dries out. A few driving trips should turn the light off.
Have you recently changed brands of fuel?
If so, be sure to fuel your vehicle with quality fuel. See
Gasoline Octane on page 5-5. Poor fuel quality will
cause your engine not to run as efficiently as designed.
You may notice this as stalling after start-up, stalling
when you put the vehicle into gear, mis�ring, hesitation
on acceleration, or stumbling on acceleration. (These
conditions may go away once the engine is warmed up.)
This will be detected by the system and cause the
light to turn on.If you experience one or more of these conditions,
change the fuel brand you use. It will require at least
one full tank of the proper fuel to turn the light off.
If none of the above steps have made the light turn off,
your dealer can check the vehicle. Your dealer has
the proper test equipment and diagnostic tools to
�x any mechanical or electrical problems that may
have developed.
Emissions Inspection and
Maintenance Programs
Some state/provincial and local governments have or
may begin programs to inspect the emission control
equipment on your vehicle. Failure to pass this inspection
could prevent you from getting a vehicle registration.
Here are some things you need to know to help your
vehicle pass an inspection:
Your vehicle will not pass this inspection if the check
engine light is on or not working properly.
Your vehicle will not pass this inspection if the
OBD (on-board diagnostic) system determines that
critical emission control systems have not been
completely diagnosed by the system. The vehicle
would be considered not ready for inspection.
This can happen if you have recently replaced
your battery or if your battery has run down.
3-34
Page 171 of 434

Daytime Running Lamps (DRL)
Indicator Light
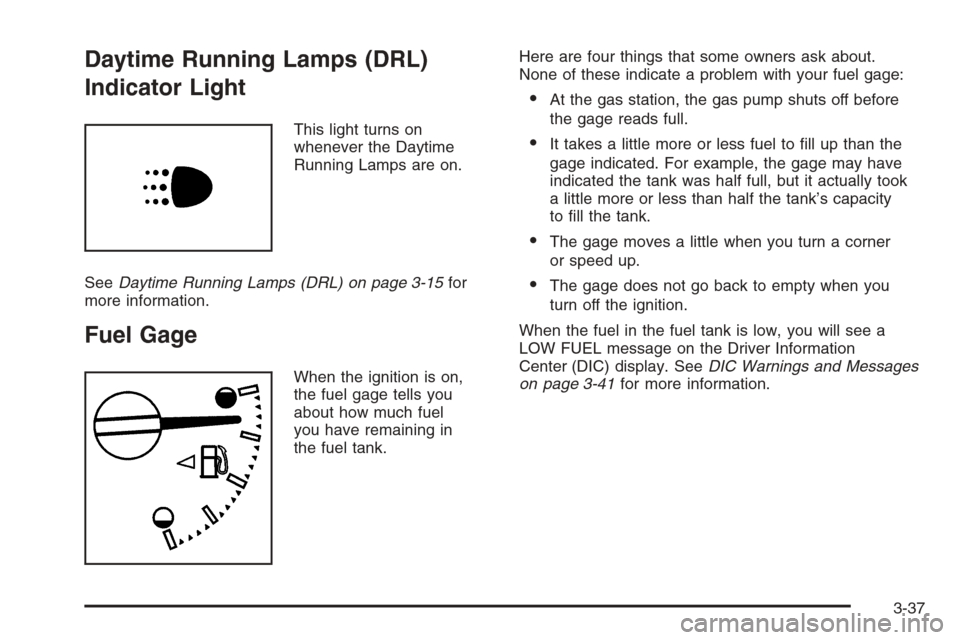
This light turns on
whenever the Daytime
Running Lamps are on.
SeeDaytime Running Lamps (DRL) on page 3-15for
more information.
Fuel Gage
When the ignition is on,
the fuel gage tells you
about how much fuel
you have remaining in
the fuel tank.Here are four things that some owners ask about.
None of these indicate a problem with your fuel gage:
At the gas station, the gas pump shuts off before
the gage reads full.
It takes a little more or less fuel to �ll up than the
gage indicated. For example, the gage may have
indicated the tank was half full, but it actually took
a little more or less than half the tank’s capacity
to �ll the tank.
The gage moves a little when you turn a corner
or speed up.
The gage does not go back to empty when you
turn off the ignition.
When the fuel in the fuel tank is low, you will see a
LOW FUEL message on the Driver Information
Center (DIC) display. SeeDIC Warnings and Messages
on page 3-41for more information.
3-37
Page 177 of 434

ENG (Engine) HOT
This message will be displayed when your engine
coolant temperature is hot. Check your engine coolant
temperature gage. SeeEngine Coolant Temperature
Gage on page 3-32for more information. You should
have your vehicle serviced by your GM dealer as soon
as possible if you suspect your engine is overheating.
SeeEngine Overheating on page 5-27for more
information.
FLUID
This message will be displayed if your brake �uid is low.
Check the brake �uid as soon as possible and have
your vehicle serviced by your GM dealer. SeeBrakes
on page 5-35for more information. Press the reset stem
to acknowledge the message and clear it from the
DIC display.
FUEL CAP
This message will be displayed if your vehicle’s fuel cap
is either off or loose. You should pull over and check
to see if your vehicle’s fuel cap is secure as soon
as possible. You may also see the check engine light
on the instrument panel cluster. SeeMalfunction
Indicator Lamp on page 3-32for more information.
Press the reset stem to acknowledge the message
and clear it from the display.
LOW FUEL
This message will be displayed if the level of fuel in
your vehicle is low. You should also check your
fuel gage. SeeFuel Gage on page 3-37for more
information. You should �ll your vehicle’s tank as
soon as possible.
LOW TRAC (Traction)
If you have the Traction Control System (TCS), you
will see this message when a low traction condition
is detected. SeeTraction Control System (TCS)
on page 4-9for more information. Press and release
the reset stem to acknowledge the message and clear
it from the DIC display.
OIL
This message will be displayed when your oil pressure
is low. SeeOil Pressure Light on page 3-35and
Engine Oil on page 5-13for more information.
PARK BRK (Brake)
This message will be displayed when the parking
brake is set. SeeParking Brake on page 2-30and
Brake System Warning Light on page 3-30for more
information. The message will clear from the display
after the parking brake is released or by pressing
and releasing the reset stem.
3-43
Page 259 of 434

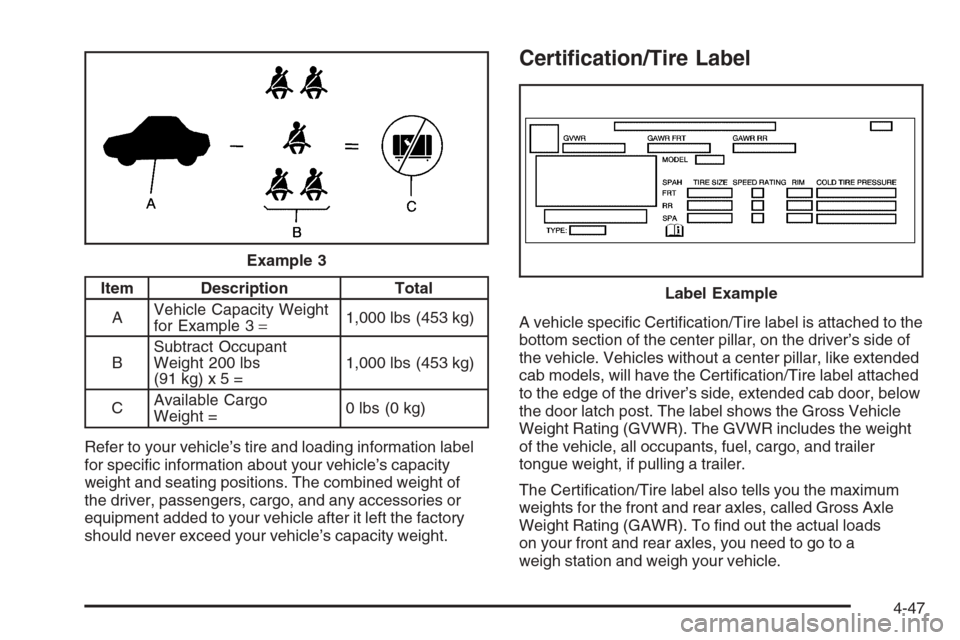
Item Description Total
AVehicle Capacity Weight
for Example 3=1,000 lbs (453 kg)
BSubtract Occupant
Weight 200 lbs
(91 kg) x 5 =1,000 lbs (453 kg)
CAvailable Cargo
Weight =0 lbs (0 kg)
Refer to your vehicle’s tire and loading information label
for speci�c information about your vehicle’s capacity
weight and seating positions. The combined weight of
the driver, passengers, cargo, and any accessories or
equipment added to your vehicle after it left the factory
should never exceed your vehicle’s capacity weight.
Certi�cation/Tire Label
A vehicle speci�c Certi�cation/Tire label is attached to the
bottom section of the center pillar, on the driver’s side of
the vehicle. Vehicles without a center pillar, like extended
cab models, will have the Certi�cation/Tire label attached
to the edge of the driver’s side, extended cab door, below
the door latch post. The label shows the Gross Vehicle
Weight Rating (GVWR). The GVWR includes the weight
of the vehicle, all occupants, fuel, cargo, and trailer
tongue weight, if pulling a trailer.
The Certi�cation/Tire label also tells you the maximum
weights for the front and rear axles, called Gross Axle
Weight Rating (GAWR). To �nd out the actual loads
on your front and rear axles, you need to go to a
weigh station and weigh your vehicle. Example 3
Label Example
4-47
Page 268 of 434

6. Release the parking brake only after the vehicle
being towed is �rmly attached to the tow vehicle.
7. Turn the ignition to LOCK.
If the tow vehicle will not be started or driven for
six weeks or more, remove the battery cable from the
negative terminal (post) of the battery to prevent your
battery from draining while towing.
After towing, see “Shifting Out of NEUTRAL” under
Four-Wheel Drive on page 2-26.
Towing a Trailer
{CAUTION:
If you do not use the correct equipment and
drive properly, you can lose control when you
pull a trailer. For example, if the trailer is too
heavy, the brakes may not work well — or even
at all. You and your passengers could be
seriously injured. Pull a trailer only if you have
followed all the steps in this section. Ask your
dealer for advice and information about towing
a trailer with your vehicle.Notice:Pulling a trailer improperly can damage
your vehicle and result in costly repairs that would
not be covered by your warranty. Always follow
the instructions in this section and check with your
dealer for more information about towing a trailer
with your vehicle.
To identify the trailering capacity of your vehicle, you
should read the information in “Weight of the Trailer” that
appears later in this section.
Trailering is different than just driving your vehicle by
itself. Trailering means changes in handling, acceleration,
braking, durability and fuel economy. Successful, safe
trailering takes correct equipment, and it has to be used
properly.
That’s the reason for this part. In it are many time-tested,
important trailering tips and safety rules. Many of these
are important for your safety and that of your passengers.
So please read this section carefully before you pull a
trailer.
4-56
Page 283 of 434

Service............................................................5-3
Accessories and Modi�cations..........................5-3
California Proposition 65 Warning.....................5-3
Doing Your Own Service Work.........................5-4
Adding Equipment to the Outside
of Your Vehicle...........................................5-5
Fuel................................................................5-5
Gasoline Octane............................................5-5
Gasoline Speci�cations....................................5-5
California Fuel...............................................5-6
Additives.......................................................5-6
Fuels in Foreign Countries...............................5-7
Filling the Tank..............................................5-8
Filling a Portable Fuel Container.....................5-10
Checking Things Under the Hood....................5-10
Hood Release..............................................5-11
Engine Compartment Overview.......................5-12
Engine Oil...................................................5-13
Engine Oil Life System..................................5-16
Engine Air Cleaner/Filter................................5-18
Automatic Transmission Fluid.........................5-19
Manual Transmission Fluid.............................5-22
Hydraulic Clutch...........................................5-23
Engine Coolant.............................................5-24Radiator Pressure Cap..................................5-26
Engine Overheating.......................................5-27
Cooling System............................................5-28
Engine Fan Noise.........................................5-33
Power Steering Fluid.....................................5-33
Windshield Washer Fluid................................5-34
Brakes........................................................5-35
Battery........................................................5-39
Jump Starting...............................................5-40
Rear Axle.......................................................5-44
Four-Wheel Drive............................................5-44
Front Axle......................................................5-45
Bulb Replacement..........................................5-46
Halogen Bulbs..............................................5-46
Headlamps..................................................5-47
Front Turn Signal, Parking and Daytime
Running Lamps (DRL)................................5-48
Center High-Mounted Stoplamp (CHMSL).........5-48
Taillamps, Turn Signal, Stoplamps and
Back-up Lamps.........................................5-49
Replacement Bulbs.......................................5-50
Windshield Wiper Blade Replacement..............5-50
Section 5 Service and Appearance Care
5-1
Page 290 of 434

Filling the Tank
{CAUTION:
Fuel vapor burns violently and a fuel �re can
cause bad injuries. To help avoid injuries to you
and others, read and follow all the instructions
on the pump island. Turn off your engine when
you are refueling. Do not smoke if you are near
fuel or refueling your vehicle. Keep sparks,
�ames, and smoking materials away from fuel.
Do not leave the fuel pump unattended when
refueling your vehicle — this is against the law
in some places. Keep children away from the
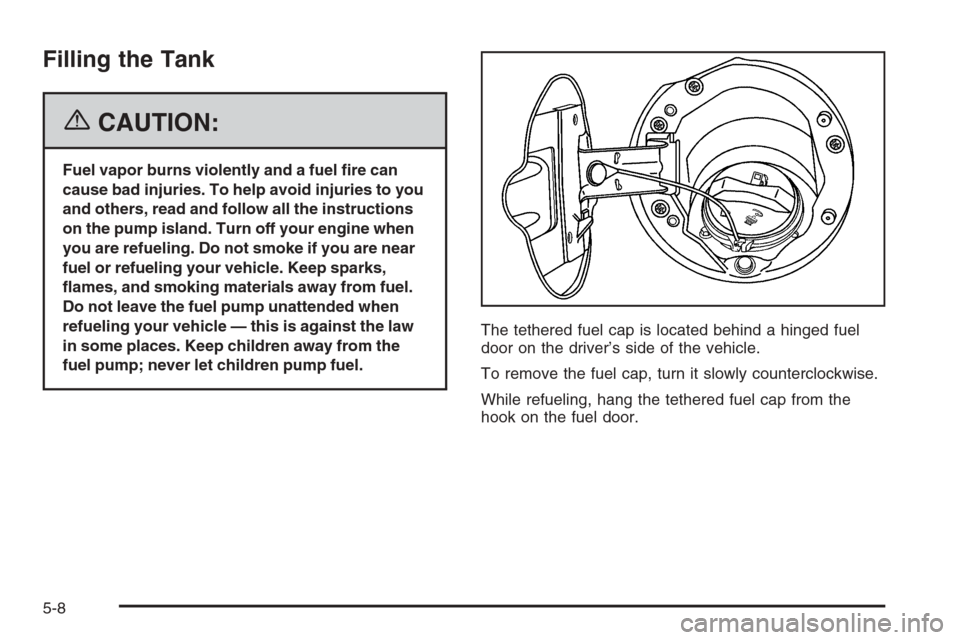
fuel pump; never let children pump fuel.The tethered fuel cap is located behind a hinged fuel
door on the driver’s side of the vehicle.
To remove the fuel cap, turn it slowly counterclockwise.
While refueling, hang the tethered fuel cap from the
hook on the fuel door.
5-8