2006 CHEVROLET COLORADO automatic transmission
[x] Cancel search: automatic transmissionPage 138 of 434
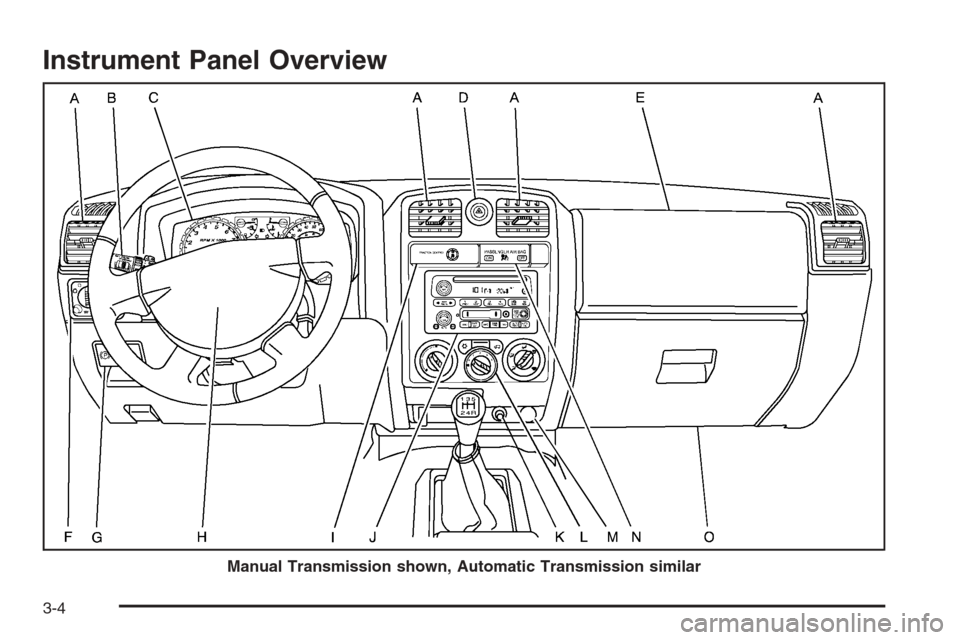
Instrument Panel Overview
Manual Transmission shown, Automatic Transmission similar
3-4
Page 149 of 434

Headlamps on Reminder
If a door is open, a reminder chime will sound when
your headlamps or parking lamps are manually turned
on and your key is out of the ignition. To turn off
the chime, turn the headlamp switch to off and then
back on. In the automatic mode, the headlamps turn off
once the ignition is in LOCK.
If your vehicle was �rst sold in Canada and the parking
lamps are turned on manually, the DRL will stay on.
Daytime Running Lamps (DRL)
Daytime Running Lamps (DRL) can make it easier for
others to see the front of your vehicle during the day. DRL
can be helpful in many different driving conditions, but
they can be especially helpful in the short periods after
dawn and before sunset. Fully functional daytime running
lamps are required on all vehicles �rst sold in Canada.
The DRL system will come on when the following
conditions are met:
The ignition is on.
The exterior lamps control is in AUTO.
The transmission is not in PARK (P) if you have
an automatic transmission.
The light sensor determines it is daytime.Your vehicle will have either the parking lamps or
reduced intensity low beams used as the DRL.
When the DRL are on, only those lamps will be on.
The taillamps, sidemarkers, and other lamps will not
be on. The instrument panel will not be lit up either.
When it begins to get dark, the headlamps will
automatically switch from DRL to the regular headlamps.
As with any vehicle, you should turn on the regular
headlamp system when you need it.
Automatic Headlamp System
When it is dark enough outside, your automatic
headlamp system will turn on your headlamps at the
normal brightness along with other lamps such as
the taillamps, sidemarker, parking lamps, roof marker
lamps and the instrument panel lights. The radio
lights will become more dim when the headlights are
off compared to when the headlights are on.
Your vehicle has a light sensor located on the top of
the instrument panel. Be sure it is not covered, or
the system will be on whenever the ignition is on.
The system may also turn on your headlamps when
driving through a parking garage, heavy overcast
weather or a tunnel. This is normal.
3-15
Page 157 of 434
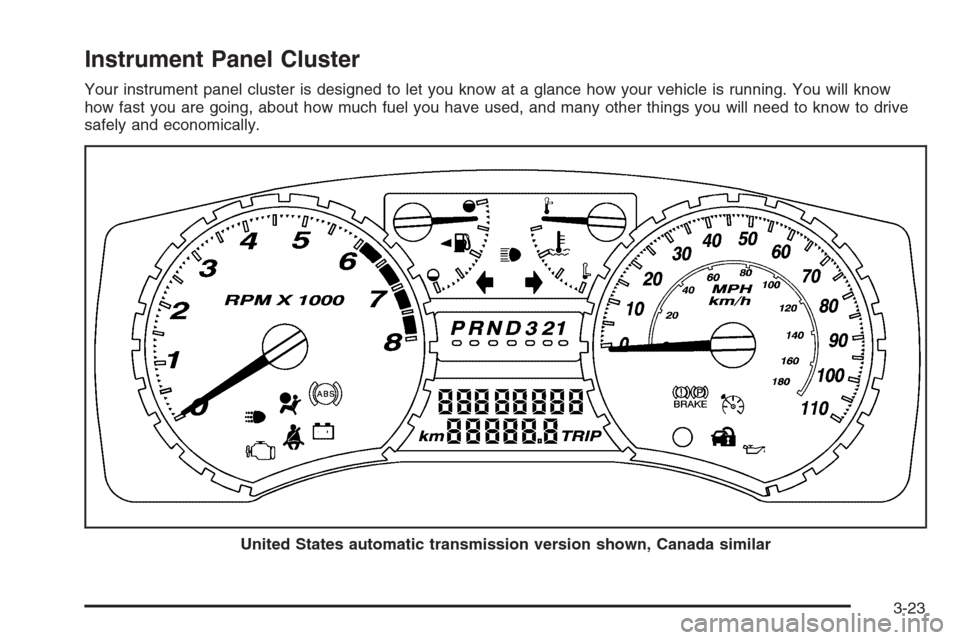
Instrument Panel Cluster
Your instrument panel cluster is designed to let you know at a glance how your vehicle is running. You will know
how fast you are going, about how much fuel you have used, and many other things you will need to know to drive
safely and economically.
United States automatic transmission version shown, Canada similar
3-23
Page 173 of 434
In addition to the engine oil life system monitoring the
oil life, additional maintenance is recommended in
the Maintenance Schedule in this manual. SeeEngine
Oil on page 5-13andScheduled Maintenance on
page 6-4for more information.
Language
This feature allows you to choose the language in
which the DIC display will show information.
To set your choice for this feature, perform the
following steps:
1. With the engine off, turn the key to ON.
2. Close all doors and make sure that the DOORS
message is not displayed in the DIC.
3. Press and release the reset stem until the language
is shown on the DIC display.
4. To view the next available language, press and
hold the reset stem for approximately two seconds.
Release the reset stem and press and hold
again to view each language. You can choose
from English (default), Spanish, or French.
5. Once the desired language is shown on the
DIC display, brie�y press the reset stem to set
your choice.
Automatic Door Locks
This feature allows you to program your door locks to
a preferred setting.
To set your choice for this feature, perform the
following steps:
1. With the engine off, turn the key to LOCK.
Do not remove the key from the ignition.
2. Press and hold the power door lock button for
approximately three seconds until the DIC
display shows the current door lock mode.
3. To view the next available mode, press and hold
the reset stem for approximately two seconds.
Release the reset stem and press and hold again
to view each mode.
4. Once the desired mode is shown on the DIC
display, brie�y press the reset stem to set your
choice. The DIC display will then clear.
The following are the available modes:
Lock 1 (default):On vehicles with an automatic
transmission, this mode locks all of the doors when the
vehicle is shifted out of PARK (P) and unlocks all of
the doors when the vehicle is shifted into PARK (P).
3-39
Page 174 of 434
On vehicles with a manual transmission, this mode
locks all of the doors when the vehicle speed is greater
than 15 mph (24 km/h) and unlocks all of the doors
when the key is removed from the ignition.
Lock 2:On vehicles with an automatic transmission,
this mode locks all of the doors when the vehicle
is shifted out of PARK (P) and unlocks the driver’s door
when the vehicle is shifted into PARK (P).
On vehicles with a manual transmission, this mode
locks all of the doors when the vehicle speed is greater
than 15 mph (24 km/h) and unlocks the driver’s door
when the key is removed from the ignition.
Lock 3:On vehicles with an automatic transmission,
this mode locks all of the doors when the vehicle
is shifted out of PARK (P). The doors will not
automatically unlock.
On vehicles with a manual transmission, this mode
locks all of the doors when the vehicle speed is
greater than 15 mph (24 km/h). The doors will not
automatically unlock.Remote Keyless Entry Feedback
This feature allows you to program your remote keyless
entry feedback to a preferred setting.
To set your choice for this feature, perform the
following steps:
1. With the engine off, turn the key to LOCK.
Do not remove the key from the ignition.
2. Press and hold the lock and unlock buttons on the
remote keyless entry transmitter at the same time.
Hold both buttons until the DIC display shows
the current remote keyless entry feedback mode.
3. To view the next available mode, press and hold
the reset stem for approximately two seconds.
Release the reset stem and press and hold again
to view each mode.
4. Once the desired mode is shown on the DIC
display, brie�y press the reset stem to set your
choice. The DIC display will then clear.
3-40
Page 221 of 434
Traction Control System (TCS)
Your vehicle may have a Traction Control System (TCS)
that limits wheel spin. This is especially useful in slippery
road conditions. The system operates only if it senses
that one or both of the rear wheels are spinning or
beginning to lose traction. When this happens, the
system reduces engine power and may also upshift the
transmission to limit wheel spin.
You may feel or hear the system working, but this
is normal.
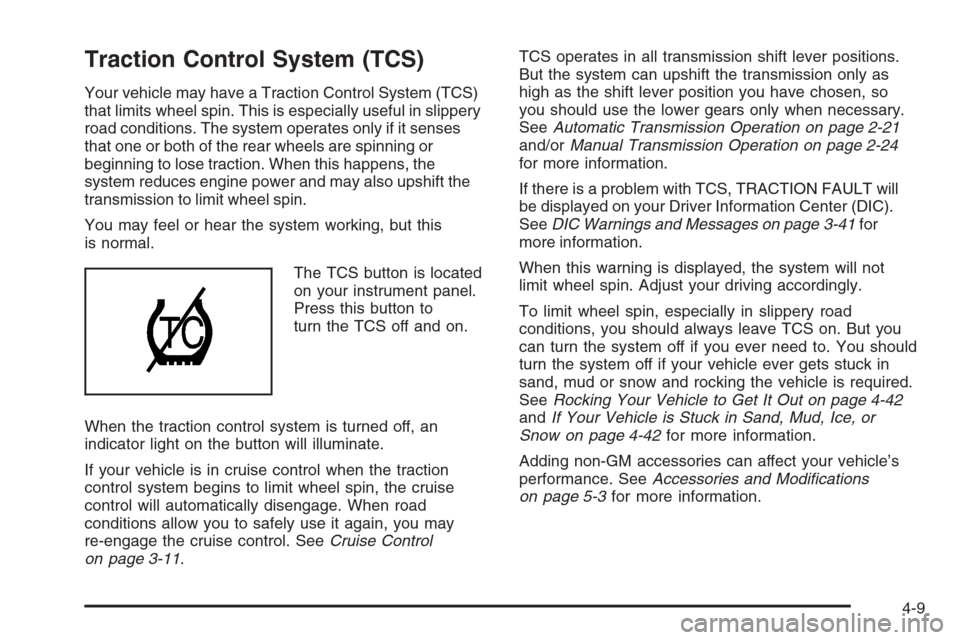
The TCS button is located
on your instrument panel.
Press this button to
turn the TCS off and on.
When the traction control system is turned off, an
indicator light on the button will illuminate.
If your vehicle is in cruise control when the traction
control system begins to limit wheel spin, the cruise
control will automatically disengage. When road
conditions allow you to safely use it again, you may
re-engage the cruise control. SeeCruise Control
on page 3-11.TCS operates in all transmission shift lever positions.
But the system can upshift the transmission only as
high as the shift lever position you have chosen, so
you should use the lower gears only when necessary.
SeeAutomatic Transmission Operation on page 2-21
and/orManual Transmission Operation on page 2-24
for more information.
If there is a problem with TCS, TRACTION FAULT will
be displayed on your Driver Information Center (DIC).
SeeDIC Warnings and Messages on page 3-41for
more information.
When this warning is displayed, the system will not
limit wheel spin. Adjust your driving accordingly.
To limit wheel spin, especially in slippery road
conditions, you should always leave TCS on. But you
can turn the system off if you ever need to. You should
turn the system off if your vehicle ever gets stuck in
sand, mud or snow and rocking the vehicle is required.
SeeRocking Your Vehicle to Get It Out on page 4-42
andIf Your Vehicle is Stuck in Sand, Mud, Ice, or
Snow on page 4-42for more information.
Adding non-GM accessories can affect your vehicle’s
performance. SeeAccessories and Modi�cations
on page 5-3for more information.
4-9
Page 235 of 434
Q:Suppose, after stalling, I try to back down
the hill and decide I just cannot do it.
What should I do?
A:Set the parking brake, put the automatic
transmission in PARK (P), or the manual
transmission in FIRST (1), and turn off the engine.
Leave the vehicle and go get some help. Exit
on the uphill side and stay clear of the path the
vehicle would take if it rolled downhill.
Driving Downhill
When off-roading takes you downhill, you will want to
consider a number of things:
How steep is the downhill? Will I be able to maintain
vehicle control?
What is the surface like? Smooth? Rough?
Slippery? Hard-packed dirt? Gravel?
Are there hidden surface obstacles? Ruts? Logs?
Boulders?
What is at the bottom of the hill? Is there a hidden
creek bank or even a river bottom with large rocks?
If you decide you can go down a hill safely, then try to
keep your vehicle headed straight down, and use a
low gear. This way, engine drag can help the brakes and
they will not have to do all the work. Descend slowly,
keeping your vehicle under control at all times.
{CAUTION:
Heavy braking when going down a hill can
cause your brakes to overheat and fade. This
could cause loss of control and a serious
accident. Apply the brakes lightly when
descending a hill and use a low gear to keep
vehicle speed under control.
Q:Are there some things I should not do when
driving down a hill?
A:Yes! These are important because if you ignore
them you could lose control and have a serious
accident.
When driving downhill, avoid turns that take you
across the incline of the hill. A hill that is not too
steep to drive down may be too steep to drive
across. You could roll over if you do not drive
straight down.
Never go downhill with the transmission in
NEUTRAL (N), or with the clutch pedal pressed
down with a manual transmission. This is called
“free-wheeling.” The brakes will have to do all
the work and could overheat and fade.
4-23
Page 263 of 434
Four-Wheel Drive Vehicles
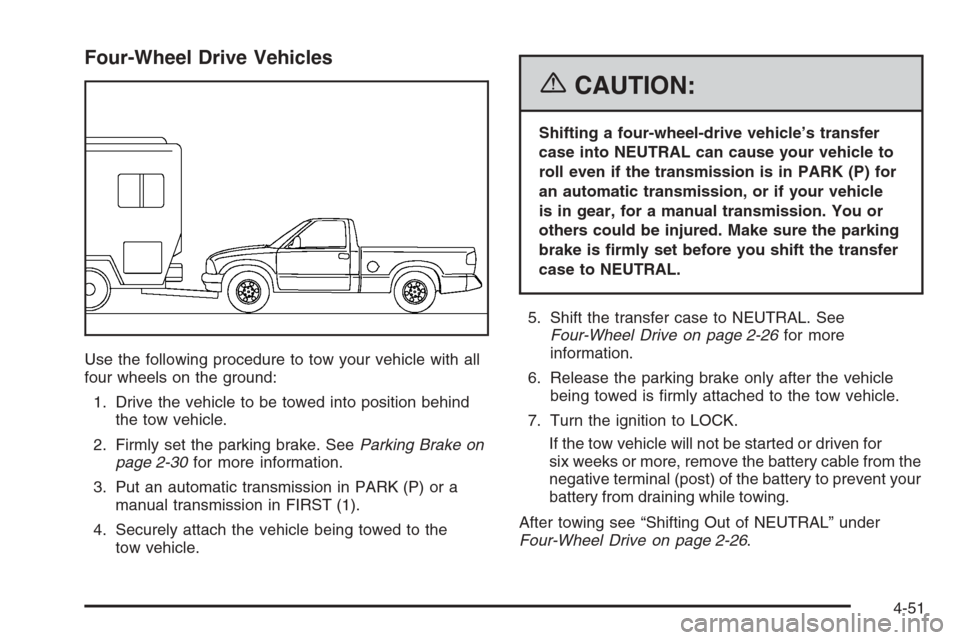
Use the following procedure to tow your vehicle with all
four wheels on the ground:
1. Drive the vehicle to be towed into position behind
the tow vehicle.
2. Firmly set the parking brake. SeeParking Brake on
page 2-30for more information.
3. Put an automatic transmission in PARK (P) or a
manual transmission in FIRST (1).
4. Securely attach the vehicle being towed to the
tow vehicle.
{CAUTION:
Shifting a four-wheel-drive vehicle’s transfer
case into NEUTRAL can cause your vehicle to
roll even if the transmission is in PARK (P) for
an automatic transmission, or if your vehicle
is in gear, for a manual transmission. You or
others could be injured. Make sure the parking
brake is �rmly set before you shift the transfer
case to NEUTRAL.
5. Shift the transfer case to NEUTRAL. See
Four-Wheel Drive on page 2-26for more
information.
6. Release the parking brake only after the vehicle
being towed is �rmly attached to the tow vehicle.
7. Turn the ignition to LOCK.
If the tow vehicle will not be started or driven for
six weeks or more, remove the battery cable from the
negative terminal (post) of the battery to prevent your
battery from draining while towing.
After towing see “Shifting Out of NEUTRAL” under
Four-Wheel Drive on page 2-26.
4-51