Page 258 of 390

Engine Coolant
The cooling system in your vehicle is �lled with
DEX-COOL®engine coolant. This coolant is designed to
remain in your vehicle for �ve years or 150,000 miles
(240 000 km), whichever occurs �rst, if you add only
DEX-COOL
®extended life coolant.
The following explains your cooling system and how to
add coolant when it is low. If you have a problem with
engine overheating, seeEngine Overheating on
page 5-29.A 50/50 mixture of clean, drinkable water and
DEX-COOL
®coolant will:
Give freezing protection down to−34°F (−37°C).
Give boiling protection up to 265°F (129°C).
Protect against rust and corrosion.
Help keep the proper engine temperature.
Let the warning lights and gages work as they
should.
Notice:Using coolant other than DEX-COOL
®may
cause premature engine, heater core, or radiator
corrosion. In addition, the engine coolant may
require changing sooner, at the �rst maintenance
service after each 30,000 miles (50 000 km) or
24 months, whichever occurs �rst. Any repairs
would not be covered by your warranty. Always use
DEX-COOL
®(silicate-free) coolant in your vehicle.
5-24
Page 259 of 390

What to Use
Use a mixture of one-half clean, drinkable water and
one-half DEX-COOL®coolant which will not damage
aluminum parts. If you use this coolant mixture, you do
not need to add anything else.
{CAUTION:
Adding only plain water to your cooling
system can be dangerous. Plain water, or
some other liquid such as alcohol, can boil
before the proper coolant mixture will. Your
vehicle’s coolant warning system is set for the
proper coolant mixture. With plain water or the
wrong mixture, your engine could get too hot
but you would not get the overheat warning.
Your engine could catch �re and you or others
could be burned. Use a 50/50 mixture of clean,
drinkable water and DEX-COOL
®coolant.
Notice:If you use an improper coolant mixture,
your engine could overheat and be badly damaged.
The repair cost would not be covered by your
warranty. Too much water in the mixture can freeze
and crack the engine, radiator, heater core, and
other parts.If you have to add coolant more than four times a year,
have your dealer check your cooling system.
Notice:If you use extra inhibitors and/or additives
in your vehicle’s cooling system, you could damage
your vehicle. Use only the proper mixture of the
engine coolant listed in this manual for the cooling
system. SeeRecommended Fluids and Lubricants on
page 6-12for more information.
Checking Coolant
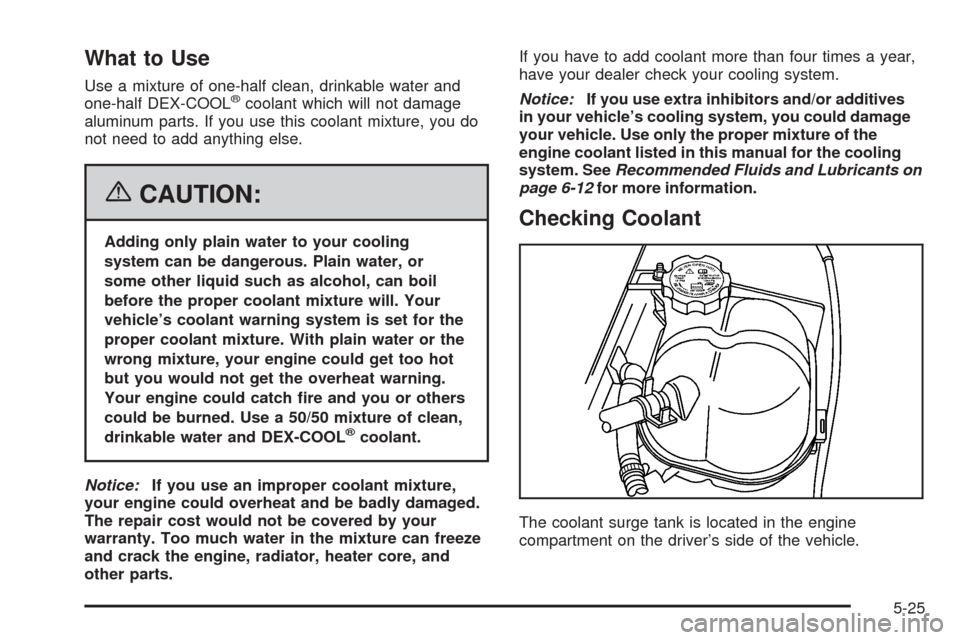
The coolant surge tank is located in the engine
compartment on the driver’s side of the vehicle.
5-25
Page 260 of 390

SeeEngine Compartment Overview on page 5-12
for more information on location.
{CAUTION:
Turning the surge tank pressure cap when the
engine and radiator are hot can allow steam
and scalding liquids to blow out and burn you
badly. Never turn the surge tank pressure
cap — even a little — when the engine and
radiator are hot.
The vehicle must be on a level surface. When your
engine is cold, the coolant level should be at the
COLD FILL line.
Adding Coolant
If you need more coolant, add the proper DEX-COOL®
coolant mixture at the coolant surge tank, but only
when the engine is cool. If the coolant surge tank is
empty, a special �ll procedure is necessary. SeeEngine
Overheating on page 5-29for instructions on “How to
Add Coolant to the Coolant Surge Tank.”
{CAUTION:
You can be burned if you spill coolant on hot
engine parts. Coolant contains ethylene glycol,
and it will burn if the engine parts are hot
enough. Do not spill coolant on a hot engine.
When replacing the pressure cap, make sure it is
hand-tight and fully seated.
5-26
Page 266 of 390
A. Electric Engine Cooling Fans
B. Intercooler System Pressure Cap
C. Coolant Surge Tank and Pressure Cap
{CAUTION:
An electric engine cooling fan under the hood
can start up even when the engine is not
running and can injure you. Keep hands,
clothing and tools away from any underhood
electric fan.
If the coolant inside the coolant surge tank is boiling, do
not do anything else until it cools down. The vehicle
should be parked on a level surface.
The coolant level should be at the COLD FILL line. If it
is not, you may have a leak at the pressure cap or
in the radiator hoses, heater hoses, radiator, water
pump, or somewhere in the cooling system. 2.0L L4 Supercharged Engine
5-32
Page 267 of 390

{CAUTION:
Heater and radiator hoses, and other engine
parts, can be very hot. Do not touch them. If
you do, you can be burned.
Do not run the engine if there is a leak. If you
run the engine, it could lose all coolant. That
could cause an engine �re, and you could be
burned. Get any leak �xed before you drive the
vehicle.
If your vehicle is equipped with the 2.2L or 2.4L L4
engine and there seems to be no leak, with the engine
on, check to see if the electric engine cooling fan is
running. If the engine is overheating, the fan should be
running. If it is not, your vehicle needs service.If your vehicle is equipped with the 2.0L L4 Supercharged
engine and there seems to be no leak, with the engine
on, check to see if the electric engine cooling fans are
running. If the engine is overheating, the fans should be
running. If they are not, your vehicle needs service.
Notice:Engine damage from running your engine
without coolant is not covered by your warranty.
Notice:Using coolant other than DEX-COOL
®may
cause premature engine, heater core or radiator
corrosion. In addition, the engine coolant may
require changing sooner, at 30,000 miles (50 000 km)
or 24 months, whichever occurs �rst. Any repairs
would not be covered by your warranty. Always use
DEX-COOL
®(silicate-free) coolant in your vehicle.
5-33
Page 269 of 390

{CAUTION:
Adding only plain water to your cooling
system can be dangerous. Plain water, or
some other liquid such as alcohol, can boil
before the proper coolant mixture will. Your
vehicle’s coolant warning system is set for the
proper coolant mixture. With plain water or the
wrong mixture, your engine could get too hot
but you would not get the overheat warning.
Your engine could catch �re and you or others
could be burned. Use a 50/50 mixture of clean,
drinkable water and DEX-COOL
®coolant.
Notice:In cold weather, water can freeze and crack
the engine, radiator, heater core and other parts.
Use the recommended coolant and the proper
coolant mixture.
{CAUTION:
You can be burned if you spill coolant on hot
engine parts. Coolant contains ethylene glycol
and it will burn if the engine parts are hot
enough. Do not spill coolant on a hot engine.
1. You can remove the coolant surge tank pressure
cap when the cooling system, including the coolant
surge tank pressure cap and upper radiator
hose, is no longer hot. Turn the pressure cap slowly
counterclockwise about two or two and one-half
turns. If you hear a hiss, wait for that to stop. This
will allow any pressure still left to be vented out
the discharge hose.
2. Then keep turning the
pressure cap slowly,
and remove it.
5-35
Page 270 of 390

3. Fill the coolant surge tank with the proper mixture,
to the COLD FILL line on the tank. Wait about
�ve minutes, then check to see if the level is below
the COLD FILL line. If the level is below the line,
add additional coolant to bring the level up to
the line. Repeat this procedure until the level
remains constant at the COLD FILL line for at least
�ve minutes.4. With the coolant surge tank pressure cap off, start
the engine and let it run until you can feel the upper
radiator hose getting hot. Watch out for the
engine cooling fan.
By this time, the coolant level inside the coolant
surge tank may be lower. If the level is lower than
the COLD FILL line, add more of the proper mixture
to the coolant surge tank until the level reaches
the COLD FILL line.
5. Then replace the pressure cap. Be sure the
pressure cap is hand-tight and fully seated.
See your dealer, if necessary.
2.0L L4 Supercharged Engine
If no coolant is visible in the coolant surge tank, you will
need to either see your dealer or refer to the Dealer
Service Manual for a special coolant service �ll procedure
to ensure enough coolant is added. To purchase a
service manual, seeService Publications Ordering
Information on page 7-14.
5-36
Page 285 of 390

5. Pull the headlamp assembly up on an angle and
towards the radiator to remove it.
6. Disconnect the bulb base from the wiring harness
by lifting the plastic locking tab.
7. To replace a headlamp bulb, do the following:
7.1. Disconnect the wiring harness from the
bulb socket.
7.2. Remove the black retainer by turning it
counterclockwise.
8. Turn the bulb socket for the headlamp, front turn
signal, or parking lamp counterclockwise. For the
sidemarker bulb, you will need to us a tool to assist
in turning the bulb socket.
9. Pull the old bulb out of the socket.
10. Install a new bulb.11. Reinstall the bulb assembly by reversing
Steps 1 through 8.
When reinstalling the headlamp assembly, �rst
make sure that the wiring harness is in its original
position. If not, the headlamp assembly will not
�t correctly.
You will also need to line up the two tabs on the
bottom of the assembly that �t into two slots in the
headlamp assembly bracket.
Center High-Mounted Stoplamp
(CHMSL)
To replace a CHMSL bulb, do the following:
1. Open the trunk. SeeTrunk on page 2-10for more
information.
2. Locate the CHMSL bulb assembly in the trunk lid.
3. Depress the plastic tabs to release the bulb
assembly.
5-51