Page 224 of 362

Tire Chains..................................................5-57
If a Tire Goes Flat........................................5-58
Changing a Flat Tire.....................................5-58
Removing the Spare Tire and Tools................5-60
Removing the Flat Tire and Installing the
Spare Tire................................................5-61
Storing a Flat or Spare Tire and Tools............5-65
Compact Spare Tire......................................5-66
Appearance Care............................................5-66
Cleaning the Inside of Your Vehicle.................5-66
Fabric/Carpet...............................................5-67
Instrument Panel, Vinyl, and Other Plastic
Surfaces..................................................5-68
Care of Safety Belts......................................5-69
Weatherstrips...............................................5-69
Washing Your Vehicle...................................5-69
Cleaning Exterior Lamps/Lenses.....................5-69
Finish Care..................................................5-70
Windshield and Wiper Blades.........................5-70
Aluminum Wheels.........................................5-71Tires...........................................................5-71
Sheet Metal Damage.....................................5-72
Finish Damage.............................................5-72
Underbody Maintenance................................5-72
Chemical Paint Spotting.................................5-72
Vehicle Care/Appearance Materials..................5-73
Vehicle Identi�cation......................................5-74
Vehicle Identification Number (VIN).................5-74
Service Parts Identification Label.....................5-74
Electrical System............................................5-74
Add-On Electrical Equipment..........................5-74
Headlamp Wiring..........................................5-75
Windshield Wiper Fuses................................5-75
Power Windows and Other Power Options.......5-75
Fuses and Circuit Breakers............................5-75
Instrument Panel Fuse Block..........................5-76
Engine Compartment Fuse Block....................5-77
Capacities and Speci�cations..........................5-80
Normal Maintenance Replacement Parts..........5-81
Section 5 Service and Appearance Care
5-2
Page 225 of 362

Service
Your dealer knows your vehicle best and wants you to
be happy with it. We hope you will go to your dealer
for all your service needs. You will get genuine GM parts
and GM-trained and supported service people.
We hope you will want to keep your GM vehicle all GM.
Genuine GM parts have one of these marks:
Accessories and Modi�cations
When you add non-GM accessories to your vehicle they
can affect your vehicle’s performance and safety,
including such things as, airbags, braking, stability, ride
and handling, emissions systems, aerodynamics,
durability, and electronic systems like anti-lock brakes,
traction control and stability control. Some of these
accessories may even cause malfunction or damage not
covered by warranty.
GM Accessories are designed to complement and
function with other systems on your vehicle. Your GM
dealer can accessorize your vehicle using genuine
GM Accessories. When you go to your GM dealer and
ask for GM Accessories, you will know that GM-trained
and supported service technicians will perform the
work using genuine GM Accessories.
California Proposition 65 Warning
Most motor vehicles, including this one, contain and/or
emit chemicals known to the State of California to
cause cancer and birth defects or other reproductive
harm. Engine exhaust, many parts and systems
(including some inside the vehicle), many fluids, and
some component wear by-products contain and/or emit
these chemicals.
5-3
Page 230 of 362

The tethered fuel cap is located behind a hinged fuel
door on the passenger’s side of the vehicle.
To remove the fuel cap, turn it slowly counterclockwise.
The fuel cap has a spring in it; if the cap is released
too soon, it will spring back to the right.
{CAUTION:
If you spill fuel and then something ignites it,
you could be badly burned. Fuel can spray out
on you if you open the fuel cap too quickly.
This spray can happen if your tank is nearly
full, and is more likely in hot weather. Open
the fuel cap slowly and wait for any hiss noise
to stop. Then unscrew the cap all the way.
Be careful not to spill fuel. Do not top off or overfill the
tank and wait a few seconds after you have finished
pumping before removing the nozzle. Clean fuel
from painted surfaces as soon as possible. See
Washing Your Vehicle on page 5-69.
When replacing the fuel cap, turn it clockwise until it
clicks. Make sure the cap is fully installed. The
diagnostic system can determine if the fuel cap has
been left off or improperly installed. This would allow fuel
to evaporate into the atmosphere. SeeMalfunction
Indicator Lamp on page 3-34.
5-8
Page 235 of 362

A. Engine Air Cleaner/Filter. SeeEngine Air
Cleaner/Filter on page 5-17.
B. Engine Oil Fill Cap. See “When to Add Engine Oil”
underEngine Oil on page 5-13.
C. Engine Oil Dipstick. See “Checking Engine Oil”
underEngine Oil on page 5-13.
D. Brake Fluid Reservoir. See “Brake Fluid” under
Brakes on page 5-32.
E. Automatic Transaxle Dipstick. SeeAutomatic
Transaxle Fluid on page 5-19.
F. Engine Coolant Surge Tank. SeeCooling System on
page 5-26.
G. Engine Compartment Fuse Block. SeeEngine
Compartment Fuse Block on page 5-77.
H. Power Steering Fluid Reservoir. SeePower Steering
Fluid on page 5-30.
I. Battery. SeeBattery on page 5-35.
J. Windshield Washer Fluid Reservoir. See “Adding
Washer Fluid” underWindshield Washer Fluid
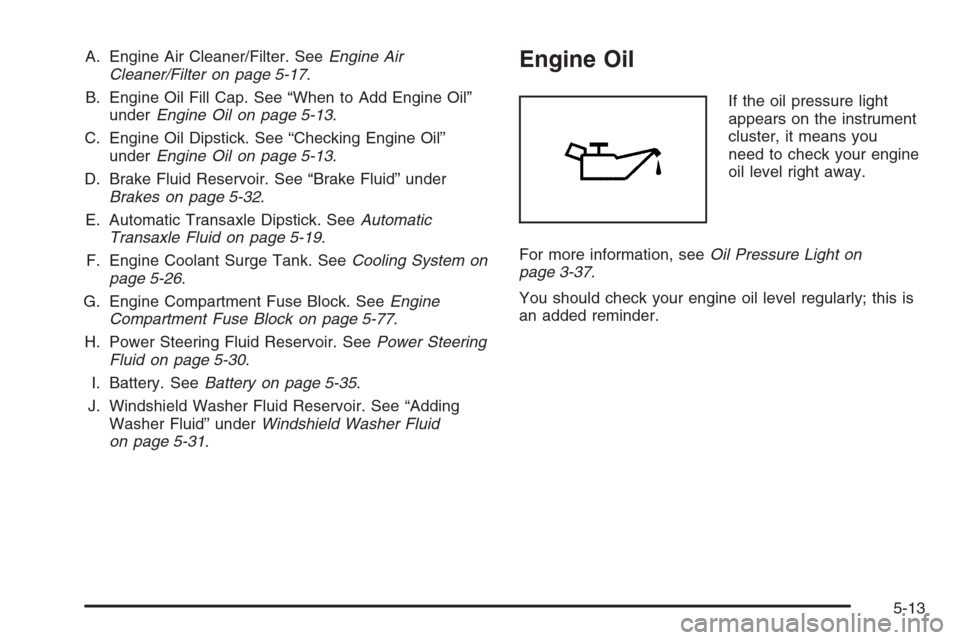
on page 5-31.Engine Oil
If the oil pressure light
appears on the instrument
cluster, it means you
need to check your engine
oil level right away.
For more information, seeOil Pressure Light on
page 3-37.
You should check your engine oil level regularly; this is
an added reminder.
5-13
Page 251 of 362
{CAUTION:
You can be burned if you spill coolant on hot
engine parts. Coolant contains ethylene glycol
and it will burn if the engine parts are hot
enough. Do not spill coolant on a hot engine.
1. You can remove the coolant surge tank pressure
cap when the cooling system, including the coolant
surge tank pressure cap and upper radiator
hose, is no longer hot. Turn the pressure cap
slowly counterclockwise about two or two and
one-half turns.
If you hear a hiss, wait for that to stop. This will
allow any pressure still left to be vented out
the discharge hose.2. Then keep turning the pressure cap slowly, and
remove it.
5-29
Page 264 of 362

Front Turn Signal and Parking
Lamps
To replace a front turn signal or parking lamp bulb, do
the following:
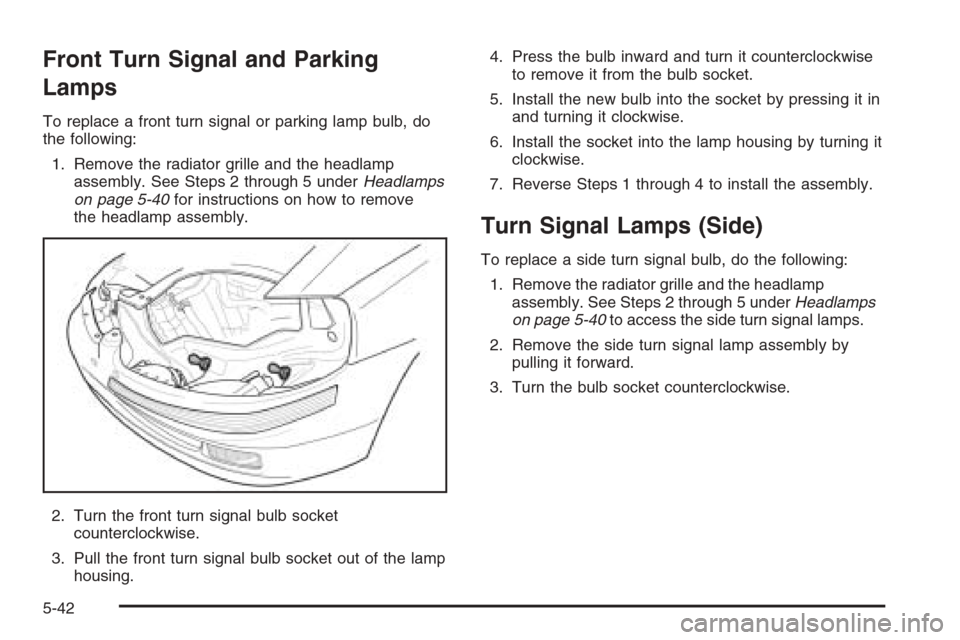
1. Remove the radiator grille and the headlamp
assembly. See Steps 2 through 5 underHeadlamps
on page 5-40for instructions on how to remove
the headlamp assembly.
2. Turn the front turn signal bulb socket
counterclockwise.
3. Pull the front turn signal bulb socket out of the lamp
housing.4. Press the bulb inward and turn it counterclockwise
to remove it from the bulb socket.
5. Install the new bulb into the socket by pressing it in
and turning it clockwise.
6. Install the socket into the lamp housing by turning it
clockwise.
7. Reverse Steps 1 through 4 to install the assembly.
Turn Signal Lamps (Side)
To replace a side turn signal bulb, do the following:
1. Remove the radiator grille and the headlamp
assembly. See Steps 2 through 5 underHeadlamps
on page 5-40to access the side turn signal lamps.
2. Remove the side turn signal lamp assembly by
pulling it forward.
3. Turn the bulb socket counterclockwise.
5-42
Page 265 of 362
4. Remove the bulb from the lamp housing by pulling
the bulb straight out of the socket.
5. Install the new bulb into the bulb socket by pushing
it in and rotating the bulb socket clockwise.
6. Push the side turn signal lamp assembly back into
its original position.
Taillamps, Turn Signal, Stoplamps
and Back-up Lamps
To replace a taillamp, stoplamp or back-up bulb, do the
following:
1. Open the trunk or liftgate. SeeTrunk (Sedan) on
page 2-9orLiftgate (Hatchback) on page 2-11for
more information.
2. Remove the two screws and the lamp assembly.
3. Remove the bulb socket by turning it
counterclockwise.
4. Remove the bulb from the socket by pressing the
bulb and turning it counterclockwise.
5-43
Page 266 of 362

5. Install the appropriate bulb into the socket.
6. Replace the bulb socket into the lamp housing.
Twist the bulb socket clockwise to secure.
7. Reverse Step 2 to reinstall the lamp housing.
Replacement Bulbs
Exterior Lamp Bulb Number
Back-Up 94535571
Center High-Mounted Stoplamp
(CHMSL)94535587
Headlamps 94535548
Front Parking/Turn Signal 94535574
Side Turn Signal 94535587
Stoplamp/Taillamps 94535574
Turn Signal Lamps 94535572
For replacement bulbs not listed here, contact your
dealer.
Windshield Wiper Blade
Replacement
Windshield wiper blades should be inspected for wear or
cracking. See “Wiper Blade Check” underPart B: Owner
Checks and Services on page 6-18for more information.Replacement blades come in different types and are
removed in different ways.
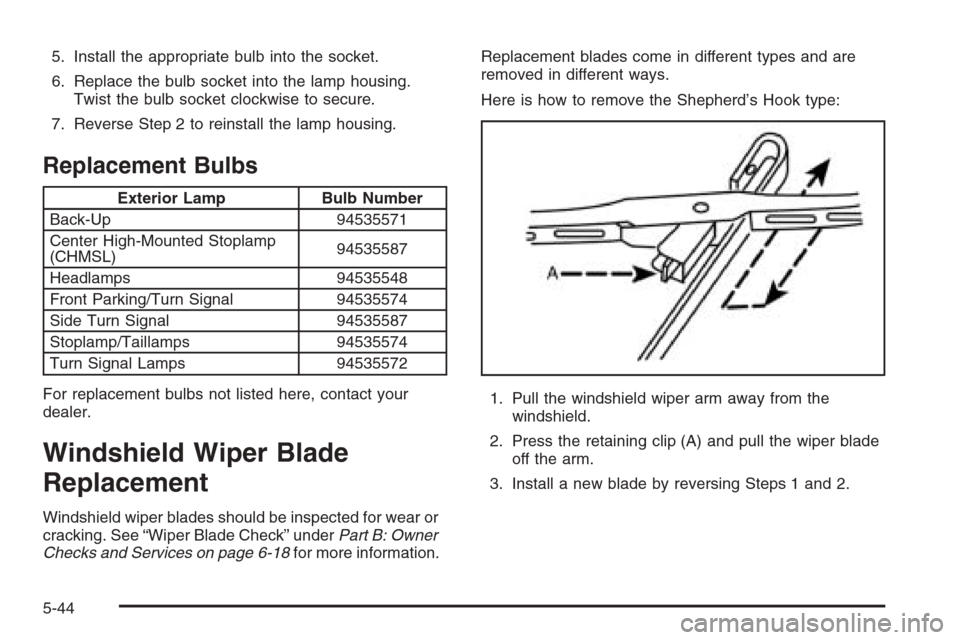
Here is how to remove the Shepherd’s Hook type:
1. Pull the windshield wiper arm away from the
windshield.
2. Press the retaining clip (A) and pull the wiper blade
off the arm.
3. Install a new blade by reversing Steps 1 and 2.
5-44