2006 CHEVROLET AVEO fuel
[x] Cancel search: fuelPage 1 of 362

Seats and Restraint Systems........................... 1-1
Front Seats
............................................... 1-2
Rear Seats
............................................... 1-6
Safety Belts
.............................................1-12
Child Restraints
.......................................1-30
Airbag System
.........................................1-56
Restraint System Check
............................1-71
Features and Controls..................................... 2-1
Keys
........................................................ 2-2
Doors and Locks
....................................... 2-7
Windows
.................................................2-12
Theft-Deterrent Systems
............................2-14
Starting and Operating Your Vehicle
...........2-17
Mirrors
....................................................2-32
Storage Areas
.........................................2-34
Sunroof
..................................................2-35
Instrument Panel............................................. 3-1
Instrument Panel Overview
.......................... 3-4
Climate Controls
......................................3-18
Warning Lights, Gages, and Indicators
........3-23
Secondary Information Center (SIC)
............3-31
Audio System(s)
.......................................3-38Driving Your Vehicle....................................... 4-1
Your Driving, the Road, and Your Vehicle
..... 4-2
Towing
...................................................4-34
Service and Appearance Care.......................... 5-1
Service
..................................................... 5-3
Fuel
......................................................... 5-5
Checking Things Under the Hood
...............5-10
Headlamp Aiming
.....................................5-39
Bulb Replacement
....................................5-40
Windshield Wiper Blade Replacement
.........5-44
Tires
......................................................5-45
Appearance Care
.....................................5-66
Vehicle Identification
.................................5-74
Electrical System
......................................5-74
Capacities and Specifications
.....................5-80
Normal Maintenance Replacement Parts
......5-81
Maintenance Schedule..................................... 6-1
Maintenance Schedule
................................ 6-2
Customer Assistance and Information.............. 7-1
Customer Assistance and Information
........... 7-2
Reporting Safety Defects
...........................7-14
Index................................................................ 1
2006 Chevrolet Aveo Owner ManualM
Page 94 of 362

Immobilizer
This device complies with Part 15 of the FCC Rules.
Operation is subject to the following two conditions:
1. This device may not cause interference.
2. This device must accept any interference received,
including interference that may cause undesired
operation.
This device complies with RSS-210 of Industry Canada.
Operation is subject to the following two conditions:
1. This device may not cause interference.
2. This device must accept any interference received,
including interference that may cause undesired
operation of the device.
Changes or modifications to this system by other than
an authorized service facility could void authorization to
use this equipment.
Immobilizer Operation
Your vehicle may have a passive theft-deterrent system.
The immobilizer system prevents your vehicle from
being started by unauthorized persons.
If your vehicle has an immobilizer system, your vehicle
has a special key that works with the theft-deterrent
system. There is a transponder in the key head that is
electronically coded. The correct key will start the
vehicle. An invalid key immobilizes the engine. The
immobilizer system isolates the power supply to
the ignition system, the fuel pump and the fuel injectors.
The engine immobilizer is activated after the key is
turned to LOCK and removed from the ignition.
The security light located on the top center of the
instrument panel in the secondary information center will
flash when the immobilizer is active. If the light does
not flash after removing the key, have the system
checked by your dealer.
The immobilizer system works when you turn the key to
START. If the immobilizer system does not recognize the
electronic code, the engine will not start and the security
indicator will continue blinking. If your key is ever
damaged, you may not be able to start your vehicle.
2-16
Page 98 of 362

Engine Coolant Heater
Your vehicle may have an engine coolant heater. In
very cold weather, 0°F (−18°C) or colder, the engine
coolant heater can help. You will get easier starting and
better fuel economy during engine warm-up. Usually,
the coolant heater should be plugged in a minimum
of four hours prior to starting your vehicle. At
temperatures above 32°F (0°C), use of the coolant
heater is not required.
To Use the Engine Coolant Heater
1. Turn off the engine.
2. Open the hood and unwrap the electrical cord. The
cord is located on the driver’s side of the engine
compartment, behind the battery.
3. Plug it into a normal, grounded 110-Volt AC outlet.
{CAUTION:
Plugging the cord into an ungrounded outlet
could cause an electrical shock. Also, the
wrong kind of extension cord could overheat
and cause a �re. You could be seriously
injured. Plug the cord into a properly grounded
three-prong 110-volt AC outlet. If the cord will
not reach, use a heavy-duty three-prong
extension cord rated for at least 15 amps.
4. Before starting the engine, be sure to unplug and
store the cord as it was before to keep it away
from moving engine parts. If you do not, it could be
damaged.
How long should you keep the coolant heater plugged
in? The answer depends on the outside temperature, the
kind of oil you have, and some other things. Instead
of trying to list everything here, we ask that you contact
your dealer in the area where you will be parking
your vehicle. The dealer can give you the best advice
for that particular area.
2-20
Page 101 of 362

AUTOMATIC OVERDRIVE (D4):This position is for
normal driving.
When operating your vehicle in severe cold conditions,
the transaxle may be prevented from shifting into
D4 gear until the transaxle fluid has warmed up to it’s
operational temperature.
Notice:Driving your vehicle if you notice that it is
moving slowly or not shifting gears as you
increase speed may damage the transaxle. Have
your vehicle serviced right away. You can drive in
SECOND (2) when you are driving less than 35 mph
(55 km/h) and AUTOMATIC OVERDRIVE (D4) for
higher speeds until then.
SECOND (2):This position gives you more power but
lower fuel economy. You can use SECOND (2) on
hills. It can help control your speed as you go down
steep mountain roads, but then you would also want to
use your brakes off and on.
Notice:Do not drive in SECOND (2) at speeds over
65 mph (105 km/h), or you can damage the transaxle.
Use AUTOMATIC OVERDRIVE (D4) as much as
possible. Do not shift into SECOND (2) unless you
are going slower than 65 mph (105 km/h) or you can
damage your engine.FIRST (1):This position gives you even more power
but lower fuel economy than SECOND (2). You can use
it on very steep hills, or in deep snow or mud. If the
shift lever is put in FIRST (1), the transaxle will not shift
into first gear until the vehicle is going slowly enough.
Notice:Spinning the tires or holding the vehicle in
one place on a hill using only the accelerator
pedal may damage the transaxle. If you are stuck,
do not spin the tires. When stopping on a hill,
use the brakes, or parking brake to hold the vehicle
in place.
If there is a malfunction with the automatic transaxle,
the malfunction indicator lamp (MIL) or the HOLD
indicator light will turn on or flash. SeeMalfunction
Indicator Lamp on page 3-34orHold Mode Light
on page 3-34.
Have your vehicle fixed as soon as possible.
2-23
Page 115 of 362

Instrument Panel Overview...............................3-4
Hazard Warning Flashers................................3-6
Other Warning Devices...................................3-6
Horn .............................................................3-6
Tilt Wheel.....................................................3-6
Turn Signal/Multifunction Lever.........................3-7
Turn and Lane-Change Signals........................3-7
Headlamp High/Low-Beam Changer..................3-8
Flash-to-Pass.................................................3-8
Windshield Wipers..........................................3-8
Windshield Washer.........................................3-9
Rear Window Wiper/Washer...........................3-10
Cruise Control..............................................3-10
Exterior Lamps.............................................3-13
Headlamps on Reminder................................3-13
Daytime Running Lamps (DRL).......................3-14
Fog Lamps ..................................................3-15
Instrument Panel Brightness...........................3-15
Dome Lamp .................................................3-16
Accessory Power Outlet(s).............................3-16
Ashtray(s) and Cigarette Lighter......................3-17
Climate Controls............................................3-18
Climate Control System.................................3-18
Outlet Adjustment.........................................3-21
Passenger Compartment Air Filter...................3-21Warning Lights, Gages, and Indicators............3-23
Instrument Panel Cluster................................3-24
Speedometer and Odometer...........................3-25
Trip Odometer..............................................3-25
Tachometer.................................................3-25
Safety Belt Reminder Tone............................3-25
Passenger Airbag Status Indicator...................3-26
Brake System Warning Light..........................3-27
Engine Coolant Temperature Gage..................3-28
Cruise Control Light......................................3-29
Highbeam On Light.......................................3-29
Daytime Running Lamps (DRL) Indicator Light.....3-29
Fuel Gage...................................................3-30
Low Fuel Warning Light.................................3-30
Secondary Information Center (SIC).................3-31
Clock..........................................................3-32
Safety Belt Reminder Light.............................3-32
Airbag Readiness Light..................................3-32
Charging System Light..................................3-33
Anti-Lock Brake System Warning Light.............3-34
Hold Mode Light...........................................3-34
Malfunction Indicator Lamp.............................3-34
Oil Pressure Light.........................................3-37
Fog Lamp Light............................................3-38
Door Ajar Light.............................................3-38
Section 3 Instrument Panel
3-1
Page 138 of 362

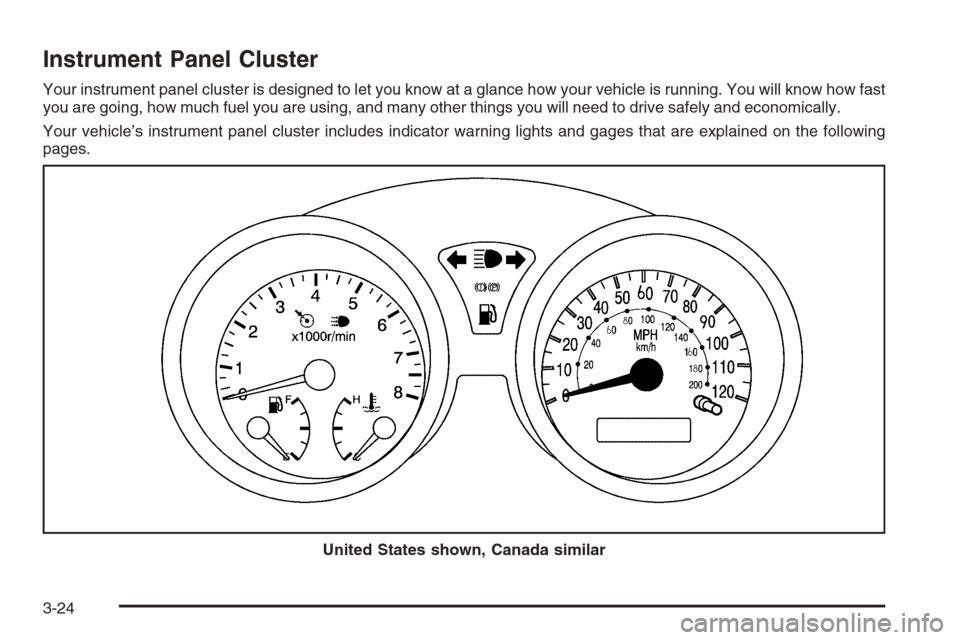
Instrument Panel Cluster
Your instrument panel cluster is designed to let you know at a glance how your vehicle is running. You will know how fast
you are going, how much fuel you are using, and many other things you will need to drive safely and economically.
Your vehicle’s instrument panel cluster includes indicator warning lights and gages that are explained on the following
pages.
United States shown, Canada similar
3-24
Page 144 of 362

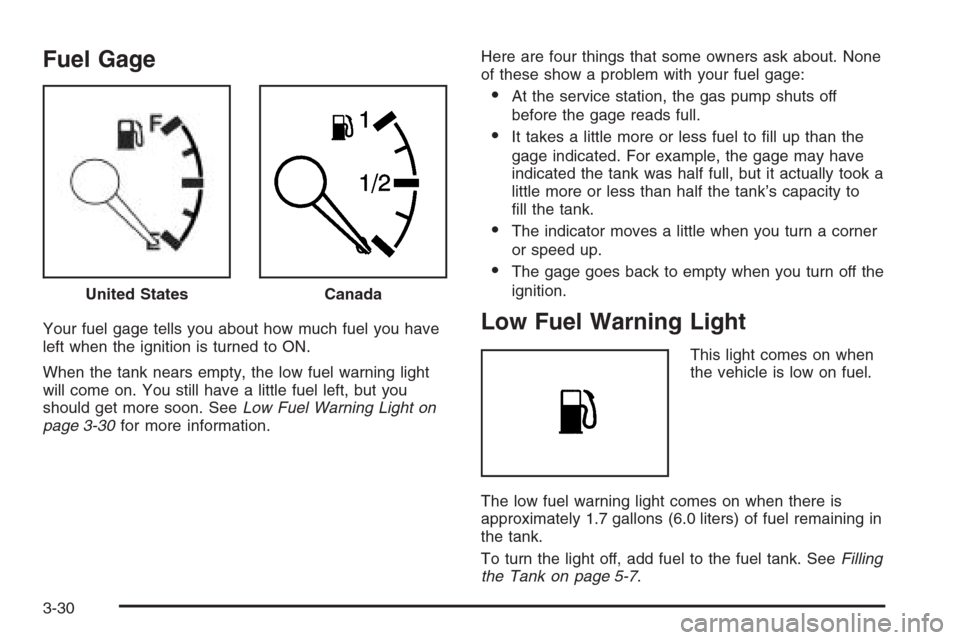
Fuel Gage
Your fuel gage tells you about how much fuel you have
left when the ignition is turned to ON.
When the tank nears empty, the low fuel warning light
will come on. You still have a little fuel left, but you
should get more soon. SeeLow Fuel Warning Light on
page 3-30for more information.Here are four things that some owners ask about. None
of these show a problem with your fuel gage:
•At the service station, the gas pump shuts off
before the gage reads full.
•It takes a little more or less fuel to fill up than the
gage indicated. For example, the gage may have
indicated the tank was half full, but it actually took a
little more or less than half the tank’s capacity to
fill the tank.
•The indicator moves a little when you turn a corner
or speed up.
•The gage goes back to empty when you turn off the
ignition.
Low Fuel Warning Light
This light comes on when
the vehicle is low on fuel.
The low fuel warning light comes on when there is
approximately 1.7 gallons (6.0 liters) of fuel remaining in
the tank.
To turn the light off, add fuel to the fuel tank. SeeFilling
the Tank on page 5-7. United States
Canada
3-30
Page 148 of 362

Anti-Lock Brake System Warning
Light
If your vehicle has an
anti-lock brake system, this
light will come on when the
ignition is turned to ON and
may stay on for several
seconds. That is normal.
If the light stays on, turn the ignition to LOCK. Or, if the
light comes on, stop as soon as possible and turn
the ignition off. Then start the engine again to reset the
system. If the light still stays on, or comes on again
while you are driving, your vehicle needs service. See
your GM dealer. If the regular brake system warning
light is not on, you still have brakes, but you do not have
anti-lock brakes. If the regular brake system warning
light is also on, you do not have anti-lock brakes
and there is a problem with your regular brakes. See
Brake System Warning Light on page 3-27.
The anti-lock brake system warning light will come on
briefly when you turn the ignition to ON. This is normal.
If the light does not come on then, have it fixed so it
will be ready to warn you if there is a problem.
Hold Mode Light
If your vehicle has this
feature, this light will come
on when the hold mode
is active.
If the HOLD mode light flashes, have your vehicle
checked. See “Hold Mode” underAutomatic Transaxle
Operation on page 2-21for additional information
on this feature.
Malfunction Indicator Lamp
Check Engine Light
Your vehicle has a
computer which monitors
operation of the fuel,
ignition, and emission
control systems.
3-34